Windows accounts are a very useful feature for personal computers that are used by several people. For each user, you can create a personal account and a personal folder in which his files and configurations will be stored. The account remembers all desktop settings, some programs, keyboard layouts and much more. This article provides a detailed guide on how to work with accounts: change the username, delete unnecessary ones and log out of Windows 8 without shutting down the computer.
Account Management in Windows
And first, let's look at where account management occurs on a computer. Go to the Windows 8 control panel. And open the “Accounts and Family Safety” section.
And then go to the first subsection “Accounts”.
Here I want to give a hint. If, for example, you have the Control Panel pinned to the Taskbar, just right-click and immediately go to the item you are looking for in the drop-down menu. So, we find ourselves in a window where the administrator account and a list of available functions will be displayed. From here we will make changes to user accounts.
Editing on a personal computer
The second method of changing your account is a little simpler, and there is no need to switch to a Microsoft service to complete it. The operating system will automatically connect to your profile.
- Open the start screen of the Metro interface.
- The account under which you are logged into Windows is displayed in the upper right corner. Right-click on the avatar and select “Change avatar”.
- In the new window, click on “Advanced online account settings.”
- The operating system connects to the profile via the Internet and displays the “Account details (password, addresses, time zone)” window.
- Change the necessary data and click on “OK” to save the changes.
Here you can change the photo for your avatar.
How to log into Windows 8 as a guest account
Very often, users are concerned about the question of how to log into the computer system as a guest. After all, sometimes there is not much choice at the entrance. And Windows requires you to enter a password. The thing is that the ability to log in using a guest account can be turned on and off.
Therefore, in the current window we go back a step and open the next function “Manage another account”. A window will open with a list of existing accounts on this PC. Select the local Guest account. It exists by default; you do not need to create it.
And next to the Guest icon, activate the option “disable or enable the guest account.” Then, when you log in, this option for secure login will be added. Or disconnect if you do not want an outsider to log in.
What is an account and why is it needed?
This is a kind of separate system for each user. For example, at home, several family members work on one computer, each of whom wants to customize Windows for themselves and organize the desktop at their own discretion. This is precisely why different profiles are needed, which allow you to create a separate desktop for each.
Moreover, changing the user in OS Windows 8 allows you to customize the OS for yourself, installing different applications, design, and so on. In this case, each user uses personal data and passwords that are not available to others. In other words, in each browser profile you can safely save keys and other important information, since it cannot be seen or learned from another account.
How to add accounts in Windows 8
If you want not everyone to be able to log into the PC, but certain users, then you need to add new accounts for them.
To do this, open the section “Changing an account in the Computer Settings window.” And I’ll immediately note that you can open PC Settings not only from the control panel, but also from the start screen by clicking the gear icon.
So, look at the screenshot and select the “Other accounts” section. And then click “+” and add a new one.
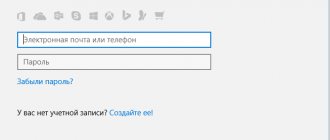
After this, a window will open with fields for filling in data. And here, pay attention to the choice. If the new user already has an email address to sign in to Microsoft, enter it. And if not, or he forgot it, then we register a new one.
To register a new address, click the link under the empty line. And let's move on to filling out the fields. Enter your first and last name. E-mail address. This is outlook, or another mailbox (to do this, click the link below). Create a complex password and repeat it. Select a country. And click the Next button.
The procedure does not end there. Enter your date of birth and indicate your gender. And write down a valid phone number. This is required as a confirmation code will be sent to it. In the last field, you can optionally enter a backup email address. Useful in case of password recovery if you lose your password.
Now all that remains is to enter the captcha. We proceed in the same way. In the next window, click “send code” under the phone number. Enter it and click “Finish”.
Once registration is completed, the new account will appear in the list. It can be found in the future both in PC Settings and through the Windows Control Panel.
Create an entry
Instead of changing the name of your old account, you can create a new account with the name you want. This is done very simply. All you need to do is:
- Click on “Start”. A menu will open in which you need to select the name of the current account. In the drop-down list, click on the item responsible for changing parameters.
- A dialog with account configurations will appear. We are interested in the left sidebar, which contains the item “Family and other users”. Go to this section, then add a new user by clicking on the corresponding button.
- A dialog will open to create a new user. The system will ask you for your mailbox. If you specify an E-mail, the OS will be linked to your Microsoft account. To avoid this and create a local account, indicate that you do not have email by clicking on the appropriate hyperlink.
- The system will prompt you to register on the company’s official website. We refuse by clicking on the item that allows you to add a user without a Microsoft account.
- After carrying out the above manipulations, you will be taken to a dialogue with account parameters. Enter your username, password and hint to log into your account. After this, click on the “Next” button.
Voila - you have created a new account. Now we need to give her Windows 10 administrator rights. To do this:
- In the already familiar “Family and other users” section, select the created account and click on the button responsible for changing the account type.
- In the dialog that appears, use the drop-down list to set the “Administrator” parameter. Now for the changes to take effect, click on “OK”.
How to delete accounts in Windows 8
Notice that two buttons appear below the entry. Edit and Delete. Thus, if you decide to restrict a certain person's access to your computer, you just need to delete his account. And when you click the Edit button, you can manage rights. By default, the Standard account type will be assigned. You can add Administrator rights, or select the Child item to gain control over actions.
Now let's go back to the Control Panel. Open the “Account Management” item. And we will find the newly created account in the list. Click on it.
And to the left of the icon we see a list of available options. Here you can delete an unnecessary entry in the same way. Or change access rights by clicking “Change account type”.
Shutting down and changing the active account
The first thing you should learn when working with accounts is how to change the current user. To do this you will need to shut down Windows:
- Move your cursor to the bottom left corner of the screen and click on the icon that appears to bring up the Start menu. A similar action will occur if you press the Windows button on the keyboard.
- Now you need to click on the user's image at the top of the screen.
- Select "Log Out" from the drop-down menu.
- Thus, you have completed the current session. To change the active account, click on the "Back" button.
- Press the Control+Alt+Delete key combination at the same time.
- Select the desired account for authorization.
Changing the name of the user directory
To rename the user directory, you will need to perform the following steps:
- In the section called “Accounts”, create an additional administrator profile. You can get to it through the “Change PC settings” menu, and how to get there is described in the previous instructions above;
- Then launch the “PU” (the launch description is given above - in “Method 1”);
- Log in to the “User Accounts” section;
- Select the additionally created profile and click “Change account type”;
- Put o;
- Log in to the system with extended privileges and expand the contents of the “Users” directory, which lies on the system volume marked with the letter “C” and give a new name to the target user’s directory (to rename a folder, just open its context and click “Rename”).
Note: Sometimes on computers and laptops with Windows 8 and 8.1 it is not possible to perform renaming using the method described above. In this case, it is recommended to boot the PC in safe mode and follow the steps described:
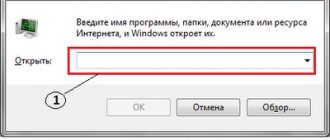
- In the “Run” menu, insert “regedit”;
- Click “Enter”;
- Expand the contents of "HKEY_LOCAL_MACHINE";
- Open the directory called “SOFTWARE”;
- Enter the “Microsoft” subdirectory;
- Go to the “Windows NT” directory;
- Next, in the “CurrentVersion” subdirectory, find “ProfileList”, where to expand the user’s pack;
- Open context from "ProfileImagePath";
- Click “Change”;
- Show the folder location and click “Ok”;
- Exit Registry Editor;
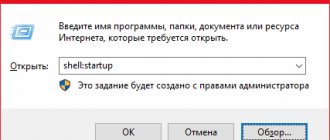
- In “Run” insert the word “netplwiz”;
- Click "Enter";
- Click on the user and then on “Properties”;
- Enter a new name;
- In the accounts window, check the box “Require username and password” for the user being adjusted;
- Click “Apply”;
- Click “Ok”;
- Restart the PC after exiting system master mode;
- Ready.
How to change registry paths
The folder name is recorded in the Windows registry. Thus, after you have succeeded in renaming the user folder, you still need to change the paths in the registry.
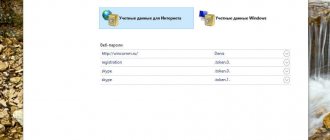
To do this, press Win+R, write regedit in the window that opens and click “Ok”. You will see the Registry Editor.
Go to the folder HKEY_LOCAL_MACHINESOFTWAREMicrosoftWindows NTCurrentVersionProfileList You will see several sections whose names begin with “S-1-5...”. Open each of them and find the one where the "ProfileImagePath" parameter contains a value with the username that you are renaming.
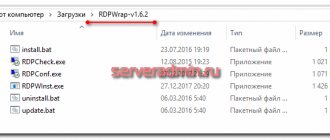
So, I'm looking for "ProfileImagePath", the value of which is "Victor".
Double-click on this parameter and change its value by writing down a new username. But change only the part of the path that contains the old name. And click the "Ok" button.
As a result, you will see that the parameter has changed value.