We live in a world where everything we could want or need is available to us 24/7, 365 days a year. If we want, we can watch live someone playing our favorite video game or someone traveling right now.
81% of Internet and mobile users now watch a huge amount of video content. And the video streaming industry is projected to be worth $70 billion by the end of 2022.
Now anyone with a YouTube channel (that qualifies) can live stream something to their audience.
YouTube Live is a fast and powerful way to connect with your audience now. It's unencrypted and responsive, so it's authentic content—exactly what audiences are looking for.
Livestream research shows that 82% of people prefer live video to social media posts, proving that live video has a huge presence in consumers' news feeds.
And in this article we will tell you how to properly start streaming games on YouTube and what you will need for this, are you ready? Begin!
What is streaming on YouTube?
Stream is a continuous supply of video and audio data online from the provider to the user. In fact, this is a full-fledged live broadcast, which is similar to television broadcasts. The only difference is that the stream on YouTube is carried out via the Internet. There are two types of streams:
| The most complete course - launching and promoting a YouTube channel. We will teach you how to stay in the frame, shoot and edit videos, promote videos and gain an audience. Producing your own and client channels, making money on YouTube. 3 months of training, top speakers, premium subscription to the video editor as a gift. View the course and get a free consultation: |
- pre-recorded;
- live broadcasts in real time.
To watch a video product on any gadget, there is no need to install additional applications or drivers - Youtube is enough. The video displays “On Air” or “On Air” at the bottom of the screen - this is the stream.
Stream mistakes you shouldn't make
The first mistake that all beginners make is not preparing for the broadcast. That’s why they stutter during recordings, jump from topic to topic, and their overall monologue is not structured. Be sure to create a broadcast script and rehearse it.
The second mistake is not conducting a test stream. Therefore, in the end, you don’t look the way you planned in the frame, and the background is littered with unnecessary objects. Also, a trial broadcast helps to recognize and remove all problems: bad sound, freezing.
The third mistake is ignoring your audience or interacting poorly with them. Answer questions, read comments and listen to comments.
There are a couple more points to consider:
- make the stream long: from an hour to three;
- broadcast in a place where there is good internet and lighting;
- Don’t forget to call viewers to action: ask questions, express opinions.
Requirements for broadcasting
Live broadcasting on YouTube consists of certain processes:
- filming;
- treatment;
- coding;
- sending;
- playback
The application developers have established general rules and technical recommendations for streaming.
General rules:
- The channel must have at least 1000 subscribers. However, this restriction does not apply to streams conducted using a video decoder or webcam.
- The authenticity of the YouTube channel must be confirmed. This can be done by verifying your phone number.
- Over the past 90 days, no restrictions have been applied to the channel, including for broadcasting.
- The streaming function must be activated. If it is not there, you need to connect it, and, preferably, do this a day before the start of the broadcasts.
Technical recommendations explain the nuances of broadcasting via Xsplit Broadcaster (or OBS), on relatively powerful computers and using mobile devices.
On a note! The recommendations are discussed using Windows computers as an example. For MacOS the requirements are similar.
Via Xsplit:
- Availability of a processor no lower than Intel Core i3.
- RAM - from 4 GB.
- Availability of 3D acceleration support.
- Availability of Windows 7 or Windows XP SP3.
- Internet speed - at least 3 Mb/sec.
Important! Broadcasts via Xsplit are obtained in very low quality.
More powerful computer:
- Availability of Intel Core i7 processor.
- RAM - 8 GB and a modern video card.
- Internet speed - at least 3 Mb/sec.
On mobile devices:
- Uninterrupted stable Internet.
- Battery fully charged.
- RAM – at least 4 GB.
- High-quality audio and video characteristics of the device.
How to activate the streaming function
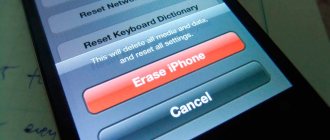
For all mobile devices - log into the YouTube application, click on the “+” icon at the bottom of the screen and then follow the prompts on the screen.
For computers - go to the “Settings” section on your channel and click on the “Channel status and available functions” line.
To conduct broadcasts, Features must be activated, to access which you need to confirm your phone number. Confirm the number, go to “Advanced settings” and follow the prompts to activate the desired functionality.
The completion of activation, which takes place within 24 hours, can be checked by clicking the “Enabled” button in the “Function availability” section.
Setting up a video encoder
Now you can start setting up your video encoder, that is, your software for video and streaming. This could be the same OBS or Open Broadcaster Software that you adapted to in the previous paragraph. This software is free and quite convenient. To begin with, it will be enough for you.
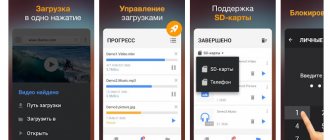
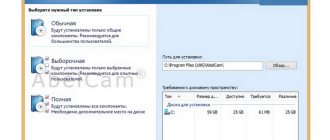
- To install the program, download it. It is best to choose the 64-bit version as it has higher performance. You can also select a program not only for Windows, but also for other operating systems.
- After you have launched the program, go to the “Broadcasting” section in the settings. In the live broadcasts section, you need to indicate the settings that you have set on your YouTube channel.
- After “Broadcasting” we go to “Output”. We choose an encoder that will match the adapter that you have.
- The next section in which we will change the settings is “Video”. The resolution must be set to the same as what you did on the channel, otherwise the picture will not please you with its quality.
- Next we have the bitrate. You must specify it by matching the data with your device. An incorrect bitrate may simply cause the broadcast to fail to start. But there is also a risk that the laptop will burn out. This parameter is measured in kilobits per second. It can even reach 13 thousand Kbps, although we recommend the following values: 1080p for 4-6 Mbps (do not confuse with megabytes) or 720p at 2.5-4 Mbps.
- In order for the laptop to have enough strength to reproduce the picture, it is best for beginners to start with 720p. And the game must be played with an FPS of at least 30.
- We return to “Broadcasting” again. We indicate YouTube and the “Primary” server as the service. To specify stream key information, copy and paste the stream name.
- Now you can press the treasured buttons to start the broadcast.
- We check if everything is configured correctly and click save.
Step-by-step guide to setting up, launching and running live broadcasts
You can broadcast live on YouTube using computers running Windows, MacOS and mobile devices running Android and iOS.
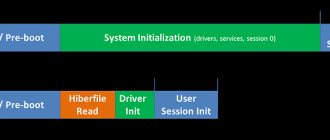
General recommendations for setup
Net. Consider the overall bitrate and bandwidth when downloading. The recommended reserve is 20%. For example, the minimum Internet speed required to start a stream is 3 megabits per second. Accordingly, for normal uninterrupted data transmission, the bitrate must be at least 3.6.
Video encoder. If you are using a video encoder, set it up in advance, about 2 hours before the broadcast. To check the quality of the broadcast, connect it 15 minutes before the start of the broadcast and make sure that the video is played correctly on the broadcast control panel.
Webcam. Check the necessary basic settings before broadcasting.
On a Windows computer
Check if the streaming function is enabled on your channel. Be sure to have the latest browser versions - for example, Chrome 60 and higher or Firefox 53 and higher. And, a Windows version of at least 7 is desirable.
If the function is activated and it is displayed on the site, you can proceed to the next settings.
Click on the button with the image in the upper left corner of three horizontal lines.
In the window that opens, enter “Settings”.
Click on the camera icon in the top right corner.
In the window that opens, click on “Start broadcast”.
In the window that opens, select the desired mode. You can create a delayed broadcast by setting a timer or start it online.
After selecting a mode, the system will provide step-by-step instructions with clarifications - do you know the rules of broadcasts, is the function for broadcasting active, and will ask for a name, description, camera and microphone settings. After this, you will return to the mode selection window, where you need to click on “Select”. After that you go live.
Important! If you activated the streaming function less than a day ago, most likely you won’t be able to broadcast, you’ll have to wait.
On a Mac OS computer
Setting up and running streams on MacOS is identical to Windows OS; the differences are noticeable only in the interfaces.
Step-by-step algorithm:
- Log in to your YouTube account and click “My Channel”.
- Click on the camera icon in the top right corner and “Create”.
- Click on “Start Broadcast”.
- In the menu section on the left, enter a title, description, and access options.
- Double-check your camera and microphone settings.
- Click "Start Broadcast".
- To end the stream, click on “End broadcast” at the bottom of the page.
On Android
Log in to your YouTube account and click on the round button in the top right corner.
Click on the “My Channel” line in the settings window that opens.
Click on the "+" icon at the bottom of the screen.
On the panel that appears, click on the “Start broadcast” line.
To complete, you need to click on the appropriate button at the bottom of the screen to complete.
Important! Before you start streaming, check your smartphone settings to see if the camera, microphone, etc. are working correctly. For better video quality, it is recommended to use the main camera, which is located on the back of the phone. The front camera is not very suitable due to poor quality video playback.
On iOS
The algorithm is identical to streaming on YouTube for Android.
- Log in to your YouTube profile.
- Open your channel and click on the "+" at the bottom of the screen.
- In the tab that appears, click on “Start broadcast”.
- To finish, click the "Finish" button.
Selecting a capture source in OBS Studio
Information! You will also find the article useful: “OBS Studio scenes and sources.”
Before you start broadcasting, you will need to choose what exactly will be broadcast. To do this, the first thing you should do is select a new scene in the lower left corner (by clicking on +), consider the four main options for our broadcast, read about all sources in the article above.
Adding a source in OBS Studio
Game capture
Information! "OBS Studio. Black screen when capturing CS:GO."
This capture is needed primarily for capturing applications that use the GPU graphics accelerator such as games and the like, hence the name of the capture. If the application does not appear in the window, maximize it and then minimize it, it also happens that this is not enough in this case:
Use the following recommendations:
- “Mode” - Capture a separate window;
- “Window” select the required process (the process must be running);
- “Window Matching Priority” - Compare title, otherwise find window of the same type;
- It is better to check the box for “SLI/Crossfire capture mode (Slow) at the last moment, as this greatly affects performance;
- Check the box “Use an interceptor combined with anti-cheat protection;
- Read the instructions for eliminating the black screen here;
- Please contact our dedicated team to resolve this issue.
Window Capture
It is used to capture windows that do not use and use a GPU graphics accelerator, hence problems with capturing browsers that use hardware acceleration. Starting with version 25.0, this problem was fixed with a new method of capturing a window, which can be selected in the source properties, but as a result a yellow outline will appear around the windows, you will either have to put up with this or disable hardware acceleration in the browser. To resolve most problems, use the following recommendations:
- “Window” select the desired process from the list (the game must be launched in windowed mode or full-screen windowed);
- “Window Matching Priority” - Compare title, otherwise find window of the same type;
- Check the box for “Multi-adapter compatibility”;
- One by one, select one of the window capture methods other than “Automatic”
- Read the instructions for eliminating the black screen here;
- Please contact our dedicated team to resolve this issue.
Screen capture
This source allows you to automatically broadcast the user's entire desktop screen, so that everything that is on your desktop will be shown to the end user. As a rule, this method is chosen by those who experience any difficulties when capturing in the first two ways.
Information! "OBS Studio. Black screen".
Video capture device
A source that allows you to broadcast “your loved one” to the network. Secrets of adding a camera also exist for this source.
- First, you need to select the resolution of your camera using the knobs.
- Secondly, set the FPS frame rate to 29.97 NTSC (needed to eliminate frame rate lag at high picture resolutions).
How to promote live broadcasts
In order for as many users as possible to know about your stream, it is necessary to take measures to promote the channel and the specific broadcast.
- Make a promotional video for your upcoming stream and run paid advertising on YouTube.
- Link your channel to your social media accounts and share information about your upcoming broadcast there.
- Order advertising for the upcoming broadcast on third-party resources - from bloggers on social networks and websites.
- Increase channel subscribers and make announcements of upcoming broadcasts. Subscribers will see this information in their recommendations.
Audio filters in OBS Studio
Information! "OBS Studio. Setting up the microphone."
Screenshot "YouTube"
It's no secret that OBS Studio comes with audio filters right out of the box.
You can improve your sound by adding just a couple of filters, add them in the same order as the numbers, the limiter filter should always be the last one.
- Compressor.
- Noise suppression.
- Limiter.
More detailed settings for these filters are discussed in a new article, but for now the default value should be enough to:
- Remove noise.
- Remove sound drops.
- Remove clipping.
Information! You will also find the article “OBS Studio filters” useful.
How to monetize streams
There are three monetization options for streams on YouTube:
- advertising;
- super chat;
- sponsorship;
- YouTube Premium
are advertising videos that stream viewers see at the beginning, middle or end of the broadcast. Advertisers can be adult users or minors with the consent of a guardian.
Superchat is a paid service that allows users to place animated captions, stickers, etc. during broadcasts. Relevant for adult viewers and not supported in all regions.
Sponsorship - channel subscribers activate this service and regularly transfer money to you in exchange for various bonuses. Available to adult users who have at least 1000 subscribers on the channel.
YouTube Premium - get money for watching Premuim content. This is a paid subscription, and income will be received from the same Premium subscribers when participating in your streams.
Note. For example, what advertising looks like in streams. It may appear in the lower right corner of the screen.
Or several commercials in a row will be visible on the entire screen. Ads can be inserted at the beginning of the broadcast, in the middle and at the end.
Advertising is set up according to different targeting subtleties - you need to select a target audience indicating region, gender, age, interests, etc.
On a note! YouTube Premium is not only monetization, but also the ability to watch streams of other users and videos without advertising.
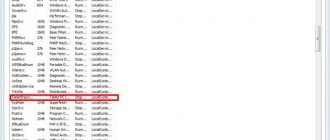
Additional settings
Additional settings for broadcasting exist for a simple reason - during the streaming process, you may notice that, for example, some open tabs will be visible on the screen. To prevent this from happening, go to the Open Broadcaster Software program and go to “Sources”. And use the right mouse button to click “add”. This will open up a lot of opportunities for the game to be broadcast in decent quality. Select “Game Capture”. After this you will be able to preview. Save everything you've done.
Now you are all ready for your first stream, so you see, there was nothing complicated about it. The most important thing is to set the parameters correctly and prepare suitable content!
How to moderate a chat
You can moderate the stream before, during, and after completion.
Before the beginning:
- Appoint moderators to monitor comments during the stream.
- Create filters for words that are unacceptable to you - they will be automatically removed from comments.
- In the settings, you can limit the frequency of sending messages or completely close comments.
During the event:
You or the moderator can delete comments in the chat during the stream. In addition, you can limit actions or block users.
After:
Similar to moderation during the event - you can delete comments and block users.
What to do first
Create a YouTube channel. If you use gmail email, your account has already been created. Open video hosting, log in, then:
Open the live broadcast menu.
Go to:
Copy the key.
Write the name, select the audience. For streaming, you need an intermediary who will ensure the transmission of the broadcast to the video platform. We will use a streaming application.
Restrictions on live broadcasts
Main restrictions for streaming on YouTube:
- To broadcast via mobile devices, the channel must have at least 1000 subscribers.
- Your stream violates copyright.
- You have exceeded your daily broadcast limit.
- Content for children or minors - restrictions are updated frequently. For example, super chats and comments are not available in streams for children; for minors, an adult guardian or parent must be present at the stream.
- You are restricted from creating any content on YouTube due to violating the rules regarding content eligible for monetization, or are restricted from posting product placement and direct advertising.
Pros and cons of streaming on YouTube
All sites compete with each other, offering the user different conditions . YouTube is currently the most frequently visited video hosting site in the world .
However, it has certain disadvantages:
- an extremely inconvenient license to use copyrighted content If you want your favorite song on a stream directly from the system or from the speakers of an external device, you may have copyright problems
- YouTube has limits on the amount of incoming information . This means that you won’t be able to stream on YouTube in excellent quality and with perfect sound without resorting to the use of additional services .
- Inconvenient chat and a notification system.
- advertising system for promoting streams to the TOP also does not work perfectly, sometimes bringing streams with 20 viewers to the top.
- Weak advertising integration . Not everything can be advertised during a stream, and for some poorly spoken words , the stream can even be deleted and the channel blocked.
- Strict policy , which is based not only on channel blocking. In case of a violation , a person is blocked and prohibited from creating channels for him in the future. This means that if you created a channel and violated the rules of the service, you will be blocked forever , and all your subsequent channels may be deleted without reason if it is proven that they belong to you.
Pros:
- Opportunity to reach a large audience and generate solid traffic .
- Ability to save the stream recording in original quality along with comments.
- Possibility to monetize the stream .
How to make money from streaming?
Showing how cool you are at dealing with enemies in a computer game or showing off a new script for a comedy show is undoubtedly interesting. But every streamer also wants to earn a pretty penny. You can top up your wallet in two ways:
- Advertising. Third-party advertising is not prohibited, but it must be used with caution. Ideally, you place the ad on a large poster directly behind the streamer or run an ad line directly in the game chat. To prevent your channel from being blocked, create an additional account and use it for advertising lines. Never involve online casino owners as advertisers. They pay well, but YouTube is not friendly with this area. Native advertising can still pass verification, but explicit advertising will lead to account blocking.
- Donat. Select one of the donation services, register in it and connect it to your YouTube account. In the settings, set the sounds you like for notifications and configure widgets. Even beginners can cope with this; no instructions are required. Then go to the “Fundraising” section, add a new goal, write down the required amount and the end date of the collection. The entire procedure will take you ten minutes. After receiving the donation, request a withdrawal of the collected funds to your e-wallet. People donate surprisingly willingly. Some are ready to pay for the streamer to thank them live, others want to get into the top donors.