04/17/2014 windows | Internet
If your computer uses a PPPoE connection (Rostelecom, Dom.ru and others), L2TP (Beeline) or PPTP to access the Internet, then it may not be entirely convenient to start the connection manually again every time you turn on or restart the computer.
This article will talk about how to make the Internet connect automatically immediately after turning on the computer. It is not difficult. The methods described in this manual are equally suitable for Windows 7 and Windows 8.
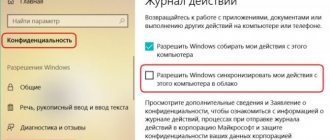
Is it possible for Windows 10 to automatically connect to the Internet when turned on?
Internet icon in the taskbar of the Windows 10 operating system
On operating systems of the Windows family, this is possible if the computer is provided with the Internet directly via a LAN cable. To do this, you need to complete just a few steps, and you can use different methods.
Note! If the PC is provided with the Internet via a Wi-Fi router or modem, then the Network on it will always be active as long as the router is running. That is, when you turn on the laptop, you do not need to perform any connection actions.
How to make the Internet connect automatically on Windows 7 and 10
How to create an Internet connection on Windows 7
Regardless of the operating system version, the auto-connection process is similar. You can try several methods in turn if you were unable to set up an automatic Internet connection the first time. Each method has its own nuances and features. The most common and effective methods are presented below.
Creating a bat file and adding it to startup
The simplest method involves placing a shortcut responsible for connecting to the Network in the startup window. Thus, this shortcut will be launched simultaneously with the start of the operating system.
Startup menu on Windows ten
If the user does not have a router, then in order to enable auto-connection in this way, he will need to perform several steps according to the algorithm:
- Open the Start menu and type “control panel” in the search bar.
- Tap on the found application icon with the left key of the manipulator.
- In the list of parameters, find the “Network and Internet” block. At the bottom under the section name there will be a line “View network status and tasks”. You need to tap on it.
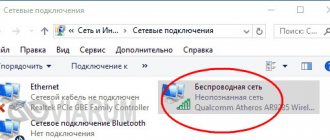
- In the next window that should appear, click on “Change adapter settings” in the left column.
- After performing the previous manipulations, a list of all adapters connected to the computer should appear. In this situation, the user will have to right-click on the name of the device through which access to the Global Network occurs.
- In the contextual window, click on the “Create shortcut” line. After this, a notification will appear that a similar shortcut cannot be created in this folder, and it will be transferred to the desktop. You must agree to the notification by clicking “Yes”.
- Make sure that the adapter shortcut actually appears on the desktop. Then you need to right-click on it and copy it by tapping on the appropriate option.
- Next, go to the Start menu again.
- LMB on the line “All programs”, and then on “Standard”.
- In the list that appears, find the “Startup” option and right-click on it.
- Click on the “Open” item.
- Paste the copied shortcut into the Explorer window.
Control panel interface on the Windows 10 operating system
Important! At the end, you need to restart your computer and check whether the device connects to the Internet automatically. If everything is done correctly, the result should be positive.
Automatic PPPoE connection in Windows 10 via scheduler
The Windows task scheduler is a tool built into the operating system designed to automatically run certain processes and applications. Automatic connection to the Internet is no exception and can be configured using the tool in question. The main thing is to follow the instructions:
- Similarly, go to the “Start” menu and enter the word “scheduler” in the search engine.
- LMB-click on the element that will be found to open it.
- In the menu that opens, in the column on the right, you need to go to the “Connect a new task” section.
- In the next window, click “Next” once, specifying any task name if necessary.
- In the “When to run the task” section, put the toggle switch in the “When logging into Windows” line and tap “Next” again.
- Now, when choosing an action for a task, you will need to specify the “Run program” option by placing the toggle switch in the appropriate line.
- Then the user will need to specify the path to the executable file. To do this, in the required field you need to write “C:\Windows\SysWOW64\rasdial.exe” and click on “Next”.
- At the final stage, you will need to check the correctness of the entered login and password provided by the provider, for example, high-speed Internet from Rostelecom, and click on “Finish” LMB.
Task scheduler on OS Windows 10
For your information! Through Rostelecom you can connect to cable or digital television and quickly turn it off if desired by calling the operator’s number.
If the computer does not automatically connect to the Network after carrying out the above manipulations, then you should try another method or run the troubleshooting utility.
How to enable mobile internet on Android - an overview for beginners
Turning on the Internet
The simplest and most quickly remembered thing is to turn on data transfer (Internet). If you do not use the Internet connection for some time, it is advisable to turn it off in order to save battery power. This means you will go through this procedure at least twice a day, to turn it on and off.
You can turn on the Internet using the top curtain or through “Settings”. Both paths lead to the same switch.
Let's look at turning on the Internet using Android 5.1 as an example (identical to Android 6). Early versions are included by analogy.
1. Swipe down to open the curtain →select a telecom operator →enable “Data transfer”.
2. Settings → data transfer → select operator → enable “Mobile data”.
For those who do not have unlimited mobile traffic, you can set a limit. When the threshold is reached, the Internet connection will not turn on, which will save additional payment for exceeding. Each subsequent 1MB of excess costs much more than the charged one.
Here you just need to enable “Mobile traffic limit”→set the time interval.
Next, set the upper limit and warning threshold on the scale.
Now you can safely use the Internet and not be afraid to exceed the limit set by the tariff.
Checking Internet connection settings
It happens that everything is turned on, but there is no Internet connection. This is where you need to check the settings according to your telecom provider.
You need to go through Android’s “Settings” → More → Mobile networks → Access points (APN) → Beeline Internet (in my case).
APN is the name of the access point
Of the numerous parameters, you only need to check:
— Access point name
— name (of the provider)
- password
As you can see, turning on mobile Internet on Android is not difficult, a little care when filling out and the Internet is connected. If there are no such parameters or there is not even an APN access point, then you need to create it by returning to the “Access Points” step and create a new one by filling out the specified parameters for your network.
Data for settings of popular operators.
It remains to consider connecting to the Internet via WiFi.
Setting up automatic connection mode through the Windows Registry Editor
No Internet connection - protected, Windows 10: how to fix
This method requires strict adherence to the algorithm, since incorrectly changing system registry parameters will lead to unstable operation of the operating system. It is recommended to proceed as follows:
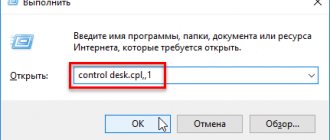
- Press the “Win + R” keys on your PC keyboard simultaneously in the specified sequence on the English keyboard.
- In the “Run” window, enter the “regedit” command, then press “Enter” from the keyboard to confirm.
- A registry editor window will open, in which you must immediately go to the “Edit” section, and in it click on “Create”.
- Select “String parameter” as the element to be created. You can call it any name at the user's discretion.
- Double-click on the created parameter to launch the editing window.
- In the “Value” field you need to enter the path to the executable file with minor adjustments. In this case, the user must write “C:\Windows\System32\rasdial.exe connection_name login password.” Instead of Russian words, you need to indicate the corresponding data.
- Click on “Ok” and close the system registry window.
- Restart your desktop computer or laptop and make sure it is automatically connected to the Network without any interruptions.
Creating a string parameter in the system registry on the Windows 10 operating system
Note! If, after going through the above steps, the operating system refuses to start and you cannot get to the desktop, then you need to restore the operating system through safe mode.
Autostart VPN connection using Windows Scheduler
Let's try to configure VPN autostart using the Windows Task Sheduller functions. To do this, run the program Start->All Programs-> Accessories-> System Tools->Task Scheduler, or on the command line run: taskschd.msc
Let's create a new simple scheduler job named "AutoConnectVPN"
Next, you need to specify when the task needs to be performed. In this case, we are interested in the following scheduler capabilities:
- When the computer starts (when the computer boots)
- When I log on (when the user logs in)
The choice in this case is yours, because... Depending on your system requirements, sometimes you want the VPN to connect automatically when the computer boots (the user has not yet logged in). This is useful on servers (for services running in the background or for other automated operations). If you want the VPN to start only when the user logs in (the beginning of the working day of an operator or remote office employee), you need to select the second option.
Then we indicate that the scheduler should start the program (Start a program).
In the next window you need to indicate which program you want to run and with what parameters. We run C:\Windows\system32\rasdial.exe with arguments vpn_office winitpro_admin [email protected] @
After the wizard finishes, another task named AutoConnectVPN will appear in the list of tasks performed when Windows boots. Now the next time you boot the VPN system, the connection should pick up automatically.
For Windows 7/Win 8. If the connection cannot be established, try to find the task you created in the task scheduler and in its properties on the General tab, specify - Run with highest privileges (run with administrator rights), this should help.
Automatic Internet connection Windows 10 via command line
Error 651 Windows 7 when connecting to the Internet
The command line is also a tool built into the system that allows you to change some OS parameters after entering a set of commands.
To set up an automatic Internet connection on Windows 10 after turning on the PC, you need to do the following:
- Open the Start menu and enter “CMD” in the search engine.
- Right-click on the name of the found software and in the contextual window, click on the line “Run as administrator”. This is necessary to give the software more rights.
- In the line with the blinking cursor, type the command “sc create connection name start= auto binPath= “rasdial connection name username password” DisplayName= “connection name” depend= lanmanworkstation obj= “NT AUTHORITY\LocalService”. It is clear that instead of Russian-language words, you need to write the corresponding information.
- After entering the above characters, you must press “Enter” from the computer keyboard to confirm the command. The correctness of the actions will be indicated by the word “Success” in the command line window.
- Close “CMD” and go to the list of operating system services.
- Find the service that was created when writing the command in “CMD”, focusing on the specified name, and double-click on it with LMB.
- In the properties window, in the “Startup type” line, select “Automatic”, and then tap on the word “Run”.
- Restart your PC.
Setting up an automatic Internet connection on Windows 10 via the command line
Important! It is worth carefully checking the name of the connection entered on the command line to avoid system errors.
Thus, on Windows 10 it is possible to create an automatic Internet connection when you turn on the computer. There is nothing complicated here. You just need to carefully read the methods outlined above.
Autostart VPN in Windows
In the last few years, the technology of organizing a remote workplace (be it an individual employee or an entire office) through VPN technology has become increasingly popular. However, it is not very convenient for the user to manually initiate a VPN connection every time the computer boots. How can I make sure that the VPN connection is opened automatically when Windows boots or when the user logs in and does not require any additional manipulations from the user? Let's try to figure this out.
Let's assume that to connect to the VPN, you use a specially created connection named “vpn_office”. If a new VPN was created with default settings, most likely its name will contain spaces or Russian characters (the process of creating a VPN connection in Windows 8). For further work, it is better to rename it so that the VPN connection name contains only English characters and there are no spaces in the name (Right-click on the connection icon and “Rename”).
In the VPN connection settings, uncheck the following options:
- Display progress while connecting
- Request name, password, etc. (Prompt for name and password, certificate, etc)
- Include Windows logon domain
There are several ways to automatically establish a VPN connection in Windows. Most of them work correctly in almost all versions of Windows and differ in the way they implement the automatic launch of the VPN connection initiation script. In some cases, a particular technique may not work, and you will have to try an alternative. It is also worth noting that the described methods for automatically connecting to a VPN were tested in Windows 7, however, with minor modifications and edits (or none at all), they can be used in other operating systems of the Windows family
To establish an automatic VPN connection, we will use the rasdial utility built into the system.