Method 1: Enable or disable automatic update using Wu10Man
This method will work on all versions of Windows 10.
Win10Man is an open source tool created by WereDev for GitHub that can be used to completely disable Windows Update on Windows 10.
If you disable automatic updates using Win10Man, you will need to enable automatic updates using Win10Man each time before checking for and installing updates in Windows Update.
- Download and run the latest version of Win10Man from GitHub below.
- Follow step 3 (Disable) or step 4 (Enable) below depending on what you would like to do.
- Disable automatic updates
- On the "Group Policy (Group Policy)" select "Disable Automatic Updates (Disable automatic updates)" in the drop-down menu and click on the "Update Policy (Update policy)." (see screenshots below)
- On the Windows Services tab, disable all Windows services and click OK after each one.
- On the Host File , click on the Hosts and click OK.
You can now close Win10Man.
- On the "Group Policy (Group Policy)" select "Enable Automatic Updates (Enable automatic updates)" in the drop-down menu and click on the "Update Policy (Update policy)." (see screenshots below)
- On the Windows Services tab, enable all Windows services and click OK after each one.
- On the Host File , click on the Unblock All Hosts and click OK.
You can now close Win10Man.
There are other similar programs
- Win Updates Disabler v1.4
- Windows Update Blocker
What is it for
There is an update available for every Win 10 product. Any user can update the operating system on their laptop. Activation of the update is simple and straightforward and is performed in the “default” mode, that is, forcibly.
However, the user can configure the system to accept absolutely all auto-updates or, when receiving notifications about new services and software, independently install the required package.
Activating updates is recommended for:
- eliminating vulnerabilities in PC operation;
- supporting and improving the security of Microsoft Office, Windows, Internet Explorer;
- improvements to the built-in Microsoft Security Essentials antivirus;
- receiving new spam filters for the internal Microsoft Outlook service;
- improvements to tools that diagnose problems;
- adopting the latest version of MSRT (Malware Removal Tool);
- obtaining Windows-compatible drivers that improve PC performance;
- support for any modern equipment;
- bug fixes and PC performance improvements;
- adding new features.
recommends that users activate, or rather do not disable, the default automatic reception of packages with new products via the Internet. In this case, Windows and Microsoft Update will independently update the drivers, anti-virus and security databases of a particular PC over a certain period of time. If desired, each user, receiving the next notification about new software, can decide for himself which of the proposed packages to install on his computer. He only needs to activate not automatic, but selective loading.
Method 2: Enable or disable automatic updates using Group Policy
This option is not available and will not work on Windows 10 Home. Microsoft has prevented automatic updates from being disabled in the home version.
This method will only work on Windows 10 Pro and Enterprise versions.
- Open the Local Group Policy Editor. Open Run (Win + R).
- Enter gpedit.msc in the Run box and click OK.
Computer Configuration / Administrative Templates / Windows Components / Windows Update
- Select (dot) "Not Specified", click OK and go to step 8 below. (see screenshot below)
- Select (dot) Enabled.
- Select (dot) Disabled, click OK, and go to step 8 below.
How to remove the update icon
Users of Windows 7, 8, 8.1 will sooner or later have an icon appear on the notification panel that will say that the system can be updated to Windows 10. In fact, this means that sooner or later the update will happen almost forcibly, against the will of the user. If you don't want this to happen, you just need to uninstall one update.
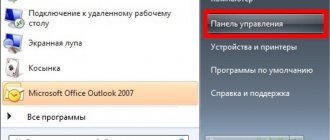
- Go to the list of installed Control Panel updates, as shown above.
- In the table we find the update with number KB3035583 and delete it.
Find the KB3035583 update and remove it - To be sure, you should also remove:
- Windows 7 - KB2952664, KB3021917;
- Windows 8 - KB2976978.
- Reboot the computer.
Method 3: Enable or disable automatic updates using a REG file
This option is not available and will not work on Windows 10 Home. Microsoft has prevented automatic updates from being disabled in the home version.
This method will only work on Windows 10 Pro and Enterprise versions.
- Download the Reg file below, depending on what you want to do.
- Enable automatic update -
- To have Windows Update notify you before downloading and installing any updates (recommended) -
- Disable automatic updates -
- Save the .reg file to your desktop.
- Double click on the downloaded .reg file.
- When prompted, click Run, Yes (UAC), Yes, and OK to confirm the merge.
- Click "Check for updates" in Windows Update, and then restart your computer after application is complete.
- If you want, you can now delete the downloaded .reg file.
- Sometimes it may take a while for it to turn on and not automatically download and install updates.
Conclusion
So, with the question of whether it is worth disabling Windows 10 updates, we will consider that we have sorted it out. It's worth it if you are completely satisfied with the OS version you are using, if you want to protect yourself from gross interference in the Windows configuration by the developer, and also if you want to gain more control over the update procedure. A reasonable solution in this case would be to block updates immediately after a clean installation of Windows 10.
Is it possible to completely and permanently disable Windows 10 updates? Only if you completely refuse to install any patches or components from Microsoft that may disable the lock you are using. Using third-party utilities is the most convenient way to rid yourself of forced updates, but you need to use their latest versions, downloading only from official developer sites or resources that you trust.
Method 4: Disable automatic updates using Disable Schedule Scan Job
- Run Command Prompt as Administrator.
- At the command line, enter:
- takeown /fc:\windows\system32\usoclient.exe /a
- Press Enter and close the Command Prompt.
- Go to the folder C:\Windows\System32\
- Find the usoclient.exe file.
- Right-click on it and select “Properties”.
- On the Security tab, click the Edit button.
- Select each item in the "Groups or Users" list one by one and uncheck everything for them below.
- Disabling permissions for usoclient.exe
- Click OK and confirm changing permissions.
- Restart your computer.
other methods
If for some reason you cannot remove updates using the methods described above, then try rolling back the system using a restore point, which is created every time the system installs updates.
- Reboot the device and press F8 when turning it on.
- Follow the path “Recovery” - “Diagnostics” - “Restore”.
Select a recent save point.
Follow the instructions.
Method 5: Enable or disable automatic updates over network connections
Windows automatically downloads and installs updates, except for metered connections. In this case, Windows will automatically download only those updates that are necessary for Windows to function properly.
This option will work on all editions of Windows 10.
- Open Settings (Win + I).
- Go to the "Network and Internet" section.
- Click "Ethernet" and select your connection.
- Switch "Set as metered connection" to "On".
Reasons to remove old updates
The reasons for deleting old updates can be very varied:
- saving disk space;
- low-quality (disturbing the operation of the system), outdated update;
- update files were installed with an error, etc.
Each of the reasons stated is sufficient to interfere with the operation of the system in order to debug it.
As my experience shows, in operating systems that have been running for six months or more, it is almost necessary to remove old updates. Firstly, updates clutter up the system disk, and the more space there is, the better Windows works. Secondly, updates can overlap each other, which causes file paths to become confusing, which also incorrectly affects the system’s performance.
Is it possible to remove updates?
Of course, updates can be removed, but with some nuances:
- the update must be removed correctly. Regular deletion of files will lead to undesirable consequences, including the crash of the operating system;
- Not all updates can be removed. Some, especially those related to Windows Defender, are vital to the secure operation of the system;
- You need to be careful when choosing which update to remove. It is quite possible that it is not old and unnecessary. This means that the system will install the update again.
Proper removal of updates is the key to system performance
Method 7: Disable automatic updates using Windows 10 update settings
If you have Windows 10 Pro, you can change your Windows Update settings to delay updates or pause them entirely.
- Open the Start menu and run Windows Update.
- Select More options.
- To pause updates, set the Pause Updates switch to On and updates will be paused. This option only disables updates temporarily for 35 days. You need to turn pause updates off and on again for the count to start again.
- To defer updates instead, select the desired Service Channel Update Window from the first drop-down menu, and then set how long you want to defer feature updates and quality updates.
- Feature updates can be delayed up to 365 days, while quality updates can be delayed up to 30 days.
Enjoy your Windows 10 device with updates temporarily disabled. To undo the changes, go to Windows Update settings and make sure the deferment days are set to 0 and the maintenance channel is set to Semi-Annual Channel (Targeted).
What should you not do?
Of course, any irreversible data cleaning or removal of updates must be approached wisely. We advise you not to touch those files that are associated with Windows Defender; reckless actions here can cost you the security of your system. Also make sure that the system is not using the update you are interested in. If you uninstall such data, it will simply be downloaded again, and you will not gain anything. In addition, simply deleting files can lead to malfunctions or complete system crash. To prevent this from happening, use one of the methods described below.