Our article today will show you various ways to disable Windows 7 updates on your computer. Microsoft continues to update the latest editions of its operating systems. This is necessary to improve performance and speed, introduce new features, improve security, and also to correct various shortcomings, bugs and errors observed in previous releases of Windows 7.
Users of licensed Windows 7 can safely upgrade to more recent releases, while owners of pirated versions of Windows 7 are not recommended to do this. Developers never stop fighting unofficial (hacked) software products; accordingly, one or another update can significantly limit functionality and block tools that are important to you.
Even as a user of official Windows, it’s worth thinking about whether the next Windows auto-update will bring real benefits? In most cases, an application that is experiencing problems will automatically inform you about the need to update. If your computer is fast, stable and productive, there are no errors in the system, and there is a reliable antivirus, you can completely disable updates with peace of mind or temporarily postpone this procedure until the moment when it is really needed.
- How to disable automatic updates in Windows 7?
- How to stop operating system updates permanently?
- Command line shutdown method
- Removing system notifications
- What can I do to prevent my computer from rebooting after auto-updates?
- How to prevent Windows from installing drivers on its own?
Let's look at the main reasons why you should deactivate the Update Center:
- You are using a pirated version of OS Windows 7 . There is a high probability of disrupting the functionality and performance of many software components;
- There is not enough space on the system disk . The size of the patch packages is quite large, which means you risk losing the last free gigabytes on your hard drive.
- Internet speed limitation or complete lack of traffic . In the best case, Windows simply will not be able to download content; in the worst case, communication with Microsoft servers will be lost during the process of downloading and installing Windows 7 updates, which will most likely lead to critical errors during the update process.
Where can I turn off automatic download and installation of updates?
- Open “Start” and go to “Control Panel”;
- Select “Windows Update” (if the “Categories” view mode is activated at the top right, switch to displaying large icons for greater convenience);
- In the next window, click on the “Settings” line located on the left side of the Windows interface menu;
- We are interested in the “Important updates” option, select “Do not check for updates (not recommended)”;
- You can also uncheck two settings below: “Recommended” (“Receive in the same way as important ones”) and “Who can install” (“Allow all users”);
- All that remains is to press the OK key to confirm the changes made.
In this case, the system will continue to search for updates by default, but will not be able to install them without your consent. Now the user will be able to update only manually from the Download Center. Just click the “Check for updates” button.
Third Party Applications
If the first six methods seemed overly complicated to the Windows 7 user, it is worth trying to remove the system update using a program from independent developers, for example StopUpdates10 (download - greatis.com):
- Download and run the application, then go to “Settings” (menu “Tools”).
- And make sure that all three circled checkboxes are ticked - and if not, set them yourself.
- Return to the main window and click on the “Ban Windows updates” button.
- Wait until the selected settings are applied and restart the computer.
Tip: you can turn auto-update back on using the same program.
How to disable Windows 7 update completely?
To completely disable WinUpdate Center in the Windows 7 operating system, follow the instructions below:
- Go to “Start”, open “Control Panel” and find the “Administrative Tools” section;
- Double-click with the left mouse button on “Services”;
- A window will open with a list of services, among which you need to find “Windows Update”;
- Right-click on the found service and select “Properties” in the drop-down context menu;
- In the “General” tab, set the startup type: “Disabled” and click the “Stop” button;
- To confirm the changes, click “Apply” and then OK;
- After this, the OS will stop checking for updates and installing them automatically.
Using a BAT file
One of the easy effective methods that works on any version of the OS is to create a BAT file, which is an executable file that runs, together with the task scheduler, a command that will block the downloading of system updates.
The procedure involves the following steps:
- Create a text document in Notepad and write in it:
net stop wuauserv sc config wuauserv start=disabled
- Save the file by specifying any name and using the “.bat” extension.
- From the “Start” context menu (RMB), go to the “Computer Management” item.
- In the list on the left, select “Task Scheduler”.
- In the action menu on the right, click “Create a simple task.”
- Enter the name and description, click “Next”.
- Now you need to assign a trigger (indicate when the batch file should be called). Select from the available options “When the specified event is logged” and click “Next”.
- We indicate which record will trigger the trigger:
Magazine: System. Source: Service Control Manager Event code: 7040.
- Select the action - “Run the program”, click “Next”.
- Opposite the empty “Program or script” field, click “Browse...” and indicate the location of the previously created BAT file so that it runs every time the system sends a signal. Click “Next” and “Finish”.
Now the file will prevent unwanted actions, starting automatically under specified conditions.
Disable downloading updates via the command line
- Go to the “Start” menu and start typing “Command Prompt” in the search box;
- Run the found application as administrator (right-click on it and select the appropriate item);
- In the interpreter interface sequentially enter two commands (press Enter after each): reg add "HKEY_LOCAL_MACHINE\SYSTEM\CurrentControlSet\Services\wuauserv" /v Start /t REG_DWORD /d 4 /f
and then:reg add "HKEY_LOCAL_MACHINE\SOFTWARE\Microsoft\Windows\CurrentVersion\WindowsUpdate\Auto Update" /v AUOptions /t REG_DWORD /d 1 /f
- Wait for the operation to complete successfully and close the Windows console by entering Exit.
How to remove OS notifications?
After completing all the steps described above, the operating system will stop updating, but will continue to issue intrusive messages that the user should update. Reminders will appear in the lower right corner of the screen.
If you are annoyed by these notifications, you should do the following:
- Notice the system tray (right side of the taskbar), which displays a checkbox with a red cross;
- Click on this checkbox, in the menu that appears, select “Open support center” (if there is no such function, you can get to the same section from the control panel);
- In the interface that opens on the left, click “Support Center Settings”;
- The “Disable or enable messages” window will appear, in which you can uncheck the boxes next to items you do not need, including: updates, anti-spyware protection, Internet security settings, account control, network firewall, virus protection, archiving, and so on;
- Confirm the changes by pressing the OK key;
- Done, you managed to remove the red cross in the tray.
Results
So, now you know how to disable updates in Windows 7, as well as how to manage updates manually. We hope you found this information useful!
An operating system is a product containing millions of lines of software code. They contain certain shortcomings and errors. Hotfix packages are designed to solve these problems. Among OSes, Microsoft products remain the most popular. Users and thousands of application software developers have adapted to them. But the company by default builds into its systems a means of automatically downloading updates, which users do not like. After some packets, the computer begins to behave unpredictably. You can disable auto-updates from the control panel
What can I do to prevent my PC or laptop from rebooting after installing updates?
Let's look at how to cancel a computer restart:
- Hold down the Win + R key combination and enter gpedit.msc ;
- The “Local Group Policy Editor” will open;
- Follow the path: “Computer Configuration” - “Administrative Templates” - “Windows Components” - “Update Center”;
- On the right side of the screen there is a list of various parameters; you need to double-click on the line “Do not automatically reboot...”;
- Select “Enable” and save the new settings;
- Important point! Now you need to apply the changes to the group policy files, this is done on the command line;
- Launch the console with administrator rights and enter the command gpupdate /force and click Enter. The Windows 7 Group Policy Editor will open in front of you again.
Using a metered connection
This feature can be used to disable downloading of updates, since if the Wi-Fi network is configured as a connection to a metered tariff plan, the OS does not automatically download packages. The method is applicable to all editions, but from the April 2017 update, dozens of packages will still be installed. To carry out the procedure, we use the “Settings” snap-in, designed to replace the “Control Panel” in Windows 10. Follow the steps:
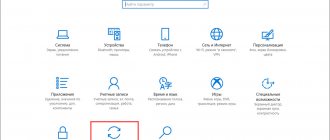
- Go to “Settings” (for example, from the Start button), open the “Network and Internet” section.
- Go to the “Wi-Fi” subsection and in the right area of the window click “Manage known networks”.
- Select the desired network in the list and click “Properties”.
- In the “Limited connection” block, enable the option by moving the toggle switch to the appropriate position.
Where can I disable driver autoloading?
Another problem for many users, from the good old Windows XP to modern 8.1 and 10, is the driver autoload service. On the one hand, the function carries a certain usefulness, on the other hand, it may be unnecessary if the PC or laptop has recently been updated and is working properly and efficiently, without any negative glitches or problems. In any case, the option can be enabled manually at any time convenient for you.
- Open “Control Panel”, go to “Hardware and Sound”;
- Next you need to go to “Devices and Printers”;
- Find the icon with the name of your computer, right-click on it to open the context menu and select “Device installation options”;
- A window will appear with the message “Should I download drivers and realistic icons for the devices?”;
- First, click “No, provide choice,” then “Never install...”;
- Don't forget to click the "Save" button located at the bottom of the screen.
What are Windows updates and why are they needed?
Windows updates are software packages that fix bugs and vulnerabilities found. The main task of updates is to maintain security, but it is not the only one. Let's look at what functions system updates perform:
- Protective. An OS with installed updates is less susceptible to virus infection and hacker attacks. The developers try to close holes as soon as they are discovered.
- Increased stability. Everyone makes mistakes. They lead to malfunctions, reboots, etc.
- Introduction of new functions. Without installing updates, new programs do not work on outdated operating systems.
Advice. It's worth thinking before you disable auto-update in Windows 8 or any other. This will affect the security and stability of the computer.
