Today, to send media files, users mainly prefer to choose email or social networks, for example, Odnoklassniki, VKontakte and others. But, in principle, there are still people of the old school who still want to work with MMS rather than with e-mail. Why, you ask? There are hundreds of answers: email can be hacked, it is difficult to register a mailbox for individuals, it is very difficult to remember your address rather than someone else's, you constantly forget your password and much more. In this case, we decided to describe in detail how to set up MMS on your Android and what is needed for this!
In principle, the setup process is no different from previous generation devices, when we specified all the settings manually or automatically. We will describe all the methods for the main mobile operators.
The article will contain the following operators:
- MTS;
- Beeline;
- Megaphone;
- Tele 2.
How to configure MMS manually
If the operator does not have the settings or the ordered parameters did not arrive, configure the MMC manually. To do this, open the appropriate settings section and enter the parameters taking into account the operator used.
Location of settings on different OS:
- iOS. Settings - Cellular - Data settings - Cellular data network.
- Windows Phone. Settings - Data transfer - Add Internet access point.
- Android. Settings – More or Wireless networks – Mobile networks – Access points – Add.
Operator assistance
This method, like manual entry, can be used an unlimited number of times. But! As you understand, it will not be possible to sit straight on the fifth point, since you will have to perform certain manipulations.
Each mobile operator has a consultation number (the service is free):
- Beeline – 0611;
- MTS – 0890;
- Megafon – 0550;
- Tele 2 – 611 (or 679);
- Motive – 111.
Next, following the instructions of the automatic informant, we establish a connection with the operator, and order the necessary settings, accept them, and save them. Then we reboot the device. Sometimes the service needs to be activated, then we call again and ask the operator to activate the service on this number. This completes the MMS setup.
Setting up MMS on TELE2
- Settings name: Tele2 MMS.
- Home page or MMS server: https://mmsc.tele2.ru.
- Proxy server: enabled.
- IP address: 193.12.40.65.
- Port: 8080 – if WAP2.0 is supported. 9201 – if WAP1.x version is supported.
- Channel or connection type: GPRS.
- Access point APN: mms.tele2.ru.
Skip other points.
Important! After setting up, you need to send MMS messages in order to correctly receive MMS sent by other subscribers.
What is MMS
We are all familiar with text messages and use them quite regularly, but they cannot send any images or sounds. The MMS service was created specifically for this purpose. The name itself is an abbreviation that translates into Russian as “multimedia messaging service.” It seems incredible, but in the US and Norway, more than two-thirds of the total is MMS. There is a version that the technology was developed by the first providers for paid storage of photos taken from users’ phones on their servers.
The difference between MMS and SMS is that thanks to it you can send not only text, but also an image, sound, presentation or video. You can combine all this with each other or with text, provided that the resulting size does not exceed 999 kB (in some phones the size is limited to 100 kB). Almost all operators support this type of message. In order to successfully send MMS, you must have 3 and 4G protocols. This is UMTS and higher. Previously, low-speed data could be transmitted via GPRS, but today this does not seem to be a serious problem.
Packet transmission can be used for any purpose, but is usually used specifically for accessing the Internet. Because it is convenient to charge based not on time, as in a telephone conversation, but on the volume of transmitted information. Which is what is required in this case. MMS is delivered in a fundamentally different way. It was found that not every message the recipient wants to read. Therefore, to save traffic, the data is delivered to the server, from where a short request about the availability of the package comes. The shelf life usually does not exceed 3 days.
Network protocol information is transmitted at the moment when there are free voice channels formed by frequency and code methods. It is believed that the operator himself decides what type of information to give the prerogative, but if the quality of voice communication deteriorates sharply, then many will want to change the cellular operator. Be that as it may, with the introduction of smartphones, multimedia messages have become so popular that the issue of priority has had to be reconsidered in recent years: in the United States, many are dissatisfied with the service!
Not all phones support MMS because it requires some minimum capabilities. And the first of them is access to the Internet. Cheap phones can't do this because they don't have the hardware or software to do it. Physically, the phone can receive encoded information, because the transmission is on the same frequency, but it is not able to decipher and display it: there are no decoders or means of playing multimedia.
Submission Methods
If you managed to enable MMS on iPhone 5s, try sending a message like this. Remember, when sending, you need to select files that will not exceed 300 KB (this weight is set by most mobile operators). Moreover, this rule applies to both photographs (two or three images) and videos (a video lasting 20-45 seconds).
There are several ways to do this, let's look at each of them in more detail.
First method:
- Open the Messages folder on the product desktop.
- Click on the icon of a piece of paper and a pen/pencil.
- Select the recipient in the message creation menu, click on the icon that shows the camera.
- Select the required file in the “Media Library” section.
- Click on "Take a photo or video" if you want to save something in real time.
- Sign if required.
- Click on "Submit".
Sending MMS from an iPhone model 7 or 7 Plus is carried out as follows:
- Go to the Messages application, which will display a list of all incoming and outgoing SMS, as well as multimedia MMS.
- In the upper right corner there is a button with an icon in the form of a pencil and a note, click on it.
- Now you need to fill out the letter creation form. In the “To” field, enter the mobile phone number, Apple ID or contact name to whom your message will be addressed. If the contact is saved on your device, you can easily select it by clicking on the blue plus sign located in the same line.
- Next to the SMS/MMS input field there are keys for attaching multimedia elements, videos or photographs (static images or gifs). Attach the required files.
- When the message is completed and ready, all that remains is to send it to the recipient by clicking on “↑”.
These instructions are also suitable for models version X and higher. We proceed in a similar way:
- We go to the standard “Messages” application.
- Now you need to create a new letter by clicking on the button with a pen and a leaf.
- Select who the future MMS should be delivered to by filling out the form above.
- Upload a file from your iPhone library, add text to it, and click on the send message button, which looks like an arrow in a circle.
Second method
This method is not used very often. In this case, the message is sent during the process of taking a picture from the camera. So:
- take a photo;
- click on the photo you were able to take;
- When expanded to full screen, you can see an arrow at the bottom. When you click this arrow, you can immediately send the image to another recipient.
Third method
In this case, MMS can be sent directly from the gallery. To do this, it is important to be in the “Photos” folder and select a video or picture to send (check the boxes for the files). Next, click on the icon below and select “Message”. At the last stage, the text and the recipient are added, after which the sending is carried out.
Interestingly, a number of operators set the maximum possible file size for sending, which is no more than 1 megabyte. Often it is not possible to send an image larger than 1-2 megabytes the first time, we recommend trying again.
Note that sometimes, after changing the settings, you should reboot the device.
Another way...
Another way to obtain settings is to order them on the operator’s regional website. To do this, on a computer connected to the Internet, use a search engine to find the page we need. Then select the smartphone model and enter the captcha and mobile number. Then click “Submit”. Within 5 minutes the necessary information will be received. We save and install the necessary profiles. If the requested information has not been received within 5 minutes, it is better to repeat the order on the same regional website of the mobile operator. It is also recommended to completely reboot the phone. After that, we send and receive MMS. There shouldn't be any problems. If something doesn't work, we look for the error. As practice shows, somewhere they did something wrong. You can delete the old profile and do everything again.
Regular phone
Shown is an old phone with CSD technology, which was later replaced by GPRS. Therefore, settings are carried out taking into account this archaic feature. In the menu you need to enable the use of GPRS, because by default there will be an attempt to transfer data without packets via CSD.
Then we proceed to setting the IP address 192.168.192.192 and the transmission port 9201.
It's time to enter the MMS server address.
MTS has already created our profile for us, all that remains is to activate it.
And yet we check whether the settings have changed over the past 10 years.
No, everything remains the same. Login: mts, and password is the same. To activate the service, we send a trial MMS to the toll-free number 8890.
Possible problems
Difficulties with sending and receiving multimedia messages are not always associated with technical problems with the device or the lack of required settings on the Android smartphone. In private situations, the limitation is determined by the tariff plan. But, the user first checks the network parameters. When the problem is not in them, then the reason for the non-working MMC function is often in the following moments:
- The service may not be available in some regions. If there is such an assumption, then to clarify the functions of the tariff plan, the subscriber contacts a representative of the mobile communication provider.
- When a Samsung smartphone has 2 parallel SIM cards from different operators, then in order to receive and send MMS from them the user needs to configure each number separately.
- Sometimes a subscriber is unable to send a message with multimedia content - this may be due to the fact that the recipient’s tariff plan does not include such an option or his device uses different network parameters.
If the case is isolated, then the problem is in the message itself - the MMS may be broken and therefore not open.
To open or send MMS from an Android smartphone, the correct settings must be set, and the service must be activated in the tariff. If these parameters are not present, then MMS on Samsung will not open. To fix this problem, the subscriber needs to set up the smartphone themselves or order it from the operator - this will make the option available. However, sometimes the inability to read or transmit multimedia messages is caused by other factors.
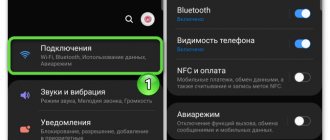
Step 1 . Launch the Settings and select the “SIM cards and mobile networks” section.
conclusions
Before you send a multimedia message, you need to make sure that your device is capable of receiving and sending this type of message.
We recommend viewing:
If you can’t figure out the mms parameters on your own, you can use the help of an operator who will clarify the phone model and help you restore operation step by step.
With the correct order of settings, you can successfully send a message with a picture or photo to any subscriber, no matter where he is.
MMS messages are a service that allows you to transfer various files, including photographs, pictures and animated images.
Sometimes situations arise when you need to edit received or sent media files, which is why the question arises, where are mms stored in android.
In general, all mms can be viewed in the “Messages” folder. But only viewing is available there, that is, it turns out that you will not be able to edit received files in this folder.