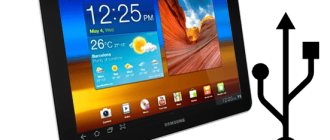
As a rule, all tablet computers and smartphones have internal slots for expanding memory through the use of microSD cards. Moreover, the USB connector (microUSB) allows you to connect external drives, which is very convenient. But what should you do if it turns out that your tablet does not see the USB flash drive or does not respond to the new SD memory card?
The reasons for the error with the recognition of a flash drive by a tablet are different.
There are a number of reasons why a flash drive remains invisible to your gadget. This article is intended as a quick introduction to the most common problems.
- Possible reasons why the tablet does not see the USB drive;
- Problems with microSD drives;
- Blitz tips.
Possible reasons why the tablet does not see the USB drive
A convenient and compact USB flash drive has long become the most popular mobile storage device for information. Naturally, we have the right to demand that our tablet work correctly with external flash drives.
But if you suffer an evil fate and your tablet refuses to see the flash drive, pay attention to a number of possible reasons:
- Most tablet computers and smartphones are equipped only with a microUSB connector and do not have a standard-sized USB connector. In such cases, a standard USB flash drive is connected through additional accessories. This, in turn, adds to the number of places where contact may be unreliable. If the device previously worked normally, then the likely cause of the failure may be a lack of contact at the connections.
A thorough external inspection may, for example, reveal that the tablet does not see the flash drive via the OTG cable. The manufacturer saved on materials - as a result, external damage “cut off” your flash drive. The vast majority of adapters, USB cords and OTG cables are made non-separable, which means they cannot be repaired. If any faults are found in the above-mentioned devices, it is recommended to replace them.
- Different types of external drives require electrical power from 40 to 300 mA. The flash drive is powered via a USB connector (there are two outer contacts on the connecting strip). Due to design features, it happens that the tablet is not able to provide the necessary current for the drive to operate.
There is only one way out of the situation - an adapter with a separate power source. To be honest, such a thing is very impractical and makes sense only in exceptional cases. The most practical thing would be to choose a flash drive that will match the parameters of your device.
- The most common cause for concern is when the drive is connected and there is no pop-up notification window on the tablet. The natural conclusion is that the tablet does not see the flash drive.
Look in the Device Manager, if it displays the flash drive, then the problem of the missing pop-up window should be looked for in the tablet settings.
All ways to connect a flash drive to a tablet
The question of how to connect a flash drive to a tablet may arise for many users. This is due to the fact that a tablet with USB is extremely rare, and this type of connection is the most popular.
Having figured out how to connect a flash drive to a tablet, you can:
- transfer photos from tablet to flash drive;
- transfer information from a flash drive to a tablet;
- transfer various multimedia files from a flash drive to a tablet (and vice versa);
- reflash via USB flash drive by connecting the flash drive to the tablet.
This is a rather broad topic, since in addition to ways to connect a flash drive to a tablet, problems may arise in which the tablet stops seeing the external drive.
Ports and inputs in tablets
Most tablet computers do not have a connector for connecting a flash drive; there is only the ability to write data to a microSD card, which is inserted either into a separate slot or instead of one of the SIM cards.
Photo source: otzovik.com
The main connectors found on these devices are:
- micro-USB connector, USB-C or mini-USB for charging;
- microSD for memory cards;
- 5 mm Jack for headphones;
- SIM card slot.
Methods for connecting a flash drive to a tablet
When asked whether it is possible to connect a flash drive to a tablet, the answer can be quite varied, since there are several ways to connect a standard external drive with a USB port.
OTG adapter
OTG cable
The most universal option is to use a USB-OTG adapter. To do this, you need to buy it and follow the instructions:
- Insert one end of the adapter (which is included) into the microUSB port on your mobile device.
- The other end must have a memory card connected, as it is just a standard USB socket.
After this, the device will perceive the inserted drive as an internal memory card. After this, the problem of how to transfer photos and other files will be solved.
Important! A similar connection is available on Android devices with version 3.1 and higher. If the gadget uses another port instead of a microUSB port, this is not a problem, since there are OTG adapters for all popular connectors.
Double head cable
A two-headed cable will also help solve the problem of how to open files from a flash drive on a tablet. This is the same OTG adapter, but unlike the standard version, it has 2 USB inputs.
In this case, the device will accept both connected memory cards simultaneously, displaying 2 external drives. As with the previous option, there are cables not only with a microUSB port.
Flash drive C-Type with connector
There are cards with a C-Type or micro-USB connector on sale. They are the easiest to connect, because you just need to insert such a drive into the gadget.
He, in turn, perceives them as an external drive, displaying them in Explorer on Android in the root partition with internal memory.
Moreover, such a drive can be connected to a computer, since there is a regular USB input on the opposite side from the C-Type or micro-USB. Of course, you should not connect at the same time.
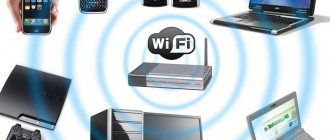
Wireless drives
The problem with the tablet and components does not occur when using wireless drives. They appeared not so long ago, but look similar to hard drives.
In this case, the connection to the gadget occurs either via a Wi-Fi wireless network or via Bluetooth. This method is mainly used on iPads.
Custom adapters
Custom adapters are called OTG-type adapters, but they are supplied either with the device or in the branded stores of the corresponding manufacturer.
The principle of operation and connection is the same as in OTG. The only difference is that a problem may arise when the device does not see the USB flash drive. This is justified by different types of file systems: FAT32 or NTFS.
It is important that the file systems are identical.
Applications for correct operation of OTG
Sometimes the problem may not be how to open the flash drive on the tablet, but that the files are not transferred. This is due to the automatic blocking of the system, be it Android or iOS. You can bypass the blocking using special applications.
There are several similar applications. The best thing is StickMount.
Instructions for its use:
- Get root rights on the gadget.
- Connect the device.
- Install software.
Now a separate folder with its name will be created for the external drive. You can transfer files there. And also, using the application, you can figure out how to format a flash drive not through a PC, but through a mobile device.
What else can you connect to your tablet using USB OTG?
Since the USB port is universal, you can connect not only memory cards to it. You can reinstall the operating system via a bootable Android flash drive, connect a keyboard, mouse, 3G modules, gamepads and much more.
In most cases, the device will correctly identify the connected device and allow you to use it.
Why doesn't the tablet see the media?
You can figure out why the tablet does not see the flash drive by identifying the root of the problem. There are 3 most common causes of this problem.
Important! Unlike PCs, mobile devices do not have a safe eject feature. Therefore, there are no ways to safely remove a flash drive. But this feature is completely unnecessary.
Problem with the tablet
The problem with the tablet computer may be due to the fact that the power in the connector does not meet the required level for the memory card to function. This may be due to the energy saving mode being turned on.
Also, a malfunction may occur due to the fact that the device does not support the storage capacity of the drive. Only using a drive with less memory will help here.
Software problems
If the device sees the map, but you cannot move files, it is recommended to use the application. Through it you can bypass the system lock.
Problems with microSD drives
The microSD drive is designed in such a way that, from a mechanical point of view, there is, in principle, nothing to break there. If the inspection does not reveal any cracks or impact marks on the body, then most likely the reason is different.
- Perhaps the tablet has stopped seeing the memory card due to oxidation or contamination of the connecting contacts. A cotton swab dipped in ethyl alcohol will help clean the contacts.
- Another reason why the tablet does not see the microSD flash drive is the use of a card reader. To synchronize the operation of the tablet and the card reader, which has its own software, you may need to install a driver.
- Recently, microSDHC and SDXC cards have become especially popular. These flash drives are distinguished by a huge amount of memory and high data transfer speed. Only the latest generation gadgets are adapted to work correctly with them. The tablet may not see the SD memory card due to incompatibility.
- Different operating systems use individual file system layouts. For example, if your Android tablet computer no longer sees the memory card, the problem may be formatting incompatibility. Most devices running Android software do not recognize files with the NTFS partitioning system; the file system partitioning according to the FAT32 standard is acceptable for them.
There are two ways to deal with this problem:
- Reformat the flash drive to the required standard.
- If the tablet does not see the memory card due to a discrepancy in formatting, then one of the many programs that will “teach” your gadget to recognize different formats will help it see the light.
Brief Introduction to USB-OTG
What is USB-OTG? This technology appeared back in 2001 and was intended for the same thing it is used for now: connecting USB devices to gadgets like mobile phones and wearable media players. The key feature of OTG is that the head device (in our case, a tablet) can operate in both “host” and “client” modes.
In other words, through the same port, our tablet can not only work with a flash drive, but also act as one itself when connected to a PC via the appropriate cable.
How it works
But how exactly does this all work? Surprisingly, the technology has not undergone any significant changes since its invention. In order to switch the tablet to the “host” mode, the OTG cable is equipped with a special jumper, which is not included in the regular USB cable included in the kit. Thanks to this jumper, the tablet “understands” that this particular cable is connected and “gives” energy to the flash drive, rather than receiving it, for example, for charging. Sounds pretty simple, doesn't it?
Schematic diagram of OTG operation
By the way, at the moment there are devices that allow tablets to work with OTG and charge at the same time, which is incredibly convenient for several reasons. Instead of a jumper, they use a resistance (resistor) and the voltage from the charger is supplied not only to the tablet itself, but also to the flash drive connected to it. Unfortunately, not all tablets support this function yet.
Blitz tips
All sorts of problems with the electronics around us happen all the time. The first golden rule in such situations is not to panic. We must calmly try to deal with all aspects of the problem.
If the tablet does not see the memory card, what to do first:
- Start by rebooting the device (an action that will prevent a simple system crash).
- You need to check the flash drive on another device (this will confirm whether the drive is working or not).
- If it is possible to connect another USB drive to the tablet computer (this will allow you to determine whether your device is generally capable of connecting via a USB port).
- When purchasing flash drives, ensure device compatibility. Ideally, when purchasing, have a tablet with you and check without leaving the checkout, so to speak.
- Do not exclude damage to wires and contacts. Intense loads on connectors are the cause of most malfunctions.
Is it possible to “make friends” between two Android tablets via OTG?
Surely, this is a question that interested many after reading this article. There are situations when you need to transfer a large amount of information from one tablet to another. For example, a folder with photos, a large game or a movie of a gigabyte or two. Of course, even if the tablet has the latest version of Bluetooth, you will have to wait more than one hour. This, of course, is not an option. This begs the question, is it possible to connect two Android tablets or smartphones to each other via OTG? The answer is yes. However, there are some limitations. With the latest versions of Android, Google is gradually moving away from mounting device memory as USB drives. Now most Android devices are connected using the MTP protocol, that is, as media devices, since this is more secure from a corporate point of view.
Smartphone connected via MTP
What does this mean? And the fact that Android does not currently support MTP connection to it. You can get around this by switching your smartphone or tablet to standard storage mode using the corresponding item in the settings. If there are no such settings, you can try to do this using special programs. Unfortunately, these programs are not a panacea and will not work with every tablet.
If the tablet does not work as a drive
As a result, if your tablet does not work as a storage device, you have only one outlet for transferring a large amount of information - WiFi. The essence of such a transfer is the following - one device is the host and opens the access point, and the other is the client, which, in fact, connects to this point. Today, many programs allow such transfer, for example, the same “ES Explorer” or the MiDrop function of Xiaomi. But the most convenient program is SHAREit
Although it was copied from the Transfer application in MIUI (they even connect without problems), it is supported by all Android devices and provides enormous data transfer speeds. There is no comparison with Bluetooth. In addition to this, it looks nice, is very easy to use and allows you to transfer data even to Apple products. In general, this is truly a “must have” for any Android device.
Small and capacious MicroSD cards (flash drives) are used on almost all mobile devices. Unfortunately, problems with them occur much more often than with USB drives. One of the most common problems is that the smartphone or tablet does not recognize the flash drive. Why this happens and how to solve the problem, we will talk further.
If we are talking about a new MicroSD card, it is possible that your device is simply not designed for this amount of memory or cannot recognize its specification. Therefore, carefully study the information about which flash drives are supported by your smartphone or tablet.
The file system on the memory card could be damaged or the markings might be lost. This could happen after installing Root rights, due to incorrect formatting or flashing the device. Although, even if such manipulations were not performed, the flash drive may become unreadable simply due to accumulated errors.
The most unpleasant case is when the media fails due to mechanical or thermal damage. In this case, it is impossible to repair it or return the data that was stored there.
By the way, a flash drive can burn out not only from overheating, but also from the device itself on which it is used. This often happens with cheap Chinese devices, which spoil storage devices over and over again.
How to check the fault
First, make sure the flash drive is installed correctly. It may have moved or been inserted the wrong way around. Also carefully inspect the connector itself for contamination, and if necessary, carefully clean it.
If your phone still doesn't see the memory card, try inserting it into your computer using a card reader. Also check the functionality of other flash drives on your gadget. As a result, you will understand what the problem is - in the carrier or the phone. In the latter case, the culprit may be a software error or simply broken contacts, and the best solution would be to contact a specialist. But when the flash drive itself refuses to work normally, you can try to solve the problem yourself. There are several ways to do this.
Method 1: Clearing the system cache
This may help if problems occur in the internal memory of the device. The data on the flash drive should be saved.
It is worth saying that this method is not suitable for all smartphones/tablets. Most models allow you to clear the system cache. Some have so-called custom firmware, which also provide this opportunity. But if in “Recovery”
You will not have the above command, which means you are out of luck and your model is one of those on which it is impossible to clear the cache. If this method does not help, move on to the next one.
Method 2: Check for errors
In this and subsequent cases, you need to insert the USB flash drive into your PC or laptop. There is a high probability that the system itself will offer to check the memory card for errors. Choose the first option.
Otherwise you will have to do it manually. To do this, follow these steps:
Method 3: Formatting the flash drive
If the flash drive is opened on a computer, then copy the necessary files, since formatting will completely erase the media.
How to recover information
In especially severe cases, when you cannot open a flash drive on a computer, the data stored on it cannot be retrieved before formatting. But with the help of special utilities, most of the information can still be returned.
Let's consider this procedure using the example program. Remember that recovery is only possible if a “Quick Format”
.
It will take longer, but there is a greater chance that the missing files will be found.
We have looked at solutions to the problem when the problem is in the MicroSD card. If nothing helps or the computer doesn’t see it at all, you have only one thing left to do - go to the store for a new flash drive.
Tablet computers are very limited in internal memory. Plus, most of them deliberately lack the ability to use microSD memory. It follows from this that many users, and more than once, wondered how to connect a flash drive to a tablet?
Software errors
It happens that the gadget does not see the external storage media due to software errors, to eliminate which you need to take the following steps.
Clear OS cache data
In order to clear cache data on your tablet, you can use both built-in tools and third-party programs. The most popular utilities: CCleaner and Clean Master - are suitable for Microsoft Windows operating systems (including 7, 10), and have mobile versions for Android OS.
If you decide to clean it manually, you need to go to “Settings” - “Storage”. In this section, the system will estimate the amount of memory used and offer to delete unnecessary files. Clearing the application cache must be done separately for each of them.
It is also possible to delete the cache through the Bios engineering menu (Bios for Windows OS) and Recovery (for Android OS).
Checking sectors for errors
To diagnose the drive for errors, connect it to a computer or laptop, select the desired removable drive in “my computer”. Then click "Properties" in the context menu. In the dialog box that opens, go to the “Service” tab and start the scan using the appropriate key.
We recommend checking your USB drive using the Check Flesh program, having first copied the contents of the flash drive, since the utility erases all files. If the manipulations did not help, then it is worth formatting.
Format to FAT32
A malfunction may occur due to an incorrect file system format of the flash drive: instead of the usual FAT32, EXFAT, EXT, suitable for Android and Windows OS, the NTFS system is selected. Once you have backed up the content to your computer, start the formatting process. For this:
- In Explorer, select a removable drive, open the dialog box with the right mouse and select “Properties”, then “Tools”, “Format”.
- Set the required settings (FAT32).
- Make sure o is missing.
- Click "Get Started."
Reinstalling the file system format may take some time. Then transfer the files back and try reading them on the tablet.
The computer or laptop does not see the memory card - what to do
First, you need to make sure that the card works. To do this, insert it into another device with a slot for SD (or microSD using an adapter) cards. This could be a camera, video camera, second computer, tablet, smartphone or any other device equipped with an appropriate slot. If the memory card is not recognized in this device or works intermittently, it means it is either damaged or needs to clean the connectors.
Take a cotton pad, ear swab or piece of cotton, lightly soak them in alcohol or a suitable cleaning product (in theory, plain water will do, but either a special cleaning product or simple alcohol will do the job best), then lightly go over the metal contacts on the back side of the memory card. Important: do not pour liquid on the card (this will only risk killing it) or insert it wet into the port. Make sure the contacts are dry and clean, and then try connecting the memory card to the computer again.
Check if this area of the memory card or adapter you are using is dirty.
If after this procedure the memory card works in other devices, but does not work in the computer, then it makes sense to also clean the slot itself. There may be too much dust in it, which prevents the computer from reading information normally. You can clean the memory card slot in a computer or laptop using compressed air.
Advice: don't blow into the slot. Your mouth will not be able to provide enough air and pressure to effectively clean the slot of dirt. This cleaning method can do more harm than good, since you risk simply spitting on a slot in your computer. It's better to buy compressed air at your local computer store. Fortunately, it is not expensive, and at the same time, high pressure and a long nozzle will allow you to effectively clean the deep memory card port without the risk of spitting on it with your drool.
Another tip: make sure you insert the card the right way. The computer should indicate which side the card should be inserted. Some slots use a snap mechanism to secure the card in the slot. In such a computer, you will not be able to install the card the wrong way around, since it will not lock. Other computers may not have this mechanism, so make sure the memory card is installed correctly. Do not use force when inserting or removing a card, as you risk breaking the slot, card, or locking mechanisms.
Let's say the memory card works, you insert it the correct way, the slot in your computer is clean, but the PC still does not see the SD card. In this case, there are a few more tips that should help.
Check if the memory card is recognized in the disk management interface. If the memory card is not assigned a letter, the drive will not appear in Explorer, although both the slot and the memory card physically work.
- Disconnect any flash drives from your computer and leave only your SD card. This will help simplify the process.
- Press Win + X and select Disk Management.
- At the bottom of the utility interface, your hard drives and SSD drives will first be displayed. They are marked "Basic". Any removable drives (flash drives, memory cards, external hard drives, etc.) o. See if it's on the list. Disk Management should show the media type, its size, and “Online,” which means the card is working properly.
- Check if the letter is assigned to the card. If there is no letter next to the name of the card ((G:), for example), then this is why it is not displayed in Explorer.
- Right-click the map and select Change Drive Letter or Drive Path. In the window that appears, click Add, and then select the Assign a drive letter (AZ) option. Select any letter you like and click OK.
- After this, the system should inform you about the new disk found and the memory card will appear in Explorer.
Check if the memory card slot is enabled in your computer's BIOS settings. Sometimes it happens that the card reader on the PC motherboard is simply disabled for some unknown reason. You can check this by simply diving into the BIOS settings. Restart your computer and during startup press F2/Delete (or another button selected by your manufacturer) to get into the BIOS. Each computer has its own BIOS (UEFI), which differs depending on the manufacturer or model of motherboard, so we cannot publish all options here. You need to find the section with ports and devices (Onboard Devices / Miscellaneous Devices and so on), and then look for something like “Media Card Reader”, “SD Reader”, “Enable ExpressCard” and so on. Make sure it is turned on, then save the settings, restart your computer and try connecting the memory card again.
A checkbox that is responsible for activating the built-in SD card slot in the BIOS of Dell computers. If there is no checkbox, the port will not work.
In the case of desktop computers, it is also possible to have a scenario where the SD card slot on the front of the case is not connected to the computer's motherboard. Here you will have to open your case (before doing this, completely disconnect the computer's power from the outlet) and see if the wire from the front panel of the case is connected to the motherboard. The wire with a 9-pin connector must be connected to the appropriate comb on the motherboard.
Sometimes the source of the problem can be an adapter that is not working as expected. This is the case if you are using an SD adapter for microSD cards or a card of another format paired with an adapter. Of course, you don’t always have an extra adapter at hand, but this option is also worth considering if you just can’t get your computer to work with a memory card. Fortunately, adapters cost mere pennies and finding them is not difficult.
You can refer to the system's built-in diagnostic and troubleshooting methods. Perhaps Windows itself will be able to find the cause and successfully fix it.
- Press Win + I and go to Update & Security.
- In the left menu, click Troubleshoot. In the list, find Hardware and Devices. Click this option and then click Run the troubleshooter.
- Wait while the wizard checks your system and reports the results. If it doesn't find anything, move on with these instructions. If the diagnostics does find something, apply the tips it suggests, and then try connecting the card to the computer again.
The next option is to turn the card reader off and on. Perhaps a banal bug in the operating system or controller led to the failure of the card reader.
- Press Win + X and select Device Manager. Alternatively, you can press Win + R and enter devmgmt.msc.
- In the list of devices, look for Storage Host Adapters. This is your SD reader. Expand it and the adapter controller should appear on the screen. This could be a Standard SDA-compatible SD host controller, some Realtek PCIe CardReader, or an adapter from another manufacturer.
- Right-click on the adapter and select Properties. Go to the Driver tab and click on the Disconnect device button. Confirm the action.
- Then re-open the properties and turn the card reader back on in exactly the same way.
If rebooting the adapter does not help, you can try to reinstall or update the card reader driver. Go to your manufacturer's website and check if there is a new driver version. If available, download and install it. You can first remove the old version of the driver in Device Manager.
- Press Win + X and select Device Manager.
- Expand Storage Host Adapters, and then click the adapter and select Properties.
- On the Driver tab, click Uninstall Device. Confirm deletion.
- After that, download the driver from the manufacturer’s website and install it. Restart your computer, and then try connecting the card again.
- If the slot stops working after recent driver updates, click Rollback on the Driver tab to revert to the previous driver version. Please note that the driver rollback feature will only be available if you have updated the driver at least once. If the system does not have previous versions of the driver, the Rollback button will be grayed out, as in the screenshot below.
It is worth understanding that none of these methods will help if your computer's slot is damaged or broken. If the memory card works in other devices, but is not detected in any way in your computer even after all these dances with a tambourine, then you need to contact a specialist who will check the physical condition of the port, repair or replace it. To extract information from a card, insert it into another device (the same camera), and then connect it via a USB cable to your computer, or transfer the data you need from another PC.
We hope these tips will help you fix the problem and you won’t have to go to a service center, repair your computer, or change the memory card.