Good afternoon friends. On RuNet, users quite often disable system updates, since a decent number of operating systems are pirated, and people are afraid of exposing a pirated version of the system. Some users still strive to update the system on time, since they are well aware that updates provide protection against OS failures and other improvements to the system code. But the update system does not always function. What to do when Windows 10 updates don't work?
Why won't Windows 10 update via Update?
- The most common reason for the update center not working is its banal shutdown. Updates could be disabled either by the user himself (often accidentally) or by the creator of the Windows assembly, if you have a prefabricated system installed.
- System disk is full. A very common problem, especially recently, when the top ten is frequently updated. In this case, there are two options - either we clean up the system disk, or we add free space to it from another partition. For these purposes, I recommend using Acronis Disk Director.
- The update cache is full. In this case, the cache must be cleared. How exactly is described in the article below.
- Blocking by Antivirus, or Firewall, or Windows Defender The solution in this case is quite simple. Disable these programs and perform the update. After this, the main thing is not to forget to turn on the antivirus again (I will present an excellent program to disable them).
- Malicious software is interfering with the update. In this case, we launch your reputable antivirus and scan all sections of the computer in detail. If your antivirus is weak, or you don’t have one at all, in this case, one-time antiviruses like Web CureIt will help us. We go to the Dr.Web website, download and perform a detailed scan.
- External storage devices, such as flash drives, may interfere with the update. In this case, you need to disable them and try updating Windows.
- The operating system is damaged. In this case, you need to run a special utility that will scan your system and eliminate various failures (more on this below). Also, in this case, restoring the system from a backup copy or recovery disk will be a great help.
How to avoid problems when installing a Windows update
If you encounter problems updating frequently, then you may be doing something wrong yourself. Make sure to avoid common Windows 10 upgrade pitfalls:
- Check the stability of the Internet and do not overload it. If it works poorly, intermittently, or you borrow it from other devices during the update, there is a high probability of receiving an error when installing such an update. After all, if the files are not downloaded completely or with errors, then they will not be installed correctly.
- Don't interrupt the update. If you feel like the Windows 10 update is stuck or is taking too long at any stage, don’t touch anything. Important updates can take up to several hours to install, depending on the speed of your hard drive. If you interrupt the update process by disconnecting the device from the network, you risk getting a lot of problems in the future, which will not be so easy to solve. Therefore, if it seems to you that your update is not finishing, wait until it is completed or reboot. After a restart, the system should roll back to its previous state, which is much better than rudely interrupting the update installation process.
If the update fails, it is better to roll back the changes than to simply rudely interrupt their download
- Check your operating system with an antivirus program. If Windows Update refuses to work for you, then you will need to restore damaged files. The only reason for this may be malware that damaged these files.
Usually the cause of the problem is on the user's side. By following these simple tips, you can avoid critical situations with new Windows updates.
Are updates enabled in Task Manager?
This is the very first method to find out whether your update service is turned on at all, or whether someone thought of turning it off. In this case, we will only use system programs, such as the task manager. So, let's launch the dispatcher using the hotkeys CTRL + SHIFT + ECS . Next, select the “Services” menu and look for the inscription wuauserv .
As you can see from my screenshot, this service is stopped for me. Right-click on this line and click “Run”.
Now, as we see, . But it is possible that you wuauserv in this table, then we can use another method.
Enable in Group Policy
Launch the “Run” line using the Win + R keys. In the window that opens, enter services . msc . Then Ok.
The “Services” window appears. Among the commands we are looking for “Update Center...”. I have “System” above the startup type. When you see “Disabled”, you need to enable it by highlighting this command and selecting the “Advanced” mode. Then, select “Run”.
After this, reboot the computer.
Using a tool to diagnose and correct system failures
- Through the “Control Panel” go to “Troubleshooting”. If you are at a loss, Control Panel can be found and launched through the application search.
- In the window that opens, select “Troubleshoot using Windows Update.”
- The system will ask for your confirmation. Click the “Next” button and the diagnostic process will start.
- Administrator confirmation may be required.
- Please wait a few minutes while the scan completes.
- If problems are found, the system will offer to fix them.
- Once the diagnostic process is complete and all fixes have been applied, an information window will appear.
- Now you can close the troubleshooter and, preferably, restart your computer or laptop after that.
Are there new Windows updates?
So, let's enter the Update Center using the "Options" utility. To do this, right-click on “Start” and select “Options”.
Then, in the window that opens, select “Updates and Security”.
In a new window, we see the message that my PC has the latest updates. As you can see from the screenshot, the check occurred yesterday at 23:30. If desired, we can check for new updates by pressing the corresponding key.
In this window you can select “Update Options”. To do this, click on “Advanced options”. Of course, this all works if updates are enabled. But, if you have not yet managed to enable updates, there are still methods.
Possible causes of problems installing updates on Windows 10
Problems with Windows Update may occur for the following reasons:
- Infecting your computer with viruses.
- Lack of free memory on the hard drive. In this case, it is necessary to free the system disk from various kinds of “junk” files. To exclude this reason, the local disk must have at least 5 GB free.
- Blocking by Windows Defender Firewall or third-party antivirus. In this situation, you need to temporarily deactivate these services. This reason is usually indicated by a long, fruitless search for an update in the Update Center.
Not only malware, but also antiviruses themselves can prevent the system from updating - Full update cache.
- Damage to system files. It is necessary to scan and fix these files in the Command Line. Damage can be caused by viruses on the PC.
- Connected devices - external storage devices (flash drives, disks, etc.). In this case, you need to remove them and try to update again.
- Update service disabled. You need to check whether it is activated in the Services window and enable it if necessary.
Group Policy, editor
Let’s also launch the utility with the “Run” command. Press Win + R and write gpedit.msc
So, to enter the Update Center, in the left column, select “Computer Configuration”, then the “Administrative Templates” folder, then “Windows Components”. We are looking for the inscription “Setting automatic updates”.
The screenshot shows that I have this setting enabled. If it says “Not specified” above it, right-click on it and select “Change” from the drop-down menu. In the new window on the left, select the “Enabled” checkbox, then “Apply” and Ok.
Is your PC broken and you are no longer able to work on it normally? It's not a problem. You need to contact our computer repair center. We will diagnose and fix the problem. It is important for us that your PC continues to function perfectly, and that nothing distracts you from doing what you love: Our offer: 1 Free visit of a specialist; 2 Free computer analysis at your home; 3 We provide a warranty after repairs of up to three years; 4 We issue a check with a warranty card. All you have to do is leave a request and we will give you a 15% discount
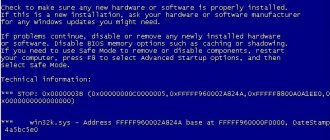
Windows 10 stopped updating
The cause could be a software or hardware failure, an improper shutdown, or a sudden Windows reset. The root of the problem is corruption of settings due to incorrect completion of the Windows registry, disk errors, etc.
Fixing Windows 10 Update using a wizard
Try the standard troubleshooting wizard first.
- Follow the path: “Start” - “Control Panel” - “Troubleshooting” - “System and Security” - “Windows Update”. Windows Troubleshooter fixes Update errors
- Launch Windows 10 Update.
- Click the "Advanced" button.
Click on the "Advanced" button to open additional OS troubleshooting settings - Make sure that automatic error correction is active, click on the link to run with administrator rights. Perform troubleshooting as an administrator
- Wait until Windows update troubleshooting finishes.
Troubleshooting your computer may take several minutes or more - Close the program when it finishes fixing problems. Quit the Windows 10 Troubleshooter if the problems are resolved
If this doesn't help, try solving the problem using Command Prompt.
Fixing Windows 10 Update using Command Prompt
- Launch Windows Command Prompt with administrator rights.
- Enter these commands one after the other:
- “sc stop bits” — stop the BITS service;
- “sc stop wuauserv” - stops requests from Windows to the server from which updates were downloaded;
- “sc stop appidsvc” - stop checking PC hardware by ID;
- “sc stop cryptsvc” - stop encryption services. Some services depend on each other, so follow the sequence of entering commands
- Register 25–36 DLLs in the registry. Their numbers may vary depending on the build of Windows. If one fails or is not found, move on to the next one. Each file is opened using the registry handler regsvr32.exe. List of DLL files that need to be registered:
- regsvr32.exe atl.dll;
- regsvr32.exe urlmon.dll;
- regsvr32.exe mshtml.dll;
- regsvr32.exe shdocvw.dll;
- regsvr32.exe browseui.dll;
- regsvr32.exe jscript.dll;
- regsvr32.exe vbscript.dll;
- regsvr32.exe scrrun.dll;
- regsvr32.exe msxml.dll;
- regsvr32.exe msxml3.dll;
- regsvr32.exe msxml6.dll;
- regsvr32.exe actxprxy.dll;
- regsvr32.exe softpub.dll;
- regsvr32.exe wintrust.dll;
- regsvr32.exe dssenh.dll;
- regsvr32.exe rsaenh.dll;
- regsvr32.exe gpkcsp.dll;
- regsvr32.exe sccbase.dll;
- regsvr32.exe slbcsp.dll;
- regsvr32.exe cryptdlg.dll;
- regsvr32.exe oleaut32.dll;
- regsvr32.exe ole32.dll;
- regsvr32.exe shell32.dll;
- regsvr32.exe initpki.dll;
- regsvr32.exe wuapi.dll;
- regsvr32.exe wuaueng.dll;
- regsvr32.exe wuaueng1.dll;
- regsvr32.exe wucltui.dll;
- regsvr32.exe wups.dll;
- regsvr32.exe wups2.dll;
- regsvr32.exe wuweb.dll;
- regsvr32.exe qmgr.dll;
- regsvr32.exe qmgrprxy.dll;
- regsvr32.exe wucltux.dll;
- regsvr32.exe muweb.dll;
- regsvr32.exe wuwebv.dll.
DLLs must be activated in a specific sequence - Empty the update cache on drive C by entering the commands “rmdir %systemroot%/SoftwareDistribution /S /Q” and “rmdir %systemroot%/system32catroot2 /S /Q”. To properly clear the update cache, follow the sequence of entering commands
- Restart previously interrupted Windows 10 update services by entering the commands:
- "sc start bits";
- "sc start wuauserv";
- "sc start appidsvc";
- "sc start cryptsvc" (action "stop" changes to "start").
Services must be started in the same order in which they were stopped. - Reset WinSock (network settings) by entering the commands:
- "ipconfig /flushdns";
- "netsh winsock reset";
- "netsh winsock reset proxy".
- Close Command Prompt and restart Windows 10.
Most likely, the first Windows update will be successfully downloaded and installed.
Enable updates on the command line
A very effective way. This method allows you to enable the wuauserv , even if other methods of enabling it do not help. So, let's open the command prompt as an administrator. To do this, enter “Com…” into the search bar.
After the inscription system32, enter the following inscription net start wuauserv , press enter.
From the screenshot we see that the update center has been successfully launched. In my opinion, this is the most efficient way to run updates.
Using the Microsoft Troubleshooting Tool
- Search the official Microsoft website for “Windows Update Troubleshooter”. This can be done by using the search bar on the Microsoft website, or by typing a search query in an Internet browser.
- Download the found tool, run it and click the “Next” button. Also, confirmation on behalf of the administrator may be required.
- The tool will then automatically detect and fix problems.
- Upon completion, you also need to close the tool and, it is recommended, restart your computer or laptop after that.
Enable updates through the registry
Also a great way. So, let’s enter the registry via “Run”, writing “regedit” and clicking OK.
Then, in the registry we look for the branch \ HKEY_LOCAL_MACHINE\SYSTEM\CurrentControlSet\Services\wuauserv
To do this, you can insert this inscription in the search window of the registry window, immediately after the word “Computer”, or go through the branch yourself. Then, in the window that opens, select the “Start” command. Next, right-click on it and click “Edit”.
If your registry is disabled, it will be 4; to enable it, set the number 1.
Update Receipt Options
The Update Center settings provide the ability to obtain current patches for all Microsoft products and use distributed downloads.
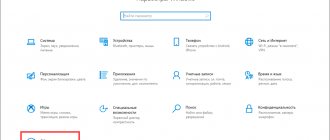
Call the Windows settings panel using the “Win+i” combinations. We go to the section highlighted with a frame in the screenshot.
In the settings block that opens by default, go to the right half of the window. Click on the area marked with a two to open additional options.
We move the switch indicated by the arrow to the “Disabled” position. Having thus prohibited updating all Microsoft products except the operating system itself, we return to the beginning of the section.
Select the line marked with one in the side list. Disable the ability to download data from other computers on the network. Let's check how Update Center works with the new settings.
Update using the Win Updates Disabler program
A fairly simple program that can qualitatively update your system and its other components. The program has both a regular version and a portable one, which can be launched even from a flash drive and does not need to be installed.
You can download the regular version, but I prefer the portable one. There is no need to clutter up the system disk again. So, let's unpack the program. Since I have a 64-bit system, I select the appropriate version. The program is in Russian.
Interestingly, the program can not only enable updates, but also disable them. We mentioned above that Windows updates may not download due to Windows Defender and Firewall. So, the program can disable them before updating.
Next, select the “Enable” menu, put a checkmark above the “Enable updates...” line and click “Apply now”.
Now, the software asks your permission to restart the computer. We agree, turn off the browser, and restart.
The computer begins to reboot and searches for updates.
Specifics of the “tens” in terms of updates
See also: “How to disable Windows 10 Defender SmartScreen Filter”
Most recently, Microsoft employees announced that they do not yet plan to release the 11th version of the operating system.
But at the same time, Windows 10 will improve, and very seriously. The changes will affect literally everything: functionality, speed, and appearance. Moreover, it is almost impossible to refuse innovations, you can only postpone them, and then only in the professional and corporate versions of the operating system.
The only way out of the situation is to use the registry editor (a program for adjusting group policies) or third-party services.
Windows Update Minitool
One of the best programs for updating Windows. This program uses the Update Center. But the functionality of this program is much more extensive than that of the Microsoft utility.
This program was created by forum members forum.ru-board.com
The program is portable, the kit includes 32 and 64 bit versions. You just need to unpack the archive, select your version, and run Update Minitool.
Download Windows Update Minitool (link on the website after the program title).
So, we launch the program by clicking on the two round arrows in the left column.
The program showed that at the time of writing there were no new updates. You can also find out which updates are already installed, whether there are hidden ones, etc. The program has many languages, but they need to be downloaded separately. The native language of the program is Russian. There are English, Ukrainian, etc.
I will not tell now all the advantages of the program, since it deserves a separate article. The main advantage of Update Minitool is the ability to install updates when the update center is not working and the ease of downloading with limited Internet traffic. Now let's look at how to fix update errors.
Other possible reasons why Windows 10 updates won't download
There are other reasons why Windows 10 updates may not install. These include:
- “Trivial” lack of free space on the system disk. Go to properties and check its load. If necessary, remove unnecessary programs, games, music, documents and other files.
- Presence of files with errors in the cache.
- Restricting Internet access.
We hope that the article was comprehensive and understandable, and that you were able to solve the problem.
See also: “Paging file in Windows 10: how to increase or disable it”
Fixing Update Center errors
As we mentioned above, updates may stop installing if there are glitches in your system. What to do in this case? If you installed the system a long time ago, and updates worked fine before, you just need to make a backup from the system image that you created after installing Windows.
Also, the system can be fixed using a recovery disk. But, if you haven’t thought of creating a backup copy of Windows, then we can use other methods.
So, let's use a system utility that was specially created by Microsoft to fix such problems.
We enter the “Control Panel” through the search bar by entering the word “panel”.
In Control Panel, select Large Icons, then Troubleshoot.
In the new window on the right, under the “System and Security” command, click on the “Troubleshooting...” link.
Click “Next” and our system will begin to look for problems that are preventing the normal download of updates.
When the utility scans the system, it will fix some problems automatically. But, to correct some of them, she will ask us what needs to be done? Fix it, or skip it and continue looking for other problems.
When the program scans the system, it will display the data that it was able to find and fix. Also, the utility will show faults that it could not fix. After this, click “Close” and reboot the system.
When the reboot is complete, you need to check through the Update Center whether it is working or not and whether new updates are being downloaded.
Table: main errors when installing an update in Windows
| Error | Description |
| Windows update failed. Cancel changes. Don't turn off your computer. | This usually occurs due to the presence of duplicate user profiles on the PC or due to a full update cache. |
| Error that starts with code 0xC1900101 | There are problems with drivers on the PC. Check Device Manager for errors and, if necessary, fix damaged files in the Command Prompt console. If it doesn't help, try other methods. |
| Errors 0xC1900208 - 0x4000C | This error may indicate that you have an incompatible application installed on your computer that is preventing you from completing the update process. Remove any incompatible apps, and then try the update again. |
| The update is not applicable on this PC | This error may mean that required updates are not installed on your computer. Install all important updates on your computer. |
| Updates are installed but not configured. The update was completed but was cancelled. | In this case, it is recommended to find out the exact error code in the update log, which can be opened through Windows Update. The code will make it clear what measures to take next. |
| Error starting with code 0x80070070 | The code indicates that there is not enough disk space. |
| 0xC1900107 | The cleanup operation of the previous installation attempt is still pending and requires a system reboot to continue the update. Reboot your device and run the installer again. If restarting the device does not solve the problem, use Disk Cleanup to remove temporary and system files. |
| 0x80073712 | A file required by Windows Update is damaged or missing. Try restoring system files. |
| 0xC1900200 – 0x20008 0xC1900202 – 0x20008 | This error may mean that your computer does not meet the minimum requirements to download or install the Windows 10 update. |
| 0x800F0923 | A driver or other software on your computer is not compatible with upgrading to Windows 10. Contact Microsoft Support for instructions on how to resolve this issue. |
| 0x80200056 | The update process was interrupted because you accidentally restarted your computer or logged out. Try updating again and make sure your computer is plugged in and remains turned on. |
| 0x800F0922 | Your computer was unable to connect to the Windows Update servers. If you're using a VPN to connect to your work network, disconnect from the network and turn off your VPN software (if applicable), then try updating again. This error may also mean that the system-reserved partition does not have enough free space. |
| 0x80240016, WindowsUpdate_8024401C, 0x8024401C, 0x80070490 | Important system files have been damaged - use the Command Prompt and remove viruses from your PC. |
How to clear the update cache manually?
We are moving on to the final stage of troubleshooting updates. If the utility fails to clear the cache, we will clear the cache ourselves. So:
We enter the “Services” window using Win + R and, as described above, enter services.msc .
Select “Advanced” at the bottom. In the right window we look for “Update Center...”. In the left window, click on the “Stop service” link. We leave this window open.
Now, go to “Explorer” (by clicking on the “Computer” shortcut), drive C. Then select Windows , then SoftwareDistribution and look for the Download , open it. Select all files and folders. Right-click on the selected area and select “Delete” from the drop-down menu.
We have cleared the update cache. Let's return to our open utility with services and run the updates again. I think Windows updates are working for you now. After the work has been done, it is advisable to clean the system and registry, for example, with a Computer Accelerator.
Conclusion: - We've covered quite a few ways to troubleshoot Windows update downloads. I advise you to start fixing problems from the top recommendations. For Windows updates to start downloading, for the most part, you just need to enable them in the Services window or through the command line. If Windows updates still don’t download, follow the steps below and they should work for you. Good luck!
Sincerely, Andrey Zimin 04/02/2019
Basic ways to solve problems installing updates on Windows 10
The operating system has many tools and modules that can solve the problem of updating it. Determine the error code and act on it using our instructions.
Recommendations from Microsoft
Tens developers give the following tips for troubleshooting errors during system updates:
- To start searching for an update, click on the “Check for updates” button. If the search does not start or an error occurs, close the center, wait 15 minutes, enter it again and run the scan.
In the Settings window, select the section called Update & Security - Open the “Windows Settings” window on the display: press the two Win and I buttons on the keyboard at once. If nothing appears, use the Start menu. Click on the gear above the power off button.
Click on the gear to open the Windows Settings window - On the panel, go to the “Update and Security” block. Click on the "Check for updates" button
- Also follow the "Advanced Options" link at the bottom of the button. Set up automatic installation for the update. In the drop-down menu, select the first item “Automatic”
This solution can only help in a number of cases, for example, when the download of updates was interrupted due to some single failure in the system or due to a temporary lack of Internet.
Solve problems using the Computer Troubleshooter
The developers have built into Windows a special tool that allows you to find various problems in the system and fix them immediately. We will tell you how to use this tool in the instructions:
- We will launch the tool through the “Control Panel”. You can open it through the “Run” module: hold down Win and R, type the control request in the empty field and click OK.
In the “Open” line, enter the command control - You can also launch the panel through “Search”. We enter the appropriate query and open the classic application in the results.
Search for "Control Panel" and open the desktop app - On the panel, click on the “Troubleshooting” section. In the Control Panel window, find and run the Troubleshooting block
- In the left column, click on the second link “View all categories”.
Go to the list of all categories for troubleshooting - We are waiting for the system to detect available diagnostic packages. Searching for diagnostic packages will take some time - please wait a moment
- At the end of the list there will be a “Windows Update” module. Right-click and select the “Run as administrator” option. Run the Windows Update troubleshooter as an administrator
- In the troubleshooting tool window, click on “Next” so that it begins the search.
Click “Next” to start searching for problems on your computer - Again, we wait until the tool completes the problem detection procedure.
Wait until the search for problems on your device is completed - If problems are found, the tool will notify you about this and immediately provide the opportunity to correct them. For example, the module may offer to run a pending update. Click on “Apply this fix”. Click on “Apply fix” to have Windows fix the problem with the update
- The system may also find any additional problems. You will learn about the success of the operations in the report, where there will be a list of errors and a mark opposite each one - “Fixed”, “Not fixed” or “Detected”. If any problems remain unresolved, run the diagnostic tool again. You can also view additional information about the problems.
Click “Close” to exit the module - If the module does not find any problems in the operation of the update center, move on to other solution methods. The tool may not detect any problems on your PC related to Windows Update.
Checking services
The Windows service corresponding to the Update Center may simply be turned off on the device at the moment. For the update to take place, you need to activate it and set it to turn on automatically every time the system starts:
- Call up the “Run” window using a simple combination of Win + R. In the free field, write services.msc or copy and then paste. To execute, click on OK or Enter. Paste the short command services.msc into the empty field
- In services we find “Windows Update” at the very end of the list. Double-click on it so that a second window appears on the display. If the click does not work, right-click and select the last element “Properties”. In the context menu of the service, click on the penultimate item “Properties”
- For the startup type in the menu, set the value to “Automatic” - the selected service will start working immediately after Windows loads. After that, click on “Run” and apply the changes. Close all windows and try to update again in class=”aligncenter” width=”1365″ height=”725″[/img] Set automatic activation in the “Launch type” menu
Clearing the update cache manually
Removing all data from the update cache is quite simple - even a beginner can do it. Follow the short instructions:
- Before getting rid of information about the previous system update, you need to deactivate the service responsible for the operation of the “Update Center” in the “Services” window. Open it using the instructions from the previous section.
- In the list of components we look for “Update Center”. In the middle part of the window, click on the “Stop” link. We don’t close the window with services yet. Disable the Windows Update service temporarily using the Stop link
- Launch Windows Explorer and immediately go to the directories on the system drive. Here we need to open the following folders: Windows - SoftwareDistribution - Download. On the system drive, open the SoftwareDistribution folder, and in it - the Download directory
- In the last section, select everything with the mouse, right-click and select delete from the options menu. Delete all contents of the Download folder using the context menu
- We return to the “Services” window. Click on the “Run” link so that the update service starts working again. Let's see if the problem with the system update has been resolved. To do this, follow the steps from the “Recommendations from Microsoft” section.
Click on “Run” to reactivate the center service
Video: what to do if Windows 10 updates are not downloaded
Checking your computer for viruses
Even the presence of an antivirus on a PC cannot guarantee absolute security - a virus can penetrate through the protection. In addition, antivirus software may not be updated and therefore vulnerable. Let's look at how to identify and neutralize a threat on a PC, using the example of the standard Windows Defender antivirus, which is built into the Windows system:
- Open the Windows tray - the down arrow icon in the lower right corner of the display. Click on the small white shield.
- You will immediately see a window with the “Security Center” on the screen. Immediately click on the first tile “Protection against viruses and threats”. In the Security Center window, click on the first tile “Virus and Threat Protection”
- Click on “Run check now”. Defender will immediately launch a quick scan. If the program does not detect anything, follow the link at the bottom of the “Run a new advanced scan” button. To get started, you can run a quick scan and, if the defender does not detect anything, enable advanced scanning
- Select the first or third option. Please note that a full scan will take a lot of time, but you will be able to work in parallel on a PC. To perform the third option - offline - you will need to restart the PC. Within 15 minutes, the defender will search for and remove threats. After selecting, click on “Run Scan Now”.
Select the scan type depending on whether you want to wait a long time for the scan to finish - Wait for the verification to complete. In the results you will see a list of actions that can be performed with the detected threat. Select removal for all viruses found, if present.
Wait for the advanced scan to complete and remove viruses if Defender finds them
You can also be helped by the small utility Dr.Web CureIt!, which can work with other antiviruses on the device without any conflicts and has a simple and user-friendly interface that is understandable to a beginner. It is better to download it from the official website. It is free for home use.
Fixing damaged system files
After scanning with an antivirus, it is necessary to “treat” the system files - restore them. Of course, they could have been damaged not due to viruses - in any case, checking for damage and eliminating it will not hurt. Do the following:
- Expand the “Search” panel through the “Taskbar” (magnifying glass icon). Enter cmd in the empty field. Write a simple cmd code in the search bar of the panel
- Right-click on the classic Command Prompt application - in the small menu, click on the option to launch the console with administrator rights.
Click on the “Run as administrator” option - Allow the module to make changes in the operating system by clicking on “Yes”.
- Now type or paste the command DISM.exe /Online /Cleanup-image /Restorehealth. After that, immediately press Enter to execute it. The console will start the process of searching and healing damaged system files. Wait for it to finish - the module will provide you with a report on the work done. After that, restart your PC and try to update.
Paste the copied command DISM.exe /Online /Cleanup-image /Restorehealth using the combination Ctrl + V
Video: how to check the integrity of system files and “cure” damaged ones
Cleaning the system disk from “garbage”
You can remove temporary files and clear various types of system cache, such as the DNS cache, using the built-in Disk Cleanup tool or third-party utilities. Let us describe the procedure using the example of the well-known free application CCleaner from the developer Piriform:
- We launch the official application page using any browser. On it, click on the first green button “Download free version”. Click on the first button “Download free version” if you do not want to buy the Pro version
- After the file has been completely downloaded, launch it and install the software, following the installer’s simple instructions.
- Now open the utility and go straight to the required “Cleaning” section. All the necessary checkboxes are already selected in the columns on the left side of the window. You don’t need to change anything in the Windows tab, but in the “Applications” block you can optionally set checkboxes for the browsers you use most often. If you do not clear their cache, they will collect a lot of unnecessary information on the system disk and work very slowly. Click on “Analysis”. Select the required sections to clean and click on “Analysis”
- The system will estimate the number of megabytes or even gigabytes that are recommended to be deleted, and will also inform you about the types of data that can be safely disposed of. Click on “Cleaning”.
When the analysis is finished, look at the amount of data that will be free on the disk and click on “Cleanup” - We confirm our desire to get rid of unnecessary information and free up the disk. We wait for the procedure to complete, close the utility, restart the device and try to update the system in class=”aligncenter” width=”1365″ height=”629″[/img] Click on “Continue” to confirm your intention to delete unnecessary system files
Video: Smart cleaning of the system from unnecessary files using CCleaner
Temporarily disabling antivirus and Windows Defender Firewall
Deactivating your antivirus and Windows Defender Firewall can help install the necessary updates, the download of which is blocked by security programs by mistake. First, let's look at disabling the antivirus using the Avast utility as an example:
- Bring up the Windows tray on the display - find the Avast icon in it. Right-click on it.
- In the context menu, place the cursor on the second item “Manage Avast Screens”. In the following list, select the time for which antivirus protection will be disabled or select “Disable permanently.” In the latter case, then do not forget to activate Avast yourself after downloading and installing the updates. In the context menu of the Avast icon, select the period during which the program's protection will not work
- Start downloading or installing the system update again in the center.
You can temporarily deactivate Windows Defender in its settings:
- Open the Defender panel through the Windows tray (image of a white shield). In the window, immediately look at the lower left corner - click on the “Options” link. Click the "Options" link at the bottom left of the window
- In the notifications section, click on “Virus and threat protection settings.” Click on “Virus and threat protection settings”
- Use the switch to deactivate the Real-time Protection option. Click on the first switch to deactivate standard antivirus protection
- Click "Yes" to allow the defender to change anything on your device. Click on “Yes” so that the “Security Center” can make changes to the system
- You will see that a cross in a red circle has appeared in the window. Repeat the update in the center. The protection will turn on itself after a while - there is no need to enter the defender again.
When you disable the antivirus, try updating the system again in the center
Now let's look at how to disable the "Firewall" to bypass the blocking of downloading system updates:
- Call the “Control Panel” through the “Run” window and the control command or using the “Windows Search” window. Find the “Windows Defender Firewall” link and click on it. Select from all sections “Windows Defender Firewall”
- In the left column with links, click on the fourth one - “Turn on and off...”. Click on the "Turn firewall on or off" link to go to the next page
- Check the boxes next to the “Disable” values for two types of network at once. At the bottom of the page, click OK to save the settings changes. About two types of network
- Red shields with crosses inside will appear on the screen. Try the update again. After this, be sure to manually enable Windows Defender Firewall protection. Make sure Windows Firewall is disabled and try updating your system
Video: How to disable Windows Firewall in several ways
Clean restart of Windows
Booting the operating system in clean mode means disabling all third-party services along with starting Windows, that is, utility processes that the user independently installed on the device earlier. This way, all extraneous components that could interfere with the installation of the update will be deactivated:
- In the “Search” panel, type the msconfig command into the line and launch the proposed classic utility with one click. The same code can also be entered in the Run window (Win and R).
Enter the query msconfig in the “Search” or in the “Run” window - In the configuration window, switch directly to the third section “Services”. At the bottom of the list, click on “Hide Microsoft services.”
- After that, click on the “Disable All” button. Apply the changes and go to the next tab called Startup. Deactivate all extraneous services using a special button
- To open an additional window, click on the blue “Open Task Manager” link.
In the “Startup” tab, click on the link to launch “Task Manager” on the screen - In the manager, deactivate all program services in the list one by one using the “Disable” button in the lower right corner or through the corresponding item in the context menu. In Task Manager, disable all services in the list one by one
- Return to the “System Configuration” window and in the “Startup” section, click on “Apply” and OK. Restart your device and try updating again in the center. If it does not work, run the troubleshooter again in clean boot mode using the instructions from the section of the same name in this article.
- Upon a clean start, the PC will lose some functionality. After a successful update, return everything to its place in the “System Configuration” window - enable all third-party services in the list using the special button.
Checking Device Manager for errors
If your PC has damaged drivers, they can be a barrier to installing updates. You need to check the serviceability in the “Device Manager”:
- Going to its window in the “ten” is quite simple: right-click on the “Start” button in the lower left corner of the display and select the manager from the list that appears. In the context menu of the Start button, find the item "Device Manager"
- If the context menu does not appear for some reason, hold down R and Win and insert the code devmgmt.msc into the empty line. After that, click on OK or Enter to execute it. In the “Open” line, enter the request devmgmt.msc and click OK
- Take a close look at the list of connected devices and their drivers. Modules that are indicated by an exclamation point in a yellow triangle or a question mark are problematic.
See if there is an exclamation mark next to any device in the list - To fix a problem with the driver, update it using the special item in the context menu.
Click on "Update Driver" in the context menu - In the new window, click on “Automatic search”. Click on the first link to start automatically searching for updates for the problematic driver
- Wait while the system searches for an available upgrade on official resources. If present, it will be successfully downloaded and installed without any user action. Wait for the end of the search for an update for the driver with which you are having problems
- If there is no update, you will see a corresponding message in the window. In this case, click on “Close”. Call up the driver context menu again, but this time click on “Remove device”. After a couple of seconds it will disappear from the list. Try installing the update without this device. A message may appear in the window stating that you currently have the latest driver installed.
- After this, be sure to return it in place. In the manager, there is an “Action” section on the top panel. Open its panel with one click and select Update Configuration.
In the “Action” menu, select the first item “Update hardware configuration” - If this method does not work, install the driver by downloading it from the official website of the manufacturer of the specific hardware or the PC itself. It also makes sense to contact the company's technical support to find out if your device is compatible with the update that the center cannot install.
Removing duplicate profiles
You can remove an extra account using the Registry Editor. However, any changes to it must be made with the utmost caution:
- Hold down the Win + R key combination on your keyboard and write the regedit code in the empty field. To execute it, press Enter or OK in the “Run” window itself.
In the "Open" line, enter the command regedit and click on OK - Click "Yes" to allow the editor to make changes to the system. Double-click to expand the third branch called HKEY_LOCAL_MACHINE.
Open the HKEY_LOCAL_MACHINE section on the left side of the editor window - Now open the following directories one by one: SOFTWARE - Microsoft - Windows NT - CurrentVersion - ProfileList.
In the ProfileList folder, look for directories with long names - See if there are directories with long names in the last folder. Open them and notice the ProfileImagePath entry. If these files in the folders have the same path, delete one of them. Usually the name of the duplicate has the word bak at the very end.
If you find a duplicate entry, delete it using the context menu
System rollback
You can return the system to the state it was before errors with updates occurred using a restore point, a system backup (which is stored in an image file), and also by resetting to initial settings. Let's look at recovery using a point. Before applying any important changes to the system, for example, installing updates, the operating system automatically creates a restore point, so in most cases there are several points on the disk. Let's start following the instructions:
- On the “Desktop”, find the standard “Windows” “This PC” icon, which is usually used to open “Explorer”. Right-click on this icon and select the last item “Properties”.
Select Properties from the context menu of the This PC icon - Now click on the “System Protection” link in the left pane of the window.
- You will immediately be taken to the desired tab. Click on the "Restore" button to launch the rollback tool. Click on "Restore" to open the module to restore the previous system state
- On the initial screen of this tool, you either select the last point created (recommended value) or open a list with all available states. After that click on “Next”. You can select a restore point from the list yourself or immediately roll back to the previous state
- If you want to select a point yourself, click on the desired item to highlight it. You can find out which programs and drivers will be affected when you restore to a specific state using the button at the bottom of the list. After selection, click “Next”.
Select the point with the left mouse button and click on “Next” - In the next window, you can see the date and time when the restore point was created and its description. Click on “Finish” - the system will begin restoring to the previous state. During the rollback process, the computer will restart. When the procedure is completed, run the system update manually in the Update Center.
Click “Finish” for the module to begin restoring the system to its previous state