Typically, an error with code 0x80070035 and the message “Network path not found” occurs when one computer tries to access the folder of another over a shared network. This happens even if everything worked fine before and the folders were accessed in different directions. At the same time, the organization of the network can be completely different, whether it is a Wi-Fi router or a properly crimped twisted pair cable, it does not matter. But suddenly, out of the blue, error 0x80070035 appears, which reports that the specified network path was not found. We will look at what needs to be done to eliminate it later in the article.
Causes of error code 0x80070035
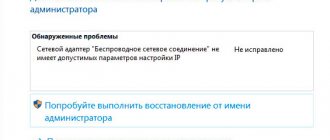
This problem can manifest itself on almost all modern versions of Windows OS. It is usually caused by the following reasons:
- The PC's antivirus or firewall is blocking access to the desired network resource;
- Shared network access is not provided to the required drive (folder);
- There is a physical malfunction of the router or damage to the network cables;
- Windows OS services responsible for the operation of network components are disabled;
- There are other incorrect network connection settings.
On Win 10, the problem may be caused by one of the early updates that prohibits the use of empty passwords when accessing required network resources.
Temporarily disable your antivirus and firewall
The most common cause of dysfunction is the network connection to another PC being blocked by the system antivirus or firewall. Temporarily disable the latter to ensure that they are not causing the problem.
Procedure:
- For a firewall, this is done by launching the “Control Panel” and going to “System and Security”.
- Next, select “Windows Defender Firewall.”
- Click on the option on the top left "Turn firewall on or off...".
- Select the options to disable the firewall, and restart your PC.
Also disable firewalls of third-party programs, the Comodo Firewall level and similar ones.
Windows update fails
An unexpected failure may occur due to the missing files in the update package received from the Microsoft server.
How to fix
Error code 0×80070002 can be corrected both automatically and manually. Let's look at the main methods. All versions of Windows use the same approach, but there are some nuances. Examples with image demonstrations are provided for Windows 8.1. Differences, if any, are explained for other OS versions.
Automatic correction
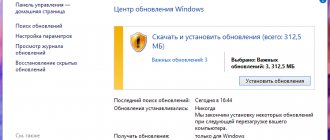
The easiest way to resolve error code 0x80070002 is to use utilities that allow you to diagnose and automatically resolve errors in the Windows Update service built into the operating system.
Download and then run the utility appropriate for your OS version from the support page https://support.microsoft.com/ru-ru/kb/910336. There are solutions for all versions of Windows starting from XP, but for the latest, tenth, such software has not yet been developed. The launched utility will correct all errors and eliminate error 0x80070002.
Stop or restart the Windows Update service
- Go to “Control Panel”. To do this, right-click on the icon with the image of windows in the lower left part of the desktop screen and then select the appropriate item from the context menu.
- In the Control Panel window, select the Administration tab.
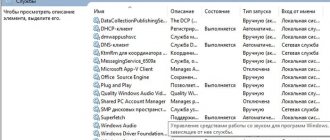
- On the administration tab, select “Services” by double-clicking on it with the left mouse button.
- In the window that opens, you will see a list of all Windows system services. Right-click on Windows Update and select Update or Restart.
- For Windows XP, all actions are performed slightly differently. Click “Start -> Control Panel -> Administrative Tools -> Services”, then stop or restart the Windows Automatic Updates service.
Stop or restart the Windows XP Update service
Removing installed updates
- Go to “Control Panel”. How to do this has already been discussed above. Select the Programs and Features tab.
- In the program management window on the left side, select “View installed updates.”
- Check and remove all installed updates.
- In Windows XP, select “Start -> Control Panel -> Add or Remove Windows Programs and Features” and check the “Show updates” checkbox at the top, then uninstall them.
Removing installed Windows XP updates
Deleting temporary files
- You need to delete files from the system SoftwareDistribution folder. Open Windows Explorer. This is done by analogy with opening the control panel, only the “Explorer” item is selected.
- Double-click the left mouse button on the disk with Windows installed.
- Select the folder called Windows.
- Open SoftwareDistribution, where the software folders are located.
- Double-click the left mouse button on the “DataStore” folder.
- Remove any files that are temporary update files from this folder.
- For Windows XP the whole process is even simpler. Or click, as mentioned above, on the computer icon, or select “Start -> My Computer”. Then everything is the same.
Opening the hard drive partition window
Using the DISM utility
This method involves using the built-in DISM.exe utility and is valid for versions of Windows 8, 8.1, 10:
open a command prompt in administrator mode;
Opening a Command Prompt
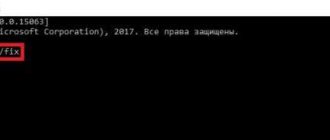
Type the command DISM.exe /Online /Cleanup-image /Restorehealth with a space before each slash and press Enter.
Entering a command in administrator mode
Checking the system's readiness for update
This method works for versions of Windows 7, Vista and involves the use of special utilities:
- Download the utility provided for your version from the website https://support.microsoft.com/ru-ru/kb/947821#bookmark-manual%20fix to your computer and run its installation.
- After installation, the utility will start automatically and correct any errors in the Windows Update service available to it. The process will take about 15 minutes. After that, close the program and reinstall the update package that failed.
Restoring Windows Update Service
Make sure your drives are shared
Non-shared PC drives may cause the “Network path not found” error. To fix the problem:
- Open Explorer, hover over the desired drive, right-click the mouse, and select “Properties”.
- Go to the “Access” tab, and if the status is “No sharing,” then click on “Advanced settings” and activate the “Share…” option.
- Click on “Ok”, then reboot the system.
Activate sharing of the desired drive (folder)
This may be useful: File system error 2147219196 in Windows 10 how to fix.
Resetting the DNS cache
Sometimes it helps to clear the error 0x80070035 after updating Windows 10 by resetting the domain name server cache. Open a command prompt as administrator.
Type the ipconfig /flushdns directive.
Reboot.
Enable Enable NetBIOS over TCP/IP
In some cases, it is necessary to introduce automatic activation of the protocol to work in NetBIOS local networks. For this:
- Click on Win+R and enter ncpa.cpl there.
- Select your active network connection, hover your mouse over it, right-click, and then select “Properties”.
- Find the IP version 4 component and double click on it.
- A window will open in which at the bottom click on “Advanced”, then go to the “Wins” tab. In the "NetBIOS Settings" option, enable the "Enable NetBIOS over TCP/IP" option.
- Restart your PC to save the changes.
I also recommend checking if the NetBIOS service is running. Click on Win+R and type services.msc. In the list of services that open, find “NetBIOS support module over TCP/IP”, double-click on it, and in its properties set the startup type to “Automatic”, this will help solve the error code 0x80070035.
Ping check
To find out if the network server is working properly, run a ping test and see if there is a response. You can also use this test to check if there is any packet loss, which also results in error 53. Follow the given steps to run it.
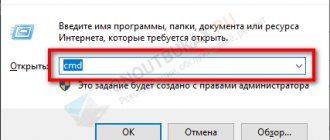
In the system search bar, type cmd, when the desired result is displayed, click on run as administrator.
In the console, run the command to test communication with the server or computer:
ping (server IP address)
If the command returns all packets without losing them, this means that the network is configured correctly. Otherwise, check your network settings.
Remove hidden network adapters
In some cases, hidden virtual network adapters may block correct network connection to another PC. We need to remove them, to do this:
- Press Win+R, type devmgmt.msc and press Enter.
- In the list of devices, click on “Network adapters”.
- Then at the top, click on “View”, and then on “Show hidden devices”. If any are found (they have a faded tint), then move the cursor over them, right-click, and select “Delete device.”
- Reboot your PC to save the changes.
Due to p-node mode
Another problem 0x80070035 Windows 7 may be that the PC uses the p-node method to determine the resolution. You can check this as follows.
We go to “Start”, in the standard ones we find “Run” (or type the key combination Win + R). In the window that appears, enter the command “cmd”. Enter “ipconfig/all” into the command line and press Enter. If the report indicates the node type is “peer-to-peer,” then the computer is in p-node mode. This can be changed in the register.
You will still need the same “Run” program. In it we enter the command “regedit”, after which the register editing window will open. Next we go the following way: HKEY_LOCAL_MACHINE// System// CurrentControlSet// Service// NetBT //Parameters. In this folder we remove the DhcpNodeType and Node Type values, after which you need to restart the computer.
Enable network discovery option
Go to “Control Panel”, then “Network and Internet”, then to “Network Sharing Center”. On the left, select “Change advanced settings...”, and activate the “Enable network discovery” option. Save the changes you have made, this may help get rid of the problem with code 0x80070035.
Enable network discovery
Enable SMB file sharing support 1
Files of type SMB 1 have been deprecated by Microsoft and are disabled by default in new builds of Windows, although they can affect network access. You can enable them this way:
- In the utility “Execute» enter the command optionalfeatures.exe.
- Mark required support point tick and save changes.
The phone fell into the water - first actions
It is worth noting that this solution is temporary, as the problem may return.
Set up passwords in Credential Manager
Go to “Control Panel”, in the search bar at the top right, enter “Credential Manager”, click on the result found. Here, click on “Windows Credentials”, and then on the inscription “Add Windows Credentials”. Sequentially, one by one, enter the user name and password for each machine connected to the network. Make sure that each username and password you type is used to log into the correct PC (or network location).
Editing the registry
Launch Registry Editor. To do this, use one of the following procedures, depending on your version of Windows:
- Windows 8 - Press the Windows key + R to open the Run dialog box. Type regedit.exe and click OK.
- Windows 7 – Click Start, type regedit.exe in the search box, and press ENTER.
In Registry Editor, locate and click the following registry subkey:
HKEY_CURRENT_USER\Software\Microsoft\Windows\CurrentVersion\Explorer\User Shell Folders
Find the following value:
Personal
Make sure the Data field for Personal is set to a valid network location. If you're not sure if this is a valid path, you can copy and paste it into Windows Explorer to determine if you have access to that location. If the path is currently unavailable because you are connected to a different network or working offline, you can reconnect to that network and try to open or create the PST file again. However, if the path in the personal registry value is no longer valid, you can change the path by completing the remaining steps.
Double-click the following value:
Personal
In the "Value" field, enter the correct path to the "My Documents" folder and click "OK". The default data for this value is %USERPROFILE%\Documents. Exit Registry Editor and restart your PC.
A number of more custom solutions
According to user reviews, the following methods can also help:
- If network users have Russian names (written in Cyrillic), change the user account names to their Latin counterparts;
- Uninstall update KV3172729;
- Check the functionality of your router. Turn it off for a couple of seconds and then turn the device back on.
Recommended reading: Your Windows 10 license is about to expire, what to do.
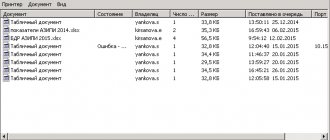
Unable to connect to remote printer
It is very convenient to have a connection to a remote printer. There are enough advantages: you don’t need to connect it directly when there’s already not enough space, and you don’t need to run from computer to computer with a flash drive for printing. However, the already known network error 0x80070035 may occur in this case.
The first step is to make sure that the printer is turned on and the computer is running and in a ready state (not in sleep or standby mode). Then we check the availability of the Internet. It is clear that without it you cannot connect to the device. Next you need to check the printer settings. To do this, on the computer connected to the printer, go to “Start”, in the right menu click on “Devices and Printers”. Right-click on the desired device and click “Printer Properties” (located approximately in the middle). In the window that appears, go to the “Access” section. Here we look to see if there is public access and if the network name matches.
If everything is fine there, and the error code 0x80070035 has not gone away, go to the Control Panel. We go to “Network and Internet”, where you need to go to the “Change additional sharing settings” section. There you need to enable sharing of data and printers, network environment.
If this does not help, then you should remove this printer and install it again.