Hi all! Error 720 when connecting to the Internet usually occurs when using an aDSL modem, or when the cable is plugged directly into the computer. In this case, the authorization type can be PPPoE or VPN. Most often, the error occurs due to some settings being damaged by viruses. But there are rarer cases when the problem occurs on freshly installed systems.
Sometimes a failure occurs when connecting via modems or routers from MTS, Beeline, Megafon, etc. I’ll warn you right away that there may be several solutions, it all depends on what exactly is causing the breakdown. If you have any questions while reading the article, write in the comments.
Causes
It is necessary to determine the causes so that a specific method for solving the problem can be selected. However, sometimes it is impossible to understand the reason. Therefore, we have to go through all the available solutions:
- Removing Avast antivirus (its consequences);
- Network card software failure;
- The result of viruses;
- TCP/IP settings failed;
- Incorrect PPP protocol configuration;
- Simultaneous operation of PPP and TCP/IP;
- Parameters failure after virus removal;
- Critical corruption of OS files;
- Outdated firmware in the router;
- Router settings failure;
- The problem is in the router hardware;
- Faulty network card.
These are the main reasons. Now let's start troubleshooting the problem.
Removing or reinstalling antivirus
Uninstalling Avast antivirus helps some users. But you need to perform the procedure correctly, using a special uninstaller, for example, “Revo Uninstaller” or the official “Avastcleaner” utility.
After uninstalling Avast, clean it with CCleaner. Check if this gives results, if not, then proceed to the next steps.
Sometimes it is not necessary to remove your antivirus, you just need to configure it correctly. Try digging into the settings and adding your Internet connection and browser to the exceptions list.
Error: “Ephemeral public key signature does not match”
The error “The server has denied access to the user” appears. Reason: the ephemeral public key signature does not match."
The problem is that when asked to provide the private key for a user certificate, media with the wrong key is presented. Possible solutions: leave one required key on the media, or use the CSP Security Code utility to move the required private key from the media to the registry.
If a copy is made, re-import the certificate and bind it to the new private key container store.
Resetting TCP/IP and Winsock settings
Revert the network configuration to its original state using the command line. This will fix the error without having to edit system files. You only need to enter a few commands.
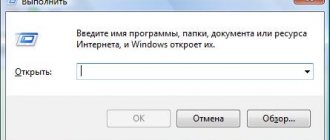
- First, launch Command Prompt as Administrator. Call “Run” (Win+R), enter cmd and press Ctrl+Shift+Enter. The last combination will launch the console with administrator rights.
- Paste the netsh int ip reset resetlog.txt command into the console and press Enter.
- Then type netsh winsock reset and use Enter again.
- Restart your computer.
After the restart, you may have to re-create a new connection to connect to the Internet.
Universal method (suitable even for Beeline and MTS modems)
In general, this method is good for restoring network operation in almost any case. However, with old Beeline and MTS modems it is the only one that helps. This is a complex, composite method that will be divided into several logical parts. So, first you need to remove those registry keys that are interfering with your work.
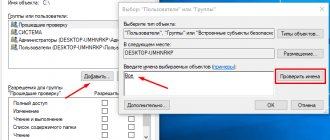
- Hold Win+R, type regedit and click OK.
- Go to the path HKEY_LOCAL_MACHINE\System\CurrentControlSet\Services\Winsock, right-click on the “Winsock” section and select “Delete”.
- Next, go to the “Winsock2” section and delete it in the same way.
- Restart your computer.
After the restart, you will need to edit “nettcpip.inf”. It stores TCP/IP protocol settings. And if the connection to the network does not work, then there is a high probability that the problem lies precisely in the protocol configuration.
- Go to the C:\Windows\inf directory and find nettcpip.inf.
- Right-click on it and click “Open in Notepad.”
- Find the line with the value "0xA0" and replace it with "0x80". See screenshot.
- Save the changes and restart your PC.
Now you need to reinstall the protocol using the already edited file with the necessary settings.
- Open Run (Win+R), type ncpa.cpl and press Enter.
- Right-click on the active component and select “Properties” from the menu that appears.
- Click on the “IP version 4” item in the list and click the “Install” button.
- Select the Protocol type and click Add.
- In the next dialog box, select "Have from disk".
- Go to the path C:\Windows\inf\nettcpip.inf, select the previously edited file and click “OK”.
- In the list of suggested components, find “Internet Protocol Version 4 (TCP/IPv4)” and click “OK.”
After completing all the steps, restart your computer. Windows will take into account all changes made only after a restart.
Attention! The problem is typical only for old modems from Beeline or MTS. The latest generation devices work well with the settings in the OS. But it is desirable that ten is installed on the PC. If you have Beeline equipment of the latest generations, then you do not need to edit any files. Their adjustment, on the contrary, will do harm.
Solution
How to fix TCP/IP corruption
Click Start, point to Settings, point to Control Panel, and double-click Network.
Select the TCP/IP that is bound to the remote access adapter and click Remove.
Removes the Client for Microsoft Networks and the TCP/IP protocol (if this component was installed). Click OK.
Click Start, point to Settings, point to Control Panel, and double-click Network.
Click Add, and then double-click Protocols.
Reinstalling the network driver
Error 720 may be the result of network adapter software corruption due to viruses or for some other reason. You need to reinstall it. Let's try a simple update first.
- Use Win+R and enter devmgmt.msc in the Run tool. Click OK.
- In Device Manager, select the “Network Adapters” category, find the device you need and update the driver by right-clicking.
- In the next window, click “Automatic Search”.
If the required files are found, they will be installed automatically. If this algorithm does not work, then first download the latest version from the website of the adapter or motherboard manufacturer, and in the manager, instead of “Update driver”, select “Remove device”. After that, install the latest version according to the standard instructions.
Attention! If you can’t update or reinstall the driver, you can simply roll it back to an earlier and working version. To do this, when you click on the adapter name in the manager, you need to select “Properties”, then go to the “Driver” tab and click “Roll Back”. The OS will reboot.
Additionally, use the same method to uninstall the “WAN Miniport” components. This helps troubleshoot the VPN issue.
We carry out diagnostics
In some cases, before deleting or reinstalling something, it is necessary to perform diagnostics that will accurately show where exactly the problem is hidden. Go to “Start”, then “Run”, and then enter Command in the field. After this you need to write Netdiag. As a result, you can observe results across multiple network components. This will also necessarily include Winsock. To get the data we need, you need to write the following: /v: Netdiag/test:winsock /v. If you did not receive any errors while executing the action, then everything is fine. If problems arise, you need to restore the damaged configuration. We have already talked about how to do this. As you can see, the “720 error” of PPPOE connection can be solved, but it requires some effort. There is a 90% chance that your problem will be solved, but it is quite possible that you will have to reinstall the operating system.
This is interesting: Where are passwords and bookmarks stored in Mozilla Firefox - how to save them in the browser
Resetting the network in Windows 10
If all else fails, then you can try to hard reset the network parameters using the built-in Tens tool. This operation will restore the factory configuration. And in some cases, the Internet connection will have to be configured again.
- Press Win+I and go to the “Network and Internet” category.
- In the “Status” tab, find “Network reset” and click on the link.
- Click on the "Reset" button.
The PC will restart when the process is completed. After starting, Windows will offer to reconfigure some network settings. There is no point in refusing. After this, re-create the connection.
Restoring the OS in Windows 7
If there was previously a point to restore the system, then you can try to restore its earlier state. That is, return the settings under which everything was fine with the seven. There is a corresponding tool for this.
- Call “Run” (Win + R), enter rstrui.exe and click “OK”.
- The recovery wizard will appear. In the first step, click “Next”.
- Then select a control point and click Next again.
- After this, all you have to do is click on “Done”.
The process will take a long time. The PC will restart. After the restart, try connecting to the Internet again.
Attention! In Windows 8 and 8.1, the Run tool option does not always work. If this happens, then click on the “Computer” icon and go to “Properties”, go to the “System Protection” category, click on the “Restore” button. Further everything follows the same instructions.
Method 1: Antivirus and system rollback
If the system is not up to date, then first of all, check the OS completely with an antivirus program. You can download a special utility like AVZ or Dr. Web CureIt. We check the entire computer with it. Next, we check the connection; if the error remains, we will perform a system rollback.
- Open the “Control Panel”. On a seven, just open the Start menu, and on a ten, you will need to press the keys and R and enter the command:
control
- "Recovery".
- Click “Run System Restore”.
- There is nothing complicated further, we just follow the instructions. At a certain step, you will need to select the earliest restore point. The computer will restart.
If error 720 (cannot connect to a remote computer...) occurs again, then try other methods.
Factory reset Windows 10
If all else fails, try resetting the top ten to factory settings. After performing this operation, the user will receive an absolutely clean system without programs, drivers and necessary settings. Everything will have to be done again.
- Use Win+I and go to the “Update and Security” category.
- Then move to the Recovery tab.
- Find the “Reset your computer to its original state” block and click “Get Started.”
- Confirm the operation.
The procedure takes quite a long time. After the restart, you will need to install all drivers and necessary programs. First of all, you should take care of the driver for network devices.
For Continent Up users
Let's look at several additional methods that show good effectiveness in troubleshooting problems with Continent-AP.
- When using Continent-AP, the first thing it is recommended to do is to reinstall the program by removing it with an uninstaller, for example, through “Your Uninstaller”. When re-installing, make sure that you have downloaded the latest version that is compatible with the current OS.
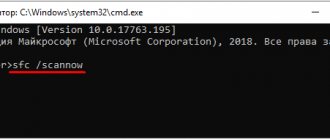
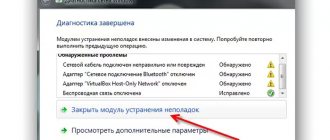
- Also launch the standard diagnostic tool by right-clicking on the connection icon on the taskbar.
- Type sfc /scannow at the command prompt and press Enter. Scanning for failures will begin, wait until it finishes.
- Make sure you have the latest Windows feature updates installed. And if you are still using XP or 7, then switch to ten.
- Check the current user's access rights. Or log in with administrator rights.
- Try to remember after what actions the problem appeared. If after the next system updates, then remove them through “Control Panel” - “Programs and Features”.
Perhaps these are the main points that I can highlight. Otherwise everything is the same.
How to fix error code 720 yourself
The unpleasant message about error 720 on the computer screen often confuses even experienced users. Moreover, it occurs whenever and at the most inopportune moment. Many people immediately begin to criticize the provider or the equipment and try to use diagnostic and system correction tools built into Windows.
But error 720 is a software issue.
A problem arises in several cases; it is not possible to give an accurate diagnosis right away.
Therefore, let’s calmly figure out what it is and how to deal with the ill-fated number 720. The main thing is that the 720th error can be “treated” independently on any version of Windows OS using uniform algorithms.
So, regardless of the version of the operating system, the article will be equally useful to everyone; this information will help get rid of the window with the 720th error.
Alternative options
Sometimes it happens that non-obvious methods help in a particular situation. They are effective, although they do not relate to network equipment in any way.
- Updating the router firmware. This option will only help if you cannot connect to the Internet from all devices, and not just from one. If this is the case for you, then it is worth updating your outdated router OS. For each model there is a corresponding instruction on the Internet.
- Reset router settings. This is done using the “Reset” button recessed into the body. After clicking on it, the user will receive a clean product with factory configuration. Perhaps this will help solve the problem. You just have to reconfigure the connection.
- Using a different cable. A faulty or broken twisted pair cable will also cause error messages. Try connecting your PC to the network using a different cable. Or use some kind of wireless adapter. Perhaps the problem will go away on its own. If there is no spare cable, make sure that the existing one is connected tightly and does not move away from the connector.
- Replacing the Wi-Fi adapter. Only if a USB Wi-Fi adapter is used to connect to the Internet. Not all wireless adapters work properly. Use only equipment from well-known brands: TP-Link, D-Link, Atheros, Broadcom, Realtek. Unknown Chinese adapters will not be able to provide the necessary stable operation.
- Cleaning the OS from garbage. Allows you to get rid of problems of any type. A cluttered system often prevents many of its components from working properly. So use CCleaner or Auslogics BoostSpeed for complete cleaning and optimization.
- Virus checking. An error when connecting to the Internet may be the result of viruses. They can damage important files. You need to check for malicious objects using Dr Web Cure IT or a similar free tool from Kaspersky.
- Use another VPN client to avoid failure on its part.
- Temporarily disable antivirus and firewall. Some security software sometimes behaves inappropriately, blocking important processes and components. It is worth disabling the protection for a while. If everything works, then you should replace the software with a less aggressive one or experiment with the settings.
- Reinstalling the OS. The most radical method. Most likely, you came across a system assembly with damaged files. That is why you are constantly haunted by error code 720. You can resort to this method only as a last resort, when nothing helps. You should refrain from downloading assemblies from unknown authors. It is best to use original images from Microsoft. You can download them on the company's official website. To create a bootable USB flash drive, use the free Rufus program.
The methods described in theory will help correct the situation. If even a complete reinstallation of the system does not help, then it makes sense to think about replacing the network adapter, USB Wi-Fi or router. Because the problem is clearly hardware related. And there is no way to solve it programmatically. However, there is reason to believe that 90% of faults out of 100 are OS crashes and file corruption.
What else should you pay attention to?
As noted above, there is a chance that none of the above will help. In this case, we can recommend trying to remove and install the TCP/IP protocol. It is likely that this will correct the situation. In any case, reinstalling the operating system should only be done after all options have been tried and nothing has helped. But again, using a Windows license reduces the risk of Error 720 to a minimum. Moreover, you can be sure that everything will work. The same applies to the modem. If it was set up by a professional, and the OS is licensed, then with 100% probability you will not receive such errors. Of course, at any time you can look at the log file, which will tell you what exactly the problem is; you can upload it to the forum where experts gather, and there they will certainly find the optimal solution. The name of the file is PPP.log, it is stored in %systemroot%/tracing.
Sources
- https://compsch.com/internet/instrukciya-po-ustraneniyu-oshibki-720-pri-podklyuchenii-k-internet.html
- https://neoshibka.ru/oshibka-720-v-windows-7-8/
- https://Vpautinu.com/oshibki/720
- https://FB.ru/article/144536/oshibka-oshibka-pri-podklyuchenii-k-internetu
- https://itmaster.guru/nastrojka-interneta/720-oshibka-pri-podklyuchenii-k-internetu.html
- https://proremontpk.ru/podkljuchenie-k-internetu/oshibka-720-pri-podkljuchenii-k-internetu.html
- https://public-pc.com/oshibka-720-pri-podklyuchenii-k-internetu/
- https://setupwindows.ru/errors/720
[collapse]