Remember how Windows 10 flew after a clean installation - it was a pleasure: fast startup, normal operation in multitasking mode. Over time, the speed of executing user requests decreases. This is a long and imperceptible process, but at one point you realize that the “ten” is very slow. There are two ways to solve the problem - demolish the system and install it again, or find and fix errors. It is unwise to reinstall the system if any problems occur, so let's still figure out how to check Windows 10 for errors. And you will always have time to demolish and reinstall the “top ten” - if only you had the distribution kit at hand.
Registry check
Due to frequent installation and uninstallation of programs, unnecessary information accumulates in the registry - this is one of the main, but not the only, causes of errors. The registry is especially bad after incorrect uninstallation of a program, when instead of a full uninstallation the user erases the folder with files. In this case, there are many empty keys left in the registry. To fix these errors, use the built-in registry scanning tools:
- Launch Command Prompt with administrator privileges.
- Run " scanreg /fix ".
The disadvantage of the built-in utility is that many registry faults remain untouched after scanning. To eliminate them, you need to use programs from third-party developers - for example, CCleaner. This utility can quickly detect and correct errors without touching anything unnecessary.
To check and troubleshoot:
- Launch CCleaner.
- Open the "Registry" section.
- Click "Search for Problems".
- Wait for the analysis to complete and click Correct Selected.
- Keep backup copies of the entries that will be corrected. If problems arise, you can roll back to the previous state by opening a previously created backup. If the system runs without errors, the backup can be deleted after the next system startup.
- Click Fix Flagged.
The registry is cleaned in the same way in Glary Utilities and Wise Registry Cleaner. Even if errors are not visually noticeable, it is recommended to check periodically - at least once every 2-3 months. This will ensure Windows runs smoothly and allows you to fix problems before they significantly affect your computer's performance.
Integrity scan
System files have one unpleasant property - they are constantly damaged, changed and lost. Depending on the user’s experience, these processes occur more often or less frequently, but no one is immune from them. Therefore, you need to remember the command to scan the system for integrity as well as your own name.
This is interesting: Installing Windows 10 from a USB flash drive
To begin with, you can use the standard SFC utility, which performs a superficial analysis.
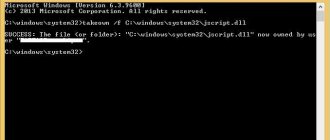
- Using Windows 10's built-in search, search for Command Prompt. Run it as an administrator and allow the application to make changes to your computer.
- Enter the command “sfc /scannow” (quotes are not needed, but a space before / is required).
- Wait for the scan to complete.
The utility will immediately correct any detected errors. But wait, rejoice - this is only a diagnostic analysis, it does not solve problems with files that are currently being used by the system. If the “ten” has been brought to such a state that programs start with a clearly audible creak, then to correct errors a stronger tool is required - the DISM utility. A message with text like “Damaged files were detected that the program could not recover” will tell you this unobtrusively.
How to open the event log via the command line?
To start Event Viewer using the command line:
- Open a command prompt window. To open the Command Prompt, click the Start button and select All Programs, Accessories, and Command Prompt.
- Enter the eventvwr command.
Interesting materials:
How to read a statement of transactions for settlement with the budget? How to give permission to an iOS application? How to give Biovit to calves? How to feed crushed chicken to chickens? How to give Ivermek to chickens? How to give Albendazole to a dog? How to give Stop Coccid to chickens? How to uninstall the game? How is the quarter divided by month? How to deport a foreigner?
Using the DISM utility
If SFC can be launched without preparation, then DISM requires more careful attention. Before running the verification utility:
- Shut down the system and disconnect everything unnecessary from the computer, such as removable drives.
- Start the system. If any programs open automatically after Windows 10 boots, quit them. Be sure to close applications that run in the background - antivirus, Yandex.Disk, etc.
- Make sure your computer is connected to the network—you may need to access Microsoft Update during the system file recovery process.
- Check the power supply mode - it should not include turning off the hard drives during prolonged inactivity. The recovery process takes more than 15 minutes; if the disk is disconnected, DISM will not be able to complete its work.
To check the operating mode of the hard drive, right-click on “Start” and go to the “Power Options” section. Open the settings of the scheme you are using.
You need additional power settings, among which there is a sub-item “Hard disk”. Set a longer time value for it - at least 30 minutes for operation on mains and battery power.
After preparation is completed, you can begin correcting errors:
- Launch Command Prompt with administrator rights.
- Run the command “DISM.exe /Online /Cleanup-image /ScanHealth”.
- Wait for the scan to complete without taking any action.
The scanning will freeze at 20% - this is normal, don’t worry. After 10-15 minutes, the analysis will be completed and you will receive a message indicating that the component store can be restored. To perform the restore, enter the following command – “ DISM.exe /Online /Cleanup-image /RestoreHealth ”.
This is interesting: How to set default programs in Windows 10. What to do if the setting is not saved
The recovery will also freeze at 20% and take about 15 minutes. Once the process completes successfully, a message will appear indicating that everything is ok. But this does not always happen - in difficult cases, DISM reports that the source files could not be found. In this case, there are two ways - try to restore individual files from a previously saved clean image of Windows 10 or reinstall Windows 10.
But the problem may not only be in the system, but also on the hard drive. Therefore, it should also be checked - using built-in utilities and programs from third-party developers.
Advanced System Care with Performance Index Widget
This program has many functions to control the system and optimize it.
This program, among many functions, also has a performance index output
It can provide some information, including the performance index of the connected equipment. And, importantly, it can display this result on the desktop in the form of a widget. This allows the user to dynamically monitor any changes in system operation. It is the widget that makes the current program more useful than its analogues, but it is worth considering two points:
- The free version of the program is very limited in capabilities;
- In addition to the performance index function, this program has many more features that may not be needed. It may be worth choosing a simpler program if finding out the performance index is your only goal.
Hard drive health analysis
If a HDD is installed on your computer, then for normal operation of the system it is necessary to periodically defragment the disk. Owners of SSD drives are exempt from such work due to the nature of the technology. On the HDD, data is written in the form of fragments into sectors that can be damaged during the operation of the disk. To prevent the hard drive from working with bad sectors and organize information, you need to perform defragmentation.
This can be done in different ways.
- Open Computer.
- Right-click on the drive and go to its properties.
- Go to the Tools tab and click Optimize.
- Select one section and click “Optimize”.
The procedure takes quite a long time, so it is recommended to run it overnight. After defragmenting one partition is complete, run error correction on another - and so on until you have fully optimized the drive.
If you want to find out the status of the hard drive, click the “Check” button in its properties on the “Service” tab. To view the test result:
- Open Security and Maintenance Center (search for it using the built-in Windows search).
- Expand the Maintenance section.
- View the result of the last check.
If you need to resolve hard drive errors without restoring sector order, use the command line.
- Launch Command Prompt with administrator rights.
- Run the command “chkdsk C: /F /R”, where C is the drive, F is troubleshooting, and R is recovering data from bad sectors.
If the disk partition is currently in use, you will be notified that it cannot be scanned. There are two options - restart the computer and scan the partition in use, or cancel the scan and scan another volume. You can choose any path, just remember to check all drives.
This is interesting: Windows 10 does not see an external hard drive or flash drive: we find it ourselves and show it to the system
Instead of the command line, you can use Power Shell to check your hard drive. This is a more powerful utility that can quickly perform actions that are impossible from the command line. For example, when using Power Shell, there is no need to reboot to scan the partition in use.
- Launch Power Shell with administrator rights.
- Execute "Repair-Volume -DriveLetter C".
Once the scan is complete, check other partitions and drives by replacing the letter "C" in the syntax. If the message is "NoErrorsFound", then no errors were found.
Common error codes on Windows 10, their causes and solutions
The following are the most common malfunctions on Windows OS:
- 0xC19000101. This error occurs when downloading programs from the Internet and installing them on a PC. Moreover, this code appears every time after turning on the computer. To fix it, you need to try to download the program from another site;
- "The system was unable to download updates." Cancellation of changes occurs due to a crookedly installed update. Solved by manually removing the software via Windows Update;
- "Output device not found." This message appears when connecting various USB devices to the PC. Most likely, to fix the problem you will have to reinstall the driver by downloading it from the Internet.
Advanced SystemCare interface
Thus, a tool that allows you to troubleshoot Windows 10 problems solves a huge number of operating system problems. To use the tool correctly, you need to read this article again to learn the step-by-step instructions.
Checking RAM
The hard drive is fine, all that remains is to check the RAM - what if all the problems were caused by it? To do this, we use the built-in Windows memory checker. That’s what it’s called – you can easily find the utility through the search. After launching the utility, you will be prompted to reboot and check. Quit all programs and agree to this operating procedure.
After the reboot (which will take a little longer), the scan will start. You can press the F1 button and change its parameters - for example, set a wide scan type with multiple passes to increase efficiency.
Once the scan is complete, the computer will reboot. When the system starts, a notification will appear with the results of the scan. If there is no information, look at Windows events:
- Search for the Event Viewer tool through Windows Search.
- Expand the Windows Logs - System section.
- Find MemoryDiagnostics-Results and see the result.
If your RAM problems are more serious than you thought, use Memtest 86+ to check. On the website you will find a kit for creating an installation flash drive. The scan starts automatically after booting from the created installation media.
It is recommended to check memory modules one at a time. We left one bar, checked for errors, installed the next one - this approach allows us to identify the faulty module. If the program has detected many errors on one board, and they greatly interfere with the operation of the computer, then it is easier to replace the board, although in some cases cleaning the contacts helps.

