Sysprep is a standard tool that helps you deploy new Windows. In a corporate environment, it is not acceptable to manually configure all the settings on subordinate computers, of which there may be 100 or more. To automate the process, special programs are used, created on the basis of ready-made operating systems (OS). However, a snapshot of one computer cannot work on another device without appropriate adjustments. The Sysprep utility helps to do just that. Below are S ysprep Windows 10 step-by-step instructions .
Option 5
1) Open the folder C:\Windows\Panther 2) Copy the setup.etl to another partition (disk) in a temporary folder. For example, in D:\Test 3) Hold down the Shift , right-click on the D:\Test folder and select Open Command Window 4) Enter the command: tracerpt setup.etl -o logfile.csv 5) Close the Command Window and open the file logfile.csv 6) Analyze this file for the registry key or process causing the error. 7) Correct the value of the found conflicting registry settings to the correct ones, terminate the conflicting process, or uninstall the application to which it belongs. Run sysprep with the parameters you need.
Disable BitLocker to run Sysprep
Error SYSPRP BitLocker-Sysprep: BitLocker is on for the OS volume. Turn BitLocker off to run Sysprep. (0x80310039) Error [0x0f0082] SYSPRP ActionPlatform::LaunchModule: Failure occurred while executing 'ValidateBitLockerState' from C:\Windows\System32\BdeSysprep.dll If you run manage-bde -status command it will show the following:
Disk volumes that can be protected with BitLocker Drive Encryption: Volume C: [OSDisk]
This error mainly occurs on Windows 10 tablets and laptops that support InstantGo encryption (based on BitLocker.) To fix this error, you need to disable encryption for the system volume using the following PowerShell command:
Disable-Bitlocker –MountPoint “C:”
Application
This operation is used when creating many computers with the same software .
This allows you to automate the system installation process and saves time. Typically, the utility is in demand in companies where there are many client machines with the same software. It also finds application in everyday life. If you plan to replace the motherboard or processor, but it is desirable to keep the existing programs, then the utility will help you do this. If you save an image of Windows 7, 8, 10 without Sysprep and install it on your computer after upgrading, it will not function correctly due to the new hardware installed.
How to force sysprep to run?
The program is launched according to the following algorithm:
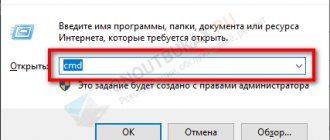
- Click on Win + R keys. The command window “ Execute».
- Enter utility name and confirm.
- Will open utility folder. Double-click on sysprep.exe.
- will appear settings utility.
What is the main network gateway and why is it needed?
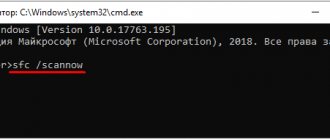
You can run the program via the command line. For this:
- Call menu "Execute" by pressing Win + R.
- Enter the inscription "cmd" and confirm.
- In the console, enter the command: “%windir%\System32\Sysprep\Sysprep.exe ”. Press " Enter ".
- A utility window will open.
What causes the "Sysprep could not verify Windows installation" error on Windows 10?
Well, if you go to the file listed in the error message and walk through it, you will find the possible cause of the error. It may differ in different scenarios, so for a basic understanding it is often related to the following factors:
- Windows Store Apps:
In some cases, the error occurs if you have downloaded an app from the Windows Store that is interfering with the tool. The main culprits were Candy Crush and Twitter. - Default Windows Applications:
Another reason for the error to occur could be uninstalling Windows by default. Applications. If you uninstalled any default Windows application before running Sysprep, this could be the cause of the error.
Moving on to the solutions, you can fix your issue by following the workarounds given below.
How the utility works
Simply put, Sysprep helps free Windows from being tied to specific PC components. All adjustments, such as removing drivers, temporary data, and others, are carried out without changing user settings. The utility does not affect previously installed programs, shortcuts, OS personalization and similar areas.
Initially, the user must create a reference Windows OS on one computer. Then its image is formed, which includes software, global system settings, and user rights. And only now we need Sysprep to eliminate application bindings to hardware. The last step is to use the program to create a backup. When the image is ready, we can quickly deploy it on any computer with virtually no human intervention. The system administrator will only need to install the correct drivers for the equipment. If necessary, we can add additional software for a specific device.
Sysprep - what is it?
Most programs by default are tied to hardware or a specific OS distribution. If you transfer utilities in the form in which they are on another PC, most likely they will not be able to work and will generate errors.
Sysprep is needed in order to remove such binding and ensure smooth operation of applications with the new software environment. To do this, the tool cleans the drivers of individual components, resets the SID, clears the system log, removes the contents of the temporary Temp folder, formats recovery points and resets activation (maximum 3 times). The main task of the utility is to ensure that the operating system is clean, but with preset parameters.
Good afternoon, today we are looking at an error: a fatal error when running the sysprep program in Windows 7. After the release of Internet Explorer 10 and a number of updates, including the operating system and some application software, it was decided to build a new WIM image of Windows 7 for deploying the operating system through ConfigMgr 2012.
A fatal error occurred while running sysprep on your computer in Windows 7
When running the Sysprep utility, an error occurred: System Preparation 3.14 - A fatal error occurred while running Sysprep on the computer. The event log contained a more informative entry.
SYSPRP LaunchDll:Could not load DLL C:\Windows\SysWOW64\iesysprep.dll [gle=0x000000c1]
What's new is Windows Management Framework 3.0 (PowerShell 3.0) and Internet Explorer 10 installed.
The name of the error hints at the involvement of IE 10 in causing the Sysprep error. A solution to this problem is quickly found.
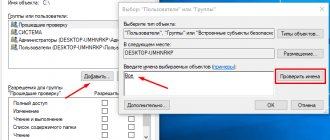
You need to launch the Registry Editor and make changes. Change the access rights for the Administrators group to Full access on the following registry branches:
HKEY_LOCAL_MACHINE\SOFTWARE\Microsoft\Windows\CurrentVersion\Setup \Sysprep\
Cleanup HKEY_LOCAL_MACHINE\SOFTWARE\Microsoft\Windows\CurrentVersion\Setup \Sysprep\ Generalize HKEY_LOCAL_MACHINE\SOFTWARE\Microsoft\Windows\Current Version\Setup\Sysprep\ Specialize
A fatal error occurred while running sysprep on your computer in Windows 7-01
We give rights to Administrators
A fatal error occurred while running sysprep on your computer in Windows 7-02
HKEY_LOCAL_MACHINE\SOFTWARE\Microsoft\Windows\CurrentVersion\Setup\ Sysprep\Cleanup
Parameter {EC9FE15D-99DD-4FB9-90D5-5B56E42A0F80} C:\Windows\SysWOW64\iesysprep.dll,Sysprep_Cleanup_IE Change to: C:\Windows\System32\iesysprep.dll,Sysprep_Cleanup_IE
HKEY_LOCAL_MACHINE\SOFTWARE\Microsoft\Windows\CurrentVersion\Setup
\Sysprep\Generalize Parameter {EC9FE15D-99DD-4FB9-90D5-CE53C91AB9A1} C:\Windows\SysWOW64\iesysprep.dll,Sysprep_Generalize_IE Change to: C:\Windows\System32\iesysprep.dll,Sysprep_Cleanup_IE
HKEY_LOCAL_MACHINE\SOFTWARE\Microsoft\Windows\CurrentVersion\Setup
\Sysprep\Specialize Parameter {EC9FE15D-99DD-4FB9-90D5-676C338DC1DA} C:\Windows\SysWOW64\iesysprep.dll,Sysprep_Cleanup_IE Change to: C:\Windows\System32\iesysprep.dll,Sysprep_Cleanup_ I.E.
After this, the Sysprep procedure proceeded as normal. This is how you simply resolve the error: A fatal error occurred while running the sysprep program on your computer in Windows 7
Site material
Popular Related Posts:
- How to hide a program in the list of installed ones, in a minute
- ID 1085, failed to apply Internet Explorer Zonemapping settings
- Failed to verify Office 365 subscription, solve it in a minute
- Error certificate chain processed corrently 0x800b0112
- Preview of Excel files does not work in Explorer and Outlook
- Returning Tsconfig.msc and Tsadmin.msc to Windows Server 2019
Can't uninstall modern apps for current user
If there are errors in setupact.log:
Error SYSPRP Package AppName_1.2.3.500_x64__xxxxxxxxx was installed for a user, but not provisioned for all users. This package will not function properly in the sysprep image. Error SYSPRP Failed to remove apps for the current user: 0x80073cf2.
This means that you manually installed applications (Modern / Universal Apps) from the Windows Store, or incorrectly removed pre-installed applications.
Try removing this package using PowerShell commands:
Get-AppxPackage –Name *AppName* | Remove-AppxPackage Remove-AppxProvisionedPackage -Online -PackageName AppName_1.2.3.500_x64__xxxxxxxxx
Additionally, to prevent the Microsoft Store from updating apps, you must disconnect your reference PC with the Windows 10 image from the Internet and turn off automatic updates in audit mode before you create the image.
Also delete all local user profiles.
Solution 3: Create a new administrator account (non-domain solution)
Some users have reported that by creating a new administrator account and then deleting all the old ones, their problem was resolved. Here's how to do it:
- Press Windows Key + I to open Settings .
- Go to Accounts and then go to Family & Other Users .
- Click Add someone else to this PC .
- Then, click I don't have this person's login information . Create a new local user account
- Then, click on ' Add a user without a Microsoft account ' and enter the desired username and password.
- Click on the account you just created and select Change account type .
- In the pop-up window, from the list under Account Type , select Administrator and then click OK. Changing the user account type
- Reboot your system and log in using the account you just created.
- Click Windows Key + I again and go to Accounts .
- Switch to the Family & Other Users tab and select your old account.
- Click ' Delete ' to delete the user account.
- Reboot the system again and try running Sysprep..
1 1 vote
Article rating