Cleaning your hard drive from temporary files
First, let's try to clear the disk of temporary files:
- Open “Start” - “Explorer”.
- In the window that appears, select the local drive on which the operating system is installed (the icon will have a Windows icon next to the drive, usually Disk C). Right-click on it and select “Properties”.
- The local disk properties window will open. In this window, on the “General” tab, click the “Disk Cleanup” button.
- The program will analyze the disk and a new window will appear, in which we click the “Clean up system files” button.
- In the list that appears, select “Temporary files” and “Temporary Windows installation files” and click “OK”. Reboot the computer.
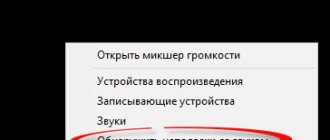
- Next, open “Start” - “Settings” - “Update and Security” - “Update Center” and check whether updates can be downloaded.
Using the DISM tool
If the previous step did not help you deal with error code 0x80073712, you can use another solution - the DISM utility to check files on Windows 10. First, launch the terminal as an administrator (for example, by right-clicking on the command line in the menu and selecting the appropriate item).
Next, enter DISM and specify the following options as parameters:
- /online – for comparing system files with their copies on MS servers;
- /Cleanup-Image and /RestoreHealth to restore failed components.
Once completed, a local integrity check must be performed.
Then try updating again.
Manually update to the latest version of Windows 10
If the first method does not help, then try to manually update the system to the latest version (if you have Windows Vista, 7 or 8, update to the latest version of the current system). For this:
- Follow the link https://www.microsoft.com/ru-ru/software-download/windows10.
- Click the “Update Now” button.
- Download the program and run it.
- The “Windows 10 Upgrade Assistant” will open. Click on “Update now”.
- After checking your computer for compatibility, click “Next”.
- The system update process will continue in the background. When it finishes, restart your computer.
Restoring the Update Center
We will tell you below what to do if an unknown error occurs and code 80073712 is displayed in the Windows Update window during the installation of updates. To carry out all the procedures described, you need to close the Update Center or restart your computer. Error 80073712 will be resolved only if you use the Administrator account when completing all steps of the instructions. Regular accounts will not be able to make the necessary changes to system settings.
Stage #1
The first step is to repair the damaged component store. If you don't have a Windows installation disk, do the following:
Once the recovery system is complete, you will be shown a report. The current status of the component store will be indicated by the Image Health State parameter. If the status is Healthy, this means that the storage has been restored and you can proceed to the second stage of this guide.
- If you have a Windows installation disc, the recovery process will be slightly different:
- Right-click on the Windows ISO image and select Connect from the menu that opens. Remember the drive letter that the system assigned to the mounted image.
- Launch PowerShell with Administrator rights and run the command Repair-WindowsImage -Online -RestoreHealth -Source X:sourcesinstall.wim:1 after replacing X with the same letter that was assigned to the ISO image.
- Wait for the procedure to complete and check the status of the component store. It must be Healthy.
Stage #2
After restoring the storage, it is necessary to scan and check the integrity of system files. In fact, this step is not related to the operation of the component store, but it is worth carrying out in order to ensure that the system components are working. To do this you need:
- Open Command Prompt as Administrator.
- Run the sfc /scannow command and wait for the scanning procedure to complete. It may take from 5 to 10 minutes.
Solution using Windows Update Troubleshooter
If the previous step also did not help, then download the utility from the link (or find it yourself in a search engine by name): https://aka.ms/wudiag. Next, the algorithm is as follows:
- Launch the downloaded file and in the window that opens, select “Windows Update”, click “Next”.
- A window will appear with a loading bar and the words “Detecting problems.” We are waiting for the problem to be detected, this may take some time.
- A new window may appear with a message indicating that the cause may be found while troubleshooting problems with administrative rights. Click “Try troubleshooting as an administrator.”
- The first window will open again, again select “Windows Update” - “Next”. The service should then detect problems and resolve them, a process that may take several minutes. While running, the utility will offer options for solving problems. Review their descriptions and choose whether to apply the fix. It is advisable to agree, otherwise the error may remain. When the service finishes, click “Close”.
- Open Update Troubleshooter again and perform actions similar to those described above for the “Background Intelligent Transfer Service (BITS)” and “Windows Network Diagnostics” items.
Once all this is done, you need to restart your computer and check if the error has been fixed.
What does it mean?
A code designation in the form of a specific set of numbers indicates a specific reason for difficulties in the operation of the OC. In what situations does error 0x80073712 appear in Windows 10? A system message with this code is displayed when the operating system service was unable to fully complete the automatic update. It is not uncommon for this problem to be caused by major changes such as the Creators Update or Anniversary Update. The reason for the inability to successfully complete the operation is the absence or corruption of system files intended to accommodate the transferred data.
Updating Servicing Stack Update (SSU)
the latest version of the service stack update (KB4035631) can sometimes solve the problem . To do this, follow the link https://www.catalog.update.microsoft.com/Search.aspx?q=KB4035631 and download the update version suitable for the target operating system. Run the resulting file and follow the installer's instructions.
After installation, restart the computer and check for errors in the Update Center.
System Restore
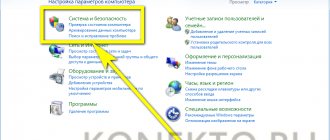
If the options above do not resolve the error code 0x80073712, the system still responds to attempts to update that the component store is damaged, you can restore the OS. To do this, open the parameters using the gear in the menu.
Go to the updates section.
Select the appropriate sub-item, then click “Start”.
The system will offer 2 options:
- keep the files, but delete all applications and reset settings. It is recommended to use it;
- delete everything, including files. In this case, the system will practically reinstall itself again.
Choose the appropriate method and follow the prompts.
How to fix corrupted files using the command line?
You must run the command prompt with administrator rights. For this:
- Right-click on the “Start” button and select “Command Prompt (Administrator)” from the context menu that appears.
- Next, in the text interface that opens, enter the following command: DISM.exe /Online /Cleanup-image /Restorehealth .
- The DISM system, designed to work with components of Windows images, will start. It may take a few minutes to complete.
- After the program has finished running, enter the following command at the command line: sfc /scannow . This will start an operation to check and repair damaged system files, which will also take a few minutes.
After sfc completes, reboot the computer and check if the error disappears.
Important! If none of the above steps help, most likely you will have to reinstall the operating system from scratch.
Deciphering the problem
This error occurs when trying to update Windows . This is usually due to the component store or update service being damaged.
Upgrading the system becomes impossible . The positive thing is that this failure is software and there is no need to change anything in the computer hardware.
Most often, the cause of the error is an incorrect shutdown of the computer. If system components are being updated and the PC is turned off at this moment, then error 0x80073712 may appear during the next upgrade.
Error 80073712 in Windows 7
This code tells us that Update Center cannot install the package for one reason or another. This may be a lack of disk space, the next installation process has already started, corruption of files in update storage and system components, as well as ubiquitous virus programs. Next, we will examine in detail how to solve this problem, moving from simple to complex.
First of all, after an error occurs, you need to postpone the operation for some time. It is possible that another package is already being installed, and the system cannot run the second copy of the installer. If the wait is too long, you can move on to active action.
Reason 1: Service failure
The service directly responsible for the update installation process may malfunction or simply freeze, like any other program. To “bring it to life” you need to restart it. There are several options for carrying out this procedure, but first you need to go to the appropriate system snap-in.
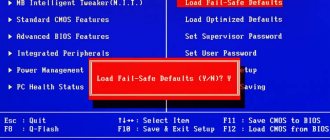
Reboot PC
Often system failures are resolved by simply rebooting the machine. True, in our situation one condition must be met - the “Startup type” parameter of the “Windows Update” service must be set to “Automatic”. You can check this by double-clicking on it in the equipment list. In the properties window that opens, look at the list indicated in the screenshot, and if it says “Manual” or “Disabled”, select the desired item and click “Apply”. After that, close “Properties” and reboot.