We'll talk about how to set up mail on iPhone and iPad.
Typically, owners of Apple equipment have mail configured by default, because it is tied to the Apple ID account even when the device is first launched. And this email address is assigned to the cloud storage. Even if a person buys a new smartphone or tablet, he will only need to enter his username and password, and the mail will activate itself.
But this does not work if you have several mailboxes from different providers, for example yandex.ru or gmail.com. If they are not initially connected to the Apple ID, then they will have to be added to the system manually.
This can be done in two ways:
- Specify the mailbox and mail server parameters in the system settings so that correspondence from the conditional Yandex arrives in the built-in iOS mail client.
- Download an email client from the same Yandex or Google from the App Store.
Let's look at both options for different email providers.
How to set up Yandex mail on Apple devices
Connecting Yandex.Mail to a third-party device is easy. Previously, this required only specifying personal data in the built-in email client, but now you need to allow the connection in the Yandex web interface, and only then proceed to configuration directly in the iPhone and iPad settings.
Changing connection parameters of third-party email clients
First you need to select the data transfer protocol (POP3 or IMAP) on the official Yandex website. To do this:
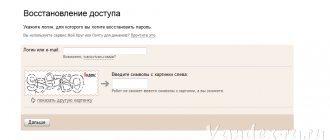
- We go to the official Yandex.Mail website and enter your username and password to open the mailbox.
- After that, click on the six icon in the upper right corner to go to the box parameters.
- In the pop-up window, click on the “Other” link.
- In the sidebar of the window that opens, look for the “Email programs” tab and go to it.
Place a checkmark next to the line “From the imap.yandex.ru server using the IMAP protocol” or “From the pop.yandex.ru server using the POP3 protocol” depending on the selected protocol. You can learn about the differences between IMAP and POP3 in this article.
Having finished changing the security settings in the Yandex.Mail web interface, you can proceed to connecting the mailbox to iOS.
If you do not follow the procedures described above, then when you try to enter your Yandex mailbox data, the system will endlessly report that you are entering the wrong password.
Connecting Yandex mailbox to iPhone and iPad
We will configure mail through the iOS system parameters in order to use the mailbox through the built-in mail client.
To set up Yandex.Mail in a standard email client for iPhone and iPad:
- Open the device settings.
- We scroll through the list of available items until we come across the “Mail” tab. Let's open it.
- Go to the “Accounts” menu.
- After that, click on the “Add account” button.
- In the list of available services that opens, select “Other”, since Yandex is not here by default, like most other (including popular) providers.
- Enter your login, Yandex email address and password. The description and name of the box are at your discretion.
- Then click on the “Next” button and wait. Usually, after a few seconds, mail is configured automatically, and there is no need to take additional measures for this.
In rare cases, you have to manually enter additional parameters, such as the data transfer protocol and the port for connecting to the mailbox. Let's take a closer look at these settings using Mail.ru mail as an example.
Check for unsent email messages in your Outbox
A notification that an email message has not been sent means that the message has been placed in your Outbox. Check your outbox and try sending the email again.
- In Mail, click Mailboxes in the top left corner.
- Select Outbox. If there is no Outbox folder, the email has been sent.
- Tap the desired email message in your Outbox. Make sure the recipient's email address is correct.
- Click "Submit".
How to set up Mail.ru mail in iOS
The principle is almost the same, but if you believe the official instructions from the Mail.ru website, you will have to enter a little more data manually.
To set up Mail.ru mail on iPhone and iPad:
- Open system settings.
- We look for mail settings among them (the tab called “Mail”).
- Go to this settings item and open the “Accounts” section.
- Then click on “Add a new account”.
- Among the available providers, we select “Other”, because Mail.ru is not there.
- In the fields that appear, enter the name of the mailbox, mailing address, password for the mailbox and a brief description.
- Click on the “Next” button.
- Save the changes made.
- In the advanced settings, find the “Outgoing mail server” item and go to it.
- After that, select the active server, move the “Use SSL” toggle switch to the active position and enter server port 465.
- Click “Finish” and go back one level of settings.
- Select the “Advanced” item.
- We turn on the “Use SSL” toggle again, but this time we specify port 993.
- Save the changes and exit the settings.
Now the mail should work.
Checking Mail settings
On an iOS device, many email service providers automatically select the correct account settings.
To see if this is the case, compare the settings in Mail and your email account.
- Go to Settings > Passwords & Accounts, then your email account.
- Click your email address next to Account to view account information, such as incoming and outgoing mail server addresses.
- Review the recommended settings for your email account using the Find Mail settings tool and make sure they match yours. If your email account settings are not displayed, contact your email service provider or system administrator.
If you use a POP3 email account, you can only check email on one device. Close other email programs and end sessions on open email websites in your browser. To check if your email account uses POP3, go to Settings > Passwords & Accounts, select your account, and look for the POP Account Information shortcut. You can also find the recommended email settings for your POP3 account by using the Mail app's Find Settings tool.
How to Set Up Google Mail, Yahoo and Outlook on iPhone and iPad
You won't have to bother with Google, Yahoo and other Western services. Already when you enter the settings, you will see the logos of popular email providers from the USA and can connect them to the built-in client in a couple of clicks.
For this:
- Open the device settings.
- We look for the “Mail” item and go to it.
- Then open the “Accounts” tab.
- Click on the “Add new account” button.
- We select the email service that we want to configure to work with our device.
- Immediately after clicking, iOS will launch the browser and open one of the sites for authentication. In the case of Google, this will be the Gmail website: here you just need to enter your mailbox details, and then allow authentication of a third-party application (you won’t have to do this manually on the website, as is the case with Yandex). That's all.
The scheme is the same with Yahoo, Outlook and AOL, only the interface for connecting to the Exchange server is different. There you will have to indicate your data just for working with a shared mailbox, and the main server parameters and other data should be indicated by the person who is responsible for Exhange in your organization.
Preparation
Several conditions must be taken into account.
- iOS device data backups to iCloud and iTunes contain your email settings, but not the messages themselves. If you delete or change your email account settings, previously downloaded messages may be deleted from your iOS device.
- Make sure your device is connected to the Internet. To test your cellular data or Wi-Fi connection, launch the Safari browser and open any web page.
- Check with your email service provider to see if their web page is experiencing a temporary outage.
How to set up other email services
When setting up third-party email services, the situation is the same as with Mail.ru, Yandex or other services that are not included in the list of “supported” by Apple. The only difference is that you will have to go to the documentation of your provider and find out what ports and protocols it uses, and configure the box in accordance with them. So pay attention to the instructions for Mail.ru mail and follow them, replacing the specified data with the data provided by your provider.
If you have your own mail server or use a corporate mailbox, then the instructions from Mail.ru are also suitable. But only on condition that the server is configured correctly and can work with third-party applications.
iPhone email problems after update and other problems
Posted by Jane Winston December 07, 2022 17:30
There are many similar questions raised among most forums such as
“My email on my iPhone has stopped working.”
"Why am I not receiving my emails on my iPhone?" and more.
People feel frustrated when they have an issue with their iPhone mail app not working.
Since sending emails has been one of the common ways of communicating and working, the “Unable to Send Mail” error is of great significance. Thus, this article talks about related iPhone email problems today and solutions to fix them.
iPhone 2 email problems: Mail app keeps crashing
- "Since I update to iOS 12/11, my mail app keeps crashing."
Some people are reporting the issue of not receiving emails on iPhone 6 after iOS 12/11 update. Slow performance of the Mail app and other iOS apps may be caused by the new iOS update. Otherwise, internal system failure may also cause iPhone email problems. So you can quit and relaunch the Mail app for a second try, or you can restart your iPhone to freshen it up. Otherwise, you may have to downgrade iOS 12/11 to an earlier version to fix iPhone email issues.
The fastest way to fix iPhone Mail app problems is to force restart the Mail app. Double-click the Home button and select Mail when the multitasking view appears. Swipe the email app to force close it. Then press the Home button again to restart the Mail app. If your email app is still stuck in the unresponsive screen, you need to restart your iPhone to troubleshoot iPhone email stop working problems.
Restarting your iPhone can also help fix iPhone not moving email messages to trash.
iPhone 4 email problems: Email won't sync
- “My emails stopped syncing with my iPhone iOS email, I don't know how to fix iPhone email won't update on iPhone 6.”
This is one of the most common email problems where iPhone mail is not updated automatically. Poor Wi-Fi network or incorrect email settings should also factor in iPhone email sync issues.
So check your email and password first. After entering the correct email account, you should check your Wi-Fi network by opening a new page to see how long it costs. If necessary, change to another strong wireless cellular network. Later, you can fix the error of email not syncing successfully on iPhone.
These are secure solutions that you can choose when your iPhone email is not working or you have other iPhone email problems. You can then activate your email account to send or receive emails as usual.
