Modern mobile phones are universal devices, the functions and capabilities of which have long allowed them to be used not only for calls and entertainment, but also for work. One of the most important options for doing business is mobile email. Having a mailbox in a smartphone allows the user to always have access to letters, instantly receive notifications of new messages, conveniently view them and respond promptly. Contrary to the expectations of many users, creating an email on a smartphone is a simple process that can be done in a browser or a special application in a matter of minutes.
Standard Mail app
Email is available on any Android device
The Android system provides a separate utility called “Mail” for working with mailboxes, but the application itself is not as multifunctional as programs from leading companies, synchronization in it is much slower, and configuration takes more effort and time.
How to work with a mailbox
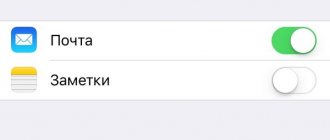
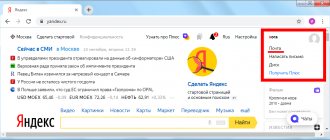
Gmail email service is very easy to use. You don't need any special skills to interact with it. To get started, you will need to log in to your account. We have already talked about how to do this earlier. After logging in, the user will see a list of received emails.
The titles of unread messages are displayed in bold font. After reading, the font changes to normal. The letter can be deleted at any time. To do this, you need to check the square box on the left and click the “Delete” button.
You can also add messages to your favorites list using the star button. Finally, you can send a letter to another user yourself by clicking the “Write” button. The email service also offers extensive options for sorting messages and creating drafts.
Gmail email client
How to set up email on iPhone and create an account
One of the most popular services for Android is Gmail.
For your information! Without an account, the owner of the smartphone will not be able to use the Google Play application store and other services from Google, so the Gmail program is installed on all Android devices by default.
You can create an email either directly in the application or without using it.
How to create a Gmail account through phone settings
Before you can set up email on your Android smartphone, you need to connect to Wi-Fi or activate cellular data.
Next you will need:
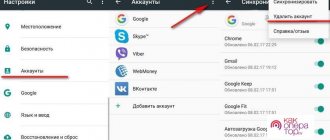
- Open the main menu and go to “Settings”.
- Go to the “Accounts” section and click on “Add account”.
- Go to “Google” and click on the line to create a new account.
- Indicate your first and last name. The reliability of the information is not checked by the service, so you can provide either real data or a pseudonym.
- Enter your date of birth and gender, the latter can be omitted if desired. If the user's age is less than 18 years, then some restrictions will be imposed on the account. Also, sometimes the system may refuse to register for a minor, in which case you will still have to create an account via a PC.
- Come up with and enter a login - the name of the email box. Then specify and repeat the password. It must consist of at least 8 characters and contain only numbers and Latin letters. Click on the “Next” button.
- Link your phone number. When registering, you will receive an SMS with a code that you must enter in the appropriate field.
- If desired, link a bank card to your account. You can use it to make purchases in the Google Play app store or pay for a Premium subscription to YouTube.
- Read the privacy policy and terms of use of the service, click on the “I Accept” button.
- Check that the entered data is correct and click “Next”.
- Log in to your account using the email and password entered during registration.
- Configure various additional options and set service synchronization parameters. After this, your Gmail email will be ready to use.
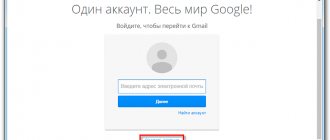
Google account login window
How to register Gmail in Google apps
If your smartphone is new, then you can go to one of the built-in applications from Google, for example, YouTube, Gmail, Google Drive or PlayMarket. The first time you use any of them, your Android device will prompt you to sign in or create an account.
Note! The further sequence of actions in this case is the same as when registering through “Settings”.
Registering a Google account and gmail
To register a new account, you need to follow a few simple steps.
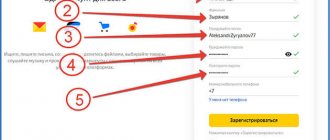
Go to google.com , select the account icon in the upper right corner (add account) and provide the required information:
- Unique username. This field may contain Latin letters, numbers, and special characters. After this, the account will take the form XXX@gmail.com, where XXX is a unique name.
- Enter your password. Numbers and Latin letters can also be used here. Length of at least 8 characters.
- Entering your phone number makes it easier to register for some services and receive passwords.
There is no need to leave your number. The user can simply leave the line blank.
The next step is to accept the terms of use and privacy.
The entire text must be read or at least scrolled to the end. After this, the “I Accept” button will appear, which passes the user to a clean mailbox.
The procedure is completed . Now among Google services there is an account that contains user information. This data can be specified in any other device. Contacts, to-do list and other data are synchronized with all connected devices. Moreover, if the device previously had contacts, they are added to the account data, and vice versa.
Service "Yandex.Mail"
Unlike other popular email services, Yandex.Mail is released on the Russian market and, accordingly, is aimed specifically at Russian users, and not at Western clients.
How to create an account in the browser
How to set up mail in Windows 10 - installing and configuring Outlook
Step-by-step instruction:
- Open any web browser and go to the Yandex.ru page by entering the domain name in the address bar.
- Under the search bar, find the “Mail” block and click on it.
- In the tab that opens, click on the “Registration” button located in the upper right corner or bottom of the screen.
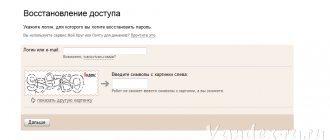
- Enter the data required for registration: first and last name, email, password and phone number. If you don’t want to leave your number in the system, you can click on the line “I don’t have a phone”, after which the service will ask you to select one of the security questions from the list and enter the answer to it.
- Pass the robot test by entering the characters from the suggested image.
- Click on the “Register” button
Note! Creating an account in this system also gives you the opportunity to gain access to space in Yandex.Cloud, music, videos, online maps and many other applications.
How to create a mailbox in the Yandex.Mail application
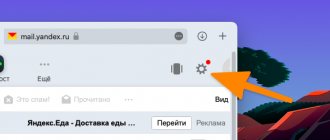
Yandex.Mail application
For ease of use, you can also download the Yandex.Mail program to your smartphone; it has a simple and pleasant interface and even allows you to change the theme of your mailbox.
To register through the application, you need:
- Download the Yandex.Mail service from Google Play.
- Open the program, select the “Registration” section in the authorization window.
- In the appropriate fields, enter your personal data, email and password, click on “Next”.
- Enter the characters from the picture. After this, the registration of your email account will be completed.
Rambler mail registration
Go to the website rambler.ru and click “ Login to mail ” at the top left. A login window will open, click “Registration” at the bottom.
By clicking on the registration button, the user is taken to a page for entering personal information.
Here you also need to specify a unique username and password, which must contain at least 8 characters and at least one lowercase and one uppercase Latin letter.
You will not be able to register without providing a phone number.
A 6-digit code will be sent to the specified number, which you will need to enter in a special field.
After specifying all the information, registration on the service occurs, the subscriber gets access to all the features of Rambler, including posters, news and other services.
Electronic mail service Mail.ru
How to set up mail on Android - step-by-step instructions
How to create Mail.ru email in a browser on an Android phone? Any installed web browser will work for this.
Procedure:
- Enter “mail.ru” in the address bar and go to the page.
- In the window that opens, find the blue “Registration” button and click on it.
- Indicate your first name, last name, gender and date of birth.
- Create a unique username and password, consisting of lowercase and uppercase letters, numbers and special characters.
- Provide a phone number that may be required to recover your account password.
- Click on the “Register” button.
- Enter the captcha. After this, the account creation process will be completed and the mailbox can be used.
How to create a mailbox in the Mail application Mail.ru:
- Open the main menu and find the Google Play application store in it.
- Enter the appropriate query into the search bar, find the desired application in the window that opens and install it.
- Open the program, click on “Create mail on Mail.ru”.
- Enter your personal information and create a name and password for your account. To reliably protect your mailbox from intruders, it is not recommended to use personal data, popular numeric and alphabetic combinations, or keyboard sequences as a password.
- Accept the terms of the user agreement.
- Provide your mobile phone number.
- Click on the “Register” button.
Registration from phone
The user will not have to register if a Google email account has been created and used previously. In this case, you just need to enter your existing login and password and continue working with your data in the new device. If this is your first account in the Google system, then you need to go through the registration procedure. Not only mail will be created, but also a common account for all Google products.
Depending on the brand of smartphone, the sequence of steps when creating a Google account may differ, but in general the steps will be identical on different devices. Therefore, as an example , we will look at how to set up email. mail on Android from Samsung:
- You need to turn on the device and connect to mobile Internet or Wi-Fi.
- Open the smartphone settings menu.
- Scroll to “Accounts” and select it.
- Click on the “Add account” button.
- The next step is to select the account type, in this case Google.
- Using the “Other option” option, you need to find the “Create an account” button.
- After this, you need to follow the instructions of the service, enter your personal data, desired password and email address.
This is enough to gain access to your mailbox and any Google service, as well as customize your email to your liking. Work with mail will be carried out through a special application that is already installed on the device.
Creating an alternative mailbox
Having an account in Google is almost mandatory for comfortable use of most services. But you can continue to use your old mailbox or register an account with an alternative mail service. This can be done in two ways:
- Go to the website of the service you are interested in through a browser, find the registration button and go through this procedure, gaining access to the mail service of another service.
- Download the application of the desired email client on Google Play (here you will need a Google account) and register directly inside it.
After this, you will be able to use all the features of mail either through a browser or through an installed application. In addition, you can add accounts from third-party systems to the list of accounts connected to the device for authorization in similar Google services from other companies. To do this you need to follow these steps:
- Turn on your smartphone and connect it to the Internet.
- Go to the “Settings” menu.
- Scroll down to the “Accounts” item.
- Select the “Add account” option.
- Select adding an account by entering your email.
- In the window that appears, enter your mailbox information - login and password. You can add either another Google account or accounts associated with other networks, such as Mail. ru or Yandex.
- The next window prompts you to synchronize data on the device and in the selected service. All data, contacts, design and settings will be transferred to the new device. After synchronization, you need to click the “Next” button.
- The next step allows you to configure your email and account name. You can leave it unchanged if everything suits you. The “Done” button is pressed.
After completing these steps, you will have access to previously sent and received letters through a new application or browser, as well as the ability to log in to various services using these accounts.
Benefits of third party services
Of course, Google is incredibly convenient in many ways, including the most important one: optimization. But there are some reasons why users may prefer another email service. Here are some of them:
- Most Google services are aimed primarily at European and American users. Therefore, authorization and linking of domestic email clients, social networks and accounts to a Google account is often unavailable.
- Google is a huge corporation that offers a large number of products. But not all of them are high quality. Yes, there are very few analogues to some services, for example, YouTube, but still some independent developers offer more convenient products that do not require a Google account.
- There have been several unpleasant episodes associated with Google recently that are pushing people away from this service. For example, problems with privacy settings for users of GoogleDrive (cloud storage), which also led to the leakage of some personal data; scanning by the Google Chrome browser of personal files of PC users without their notification.
It is precisely because Google is not perfect and has its shortcomings that other email clients are also popular in Russia.
What alternative services can offer:
- Great customization options (interface settings and other elements).
- Integration with familiar and popular social networks (VKontakte, Odnoklassniki, etc.)
- Linking to current and popular payment systems (Qiwi, WebMoney, Yandex. Money), which greatly simplifies online shopping.
- Availability of secure cloud data storage.
And this is all in addition to the mandatory presence of a mailbox, applications for smartphones and other familiar functions.
Safety regulations
Data entered during registration, as well as personal correspondence and stored information need protection. It is necessary to take care not only not to lose them, but also not to let intruders get close to them. A few simple rules that are guaranteed to help protect your data:
- You can only trust large services. Everyone knows their name, and their reputation is mostly positive. You should not share important data with young or small services: their protection may not be good enough.
- You need to carefully read the final agreement and the rules for using services in any system. Ignorance does not excuse responsibility, and if the user does something wrong, his account may be blocked.
- You need to write down all passwords and logins in a notepad and save it so as not to forget.
- Speaking of passwords, they should definitely be made very complex, since cases of hacking accounts by simply trying short and medium passwords have become more frequent. The password can be changed at any moment, and it is better to do this at least once every three months.
- You need to use two-step authorization and confirmation of actions via your mobile phone. At the moment this is the most advanced protective agent.
Create email It’s very easy to send email on your phone, and it’s even easier to use it. It is important to remember about safety, then work and entertainment on the Internet, as well as exchanging letters, will be calm and enjoyable.
Outlook email client
Create mail from the Outlook home page
Microsoft's Outlook service is also free and is one of the best personal managers for Android.
Note! Both the mail in the browser and the application have a clear interface and allow you to conveniently and quickly manage multiple accounts at the same time.
How to create an email on an Android phone using Outlook:
- Launch your browser and type the address “outlook.com” into the top line of the window. The web browser will then redirect the user to outlook.live.com.
- On the main page that opens, click on the blue button to create a free account.
- Come up with a mailbox login and move on.
- Create a password or use a combination generated by the system. Click "Next".
- Enter your first and last name.
- Indicate your country of residence and date of birth.
- Confirm that the account is not being created by a robot. To do this, the system will prompt you to enter the characters from the picture or turn on the audio recording and enter the words you heard. After this, the email creation process will be completed.
- To provide your account with more reliable protection and, if necessary, to be able to restore it, Microsoft may require you to enter an additional email or indicate a phone number to which the code will be sent. To do this, in the “Country Code” block you need to select your country, enter the number in the next field and click “Send code”. Once the code arrives, enter it in the appropriate field and complete the confirmation by pressing the blue button.
Note! If the request is sent, but the code does not arrive for a long time, you should click on the line “Code not received” and try again with the same number or, if possible, specify a different one.
Microsoft Outlook account
You can continue working with your Microsoft Outlook account in the application. After installing it from the Play Market, you just need to launch the program, click on “Get Started” and enter the details of the created account.
Creating an email inbox on Android devices is a fairly simple procedure. Filling out just a few fields will not take much time, and will give you the opportunity to receive and send emails at any time and anywhere. You can register either through any browser installed on your smartphone or through an email client downloaded from the application store.
First of all, owners of Android devices will need to create a Gmail mailbox, as it provides access to all services from Google, including the Play Market. And then those users who do not like the built-in email client can register in any service they like using one of the described methods.
Settings
Newbies often get confused by the versatility of Gmail. I decided to show the basic settings that will be useful to everyone.
Decor
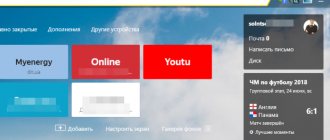
It’s hard to continue working with a dull design. Even a ten-year-old computer looks better with a new screensaver. Let's put a beautiful picture on the background. Go to: Settings → Themes → Install.
From the gallery, select a picture that you think is attractive. I missed summer and greenery so much that I chose bright grass. You can upload your image by clicking “My Photo”. The main thing is that it is of high quality. To save the result, click “Save”.
If there are no changes, reload the page.
Now my mailbox is pleasing to the eye. It's your turn. How often do you change your background? Tell us in the comments.
Template signature
Do you conduct business correspondence and are tired of constantly putting “Regards”, “All the best”? Then assign a signature that will automatically be placed at the end of any message. To do this, go to: Settings → General → Signature.
Don't forget to click “Save changes”, otherwise everything will remain the same.
Safety
Two-step authentication will reduce the likelihood of hacking by 90%. To log in you will use the password and code from the SMS. If you are checking messages from your home computer, you can set it to “Trusted” to make the process easier.
To enable two-level protection, you need to go to: Settings → Accounts and import → Change password recovery settings.
Enable two-step verification.
They will tell you about the features of this function. Click “Start”.
If you previously logged in from your phone, its model will be displayed. This mobile phone will receive information about which IP and device your profile was visited from. Click “Send Notification”.
You will receive a message, enter the code. You have made it more difficult for scammers and now you don’t have to worry about your profile.
You will find an overview and instructions on settings in this video.
Sorting emails into folders
Google is smart enough to categorize posts. But this happened a couple of times when emails from hh.ru and Pinterest ended up in spam. In addition, it is more convenient to have your own folders. Special - for memories, hobbies, correspondence with a loved one.
To create a folder, click “Create Shortcut”.
In the pop-up window, give it a name and click on the “Create” button.
Click on the arrow icon and select “Create” at the bottom.
The folder, that is, the shortcut, will be in the left menu below the draft.
By clicking on the square to the right of the shortcut, you can change the color of the icon, rename it, delete it, or even hide it.
I show you how to move a letter to any shortcut.
Place a checkmark next to the desired letter by clicking on the square on the left. Click on the folder icon with the arrow.
In the list that opens, select the name of the shortcut where we want to move it.
If everything went well, the message “A label has been assigned to the chain” will appear in the lower left corner.
In this video I show how folders are changed and deleted.
How to create a new mail on an Android smartphone
As you already understood, to fully use your Android phone, you need to have a Google account. By registering an account you receive a Gmail email account. Even if you didn’t have one before, you can create it directly on your phone.
How to create Gmail mail on Android:
So you have created a Google account that has email, to write and receive mail, go to the Gmail application.
In the new window, click on the “Add account” line.
Setting up mail on Samsung phones
This process is very simple - you just need to open the standard application on your phone.
If you have already logged in through your phone email, then you need to click on the settings icon , by opening which you can add a new account.
Next, a window will appear in which you need to enter your email login and password Thus, you can use E-mail from Samsung.
Testing the usability of Outlook
Internet users call Microsoft Outlook the ideal client for a corporate network. Its One Drive cloud integration, multi-box support, and extensive customization are perfect for the job. It is also highly compatible with Microsoft Exchange Server. You can create an account on a Samsung, Asus, Xiaomi or any other phone:
- The key disadvantage is immediately worth noting long installation from Play Market.
- You must specify the account with which you plan to work in the application and click the “Continue».
- The application offers enter password to access the box.
- After entering your password and confirming your account, Outlook asks for access to the main built-in mail and phone functions, after which the authenticity of the box is checked again.
- The last step before use becomes setting, consisting of 2 points.
What is an accelerometer in a smartphone
Outlook is a truly convenient application for your smartphone. Thanks to the built-in calendar, you can immediately plan meetings and transactions , and the high speed of sending messages will only save time. The only drawback is that it is impossible to block recipients sending spam. But this will soon be eliminated by the developers.
Rambler
Another popular mailbox is Rambler. As in the previous case, we will register mail using a mobile browser.
Open your browser, enter rambler.ru. On the main page of the service, click on the “Login to mail” button.
Here click “Registration”.
As in previous cases, you need to fill out information about yourself. Nothing complicated.
Click on the "Register" button.
The main page of the service has opened.
You can select the end of your mailbox during registration.
As you can see, nothing complicated. Moreover, often registering mail from a phone is even easier than from a computer.
Select Samsung account.
To create an account, you will need a valid email: gmail, outlook, yandex or another and a mobile phone number. You need to know your email password, as a confirmation email will be sent to you to complete registration.
Below you will find instructions for different versions of Android.
Click here if your device is Android 10
Connect to the Internet.
Select Accounts and Backup.
Select Accounts.
Select Add account.
Select Samsung account.
If this item is not selected, then an account has already been added to this device (you can only add one Samsung account per device). All added accounts can be viewed in the Accounts section (5th step).
Accept the terms and policies, click Accept.
1. Valid email address; 2. Create a password for your account - a combination of English letters, numbers and special characters. A strong password contains at least 12 characters: Zx34_29vdPCW; 3. Last name and first name; 4. Date of birth.
Click Create an account.
Enter your phone number and click Send. You will receive an SMS with a code on your phone, enter it below. Click Confirm.
If you do not receive an SMS with the code, enter the number with an 8 in front: 89991112233.
Open your email that you specified when creating your account. Find the email from Samsung, open it and click Verify account. If there is no letter, check your Spam folder.
Account has been verified.
Click here if your device is Android 9, 8, 7, 6, 5
Connect to the Internet.
Select Accounts and Backup or Cloud and Accounts. If there are no such items, proceed to the next step.
Select Accounts.
Select Add account.
Select Samsung account.
If this item is not selected, then an account has already been added to this device (you can only add one Samsung account per device). All added accounts can be viewed in the Accounts section (5th step).
Accept the terms and policies, click Next.
1. Valid email address; 2. Create a password for your account - a combination of English letters, numbers and special characters. A strong password contains at least 12 characters: Zx34_29vdPCW; 3. Last name and first name; 4. Date of birth.
Enter your phone number and click Send. You will receive an SMS with a code on your phone, enter it below. Click Confirm.
Devices running Android 7.1 and higher have required two-step verification since March 2022. This means that to log into your account you must enter a password, and then a code that will be sent via SMS to your mobile phone.
The availability of two-step verification depends on the version of Samsung services that is installed on your device. Therefore, there may not be a next step.
If you do not receive an SMS with the code, enter the number with an 8 in front: 89991112233.
Click Add to Inbox.
Sign in to your email.
Find the email from Samsung, open it and click Verify account. If there is no letter, check your Spam folder.
Account has been verified. Click Close.
If a question about biometrics appears, you can click Not now. You can configure your security settings later.
Click Back to exit the menu. All is ready.
- Open a browser on an Android smartphone (Chrome or any other)
- In the search bar write: “Create Gmail.”
- And follow the same steps with adding future mail data (see above)