Yandex, Rambler and others
Nowadays there are many large sites on the Internet that allow you to register your email. But we cannot say that they are all equally reliable. Some are functioning intermittently, while others are suspected of reading personal information contained in letters. That's why we recommend paying attention only to the following services:
- Gmail;
- "Yandex";
- "Rambler";
- Mail.ru;
- Outlook;
- Yahoo!.
To register your email, you can go to the main page of any of these sites. But on a phone, for these purposes, the easiest way is to use the proprietary application of the selected “mailer”. Let's look at each of them in a little more detail.
Mail agent for using the Mail.Ru service
There is an official mail agent for Android from Mail.Ru. You can download it on Google Play at . The client is configured according to the algorithm described above. The application is smooth and stable. In addition, there are a huge number of alternatives. They are both paid and free, and differ in functionality. Which one to choose depends entirely on personal preference.
Thus, we saw that installing the Mail.Ru service is not at all difficult, and instead of the standard client, you can use alternative ones.
Yandex Mail
QR Code
YandexYandexMail
Developer: Yandex Apps
Price: Free
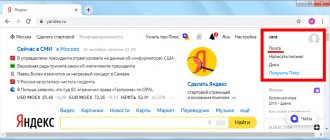
Another very convenient mail for Android. The application is pre-installed on many budget smartphones supplied to Russia. The program works stably, automatic push notifications allow you to instantly know when a letter has been received. Also, this application is ideal for those people who work very actively with mail. Even if your account contains several hundred emails, smart search will allow you to quickly find what you need.
The Yandex service allows you to assign different labels to letters. The most commonly used label is “Important”. This allows the letter to stand out among all other messages. It also supports grouping emails by topic. And Yandex is almost better than all other services at identifying spam, second only to Gmail in this parameter.
IMAP/SMTP service is disabled
Users of Gmail and Yandex most often encounter this problem. But it can also be solved. If the IMAP SMTP service is disabled, how to enable it on Android? To activate the feature in Gmail you need:
- Login to your email client;
- Go to “Settings”;
- Find the “Forwarding and POP/IMAP” tab;
- Select the desired action.
The Yandex mailer will have a “Mail Programs” folder in its “Settings”. Developers of other email clients have made protocols active by default.
You can install and configure mail on any smartphone. The process will not take much time and will not require complex preparation, but it will open up a number of new opportunities for users.
Rambler mail
In the mid-2000s, the Rambler mail service was extremely popular. This cannot be said now. However, this does not prevent the service from working stably and doing an excellent job of blocking emails containing spam. The mobile client for Android has been around for several years; at the moment it has been downloaded approximately 300 thousand times. It should be noted that this application can work not only with Rambler mail, but also with letters from other electronic mailboxes.
Like other programs of this kind, Rambler/Mail has a clear interface and support for Push notifications. At the same time, developers are always ready to meet users halfway. If you have an interesting idea that can be implemented within an email client, then just write to the creators of the utility at a special address. As for the shortcomings, the application also has them. The most important of them is the display of advertising - this was introduced into the program with the autumn update.
How are email clients different?
Before you set up email on Android, you need to decide on the client. If you already have an existing mailbox, then simply install the corresponding application on your smartphone. If you just need to create an email account, then the Internet space offers a wide selection of mailers. List of the most popular:
- Gmail;
- Yandex;
- Mail@Mail.ru;
- Outlook.
How to create an email on an Android phone
This is not a complete list of programs designed to perform mail functions. Why do users prefer these applications? What are their amenities and are there any disadvantages?
Gmail email client
Google client author. As a rule, this application is installed on Android smartphones as a standard mail application. It is convenient because you do not need to download the program additionally.
What is the convenience:
- regular updates;
- support for all the most common email protocols and services;
- possibility of connecting several electronic mailboxes.
The disadvantages include:
- instability of operation on weak smartphones;
- Quite heavy (more than 100 MB), especially for a budget gadget.
For information! The overall rating of the Gmail mailer in the Play Market application is 4.4. Users note the convenience of the software and ample opportunities.
Yandex mail client
Yandex.Mail is a universal client that can work uninterruptedly not only with the service of the same name. You can easily connect several email accounts from different platforms to it. The advantages include:
- work offline;
- activation of functions by swipe;
- automatic setting.
The disadvantages are not defined. From which we can conclude that the application is really high quality.
The Yandex.Mail email client is one of the most popular among users
Mail client Pochta@Mail.ru
A domestic product from Mail.ru Group that allows you to receive, store and process information in various file formats. Among the conveniences, users note:
- automatic mail setup on Android;
- opening the function menu for each letter by swiping left;
- the ability to enter a name that will be seen by the recipient upon receipt of the shipment;
- You can add email accounts for other services.
Among the disadvantages is the impossibility of working without the Internet.
Outlook mail client
Outlook is a development for Microsoft mobile phones. This application is chosen primarily by customers for whom Microsoft products are familiar and understandable. However, a beginner will also note the positive aspects:
- simplicity of the interface;
- support for other email services;
- the ability to open files without switching to other applications.
However, this client refuses to work with Russian Yandex and Mail, which is a big drawback.
Just in case! The software of almost every email client provides the ability to save letters in the cloud, which is convenient to use and saves the gadget’s memory.
Developers of email clients make it possible to store letters in cloud storage
In order not to get lost in the variety of email clients, it is worth accepting one fact: email clients are mostly similar and are able to satisfy the basic needs of the user.
Mail setup
If you decide to download one of the applications discussed above, you will definitely not encounter any difficulties in setting up. You will only need to enter your username and password, after which you can start reading mail. Setting up mail on Android causes certain problems only if you want to use the built-in client. Often it is used as Gmail, which is not as intuitive as we would like.
Step 1 . Launch Gmail. You can use another built-in client, but our example will be based on a Google product.
Step 2 . If you already have a Google account, then your Gmail account is also registered. Accordingly, you can already read incoming letters.
Step 3 . To connect an account from another email service, you need to pull out the curtain on the left edge and click on the “Settings” button.
Step 4 . Here click on the “Add account” button.
Step 5 . This will take you to the section where you can select the email service you are using. Select the one you registered with. For example, if your email address is [email protected] , then you should be interested in the “Yandex” item. If your service is not in the list, then select “Other”.
Step 6 . Now all that remains is to enter your email address, click the “Next” button, enter a password and confirm your actions.
This is how easy it is to set up email on Android. Don't forget that you can adjust the client to your own rhythm of life. The same Gmail allows you to select actions performed after clicking the “Delete” button, enable automatic navigation through email chains, and use many other options. You'll soon be surprised at how convenient email can be!
Ways to set up email for Android
How to set up mail in Windows 10 - installing and configuring Outlook
There are two ways to set up email on a smartphone running on the Android platform:
- automatic setup;
- manual configuration (configure using IMAP and POP3 protocols).
With automatic setup, the user enters an email address and password (if the mailbox is already registered), and the system itself determines the necessary settings. This method is more convenient and priority.
If it happened that the system could not cope with determining the necessary settings, then they can be installed manually. This method is suitable if the IMAP SMTP Android service is disabled - you have to decide how to enable it yourself.
Collecting letters
To manage the collection of correspondence, you need to open the settings in the special agent “Mail.Ru” (downloaded from the Playmarket), where in the menu click on the “Add account” line. Then you need to enter the third-party mailbox details (login and password) and connection type (POP3 or IMAP). The agent will do everything else automatically. All you have to do is select the frequency of checking other accounts and select the name of a separate folder for correspondence that came from a particular client.
Collection of correspondence
Setting up Yandex mail on Android to collect letters is quite simple. Click on the drop-down menu icon in the upper right corner and select “Settings”. Then tap on the words “Add account” and in the list o.
Next, enter the third-party client login (mailbox) and password. Then you need to decide on the type of account to connect: POP3 or IMAP. Almost all Internet gurus recommend using the IMAP type. Because this option allows you to work with correspondence in real time, that is, all changes that will be made to the letter will be immediately reflected on all accounts. Roughly speaking, a POP3 connection is intended only for downloading new messages, while the IMAP protocol allows you to work with correspondence without interrupting the connection on another server.
As for the specific ports and security type of each individual third-party client, the service should configure everything automatically, so there will be no problems here. The only thing that can be added is to select the frequency of checking other mailboxes: every 15 minutes, 30 minutes, etc.