Content Aware Fill is a powerful tool in Photoshop that gets better and better as the program evolves. In its first version, this tool was very simple (but still powerful), allowing you to simply replace part of an image with the surrounding pixels with one click. But now Content Aware Fill has more options, and you can control many aspects of the tool to work faster and get better results.
The possibilities of this tool are almost limitless, we can use it almost anywhere we want, from replacing one small place to an entire person with incredibly good results, saving our precious working time.
Let's take a look at the Content Aware Fill available in the latest version of Photoshop while working on an image and see just how powerful this tool has become.
Ready pictures
It's even easier with ready-made pictures. You simply download an image from the Internet. Read the article on how to do this so as not to fear legal prosecution and violation of copyright law.
Open the folder with the image and drag it into the working window.
All that's left to do is stretch it. There's nothing complicated about it. But you can read the article on how to properly make an image larger. Perhaps you will learn something new.
Well, that's almost all.
Copying the mask
To copy a layer mask in Photoshop, hold down the Ctrl key on your keyboard and click on its thumbnail in the Layers Palette. This way it will be copied to the clipboard.
Now create or switch to the desired layer for which you want to copy, and click on the add mask icon. As a result, we will get the duplicate we need.
Change the color of the object to white
In this example, we repaint the object white. Let's take the same red car as an example and repaint it white. First, let's go to layers - new adjustment layer - black and white.
As a result, a new layer will appear and its adjustment window will open.
Here we move the sliders, especially the top red one, since the car was red, until we get the desired result.
How to fill in Photoshop
There are 4 main ways to fill in Photoshop. Depending on the task at hand, the user must be able to select the current solution. Therefore, I decided to show everything that is there, and you decide for yourself which method is right for you.
Fill from menu
Select “Editing” → “Fill”, or use the hot keys Shift + F5.
We get to the “Fill” window. In the “Contents” item, you should select one of the options. I will highlight the most popular items:
- Main color. Filling occurs with the color selected as the main color in the palette on the toolbar;
- Background color. Fills with the color selected as the background color in the palette on the toolbar;
- Color... You are invited to choose your own color from the palette.
- Black. The layer will be filled with black.
- White. The layer will be filled with white.
- 50% gray. The layer will be filled with 50% gray.
Select the item of interest and click “Ok”. As a result, the layer will be filled with color.
Fill from the toolbar
In the toolbar, select “Fill”, or press “G”. We have activated the Fill tool.
To make a fill, click on the active layer in the work area. The painting will be done with the color that was selected as “Main”.
If you need to change the color, you can activate the eyedropper by pressing the Alt key, then click on the color of the picture you are interested in. Photoshop will define this color as the main color.
Another way is to go directly to the color palette by clicking on the primary color icon and select a color from the palette.
Painting with a brush
Probably the most difficult way, but still possible. As you understand, in this case you need to take the Brush tool and then select the desired color. Next, adjust the brush size using the “[” and “]” keys and paint over the layer.
Filling with hotkeys
The easiest way to make a fill in Photoshop is to use hotkeys. From the description above, you should already understand that there are two colors:
- Main color. Located above the icon;
- Background color. The color that is located below the icon.
The developers of Photoshop have added hotkeys that make it easier to fill any area with a single color.
- Alt + Delete is a command that allows you to fill with the main color.
- Ctrl + Delete is a command that allows you to fill the background color.
Now you know how to fill in Photoshop, but that's not all. Below I have prepared examples of various fills that will be 100% useful in your work.
Using Content-Aware fill
There is another fill option in Photoshop CS5 called Content Aware . It works with the Fill command and the Spot Healing Brush tool. By comparing brush strokes to neighboring pixels, the program then fills the adjacent area so that it blends seamlessly with the background.
When to use each option, you ask? If you have a lot of good pixels on either side of the pixels you want to remove, try using the Spot Healing Brush tool. If you want to remove pixels more precisely - say, if the object you want to remove is very close to something you want to keep - create a selection and then apply a Content Aware fill (if possible, it's better to add a little background).
Once you've created a selection, you can use the new fill option—Content Aware—to fill the selected pixels with adjacent pixels.
A few quick brush strokes and the fox highlighted on the left becomes almost invisible.
The magic Photoshop uses to fill the selected area is random and changes each time the command is used. In other words, if it doesn’t work the first time, try selecting the menu command Edit => Fill again. You will most likely get different results.
By the way
Finally, I want to tell you about one more point. It is not necessary to fill any drawing with color. You can simply fill the area.
To do this, select some area with any selection tool (I chose the Lasso tool) and draw a selection on a white background.
Now I pick up the fill again and choose any color. The selection hasn't gone away, and that's great. Then fill in what is inside the selection outline in a way already known to us. Hop! And you're done. Here's a little trick.
Well, although these are not all the properties, they will be quite enough for you. If you want to study Photoshop more thoroughly and in detail, and also “swim” in it like a fish in water, then I highly recommend that you watch this video course. I haven't seen anything better yet. If I had it before, then learning this graphic editor would have been much easier for me. Overall I highly recommend it.
Well, I’m finishing our lesson for today, dear friends. I hope that the article was useful to you and I strongly recommend subscribing to my blog updates, then you will not miss the release of new and useful articles, as well as various news and competitions.
Good luck with your studies. The main thing is not to philander). See you in the next lessons. Bye bye!
Creating a document
Despite the abundance of tools, working in Photoshop, like in any other editor, begins with creating a new document.
- In the main menu of the program, execute the command File -> New or press the key combination Ctrl+N.
- In the New window that opens, set the parameters of the future document (you can set the same as in the screenshot below).
- Name. Can be anything. Although many people do not touch this field at this stage, setting the file name already during saving, it is better to rename the document immediately to avoid confusion.
- Width. Horizontal canvas size. In the computer world, it is common to specify in pixels, but if you work with, say, paper products, then centimeters or even points may well suit you.
- Height. Vertical length of the canvas.
- Permission. The higher the indicator, the better the quality of the final image.
- Color mode. Format and color depth. Usually 8-bit RGB suits everyone.
- Background content. In our case, the background will be white, but you can set it to any other color or even make it transparent.
- Color profile. Here you can assign or delete a color rendering profile. Due to an incorrectly selected item in this drop-down list, you can get problems with color rendering, the root of which then takes a long time to find.
- Pixel aspect ratio. The option should be chosen based on the standard you are working with. If the dropdown values don't tell you anything, leave Square Pixels.
- Click OK and evaluate the result - the document has been created.
Fill part of the background layer
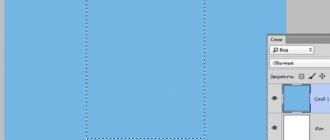
Sometimes it may happen that you need to fill not the entire background, but only some part of it. This is also quite simple. To do this, we need to take any suitable selection tool and select the area for filling:
Then fill it with any of the above methods.
Thus, thanks to this lesson, you now know how to fill the background in Photoshop in all available ways. If you have any questions, be sure to ask them in the comments.
Useful tips
Useful tips
Connecting plugins to editors
Selection tools
Transforming selected objects
Rotate and flip an image
Changing image resolution
Resizing an Image
Changing print size
Changing the Canvas Size
Crop images
Drawing Tools
Fill tools
Editing tools
Retouching tools
How to make a fill in Photoshop
We figured out the main points and looked at how to fill in Photoshop in detail. But in practice there are different situations, so you must know how:
- fill the active layer;
- fill the selected area;
- fill a shape (circle, rectangle or other);
- the pattern is filled;
- gradient fill works;
- and let's see how filling simplifies working with the mask.
I want to dwell on each point in more detail, so let’s get down to business.
How to fill a layer in Photoshop
By and large, the answer to this question has already been given above. But in order for the article to be structured, I decided to go over the main points again.
To fill one of the layers in Photoshop, you first need to activate it in the Layers panel. The action applies only to the active object.
After this, we can use one of three options:
- fill the layer through the menu (Shift + F5), where select the required fill item;
- activate the Fill tool on the toolbar and click on the layer;
- press Alt + Delete if you want to fill it with the main color and Ctrl + Delete if you want to fill it with the background color.
Each of these actions will lead to the same result. The layer will be filled with a single color.
How to fill a selected area in Photoshop
Filling the selected area looks more interesting. In this case, using any selection tool, you need to set the boundaries of the area that will be affected.
For example, take the Lasso tool. Activate the layer from the previous example and draw some shape.
Running ants indicate the selection area and this is what we will fill.
- Select the Fill tool or press the G key.
- Set the main color in the palette.
- Left-click on the selected area. The selected color will be filled.
As you understand, the selection can be of absolutely any shape.
By the way, you can also fill the selected area using the hotkeys Alt + Delete and Ctrl + Delete.
How to fill a shape in Photoshop
Let's move on to filling the shapes. It doesn’t matter at all what shape we work with, be it a circle, oval, rectangle, square, triangle or any other shape. The Fill tool is capable of filling any area limited by color with color.
In addition, if you play with the tolerance parameter... But more on that later.
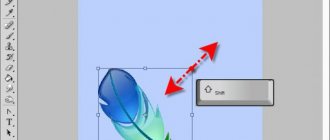
Let's conduct an experiment and fill geometric shapes with color. To do this, I will draw them on the layer from the previous example.
Now let's see how to fill with color in Photoshop. But it turns out everything is very simple. Select the Fill tool, set the desired color in the palette and activate the layer with the desired shape. After that, just click on the figure.
I’m sure whoever used the standard Windows Paint program knew these banal things. The graphic editor determines the boundary of the change in tones and fills the object within one tone.
I found a more interesting example. This is such a painted thing.
My task is to change the fill color from yellow to blue.
Do you think I’ll have to click on every yellow color? No, it's much easier to do.
- Select the Fill tool.
- At the top of the window, in the settings, uncheck “Adjacent pixels”. Thus, we make it clear to Photoshop that we want to affect all the colors of the same tone.
- Play with the Tolerance parameter in the range from 0 to 255. The lower the value, the fewer shades of the selected color will participate in the shading. Accordingly, a larger value will paint more shades.
In my case, the ideal tolerance value was 114. The result was like this.
Have you noticed how flexible the Fill tool is? If you know how to use the tool differently, be sure to write in the comments.
How to fill with a pattern
We looked at filling the entire layer, the selected area, and various shapes with a single color. But that is not all.
The Fill tool can fill with a variety of patterns. Let's see how this happens.
- Activate the Fill tool.
- At the top of the window, switch from “Basic Color” to “Pattern”.
- To the right, from the drop-down list, select the pattern texture.
- Click on an empty layer or the place that needs to be filled.
As a result, we fill the layer with a pattern.
It is also worth adding that Photoshop offers a set of patterns, but this does not mean that you cannot add your own.
When selecting patterns, click on the gear, and in the drop-down menu click on “Manage sets”. In the window that opens, click “Upload” and upload your patterns in .PAT format.
How to make a gradient fill in Photoshop
Included with the Fill tool is the amazing Gradient tool. Let's see what he can do.
- Select the Gradient tool.
- At the top of the window there are settings. Here you can choose: gradient palette and gradient type.
- Select the object, or create a simple selection area.
- Inside the area, move the mouse with the left key held down and get the effect of interest.
The developers initially offer 16 types of gradient palettes. In addition, the user can add his own unique set.
Gradients are created of 5 types:
- Linear Gradient;
- Radial Gradient;
- Cone Gradient;
- Mirror Gradient;
- Diamond gradient.
Create each of the gradient fills and see how they work in practice.
Tolerance
Many instruments have such a property as tolerance. And everywhere this tolerance works approximately the same.
The smaller the tolerance, the smaller the color range of the painted area. Those. if there is a tolerance and you want to paint with white on a blue-blue background, then only the shade that you clicked on initially will be filled, and of course all the exact same shades do not deviate one gram from the norm. And if the tolerance is maximum ( 255 ), then the fill will paint over the entire canvas without exception.
Let's look at an example, and then you can experiment for yourself. Let's take a square as a basis, which changes its color smoothly from yellow to white. Let's try to set different tolerance values and paint them black.
As you can see, the greater the access, the more he uses the range of colors that he considers native and the more colors and shades he paints. I hope you get the gist. Got it? If not, then ask. I will answer.
Video instruction
After I wrote the article, I thought some of you might be interested in collages. That is, you have some kind of base, and on top you will add a picture as a background. When creating the video, I immediately placed an object in the center of the image. In this case, the product page from AliExpress is .
To fill the background, you just need to activate the background, click on it. Then all changes will be applied not to the object itself, but to the back layer. Well, I think you will understand when you see the video. I deliberately did not cut anything out of it.
You can see what difficulties I encountered during my work.
If you liked this article, subscribe to the newsletter and learn more about Photoshop. Well, if you want to learn how to work with the program professionally and know everything about its tools and capabilities, I can recommend the video course “ Photoshop from scratch in video format .”
You no longer have to look for answers on the Internet. If you know what tools and what can be done, then solutions will appear to you by themselves. This is what distinguishes professionals.
Using content-aware fill, pattern fill, and history fill
For information about using the Edit > Content-Aware Fill feature introduced in Photoshop CC 20.0 (October 2022 release), see Content-Aware Fill.
On the background layer, press Delete or Backspace to quickly access the Fill dialog box.
Content-aware
Fills the selection with similar image content in the immediate vicinity. For optimal results, the selection should slightly cover the area that will be played back. (As a rule, using a regular lasso or a selection will be enough for this.)
Content-aware fill combines similar image elements on a random basis. If you're not happy with the result, choose Edit > Undo, and then apply a different fill based on the content.
(Enabled by default) Algorithmically blends the fill color with the surrounding color
Click the inverted arrow next to the pattern swatch and select a pattern from the pop-up panel. Additional patterns can be loaded using the panel's pop-up menu. Select a pattern library name or run the Load Patterns command and navigate to the folder containing the patterns you want to use.
You can also apply one of the included script patterns to easily create different geometric fill patterns. Select Script-Based Patterns at the bottom of the fill dialog box, and then choose a fill pattern from the Script pop-up menu.
If the pattern is dark, you must first load the pattern library before making a selection. (See Managing pattern libraries and presets.)
Restores the original state of a selection or screenshot selected in the History panel.