In this short lesson I will tell you how to type text on a computer. Where to find a printing program and how to work in it.
Open Word. Perhaps there is a special icon on the Desktop (on the screen) of your computer that opens it.
| or |
If there is no such icon, click on the “Start” button in the lower left corner of the screen.
| or |
A list will open. Click on “Programs” (All Programs).
A new list will appear. Find the “Microsoft Office” item, click on it and in the small list that appears, click on “Microsoft Word”.
If you do not find the words “Microsoft Office”, then most likely the office software package (including Microsoft Word) is not installed on your computer. In this case, you can use the standard WordPad program (Start - All Programs - Accessories). Or you can use Writer from the OpenOffice package as Word.
The following window will open. This is a program for printing text in Microsoft Word.
We are interested in the central white part. This is an A4 sheet. This is where we will print.
Please note: the sheet appears to have been cut off. In fact, it simply did not fit - after all, the size of the computer screen is smaller than the size of an A4 sheet. The part that does not fit is “hidden” below. To see it, you need to turn the wheel on your mouse or drag the slider down on the right side of the program.
But we will print the text from the beginning of the sheet, so if you went to the end (down), go to the beginning (up).
In order to start typing text, you need to left-click on the sheet. Better to click somewhere in the center.
A black light should be blinking in the upper left corner of the program. Thus, the Word program “prompts” that you can already print the text.
By the way, it will be printed where the stick flashes. If you want it to be in a different location, double-click on the desired location with the left mouse button.
Now try typing something using the keyboard. But first, look at what language is installed. The alphabet that is selected on the computer is shown at the bottom right. It is shown in two English letters.
RU is the Russian alphabet, EN is the English alphabet.
To change the input language, click on these two letters with the left mouse button and select the desired alphabet from the list.
Try typing a little text. If it’s difficult for you to come up with it yourself, open any book and print a small piece from it.
To move to another line (for typing below), you need to press the Enter button on the keyboard. The flashing stick will move down a line - the text will be printed there.
It is also worth drawing your attention to one very important button in Word. This button is called "Cancel" and looks like this:
It is located at the very top of the program and allows you to undo the last thing you did in Word.
For example, you accidentally deleted the text or somehow damaged it (moved it, painted it over, etc.). By clicking on this wonderful button, the Word program will return your document (text) to the state in which it just was. That is, this button returns one step back. Accordingly, if you click on it twice, you will go back two steps.
Although computers are found in almost every home today, some people are still very poor at using them. Today, the Internet serves people not only as a source of information, but also as a source of income. But what good is it if a person doesn’t know or can’t do the simplest things.
And first of all, I would like to touch upon the issue of printing text. After all, it is known that this is a very useful skill, without which it is impossible to work on a computer today.
Programs for working with text
Today, on every personal computer you can find more than one special program that allows you to create text electronic documents. They are the ones used for typing. In other words, using these programs you can create a layout of a document in electronic form and then print it on a printer.
Today you can download many programs of this kind on the Internet, but most often users use the following:
The first problem that a novice user who wants to master typing on a computer faces is finding and opening a typing program.
This can be done quickly if a person already knows which icon the program he needs has. If we talk about the most popular program for typing text, Microsoft Word, then it corresponds to an icon with the letter W.
First of all, we advise you to carefully examine the desktop and the toolbar below. Usually the most frequently used programs are displayed in a prominent place so that you can quickly launch them.
However, if you do not find the icon you need there , then the following method can help you:
- Click on the Start button in the lower left corner and a menu will open.
- Find the file search field in it. On most computers it's called "Find programs and files."
- Enter the name of the program you need in this field. To do this, you just need to type the word “word”, after which the assistant will find the Microsoft Office Word program for you.
- Similarly, you can type the word "wordpad" and a file finder will find where that program is located.
- Next, you need to click on the program, after which a working window will launch where you can create a document, edit and save it, and print it on a printer.
How to use a 3D printer
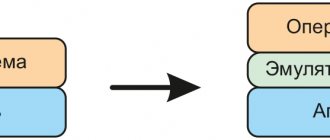
Creating 3D models is not difficult even for novice users, since the process is automatic and consists of continuous cycles that are repeated one after another until the finished product appears on the working surface. However, printing an object is only one link in a complex chain that makes up the full production cycle of a 3D model. In fact, it all starts with its development.
Preparation
The printer prints each three-dimensional object strictly according to a 3D drawing. You can create it yourself on a computer using special programs called CAD editors or CAD (Computer-Aided Design). The most popular today are:
- AutoCAD;
- Blender;
- FreeCad;
- OpenSCAD;
- GoogleSketchUp.
There is no need to draw the models yourself. As an alternative, you can search for ready-made options; fortunately, on various Internet resources you can find and download diagrams of all kinds of covers, hooks and even ATVs. If you don’t have design skills and you couldn’t find the required model, you can order it from professionals.
Creating an Object
It is recommended to start development with simple models. For these purposes, the simplest geometric shapes, for example, a pyramid, are best suited. The process will look like this.
- Develop a three-dimensional drawing (model) and save in STL format.
- Process it using a slicer program, that is, cut it into layers according to which the plastic will be laid out.
- Save the prepared 3D drawing into a file called G-code, load it into the printer and start printing.
- As a result, the device receives the necessary instructions, in which, in addition to the model cut into layers, the movement path of the print head is indicated, the printing speed and the thickness of each layer are indicated.
- The prepared model can be downloaded to the printer from a computer via Wi-Fi, using an SD card or via a USB drive.
Most printers intended for home use have a clear interface and do not cause difficulties in starting the process. Since the product manufacturing cycle is fully automated, the user will only have to turn on the device and observe the printing process.
Troubleshooting
Test printing of the first products on a 3D printer is an exciting and fascinating process, since a new thing is created right before our eyes and literally “out of nothing.” However, even an experienced user is not immune from various types of errors.
Final processing
Products printed on an FDM printer always have a textured, uneven and slightly rough surface, which is due to the layer-by-layer technology of their production. Objects created using photopolymer equipment turn out smoother, but they are also far from ideal. Consequently, all models without exception require post-processing.
- Mechanical. It involves sanding with sandpaper or a sanding sponge. Due to the labor-intensive process, it is suitable for items that do not have small parts. It is unlikely that you will be able to achieve a glossy surface, but it will help remove layering. And if the product is primed and varnished, it will take on a neat appearance.
- Chemical. Allows the use of solvents such as dichloroethane and acetone. The first is suitable for processing PLA, the second - for ABS. Due to the high toxicity of the substances, safety precautions must be observed: work with gloves and a mask outdoors or in a well-ventilated area. To level the surface using a chemical method, you should use a brush with natural bristles, pick up a minimum of substance and apply it with quick movements.
- Mixed. With this method, the solvent must be applied with a clean white natural fiber cloth and the surface polished in a circular motion until the desired smoothness is achieved.
There is another post-processing option - exposing the product to solvent vapors. However, this method is considered highly toxic and is prohibited for use at home.
Working with a document and editing text
When you launch Microsoft Word, you will see a work area in front of you that looks like a blank sheet of paper. It is in this place that typing and editing will take place.
As a rule, novice users, seeing a blank sheet of paper and many different buttons in front of them, do not understand what they need to do. They are even more confused by the keyboard because they don't know which buttons to press.
However, in reality there is nothing complicated here. It’s enough just to understand it well, and it won’t be difficult for you to learn how to type text on a computer. If necessary, you can find a special video where the process of typing text is shown online in all details.
All you have to do is repeat and remember everything. This will make it easier for you to work not only in the Microsoft Office Word editor, but also in others that use a similar principle.
At first you will type text slowly and often with errors, but don’t stop, keep practicing. Over time, you will be able to consolidate the acquired skill and bring it to perfection.
Saving text
So, you have created a new document. Now you can save it immediately. This is done using the button located in the upper left corner. By clicking on it, you will call up a menu in which you need to find the “Save” item, click on it, and then select the format you need, for example, a Word document.
You will then see a window with several options to choose from:
- where to save the file (for a quick search it is better to select the Desktop);
- what to name the file (come up with a name for the new document);
- file format (no need to change anything here).
When you make a selection in each of the fields, you can click on the “Save” button. Your document will then appear on your computer's desktop.
Now you can perform a variety of operations with them: send them to a flash drive or send them by email. You can also resume work or remove it from your computer altogether.
I would like to give some useful advice: when printing a large document, save it often. This way you will not lose the text you have already typed in case of unforeseen situations.
Printing a document on a printer
Sometimes after typing, you need to print a document. To do this, you will naturally need a printer. If you already have one , then you must make sure that it is connected to the computer and configured correctly.
If this is done, then next you need to do a few simple steps. Before you send a document to print, make sure the printer is turned on and has enough paper. After this we do the following:
- Find the document you need to print and open it.
- Click on the button in the upper left corner that opens the menu, select “Print” from it, and then click “Print” again.
- A window with many settings will appear in front of you, but don’t be alarmed, there is nothing complicated about them.
- At this stage, you will have the opportunity to select a printer, if several are connected to the computer, the number of copies of the document, sheet format and other parameters.
- If you do not need to change special settings, you can leave everything as default and immediately click OK.
Immediately after this, the printing process will begin, and in just a minute you will have your document in text format in your hands. In the same way, you can print all other files, adhering to the algorithm described above.
Copying a text file to a flash drive
If you have learned to type text on a computer, then transferring it to a flash drive will not be difficult for you:
- First of all, make sure that the flash drive is inserted into the USB connector.
- Inspect the desktop - there should be a “My Computer” icon, which you need to double-click on.
- When the window opens, find “Removable Disk” and also double-click on it.
- Now navigate to the folder where you saved the created text file. In our case, this is the “Desktop”. Right-click on the document, and then select “Copy” from the menu that opens.
- Now again go to “Removable Disk”, right-click anywhere and select “Insert”.
- After this, the copying process will begin, and soon the document will appear on the flash drive.
Many people may think that learning how to use a computer is very simple. However, this is not the case for everyone. There are still people who do not know the most basic things. Without knowing how to type on a computer, it is very difficult not only to obtain the necessary information from the Internet, but also to communicate with other people. Therefore, those who have a problem with this need to urgently address it.
In fact, learning to type text on a computer is not that difficult. Difficulties arise only at the first stage , when a person sees a lot of new things in front of him and is lost, not knowing what to do. But it will be easier for you to master this science if you learn to type text not alone, but with a more experienced user. Then he will be able to tell you if you have any difficulties and help you learn typing faster.
Basic Word Tools
After we open the text editor (you can just download the file here ) we see a blank sheet of paper with a control panel at the top and a bunch of different icons. If the message “Protected View” appears at the top, then click “Allow editing”.
Don't panic. We will sign all the necessary icons.
Selecting a printing program
For owners of Windows computers or laptops, it is best to use either Microsoft Word or WordPad. The programs allow you to print text and edit it in any way.
Attention: Word has more advanced functionality. This processor has the maximum tools for editing documents.
The user can launch applications in different ways. If program shortcuts are placed on the desktop, then you only need to double-click on them with the left mouse button. If any processor is attached to the taskbar, then to launch it you need to click on the icon with the left mouse button only once.
In some cases, there will be no Word or WordPad shortcuts on the desktop or taskbar. How then to open programs and print the desired text?
To work with Word, you need to right-click on any free field of the desktop, select the “Create” section in the context menu and specify “Microsoft Word Document” in the pop-up window.
You can quickly open WordPad on a computer or laptop using the following algorithm:
- Click on the search icon on the taskbar.
- Enter WordPad in the line and select the desired action (open, pin to taskbar, etc.).
- You can launch Word in the same way.
In fact, there are quite a lot of options for opening programs. If you have to type text quite often and in the process of work you need to use several editors at once, it is better to immediately put them on the taskbar or create a shortcut on the desktop. Let's look at creating a shortcut using WordPad as an example:
- Go to the search menu on the taskbar.
- In the line we enter WordPad and o.
- In the new window, right-click on the WordPad shortcut and select the “Copy” section from the context menu.
- Right-click on any free field on the desktop and look for the “Paste” option in the context menu.
- A Word shortcut on your desktop can be created in the same way. There are no fundamental differences.
Possible problems
Surely every person has encountered a problem when, when printing documents, the printer simply did not respond to the execution of the assigned tasks or printed information incorrectly. Many thoughts immediately arose: either the ink in the cartridge had run out, or the device had lost connections with the computer or was completely broken. But in fact, every problem that arises necessarily has a solution, perhaps more than one.
If the printer stops showing “signs of life”, does not reproduce document output and does not produce any sound signals, most likely the drivers have been configured incorrectly or the device has a weak connection. First, you should check the connection of the USB cable to the computer, make sure the software is working correctly and check for driver updates. After these manipulations, the device will definitely begin active work.
To extend the life of your office equipment and not have to deal with the troubles of printer system failure, it is important to listen to a few tips
- Conduct device diagnostics once a month.
- During diagnostics, clean the inside of the structure from accumulated debris and dust.
- Monitor timely driver updates.
- If office equipment breaks down, you should not unscrew the device yourself and try to repair the internal elements. You need to contact a service center for warranty. If the warranty period has passed, you should call a technician.
The following video demonstrates the process of printing to a printer from a computer.
Using Printing Techniques
After opening any of these programs, the user can write the desired text, save the created file or send it to print. There are many options. However, before you type your first document in Word or WordPad, you need to learn the basics of working with these processors. In this case, let's look at:
- typing words, editing them, creating a paragraph;
- placement of punctuation marks;
- working with font.
Of course, the functionality of the presented applications does not end there, but beginners should first master the first stage of working with these programs.
Words that begin sentences or belong to the category of proper names are usually printed with a capital letter. To create upper case, you must simultaneously press the Shift button and the letter itself. After this, you can enter text as you wish.
You can delete a letter or any other character in the text using two keys. They are called Delete and Backspace:
- Clicking the Delete button deletes the character located after the cursor.
- Pressing the Backspace button deletes the character located before the cursor.
Using these keys you can delete words and entire paragraphs. Moreover, doing this is no more difficult than learning to copy and paste using the keyboard. You need to select any text element and simply click on the corresponding button.
You should not type continuous text on a computer or laptop. Sentences must be combined into meaningful paragraphs and separated from each other. To create a new paragraph, press the Enter button.
Learning to use punctuation on the keyboard is also quite easy. Even beginners will not have any difficulties:
- You can write an exclamation mark in the text by simultaneously pressing the Shift and 1 buttons.
- To type a question mark in a document, you need to press Shift and the 7 button at the same time.
- If you need to type a colon, press Shift and the 6 button at the same time.
- You can add a semicolon if you press Shift and the 4 button at the same time.
- To put a simple point, you need to press the corresponding key (located next to the letter “U”).
- If you need to type a comma, press Shift and the period button.
- To open brackets, press Shift and the 9 key, and to close them, press Shift and the 0 key.
- Quotes are placed by simultaneously pressing Shift and button 2.
- If you need to put a dash in the text, you need to click on the corresponding button.
As you can see, learning to type punctuation marks on a computer is not difficult. In most cases, to set the desired symbol, you need to press Shift (this key is also called a modifier) and another button on which the corresponding symbol is applied.
Attention: for convenience, the methods of setting symbols are shown on the virtual keyboard. It is practically no different from the physical prototype. The virtual keyboard does not only have function buttons and a key to turn off the computer or laptop.
If necessary, you can edit the style. Moreover, there are as many options for changing the font in Word as in WordPad. In this case, the programs do not differ from each other. All changes can be made on the “Font” tab, located in the “Home” section.
To edit, you must first select a fragment in the text and click on the corresponding button. At his discretion, the user can change the color of the letters.
Or make the font bold, italic, underlined, or strikethrough.
If you want to make the selection more obvious, you can change the text fill.
After this editing option, the highlighted words or sentences will look as if they were underlined with a felt-tip pen. If necessary, you can change the size of the letters. To do this, click on the appropriate button and select the appropriate option.
Ways to solve error 0x00000034: CACHE MANAGER
Since error 0x00000034 occurs due to memory problems, all methods will be aimed at diagnosing the RAM modules and the hard drive itself. To do this you will need to perform a few simple steps.
Method 1: Checking RAM modules
Next, having saved the changes, we boot from the flash drive on which the program is recorded. We start checking the RAM modules.
IMPORTANT! Quite often, scanning a set of RAM does not produce results. You need to scan each individual strip
This is the only way to determine whether the bar is working or not.
You can also check the RAM strips manually. To do this, do the following:
- Turn off the computer. Disconnect the power cable from the network. Press the power button to remove any remaining charge from the motherboard.
- Open the side cover of the system unit. Use the latches to disable the RAM sticks.
- Take a paper eraser and clean the contacts.
- Now we put ONE bar back and start the PC. We've been testing for a while. Naturally, the system may swear, and in some cases, due to lack of memory, it simply will not boot. However, when working the bar, a sound post will pass.
- Now turn off the PC (remembering to turn off the power to the motherboard) and insert the same bracket, only into a different slot. Let's test it.
IMPORTANT! If you have two or more strips, then you need to repeat all the same steps with another module
Method 2: Check your hard drive and restore system files
To begin with, if such a CACHE MANAGER error occurs, it is worth checking whether there is enough free space on your hard drive. It wouldn’t hurt to clean the system with some kind of garbage cleaner, as well as defragment the hard drive.
Next, you need to run the following commands in the command line with Administrator rights:
- sfc /scannow – check the system for the integrity of Windows files;
- chkdsk C: /f – checks the file system for errors;
Write the Victoria HDD program to a flash drive or disk and run it from Windows.
Also, on the Microsoft forum, the developers suggested that when a blue screen of death appears, CACHE MANAGER should be run with Administrator rights as a command to restore boot files (enter in order).
Go to the Windows recovery environment (from a disk or flash drive);
Select “Command Line”;
- Enter the commands:
- Bootrec/fixMBR
- bootrec/fixBoot
- bootrec/rebuildBCD
- We boot into Windows after executing these commands. Don't forget to set boot priority to start from the hard drive.
If such an error appears after overclocking any components, then you need to reset all settings in BIOSe and proprietary device programs to factory settings.
If the above methods do not help at all, then you need to restore Windows using a restore point or completely reinstall the system. Don't forget to save your personal data before doing this.
Saving text to a PC or flash drive
As you can see, typing text on a computer or laptop is very easy. To save the results of your work, you should use the following algorithm:
- Click on the button symbolizing the floppy disk.
- Select the save path (hard drive or flash drive), enter the file name and click “Save”.
To save current changes, you need to periodically press the floppy disk - if you type in Word or WordPad from a computer, then one day, due to a power outage, you can lose all unsaved data. The user will have to type and edit all the text again (until the last save). Of course, this rarely happens, but sometimes you have to redo your entire day's work.
So what to choose
To get the best performance and the ability to use all available configurations, it is recommended to perform a clean installation of the operating system. Installing Windows through updates significantly degrades your computer's performance and may cause some drivers or applications to malfunction.
It is believed that each subsequent version of Windows is better than the previous one: in new versions the software is improved and rotated and the performance of the operating system is improved. However, ordinary users, for whom a slight increase in power will not provide any special benefits, choose the OS based on their own comfort in using the software. Choosing an operating system is a matter of habit and largely depends on the nature of the user.
Printing a document
Printing a document on a PC or laptop is quite easy. It will not be difficult to print the text from your computer to a printer. All work in this case takes place in several stages:
- We are looking for the “Preview” button.
- If you are completely satisfied with the current version of the document, click on “Print”.
- After this, select the printer, specify the remaining required parameters and confirm the action.
Even choosing the right laptop is more difficult than sending a document written in Word or WordPad for printing. Even a beginner can quickly learn this.
Own book
Now we have the text to write our own original material, we know how to write on both sides on the printer. Then we are completely ready.
Select all the text that will be the material for the book and go to the “Print” menu. Next, you should select the “Landscape” mode. The default is the usual vertical orientation, but books are usually in a horizontal format. It is also important to select the “book” print type in the drop-down menu, which will automatically distribute the existing text in the required form for correct reading of the book.
Now it’s enough to use the tips that we have already mastered, namely double-sided printing, and everything is ready to print a book on a printer. You can create and show off your own books to your friends.
Thus, we have learned to perform absolutely all aspects of printing. With such a base of tips and instructions, you will never get into trouble and will be able to perform any required operation with documents!
What you should know in advance
The proposed set of tools in the case of the editor in question from Microsoft is more than standard. However, there are a number of specific features that you should be aware of.
There are various nuances when choosing parameters, which affects the final result. All the features will be discussed below so that you get the best solution to the issue that has arisen.
Additional Information. If we clarify what nuances there may be, it is worth noting that in the case of Word you are able to print pages of various formats. This is where certain features arise.
How to bring back the Classic Photo Viewer in Windows 10?
We offer our readers three ways to set up Classic Viewer as the default program for viewing your favorite images and photos.
- The first method: will allow you to have a ready-made Reg file on hand, you can always restore the photo viewer on several computers.
- The second method is faster, just run the command in Windows Powershell.
- The third way is to use an application and a library
Microsoft has not removed Viewer from Windows 10, you cannot set Windows Photo Viewer as default in Settings as it is not in the list of default apps. And in the classic control panel you can only associate files with the TIFF extension. Let's fix this limitation in Windows 10 and enable the good old Photo Viewer for everyone."
Windows Photo Viewer can be activated by editing the registry. .
This can be done manually or using a Powershell command.
Enable Windows Photo Viewer using a ready-made Reg file.
To save time, I have added a ready-made log file below, now there is no need to make complex changes to the registry manually, all you need to do is download the archive, unzip and run the file: Windows 10 Photo Viewer .reg.
Step 1: Download Windows 10 Photo Viewer.zip and unzip it.
Step 2: In the resulting folder, find and run the file - “ON_Windows_10_Photo_Viewer”
Step 3: Confirm the UAC prompt and add information.
Once launched, all required keys and values will be automatically added to the registry and you will be notified (see screenshot below).
Step 4: Now open Windows Settings by pressing the Win + I keyboard shortcuts or by clicking the gear icon in the Start menu.
Step 5: Go to the “Applications” → “Default Applications” settings group. On the Default Apps page that opens, find the Photo Viewer section, click the default app icon, and select Windows Photo Viewer from the drop-down menu. See screenshot below:
Or you can right-click any image and select "Open With" from the context menu
In the "How would you like to open this file" window that appears, select "View Windows Photos."
Note: If you want to return to the default settings, the rollback file is present in the archive.
Method 2 – Enable classic photo viewer using Powershell.
This method differs from the first only in the default application setting, which is performed for each image type.
Step 1: Right-click the Start menu.
Step 2. In the context menu that appears, select Windows Powershell (administrator) - Important!
Step 3: Copy and paste the following commands:
Note. Copy and paste all the commands at once, including the # symbol, and press Enter.
If (-No (Test-Path "Registry :: HKEY_CLASSES_ROOTApplicationsphotoviewer.dll")) {New-Item -Path "Registry :: HKEY_CLASSES_ROOTApplicationsphotoviewer.dll" -ItemType RegistryKey -Force} If (-Not (Test-Path "Registry :: HKEY_CLASSES_ROOTApplicationsphotoviewer.dllshell ")) {New-Item -Path" Registry :: HKEY_CLASSES_ROOTApplicationsphotoviewer.dllshell "-ItemType RegistryKey -Force} If (-Not (Test-Pathphoto" Registry :: HKTEY_CLASSES_ROOKEY) -Registry :: ROOKEY_CLASSES_RO OTApplications -ItemProperty -path " Registry :: HKEY_CLASSES_ROOTApplicationsphotoviewer.dllshellopen" -Name "MuiVerb" -Type "@String" -Value.dll -Not (Test-Path "Registry :: HKEY_CLASSES_ROOTApplicationsphotoviewer.dllopencommand") Registry :: HKEY_CLASSES_ROOTApplicationsphotoviewer.dllshellopencommand "-ItemType RegistryKey -ForceKey - ForceKey -ForceKey -ForceKey -Force-Path ationsphotoviewer.dllshellopencommand" -Name "(default)" -Type% "ExpandStrys%" -Root tem32rundll32.exe `"% ProgramFiles% Windows Photo ViewerPhotoViewer.dll`, ImageView_Fullscreen% 1″ If (-No (test path) "Registry::HKEY_CLASSES_ROOTApplicationsphotoviewer.dllshellopenDropTarget")) {New-Item -Path "Registry::HKEY_CLASSES dllshellopenDropTarget" -ItemType RegistryKey -Force" String "-Value" {FFE2A43608ACC-56B995 Not (Test- Path "Registry :: HKEY_CLASSES_ROOTApplicationsphotoviewer.dllshellphotoprint")) {New-Item -Path "Registry :: HKEYROpps (Test -Path "Registry :: HKEY_CLASSES_ROOTApplicationsprintphotoviewer.dll") {New-Item -Path "Registry :: HKEY_CLASSES_ROOTApplicationsphotoviewer.d" llshellprintcommand" -ItemType Reg istryKey -Force} Set-ItemProperty -Apppath "Registry::HKEY_CLASS) -Type "ExpandString" -Value "%SystemRoot%System32rundll32.exe`"%ProgramFiles%Windows Photo ViewerPhotoViewer.dll, image View_Full%1″ If (-No (Test-Path "Registry:: HKEY_CLASSES_ROOTApplicationsphotoviewer.dllshellprintDropTarget")) {New-Item -Path "Registry:: HKEY_CLASSES_ROOTApplicationsphotoviewer.dll-shellprintDropTarget" -ItemTypeSShellProistry: HKEY_CLASSES_ROOTAKEYShellProgram -Type "String" - Value "{60fd46de-f830-4894-a628 -6fa81bc0190d}" #
Step 4: After executing the command, close the Powershell window and open the images folder.
Step 5: Right-click on any image and select "Open with" → "Select another application" from the context menu."
Step 6: In the window that opens, find and click “Windows Photo Viewer.” To ensure that your photos and images always open using “Windows Photo Viewer”, don’t forget to check the box like in the screenshot below:
All! Done, go to your images or photos folder and double click on any image, the image will open in “Windows Photo Viewer”!
Opera
This browser is visually similar to Google Chrome. Therefore, we will not go into details, since we have already done this above. If you are planning to print pages from this browser, we recommend that you go further where we have told you how to print in Google Chrome browser. We have done a complete review of this procedure for this browser and the information that is there will be very useful to you.
When you press "Ctrl" + "P" the Print Settings window will appear. Here you need to check the “Simplified page” checkbox (to remove unnecessary elements before printing) and select the quality “600 600”. After this, you can safely click “Print”.