There comes a time in the life of every Windows user when they need to extensively clean the operating system of various debris. Useless temporary files can be stored on your computer for years, and installing major Windows updates leads to the creation of backup files for entire gigabytes - and the most interesting thing is that, with a high degree of probability, you will never need them for their intended purpose. There are many more types of data on this list, the removal of which will help free up a significant amount of space on your hard drive.
Telegram channel of the creator of Trashbox about technology
Telegram channel of the creator of Trashbox about technology
I have collected the main options that you should pay attention to if you need to quickly and without problems return full memory. No third party tools are required.
Use the OS built-in disk cleanup utility
For large-scale cleaning, it is better to use the system utility of the same name “Disk Cleanup”: in Windows 10 it is available in the “Settings” application (“System” → “Memory”), in earlier versions of Windows - through the “Properties” menu by right-clicking on used disk in Explorer. The largest files are located in the “Temporary files” category. These are previous Windows installations, update log files, delivery optimization files, Internet files, diagnostic data, and more. Collectively, deleting them will help free up tens of gigabytes, so it is recommended to frequently check how much has accumulated over the past few months and promptly remove all garbage.
Clean up the services
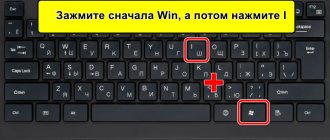
Programs can also start automatically using services. To disable unnecessary programs in services, press Win-R and run the “MSCONFIG” command.
In the window that opens, go to the “Services” tab. Here you need to check the box next to the “Do not display Microsoft services” function so as not to accidentally disable important services that are part of the operating system.
After that, study the list of installed services and disable unnecessary ones. To do this, uncheck the boxes next to unnecessary services and save the settings by clicking on the “Apply” button.
This method works the same in both Windows 7 and newer Windows 10 and Windows 11.
Delete history, caches and other data in the browser
Any website visited is saved in history, and its elements (images, videos, sounds, etc.) are cached for faster loading in the future. This is definitely useful in the context of bookmarks, since favorite websites are opened dozens of times every day. But for one-time visits to random pages, such browser “concern” turns into a huge data log, capable of occupying a considerable piece of the computer’s total memory. See how things are going for you and clean out what you consider unnecessary. Definitely free up a few hundred megabytes, at a minimum. And a nice plus: today most browsers support deleting data when closing. The application itself will clean the selected items.
Method 4: Uninstall Tool
This tool allows you to remove desktop and universal applications, as well as hidden and system components such as Microsoft Visual C++, IEData, MPlayer2 and so on. The advantage of this utility is that it supports batch removal of unnecessary and unused applications, however, this option is only available in the registered version of the application.
- Install and run the Uninstall Tool.
- Hold down the Shift key, select one by one in the list of programs that you want to remove, and click “Batch forced removal” in the left panel.
- By checking the “Yes, I understand all responsibility” checkbox, confirm the deletion procedure in the dialog box that opens.
- Click "Delete" in the next dialog box.
Like Revo Uninstaller, Uninstall Tool can be used to remove individual applications. To remove one specific program, select it with the mouse and click “Uninstall” or “Force removal” in the left panel if you cannot remove the program in normal mode.
We are glad that we were able to help you solve the problem. In addition to this article, there are 12,719 more instructions on the site. Add the Lumpics.ru website to your bookmarks (CTRL+D) and we will definitely be useful to you. Thank the author and share the article on social networks.
Describe what didn't work for you. Our specialists will try to answer as quickly as possible.
Remove unused accounts and their data
In addition to the primary owner, the computer can also be used by family members and friends. Naturally, everyone has a separate desktop, their own set of files and different tasks. For this purpose, additional accounts are usually created, each of which stores its own data. If you no longer provide access to other users, delete their accounts. All personal files will be deleted, including documents, photos, music and downloads.
How to delete family accounts and data:
- Open the Settings app.
- Go to the "Accounts" section.
- In the side menu, click "Family and other users."
- Select an account that is no longer in use and click the Delete button.
- Confirm your choice by clicking the “Delete account and data” button.
Removing duplicates
From time to time, duplicate files may appear on your hard drive. Today you downloaded a movie, and six months later you forgot about it and downloaded it again, you download music and then lose it, you download photos from your phone to your computer several times. All this leads to an accumulation of duplicates on the computer.
It is very difficult to manually search for identical files, so let's use special programs.
We return to the CCleaner program we are already familiar with and open the Service section, tab Search for duplicates. There are many different parameters that you can customize to suit your needs. For example, I don’t configure anything, I just click “Find”.
After a few minutes, the search for duplicate files will be completed. After carefully studying, I see that I have a couple of identical videos on my computer that can be safely deleted.
I don’t go into detail here, because the program found a lot of files and to remove all the junk you need to spend a lot of time on analysis. But I think the essence of this function is clear!
Move some local files to the cloud
The free plan in Microsoft's OneDrive service offers 5 GB of cloud storage. The basic volume in a similar Google Drive is 15 GB. The first is already built into Windows 10 for all users, the second can be simply integrated by turning it into a folder in Explorer. That turns out to be 20 GB of additional memory - why not find a practical use for it? Now many people have fast and stable Internet, you can convert some local files to the cloud and open them online. Surely there will be some non-permanent files that are required at a certain moment - the cloud is an ideal option for them.
How to enable OneDrive files on demand:
- Click the OneDrive icon in the lower right corner of the taskbar.
- Click Help & Options and go to Options.
- In the “Files on demand” section, check the “Save space and download files as you use them” checkbox.
- Click "OK" to save the settings.
After that, move the files to the OneDrive folder and make them available only online, that is, with an Internet connection. Follow these steps:
- Open File Explorer.
- Go to the OneDrive folder in the sidebar.
- Select files and folders.
- Right-click and click Free up space.
We replace thermal interfaces.
Part No. 1
The thermal interface is a layer of heat-conducting material that is located between the cooled surface and the heat-removing component (for example, a radiator).
The most popular thermal interface in a computer is thermal paste or thermal pad. Their purpose is to fill gaps not visible to the naked eye on the component requiring cooling and transfer heat to the heat sink element.
This is why thermal paste is applied to the central processor. Its correct application and condition are the main guarantor of normal temperature. During operation, thermal paste loses its properties and original structure, thereby beginning to perform its function worse. That is why it requires a stable replacement frequency.
The same applies to the video card, chipset (north bridge), but in their cases this procedure is performed somewhat less frequently and most often by specialists.
In case of CPU overheating. It begins to independently try to reduce the temperature by increasing the power of the fan. And also by reducing frequencies, which is called throttling. This same throttling can often occur during the execution of heavy applications or games, which begin to produce much lower performance for this reason.
Part No. 2
To perform this procedure on the processor, you will need to remove the cooling cooler from it. There are a variety of cooling system placement options and their types. So be sure to check yours directly online. Most often, you need to unscrew four screws or remove two clips. Before removing, be sure to disconnect the fan wire from the CPU_FAN connector on the motherboard.
After unscrewing the bolts or removing the fixing clips, the cooler should be removed from the processor without much effort. If this does not happen, there is a possibility that the processor is stuck to the heatsink core. Do not use force under any circumstances! You can tear the processor out of the socket in this way and damage the legs. I will demonstrate an example of a torn processor again from my personal archive.
To avoid this, you need to try to twist the cooler in different directions. A little left and right, but without force. So it will come out of the connectors sooner or later.
Part No. 3
After the cooling system is dismantled. It is necessary to clean the old thermal paste from the cooler core and processor. To do this, use a microfiber or cloth soaked in alcohol. After removing the thermal interface, wipe the surfaces dry.
Now you can apply a new one. You can buy it at any store that sells components. You shouldn’t skimp on this and take the cheapest one, for example KPT-8. It performs its function poorly in this segment and is not intended for computers. Use proven options. Personally, I recommend the Arctic Cooling MX3\MX4 or the more budget-friendly Deepcool Z3\Z5.
It should be applied a little. The basic principle is to create the thinnest possible layer over the entire surface of the processor heat-dissipating cover. A small drop will be enough.
A plastic spatula is almost always included with the paste. It's for even distribution, so use it. If for some reason you don’t have one, then an unnecessary plastic card will always do.
Try to do this as carefully as possible. Without staining adjacent elements and motherboard textolite. Absorb the excess onto a paper towel. There is no need to apply anything to the cooler radiator core itself. After application, place the cooler in its rightful place. And then, do not forget to connect the wire to the CPU_FAN connector.
Part No. 4
Be sure to check the reliability of the fastening and connection to avoid unnecessary overheating. During “idle” (when the computer is not doing any serious work), normal temperatures range from 30 to 45. (Depends on the CPU itself. Laptops may have higher values). If it is larger, then this is a reason to think about the cooling efficiency.
There's a great little app to keep an eye on your CPU temperature. It carries out constant monitoring. It's called CoreTemp and is completely free.
The application has a fairly simple and intuitive interface. And also in the background it can show the temperature of each core in the tray (panel with a clock). As you can see in the screenshot above, at the moment of idle time my processor has a temperature of 34 degrees. This is an absolutely normal value.
Disable hibernation if you don't need it
Windows 10 saves a bulk of data to your hard drive before each shutdown to preserve the current session. When you start your computer again, the hibernation cache allows you to continue where work left off in the past. Although this is a very convenient feature, it is not useful to everyone and storing information in the hiberfil.sys file requires many gigabytes of space. If your computer is running low on memory, deleting the hibernation cache will free up space for more significant files.
How to disable hibernation cache:
- Open Command Prompt, be sure to use Administrator mode.
- Type the command “
powercfg /hibernate off ”
and press Enter. - Ready! The hibernation cache has stopped working and will no longer store files.
If your computer is running on network power and you are not using sleep mode, then:
- Open the Settings app.
- Go to the "System" section.
- In the side menu, click "Power and sleep."
- Under the Sleep Mode heading, select Never from the drop-down lists and save your changes.
- Open the Run utility (Windows key + R).
- Enter the command “
powercfg -h off ”
. - Click "OK" to save the settings.
After completing the above, hibernation mode will be disabled and the hiberfil.sys file will be deleted.
Why does my computer slow down?
It's certainly nice to work on a new PC or laptop, or if you've just installed a new operating system. Everything works quickly and does not slow down. But over time, “brakes” begin, something doesn’t open right away, gets stuck, sometimes freezes or even turns off as a result of overheating . There may be several reasons for this. The most basic:
- Body contamination: dust, crumbs, wool...
- The processor heats up
- Unnecessary programs clog RAM,
- Information “junk” has accumulated on the hard drive,
- Viruses and various malware slow down Windows.
What to do about it? There is nothing wrong, anyone, even a novice PC or laptop user, can repeat what is described below. First, you need to clean your computer from dust. You will need a damp cloth, a dry cloth, cotton swabs, a vacuum cleaner, and if possible, a can of compressed air, but this is not necessary. And if you have a laptop, then most likely there will be no dust there, which means there is no need to physically clean it. The fact is that the laptop case is designed in such a way that dust practically does not accumulate there, and sometimes it is difficult to disassemble it, so it’s better not even worth it.
For subsequent cleaning, we will use various programs to clean the operating system, so be prepared for the fact that you will need to install them.
Remove offline maps, unnecessary languages and components
Check if you have installed offline maps (city or country) for Windows Maps, extra language packs (interface or system languages) and additional components (Windows Media Player, Windows Hello facial recognition, additional fonts, remote administration tools) on your computer , mathematical symbol recognizer, etc.). Feel free to remove unused items and other things that you may even be seeing for the first time.
How to delete offline maps : “Settings” → “Applications” → “Offline maps” → Delete all maps.”
How to remove localization packs : “Settings” → “Time and language” → “Language” → “Preferred languages” → “Delete”.
How to remove additional components : “Settings” → “Applications” → Applications and features” → “Applications and features” → “Additional components” → “Uninstall”.
Removing duplicates
From time to time, duplicate files may appear on your hard drive. Today you downloaded a movie, and six months later you forgot about it and downloaded it again, you download music and then lose it, you download photos from your phone to your computer several times. All this leads to an accumulation of duplicates on the computer.
It is very difficult to manually search for identical files, so let's use special programs.
We return to the CCleaner program we are already familiar with and open the Service section, tab Search for duplicates. There are many different parameters that you can customize to suit your needs. For example, I don’t configure anything, I just click “Find”.
After a few minutes, the search for duplicate files will be completed. After carefully studying, I see that I have a couple of identical videos on my computer that can be safely deleted.
I don’t go into detail here, because the program found a lot of files and to remove all the junk you need to spend a lot of time on analysis. But I think the essence of this function is clear!
Empty the trash and delete old downloads
Of course, the most obvious, but no less effective way is to regularly empty the trash and monitor the “Downloads” folder. To simplify the procedure, I advise you to enable “Memory Control”, then the process will be automated. The computer will automatically free up space only at the right time when there is not enough space on the disk. The function deletes unnecessary temporary files, the contents of the recycle bin and the downloads folder. Cleaning can also be set up according to a schedule you set: for example, not specifically when memory runs out, but daily or every month, while files from the trash and downloads can be deleted even more often - after a day or two weeks (deadlines include 30 and 60 days).
Try third-party programs to clean Windows
Specialized programs with the appropriate tools can effectively clean Windows of debris. They provide more advanced diagnostics of the operating system and identify not only unwanted files. In addition to standard methods, in most cases scanning also includes the detection of problems affecting the speed of operation, errors leading to software failures, removal of damaged keys, invalid registry entries and duplicates. Additional features include checking browser extensions and correctly compressing the WinSxS system catalog.
Recommended programs:
- Piriform СCleaner . Cleaning system directories and crash dumps, temporary files, registry, old files and logs, recycle bin, application and browser data, checking browser extensions, managing startup objects, monitoring Windows processes, uninstalling applications.
- Wise Disk Cleaner . Scan the disk for junk files, clean system directories and crash dumps, Windows components, temporary files, outdated backups, registry, old files and logs, recycle bin, application and browser data.
- Dism++ . Creating and managing system images, managing startup objects, configuring Windows, cleaning system directories and crash memory dumps, temporary files, search history and installation of updates, Microsoft Store service data.
- Auslogic BoostSpeed . Cleaning temporary files, registry, old files and logs, recycle bin, application and browser data, Microsoft Office caches, system diagnostics and disk scanning for junk files, uninstalling applications, managing startup objects, reducing the size of Windows, defragmenting disks, optimizing system settings .
Cleaning the registry.
What is a registry? Simply put, this is a kind of operating system database with settings and various parameters. A very important element of Windows. And when it is cluttered, the computer also slows down, because all the programs that we install there also register their settings, and when we do something, the parameters in the registry also change. In general, to clean your computer, you also need to clean it.
Ccleaner will help us here ; it does an excellent job with this.
- Launch the program and select the “Registry” tab.
- Here too, first we do the analysis.
- Now click “Fix”. A window will appear asking you to make a backup copy of the Registry, we agree, it won’t hurt.
- We wait until the end and reboot the PC.
There is also a program that I really like and use constantly - Wise Registry Clesner . It doesn't even require installation. What are the advantages:
- Cleans the Registry, also analysis, then cleaning.
- Optimizes the Registry
- Defragments the Registry
I do all three points, a powerful program.