Most computers and laptops support the connection of many peripheral devices, including a microphone. Such equipment is used for data entry (recording sound, conversations in games or special programs like Skype). The operation of the microphone in the operating system is configured. Today we would like to talk about the procedure for increasing its volume on a PC running Windows 10.
Select your default microphone.
The first thing on this list is also the most important. If you're having problems with your microphone where it doesn't seem to work in some programs but works in others, this could potentially fix it for you. Setting a default microphone ensures that Windows knows which microphone you want to use in all programs.
To set your default microphone, follow this simple guide below.
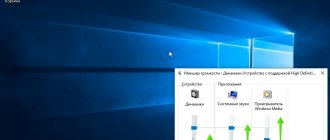
Right-click the Speakers icon on the taskbar and select Open Sound Settings.
In the right pane, click Sound Control Panel.
In the new window, select the "Recording" tab on the top panel. Now right-click on the microphone you want to set as your default microphone and select “Set as default device.”
How to set up an external microphone when connecting to Windows 10 for the first time?
Before choosing an installation method, you need to make sure that the equipment is connected. If the PC does not display it on the screen, then you can try to turn off the external equipment and then connect it back after a couple of minutes.
The first action is to open a window with parameters. Click on the “System” button with the mouse and select “Sound”.
Stages of first microphone setup.
- Selecting an input device.
- Selecting a recording device or microphone.
- Checking installed equipment.
It’s worth finding out how the voice is recorded and whether the default volume is appropriate. To do this, you need to enable built-in audio recording. It is also recommended to look at the blue segment that appears in the “Microphone Test” window when you click on this button. It should go down and up when a person speaks. If the position of this segment does not change, then most likely you will have to reinstall the drivers.
It is also worth choosing the sampling frequency and bit depth. The tenth version of the OS offers two options that operate in general mode. It is recommended that you agree with the actions described below by checking the boxes next to them.
Additionally, it is worth giving access for automatic troubleshooting and adding a protocol by which the system operates in the event that external equipment fails. In this case, you cannot disable the functions manually. This additional step will allow the administrator to log in via remote access and deactivate the equipment.
Increase the microphone level.
If you feel like people can't hear you properly when using your microphone, it may be because the microphone level is too low. Sometimes this happens when other programs take control of your microphone and sync the volume with theirs.
To increase the microphone audio level, follow the same steps as above by going to Sound Settings > Sound Control Panel > Recording.
Now double-click your default microphone (or the one whose level you want to increase).
From the top panel, select Levels. Now move the microphone slider all the way to the right to maximize the microphone level.
Troubleshooting
This system function will help you configure and improve sound quality. To activate it:
- In the Control Panel, select Troubleshooting.
- Activate the Audio Troubleshooter tool.
- A troubleshooting window will open. Click "Next".
- Select from the proposed options the device that the program will scan. Click on the “Next” button.
- The problem detection process will begin. Make the required changes by following the on-screen prompts.
Also, to diagnose a specific failure, you can follow the path “Settings” - “Update and Security” - “Troubleshooting”.
Boost your microphone
Some microphones have an additional option to increase their level. If your microphone does this, you'll see an option right under "Microphone Level." Raising the microphone level too much can cause static electricity to build up on your microphone. Therefore, it is important to balance the microphone gain accordingly.
Disable enhancements.
Windows 10 has some pretty cool audio improvements. While they work well most of the time, they have been known to crash when used in third-party applications. By default, Windows 10 has enhancements enabled.
To disable microphone enhancements, follow the instructions above to go to Sound Settings > Sound Control Panel > Recording. Double-click the default microphone you want to configure.
Now, from the top bar, select “Enhancements.” Check the box next to "Disable all sound effects." This will remove all microphone enhancements. In addition, you can uncheck the boxes for each of the improvements.
Free sound recorder
How to set up a microphone in Windows 10 in other ways? Use third-party applications to capture and record audio. There are a lot of such programs, but we will mention only one of them - Free Sound Recorder. This simple free application can record sounds from various sources, including from a microphone, and it is possible to configure the source parameters. Let's look at setting up a microphone in Free Sound Recorder using a specific example.
Launch the program and click the speaker icon (Show mixer windows). Select your microphone from the Recording Device drop-down menu and adjust volume and balance as needed. Then go to the application settings and switch to the “Automatic Gain Control” tab.
By checking the checkbox of the same name, adjust the parameters of the incoming signal manually. There are only three settings: Low and High Levels and AttackTime. The last option can be left unchanged, but you need to “play around” with the levels to achieve optimal recording quality.
Enable FFP if available.
As we mentioned above, Windows 10 has some useful microphone improvements. One of them is Far Field Pickup or FFP. This feature increases the microphone volume so your voice can be heard from greater distances. If you feel like people are having trouble hearing your voice during a call, try turning on FFP on your device. Note. Not all Windows 10 devices have FFP.
To enable FFP, go to the Enhancements tab as in the guide above and check the box next to Far Field Matching. Note. Enabling FFP will automatically disable BF (beamforming).
Once enabled, you can even talk across the room and your microphone will be able to pick it up.
Other solutions
Here is an example of a question to Microsoft, where the user, as often happens now, solved his problem himself - answers.microsoft.com/en-us/windows/forum/windows_10-hardware/noise-from-microphone-in-windows-10/ f658298b-ddac-414f-b992-20d684f01001. TP tells him about the troubleshooting wizard, but the guy himself simply solves his problem when working with Adobe Audition. Here's what he says:
- I tried different microphones, but the noise did not go away.
- Then all sound devices were turned off.
- Then I uninstalled the microphone driver and installed it again.
- I turned on all the sound devices and the noise disappeared.
Here is a screenshot of the question.
And an automatic response to it.
The only thing that is not clear is whether he removed the sound devices or simply set the volume to zero. Try both, maybe it will help! Similar advice can be found on the Microsoft website (blogs.technet.microsoft.com/mediaq/2015/07/30/windows-10-audio-troubleshooting-tips/). There, however, we are talking only about the driver for playback.
6. Prevent apps from taking control
Windows 10 has an option that allows apps to take exclusive control of your microphone. The idea is that you don't have to swap two volumes. For example, when you change the microphone volume in a Skype call, it automatically changes the volume on your computer. However, the problem is that it leaves the setting set by the application, not what you set.
To resolve this issue, go to Sound Settings > Sound Control Panel > Recording and double-click your microphone. Now select the Advanced tab from the top bar. Under Exclusive Mode, uncheck "Allow apps to take exclusive control of this device."
Another option, “Give priority to apps in exclusive mode,” will be automatically cleared.
Why is it quiet?
There are several common reasons for this circumstance:
- individual operating system settings. For example, the user has set a certain sound limit when connecting external devices, microphones, headsets, etc.;
- blocking some computer functions. Occurs during a system failure of the operating system. Eliminated by restarting the PC or using an OS recovery tool;
- viral infection. Viruses from the Internet can get onto your desktop computer or laptop, which will negatively affect the functioning of the device. Therefore, if the user is unable to increase the sound on headphones using the tool built into the system, it is worth scanning the PC for malware using a licensed antivirus or a specialized utility;
- individual feature of the microphone. Perhaps the volume value set on the gadget is maximum, and it cannot be increased even more;
- human factor. Often OS Windows 10 users adjust the volume of the connected microphone only on the PC itself, while forgetting to increase this parameter on the headset;
- Microphone or amplifier failure. Malfunctions in the operation of the device can also cause weak sound or lead to the microphone itself increasing the volume of Windows 10.
Change bitrate to DVD quality.
If you are concerned about quality, you can increase the bitrate of your microphone. However, it should be noted that higher bitrate means larger size. This means you'll need more data to stream audio over the Internet. However, the difference is pretty small and you don't have to worry about it unless you're recording.
To change the bitrate, follow the above method to go to the Advanced tab in the microphone settings. Now, under Default Format, click on the drop-down menu.
Your settings will depend on your microphone. Essentially, the higher the bitrate, the better the audio quality. Select "2 channel, 16 bit, 480000 Hz (DVD quality).
Use a third party app.
If the above settings just don't work for you, you can go ahead and install an app that will allow you to boost your microphone beyond what Windows allows you to do. However, it should be noted that these apps can only boost your microphone to the level that the microphone allows. If you don't see any change in your mic level, it probably means your mic can't be boosted further.
The app we will be using is called APO Equalizer . It's free and easy to use. Download the application to your computer. Launch the application as usual. When you reach the “Configurator”, you will be asked to select the device on which you want to install the application. Select "Capture Devices" from the top bar, then select the microphone you want to amplify. If you're not sure, select them all. You will need to reboot your system for the changes to take effect. Be sure to save all your work before restarting your computer.
Now run the application by specifying "Configuration Editor" in "Program Files" (default). From the Device drop-down menu, select your microphone.
The Preamp should be loaded by default, but if not, click the green + symbol and go to Basic Filters > Preamp.
Continue and increase the gain on the knob until you are satisfied with the level. You will see that this matches the graph below.
Update your drivers.
Outdated drivers are the root cause of many problems in Windows 10. Luckily, Windows 10 automatically updates your drivers. However, it could be that a particular driver was missed.
You can easily update your audio drivers manually. Right-click the Start menu and go to Device Manager.
Now go to Audio Inputs and Outputs and right-click on your microphone. Select Update Driver.
Now select “Automatically search for updated driver software.” Windows 10 will check online for the latest drivers and download them for you.
OK it's all over Now. We hope this list has helped you get the most out of your microphone. If you have any questions, feel free to contact us in the comments below.
Connected:
Via Device Manager
If the device is missing in the “Sound” properties (see step 3), you need to see whether the driver is installed or not:
- Right-click on the Start icon and select Device Manager. Find “Sound, gaming and audio devices” in the list and expand this section.
- The audio driver usually comes first on the list and is called Realtek High Definition Audio (RHDA).
- Then expand the “Audio inputs and audio outputs” section. There should be a microphone on the list.
- If there is an icon with a down arrow to the left of RHDA, it is disabled. To enable it, right-click on it and activate the “Enable device” option.
Important! When there is a yellow triangle next to RHDA in “Sound, Game and Audio Devices”, then the problem lies in the driver and you need to update or reinstall it.