In Microsoft Word you can work not only with text, but also with tables, graphs, and pictures. In this article we will look at the first, or more precisely, how to remove unnecessary borders in a table in Word.
This can be useful if you need to place data on a sheet in a chaotic order, when you are doing a crossword puzzle, or working with complex material that contains a lot of data. I will show it in Word 2010, but everything will be the same for you if you have 2007 or 2013 Word installed.
You can read a detailed article on how to make a crossword puzzle in Word by following the link.
Let's take this example. This is where I will show how to make unnecessary straight lines transparent.
Let's remove all internal lines for some cells. Select the desired range, then go to the tab “Working with tables” - “Design”. In the Table Styles group, click the arrow next to the Borders button. In the drop-down list, select "Internal boundaries".
After this, the selected squares will not be limited by lines.
If you are interested in how to make a completely invisible table in Word, then you can read the detailed article at the link.
You can not delete everything in this area, but only horizontal lines. To do this, select “Internal horizontal” from the list.
This will leave outer and vertical lines between the columns.
Now let's look at how to erase the table border for the cell that is in the middle. Place the cursor in the desired square, then click on the arrow next to the “Borders” button and select “External” from the list.
After this, the lines around the selected square will be removed.
To remove the bottom edge, place the cursor in the desired square and select “Bottom border” from the drop-down list.
The bottom line for the selected cell will be removed.
If you want to remove it not for one, but for several squares, then select them, then select the item mentioned above in the drop-down list.
For example, I will completely remove the bottom in the first line. Select it, then select the same item from the drop-down list.
After this, the straight line between the first and second lines will disappear.
I hope everything is clear to you. Select the desired cell, place the cursor in it and in the “Borders” drop-down list, select what you want to remove. If you need to hide them for a certain range of cells, then first select them.
Hiding all or specific table borders in Microsoft Word
The multifunctional text editor MS Word has in its arsenal a fairly large set of functions and ample opportunities for working not only with text, but also with tables. You can learn more about how to create tables, how to work with them and change them in accordance with certain requirements from the material posted on our website.
So, as you can already understand by reading our articles, we have written quite a lot about tables in MS Word, providing answers to many pressing questions. However, we have not yet answered one of the equally common questions: how to make a transparent table in Word? This is exactly what we will talk about today.
Start
Naturally, you need to run the program itself. Someone may still have Office 2003. This article will discuss how to create a table in Word 2010 version. The 2003 interface is very different from later versions of the program. They are intuitive, there is no need to search for this or that function: opening each tab, the user almost immediately sees all its capabilities.
So, after starting the program, a blank sheet will be displayed on the monitor window. Now the user needs to go to the “Insert” tab. The top one will display icons of objects that can be placed on the sheet. Among them there are tables.
Making table borders invisible
Our task is to hide, but not delete, the borders of the table, that is, to make them transparent, invisible, unnoticeable when printing, while leaving all the contents of the cells, like the cells themselves, in their places.
Important: Before you start hiding table borders, you must enable the grid display option in MS Word, otherwise it will become very difficult to work with the table. You can do this as follows.
Enabling the grid
1. In the “Home” ( “Format” in MS Word 2003 or “Page Layout” in MS Word 2007 - 2010) in the “Paragraph” , click on the “Borders” .
2. Select “Display grid” .
Having done this, we can safely move on to the description of how to make an invisible table in Word.
Hiding all table borders
1. Select the table using the mouse.
2. Right-click on the selected field and select “Table Properties” .
3. In the window that opens, click the “Borders and Shading” .
4. In the next window, in the “Type” , select the first item “No” . In the “Apply to” , set the “table” . Click the “OK” in each of the two open dialog boxes.
5. After you complete the steps described above, the table border will turn from a solid line of the same color into a pale dotted line, which, although it helps to navigate the rows and columns and cells of the table, is not printed.
- Tip: If you turn off the grid display ( Borders ), the dotted line will also disappear.
Hiding some table borders or some cell borders
1. Select the part of the table whose borders you want to hide.
2. In the “Design” , in the “Bordering” , click on the “Borders” and select the desired option to hide the borders.
3. The borders in the table fragment you selected or the cells you selected will be hidden. If necessary, repeat the same action for another fragment of the table or individual cells.
4. Press the “ESC” to exit the table mode.
Hide a specific border or specific borders in a table
If necessary, you can always hide specific borders in the table without bothering with selecting a separate fragment or fragments. This method is especially good to use when you need to hide not only one specific border, but also several borders located in different places of the table, at a time.
1. Click anywhere in the table to display the main “Working with tables” .
2. Go to the “Design” , in the “Bordering” , select the “Border Styles” and select the white (that is, invisible) line.
- Tip: If the white line does not appear in the drop-down menu, first select the one that is used as the border in your table, and then change its color to white in the Pen Styles .
Note: In earlier versions of Word, to hide/remove individual table borders, you must go to the “Layout” , “Working with Tables” and select the “Line Style” “No Borders” option in the expanded menu .
3. The cursor pointer will change to a brush. Just click it in the place or places where you want to remove the borders.
Note: If you click with this brush on the end of any of the outer borders of the table, it will disappear completely. The internal borders surrounding the cells will be deleted individually.
- Tip: To remove the borders of several cells in a row, left-click on the first border and drag the brush to the last border you want to remove, then release the left button.
4. Press “ESC” to exit table mode.
We'll finish here, because now you know even more about tables in MS Word and know how to hide their borders, making them completely invisible. We wish you success and only positive results in the further development of this advanced program for working with documents.
We are glad that we were able to help you solve the problem.
Add the Lumpics.ru website to your bookmarks and we will be useful to you. Thank the author and share the article on social networks.
Describe what didn't work for you. Our specialists will try to answer as quickly as possible.
Insert the table using Excel. Third way.
The third way is to insert an Excel table.
Most often, this method is used by those who are more comfortable working with Excel tables in the Excel program itself.
In principle, I think everything is clear here. Just add a table and fill it out.
How to create a table break in Word?
The easiest way is to place the cursor in the cell from which the division will begin and press Ctrl+Shift+Enter. All
How to delete a table in Word?
Everything is simple here. Place the cursor on the next line after the table and press erase on the keyboard until the table disappears
How to merge cells in a table in Word?
In order to merge several cells into one, you need to select the required number of cells with the left mouse button, then right-click on the selected area and select “Merge Cells”
How to make an invisible table in Word
In order to make the table invisible, you need to go to the “Borders and Fill” item. There are two ways to get into it.
First, place the cursor in any cell in the table -> select “Working with tables” -> Borders -> Borders and fill.
Second way. In any cell in the table, right-click -> in the menu that opens, select Borders and Shading.
Then the following window will open in front of you
In it, select Type -> No, and click OK (highlighted in the figure above).
If you need to remove borders not from the entire table, but from several cells, select them with the left mouse button, right-click on the selected area, and then do the same as described above.
That's all for today! I’ll tell you the rest about working with tables in Word in other articles.
How to remove table borders in Word
The multifunctional text editor MS Word has in its arsenal a fairly large set of functions and ample opportunities for working not only with text, but also with tables. You can learn more about how to create tables, how to work with them and change them in accordance with certain requirements from the material posted on our website.
Lesson: How to make a table in Word
So, as you can already understand by reading our articles, we have written quite a lot about tables in MS Word, providing answers to many pressing questions. However, we have not yet answered one of the equally common questions: how to make a transparent table in Word? This is exactly what we will talk about today.
Making table borders invisible
Our task is to hide, but not delete, the borders of the table, that is, to make them transparent, invisible, unnoticeable when printing, while leaving all the contents of the cells, like the cells themselves, in their places.
Important: Before you start hiding table borders, you must enable the grid display option in MS Word, otherwise it will become very difficult to work with the table. You can do this as follows.
Enabling the grid
1. In the “Home” ( “Format” in MS Word 2003 or “Page Layout” in MS Word 2007 - 2010) in the “Paragraph” , click on the “Borders” .
2. Select “Display grid” .
Having done this, we can safely move on to the description of how to make an invisible table in Word.
Hiding all table borders
1. Select the table using the mouse.
2. Right-click on the selected field and select “Table Properties” .
3. In the window that opens, click the “Borders and Shading” .
4. In the next window, in the “Type” , select the first item “No” . In the “Apply to” , set the “table” . Click the “OK” in each of the two open dialog boxes.
5. After you complete the steps described above, the table border will turn from a solid line of the same color into a pale dotted line, which, although it helps to navigate the rows and columns and cells of the table, is not printed.
- Tip: If you turn off the grid display ( Borders ), the dotted line will also disappear.
Hiding some table borders or some cell borders
1. Select the part of the table whose borders you want to hide.
2. In the “Design” , in the “Bordering” , click on the “Borders” and select the desired option to hide the borders.
3. The borders in the table fragment you selected or the cells you selected will be hidden. If necessary, repeat the same action for another fragment of the table or individual cells.
Lesson: How to continue a table in Word
4. Press the “ESC” to exit the table mode.
Hide a specific border or specific borders in a table
If necessary, you can always hide specific borders in the table without bothering with selecting a separate fragment or fragments. This method is especially good to use when you need to hide not only one specific border, but also several borders located in different places of the table, at a time.
1. Click anywhere in the table to display the main “Working with tables” .
2. Go to the “Design” , in the “Bordering” , select the “Border Styles” and select the white (that is, invisible) line.
- Tip: If the white line does not appear in the drop-down menu, first select the one that is used as the border in your table, and then change its color to white in the Pen Styles .
Note: In earlier versions of Word, to hide/remove individual table borders, you must go to the “Layout” , “Working with Tables” and select the “Line Style” “No Borders” option in the expanded menu .
3. The cursor pointer will change to a brush. Just click it in the place or places where you want to remove the borders.
Note: If you click with this brush on the end of any of the outer borders of the table, it will disappear completely. The internal borders surrounding the cells will be deleted individually.
- Tip: To remove the borders of several cells in a row, left-click on the first border and drag the brush to the last border you want to remove, then release the left button.
4. Press “ESC” to exit table mode.
Lesson: How to merge table cells in Word
We'll finish here, because now you know even more about tables in MS Word and know how to hide their borders, making them completely invisible. We wish you success and only positive results in the further development of this advanced program for working with documents.
We are glad that we were able to help you solve the problem. Describe what didn't work for you. Our specialists will try to answer as quickly as possible.
Did this article help you?
Insert
If you hover over the icon called “Table”, a drop-down window will appear. You can choose several construction options from it. Word will automatically display a table with ten columns and eight rows. You can reduce this amount, but you will have to increase it from the sheet.
To make the answer to the question of how to make a table in Word more clear, let’s build it, for example, with five columns and three rows.
In order to increase the number of rows, you need to left-click in any cell, then right-click. Select the desired command from the drop-down menu. Word offers several of them:
- add lines below;
- add lines on top;
- add a column to the left;
- add a column to the right.
Remove borders from a table in Word
Sometimes you may need to put text or objects into a table in Microsoft Word to simply arrange them the way you want. Placing them in a table is an easy way to align different elements. But usually when you do this, you don't want the cell borders to be visible so that the reader doesn't know there's a table there.
Removing table borders in a Word document is very easy.
First, select your table: Place your cursor in a table cell and then click the Layout tab (in the Table Tools contextual tab) > Next, click Select > Select Table.
Now that the entire table is selected, we can remove its borders. Go to the Design tab and click the down arrow to the right of the Borders button in the Table Styles group. Make sure you click the down arrow and not the button body: clicking in the main button area simply removes or adds the last border element used by that button. Word displays the last used border element on the button itself, so that's useful.
When you click the down arrow with borders, select the No borders option.
Voila - no boundaries. Be sure to select the table before deleting its borders. If you place the cursor only in a table cell and then delete the borders, they will only be removed from that cell. The rest of the table will retain its borders.
How to set borders using the Border Styles gallery
As in the first case, open the “Working with Tables” panel and the “Designer” tab. Select the table. The easiest way to do this is by clicking on the small cross located at the top left, which is called the “table movement marker”. Go to the “Framing”, “Border Styles” section. By default, Word offers you to choose a frame from one of 12 options, however, in this case, change their color and thickness at your discretion. In the “Borders” drop-down window, you can specify the location of lines that require changes (see Fig. 4).
Those interested can watch a short video explaining all the nuances.
Remove a page border - Office Support
Remove page border
To remove the border, change the Page Border setting to None
.
On the Design
select
Page Borders
.
In the Borders and Shading
in the
Apply to
, select the page (or pages) from which you want to remove the border.
In the Settings
select
No.
_
Select OK
.
If you have added a border to a page in your document, you can remove it by changing the Page Border setting to None
.
Go to Design
>
Page Borders
.
In the Borders and Shading
On the
Page Border
, click the arrow next to
Apply to
and select the page(s) you want to remove the border from.
In the Settings
select
No
and then select
OK
.
How to Add, Change or Remove a Page Border in Microsoft Word
Updated: 05/16/2020, Computer Hope
Microsoft Word gives you hundreds of page border options, allowing you to surround your page with a clean or beautiful border. You can also set a border to create a shadow or a 3D effect.
Add border
- Open Microsoft Word.
- Click the Page Layout
.
In Word 2013 and 2016, click the Design
instead. - In the Page Background
, click the
Page Borders
. - In the Borders and Shading
(shown below), if it's not already selected, click the
Page Border
. - Select Margin
if you want a square border around the page. - Select Style
you want on the page, which can be solid, dotted, or dotted.
Select the Color
and
Width
of the border. If you want to select an illustration to use as the border, click the down arrow for the
Art
. In the example below we are using hearts as the border.
By default, borders are applied to the entire document, which means that every page has the same border. Clicking the down arrow on Apply to
, you can select only the first page, the selected page, all pages except the first, and other options.
- Once you have selected all the border options you want to use in your document, click the OK
to apply the border.
Change border
- Open Microsoft Word.
- Click the Page Layout
.
In Word 2013 and 2016, click the Design
instead. - In the Page Background
, click the
Page Borders
. - In the Borders and Shading
(shown below), if it's not already selected, click the
Page Border
. - Make the desired changes to the border currently set for the document or page. You can change the border type in the Settings
, choosing
Box
,
Shadow
,
3-D
, or
Custom
. You can also change the style, color, and width of the order, and add or change the design used in the border.
- When you are finished making the desired changes to the border, click the OK
to apply the changes.
Remove border
- Open Microsoft Word.
- Click the Page Layout
.
In Word 2013 and 2016, click the Design
instead. - In the Page Background
, click the
Page Borders
. - In the Borders and Shading
(shown below), if it's not already selected, click the
Page Border
. - Select No
to remove borders from the page.
- Click OK
to remove the border.
.
How to remove a column format in Word 2007
- Software
- Microsoft Office
- Word
- How to remove a column format in Word 2007
Author: Dan Gookin
Word 2007 offers two ways to remove a column format: you can return to single column mode to remove the column format from only part of the document, or you can remove columns from the entire document.
Return to single column mode
This method prevents columns from being included in the page format and reverts you to standard single-column text in a Word 2007 document.
Place the insertion pointer where you want your columns to stop.
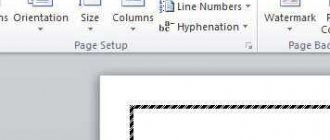
Click the Page Layout tab.
In the Page Setup group, select Columns → More Columns.
In the Columns dialog box, select Single in the Sets area.
From the Apply to drop-down list, select Forward to this point.
Stopping columns and restoring plain text to a single column.
Second way.
There is another way and it is not much different from the first, but it is a little more convenient and more accurate. Go to the same Insert tab
Click on “Table” again. And there you select “Insert table...”
In the window that opens, set the number of columns and rows in the table. Also select the column width:
- constant
- by content
- along the width of the window
Constant - this means that regardless of the amount of text in the cells, it will be the same size, even if part of the text is not visible.
By content - this means that the width will change depending on the amount of text in the cell, the more, the more
The width of the window means that the cells will be the size that the sheet allows.
If something is not clear, just try everything one by one and everything will become clear.
How to remove table borders in Word and leave the text?
The MS Word text editor has many functions, including creating tables and removing table boundaries.
- On the MS Word page, go to the “Home” tab and click on the “Borders” icon.
- In the menu that appears on the screen, select “Display grid”.
Select the table with the mouse and select “Table Properties”; in the window that opens, select “Borders and Fill”
On the screen, select “No”, and in the “Apply to” section, select “Table” and press the “Ok” button.
It turns out this picture without the table with the text saved:
You can remove table borders in the menu where the table borders are displayed. On the “insert” tab there is a table, table management, there you can remove the borders of the table, just make it invisible, you can return it again. There is also a pencil and an eraser - you can remove it “manually” with the eraser.
Draw a table (insert text into it):
Now right-click to bring up the context:
We set the boundaries - click on the one that needs to be removed and it disappears:
To do this, click on the triangle to open a drop-down menu with context.
You can also edit the table using the “table properties” context menu - this menu is always called up by right-clicking on the table:
After that, work with the table by selecting “table”, and there will be “borders and fill”.
Next, in the “Borders and Fill” window, where “border” is selected, select “sample” and edit the borders at your discretion. In this example, the bottom border is removed, like this:
There is no lower limit, so with everyone:
In Word it is quite convenient to work with tables, thanks to which we can easily place text in selected intervals, which ensures speedy execution of the document.
After the text is typed in the table, all of its borders or only part of them can simply be made invisible and to do this you need to click on the active “table” icon and select the required action. In this case, the text remains in the desired position and the tabular lines will not be visible.
If you need to perform special actions with the table, then the top panel for working in the table will help and additional options are provided there:
Basic parameters for changing faces
Before changing anything, we strongly recommend that you display the grid, otherwise you will simply lose your plate on the sheet. To do this, select it by clicking on the cross that appears in the upper left part, and there find the “Borders” field. In the drop-down menu there is an option to “show grid”. Let's select it. Now the lines of your table are replaced with a dotted line, which will not be visible when printed, but will provide convenient work with diagrams and cells.
Let's move on to the main thing - turning your circuit into “invisible”. You can change these parameters in the same menu that we introduced above. A drop-down menu lists all the changes you can apply. Among them you will find the “No Borders” option, which will completely remove them from the table.
Word 2003
It is worth paying attention to the fact that the formatting and stylization of text in different versions of Word will be slightly different from each other. This is normal.
How to remove borders in Word 2003? In this case, you will need to perform the following operations:
- Open a text document to be formatted.
- Go to the “Format” menu item. It is located on the toolbar at the top of the window.
- Click on the “Borders and Shading” line.
- Switch to the “Page” tab.
- Select "No" in the "Type" section.
- Save changes.
That's all. After completing the actions, the user will be able to see how the borders in the text document have disappeared. There is nothing difficult or incomprehensible about this.
Word 2007
How to remove borders in Word 2007? In this case, the process will resemble the previously proposed guidance. The difference lies in the graphical design of the tools.
The instructions for ridding a Word document of borders look like this:
- Go to the “Borders and Shading” section. It is located to the right of the Insert menu item. Before you begin, you will have to open the document you are editing.
- Click on the “Page Borders” button.
- Set this or that value. In our case, you will have to click on the “No” button.
As soon as the user completes the suggested steps, the boundaries in the text editor will be erased.
Word 2013 and 2016
Some people are interested in how to remove borders in Word from 2013 or 2016. These software versions differ significantly from their predecessors.
In such circumstances, the user needs to act like this:
- Open a text document in Word.
- Look at the "Design" tab.
- In the upper right corner, click on the “Page Borders” button.
- Specify the “None” option or click on the page thumbnail without borders.
You don't need to do anything else. In reality, everything is simpler than it seems. The suggested guides work flawlessly.
Table and its outline
How to remove table borders in Word? This is another simple task.
For example, you can do this:
- Draw a table and highlight it.
- Right-click and select the transition to the “Table Properties” section.
- In the menu that appears, click on the “Borders and Shading” button.
- Select the type of borders in the “Type” field. You can draw and erase them in the “Sample” field.
After confirming the action, the table boundaries will be erased. Instead, a lightened outline will remain, which automatically disappears when previewing the sheet or printing.
Important: you can enter the table editing menu by following the path “Format” - “Borders and Fill” - “Border”.
Creating a header
The table presented above is quite simplified. To enter data, you often have to merge cells. Let's look at how to make a table in Word with a header. To do this, the user must again select the number of columns and rows. Initially, their number may differ from the required one. We already know how to add a row or column.
For example, let's create a simple table. It will have six columns and seven rows.
The hat should eventually combine the top ones in pairs so that the number of remaining cells remains the same. To do this, select the first two columns in the top row. Then right-click and select the “Merge” command. The result will be a table like this:
Similarly, we combine the remaining columns in pairs. As a result, the table will look like this:
Removing frames in a Microsoft Word document
We have already written about how to add a beautiful frame to an MS Word document and how to change it if necessary. In this article we will talk about a completely opposite task, namely, how to remove a frame in Word.
Before you start removing a frame from a document, you need to understand what it is. In addition to the template frame located along the outline of the sheet, frames can frame one paragraph of text, be located in the header and footer area, or be presented as the outer border of the table.
Removing the regular frame
remove a frame in Word created using the standard tools of the Borders and Fill through the same menu.
1. Go to the “Design” and click the “Page Borders” (formerly “Borders and Shading” ).
2. In the window that opens, in the “Type” , select the “None” instead of “Frame” that was previously set there.
3. The frame will disappear.
Removing the border around the paragraph
Sometimes the frame is not located along the contour of the entire sheet, but only around one or several paragraphs. You can remove a frame around text in Word in the same way as a regular template frame added using the “Borders and Fill” .
1. Select the text in the frame and in the “Design” , click the “Page Borders” .
2. In the “Borders and Shading” , go to the “Border” .
3. Select the type “None” , and in the “apply to” select “paragraph” .
4. The frame around the piece of text will disappear.
Removing frames placed in headers and footers
Some template frames can be placed not only along the borders of the sheet, but also in the header and footer area. To remove such a frame, follow these steps:
1. Enter the header and footer editing mode by double-clicking on its area.
2. Remove the obsessive header and footer by selecting the appropriate item in the “Design” “Header and Footer” group .
3. Close the header and footer mode by clicking on the corresponding button.
4. The frame will be removed.
Removing a frame added as an object
In some cases, a frame can be added to a text document not through the “Borders and Shading” , but as an object or shape. To delete such a frame, just click on it, opening the object working mode, and press the “Delete” .
That's all, in this article we talked about how to remove any type of frame from a Word text document. We hope this material was useful to you. Good luck in your work and further study of the office product from Microsoft.
We are glad that we were able to help you solve the problem.
Add the Lumpics.ru website to your bookmarks and we will be useful to you. Thank the author and share the article on social networks.
Describe what didn't work for you. Our specialists will try to answer as quickly as possible.