Using Microsoft Software
Checking the installation of the package (verification)
1. Open in a browser - https://blogs.msdn.com/b/astebner/archive/2008/10/13/8999004.aspx (official Microsoft developer blog).
2. Download the utility that checks the functionality of the package to your PC: in the “Download location” subheading, click the second link - https://blogs.msdn.com/cfs-file.ashx/__key.
3. Unpack the downloaded archive: right-click → Extract all...
4. Run the file - netfx_setupverifier.exe with administrator rights.
5. Upon completion of initialization, in the utility window, in the “Product to Verify:” drop-down menu, select the package version.
6. To start analyzing the platform’s performance, click the “Verify Now” button.
7. If the Framework is working correctly, when the analysis is complete, the panel will display “Product verification succeeded!” (product successfully verified).
8. Click “Exit” to close the utility window.
Restoring the platform
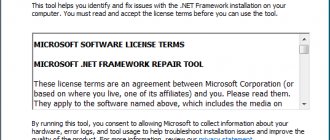
The Repair Tool utility automatically “repairs” the platform and then informs the user about the work done. Thus, Repair actions eliminate the need to reinstall the Framework if it “breaks”.
To restore a package using this tool, follow these steps:
1. On the same MSDN blog page where the link to download the verifier is posted (see “Checking the installation...” item No. 1), in the “Introduction” subheading, click on the second URL - https://go.microsoft.com/fwlink/ ?LinkID=246062.
2. In a new tab, on the official Microsoft website, under the heading “…. Repair Tool" click the "Download" button.
3. In the “Choose...” list, check the box for the “NetFxRepairTool.exe” element. Click "Next" (bottom right button).
4. Run the downloaded utility. In the installer, under the user agreement, click to enable the “I have read...” setting. Click Next.
5. Review the list of recommended changes. To add them to the package, click “Next” again.
6. Upon completion of the “repair work”, click “Next” to read the report or “Finish” to exit the program.
Removing packages
1. On the MSDN blog, open the page - https://blogs.msdn.com/b/astebner/archive/2008/08/28/8904493.aspx (Cleanup Tool User's Guide).
2. Download the uninstaller program to your PC: in the “Download location” section, click the first link (https://cid-27e6a35d1a492af7.skydrive.live.com/self.aspx/Blog_Tools/dotnetfx_cleanup_tool.zip).
3. Unpack the downloaded archive. Run the executable file (...exe) with administrator rights.
4. In the uninstaller window, in the “Product to cleanup” option, install the version of the platform that needs to be removed.
5. To remove Framework, click “Cleanup Now”.
6. When the cleaning procedure is complete, click “Exit”.
Successful uninstallation of the .NET Framework package!
How to install, uninstall or find out the version of Microsoft NET Framework
As a result of experiments with the Microsoft.NET Framework, some errors and failures may occur in its operation.
In order to restore the correct operation of this important software component for the Windows operating system, you may need to perform a clean reinstallation of it. You will first need to completely remove the previous version or versions if there are several of them on the system.
This will minimize the occurrence of errors with the Microsoft .NET Framework in the future.
Quiet operation
The .NET Framework Cleanup Tool supports silent mode, in which no messages are displayed to the user. To do this, you need to run the program with the following parameters.
cleanup_tool.exe /q:a /c:”cleanup.exe /p <version to remove>”
For example, to remove .NET Framework 1.1 you need to run the following code.
cleanup_tool.exe /q:a /c:”cleanup.exe /p .NET Framework 1.1″
However, even silent mode will not remove versions of .Net that are a component of the operating system.
Uninstalling .NET
Newer versions of .NET (version 4.5+) can be uninstalled like any other program. Older releases (such as the commonly used version 3.5) can only be disabled, not uninstalled. Deactivation and cleaning are available both through system settings and using a third-party free program.
Through system settings
The steps below will allow you to remove or disable .NET. Please note that to permanently erase or turn them off, you will need to restart the computer, so close all programs in advance and save important documents.
- Open Control Panel. You can find it using the system search bar.
Opening the control panel - Go to the "Programs and Features" block.
Open the “Programs and Features” section - If you want to erase a more modern version of .NET, you can find it in the list of all programs. Having found it, select the line corresponding to it and click on the “Delete” button or right-click on it and select the “Delete” function.
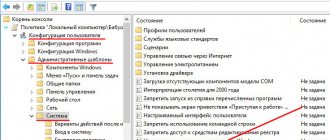
Select the library and click the “Delete” button - If you want to disable .NET, then go to the section on enabling and disabling components.
Click on the line “Turn Windows components on or off” - Find the .NET component of the required version in the drop-down list and uncheck the box next to it. The system will prompt you to restart your computer, agree.
Disable the required version of .NET
Once your computer is turned on again, you can proceed to download and install the appropriate version of .NET.
Through a third party program
There is a third-party application that allows you to remove different versions of .NET with one click - NET Framework Cleanup Tool. You can download it for free from the official Russian-language website - https://net-framework.ru/soft/net-framework-cleanup-tool.
The only thing you have to do is run the downloaded file, select the version to be removed, and click the Cleanup Now button. To complete the cleaning, you will have to restart your computer. Done, .NET has been deleted, now you should move on to restoring it as quickly as possible.
Select the version and click Cleanup Now
How to delete
So, since you have definitely decided to proceed with this issue, let's begin. But here our path diverges in two directions. The fact is that there are different versions of our framework, one of them is installed separately in Windows 10, the second is pre-installed initially. Accordingly, there will also be 2 ways to solve the problem.
4th version
To remove versions 4 and 4.5 of the library from Microsoft, you need to take a few simple steps:
- Using Windows search (icon on the left side of the taskbar), enter the desired query “control panel” and select the appropriate result from the results.
- Switch the contents of the window to the “Category” mode. To do this, use the drop-down list in the upper right part.
- Click on the “Programs” item.
- Next, select the “Programs and Features” section. This is where we can remove any installed application. To do this, simply right-click on its name and select the marked line from the pop-up menu.
After this, the uninstallation itself will begin, in which you need to work according to the prompts of the installation wizard. Everything is simple here and it won’t be difficult to figure it out.
Microsoft .net framework 1.1 configuration.lnk
3rd version
In order to disable the 3rd edition of the library, you need to do it a little differently. And more specifically:
- We go to the programs and components menu in the same way as was done above. After that, on the left side of the window, switch to the “Turn Windows components on or off” section.
- To disable a library we don't need, simply uncheck the box next to its name.
- Confirm the changes you are making by clicking the “Yes” button.
- Wait while the computer makes all the necessary settings. In some cases, a reboot may be required.
Upon completion of our manipulations, your PC or laptop will be left without the necessary libraries and many programs will no longer be able to run.
.NET Recovery
The removed library must be reinstalled. You can do this yourself and for free through the official website:
- Go to the official Microsoft website (https://www.microsoft.com/ru-RU/download/details.aspx?id=55167) and download the installation file in a language convenient for you. You will automatically be given the latest version of the library.
Download the .NET installer - Open the downloaded exe file. Confirm the installation and wait until all the required components are downloaded. The speed of completion will depend on the performance of the computer and the speed of the Internet. Once the procedure is completed, you will be able to launch any third-party applications again.
We give permission to install
What to do if Windows does not have a license
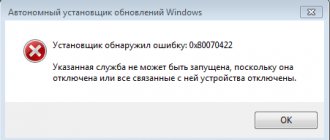
If there is no license for the OS, updating and working with components will not work. If there is a message on the screen about the need for activation , it is simply impossible to install libraries. First you need to solve the activation problem.
Sources
- https://winda10.com/programmy-i-prilozheniya/kak-udalit-net-framework-v-windows-10.html
- https://windows-ten.info/dreivers/564-net-framework.html
- https://lumpics.ru/why-not-set-net-framework-4/
- https://win10soft.ru/57-net-framework.html
- https://pyatilistnik.org/how-to-remove-net-framework/
- https://lumpics.ru/how-to-reinstall-net-framework-in-windows-10/
- https://net-framework.ru/article/oshibka-ustanovki
- https://BlogoSoft.com/15786
- https://composs.ru/ne-ustanavlivaetsya-net-framework-4-v-windows/
[collapse]
Return codes
- 0 - Removal completed successfully
- 3010 - Removal was successful and a reboot is required to complete the process
- 1 - The program requires administrator rights
- 2 - The cleanup.ini file was not found in the folder along with cleanup.exe
- 3 - This version cannot be removed because it is a system component
- 4 - The specified version name is not in the cleanup.ini file
- 100 - Uninstallation was started but failed
- 1602 - The deletion was cancelled.
Method 1: Programs and Features
To disable NO Framework, you need to open the Programs and Features tool. The easiest way to do this is through the “Control Panel”.
- Write the query control panel in “Search”, then click on the appropriate result.
Select "Uninstall programs".
After launching the installed software manager, click on the “Turn Windows components on or off” link. Please note that your account must have administrator rights to access this option.
Read more: Obtaining administrator rights in Windows 10
Find entries related to the .NET Framework in the list of components and uncheck them. Make sure that the checkboxes next to the required positions are empty, then click “OK”.
Wait a while for the system to remove the marked components, then restart your computer.
Recommended links for solution:
(1) Download (How to Remove Microsoft.Net Framework) Recovery Utility.
(2) How to remove Microsoft.Net Framework
(3) Removing a corrupted version of Microsoft.net Framework 2.0
(4) Microsoft .NET Framework 3.5 SP1 and .NET Framework Family Update 3.5 (KB951847) x86
(5) Solution: Microsoft .NET Framework 3.5 Service Pack 1 and .NET Framework 3.5 Family Upd
Attention Manual fix How to remove Microsoft.Net Framework error only Recommended for advanced computer users only. Download an automatic repair tool instead.