How to transfer the necessary information from a CD or DVD to a flash drive
Hello, dear visitors of the Start-Luck blog. Some readers remember those times when we shared our videotapes, disks, books and then lost them in obscurity, forgetting which particular bad friend took “our charm.”
For modern people this is already such a rarity. Digital options include recording and re-recording. Even if you want to give something to someone, you can always make a copy with peace of mind and not worry about whether the information will be returned to you or not. It will remain at hand. This is what we will talk about today.
In this article I will tell you how to transfer from a disk to a flash drive using a simple method and using an ISO image. I will work on Windows 7, although essentially this is not so important. The steps won't be much different no matter which version you're using.
And, of course, we cannot do without video instructions, which will resolve any misunderstanding between me and those eager to know the information.
I think we can start now.
A simple way without programs
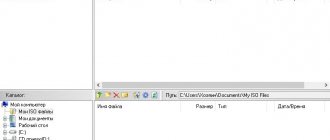
So, first of all, open the “My Computer” section. Then you need to insert your CD or DVD into the drive.
Some laptops do not have a dedicated disk drive. What to do in this case? I think you already know the answer to this question and have used boot disks in ISO format more than once. You should have it now.
If this is your first time encountering this problem, I’ll explain. You need to mount the image, I already described how to do this in one of my previous publications. Thanks to programs like Daemon Tools, we can easily solve this problem.
You won't have a physical disk, but the computer will start to "think" that the CD is inserted into the correct drive. Stop for a second, now you need to take a little break from the main task and solve a related one. My article will help you with this. After reading and “inserting” the image into the “disk drive”, return here.
As soon as you have solved the most important task and inserted a physical disk or its image, you will see an autorun window. Click on "View Files".
If the required window is not displayed, then you can right-click on the image or disk so that a dialog menu appears, in it select the “Open” function, or the same “Autorun”.
Now insert the flash drive into the USB port. This goodness is enough for any laptop or computer. Select the “Open folder to view files” section again. Again, if this does not happen, the right mouse button and the “Open” or “Autorun” function will help you.
As a result, you should have two windows with the “insides” of each disk. If this does not happen, simply open the CD/DVD, then in a new window go to the “My Computer” section and open the flash drive.
Copy files from the disk. Click on the ones you need, then right mouse button and the “Copy” function.
You can, of course, first open the disk and copy files from it, and then “open” the USB and insert everything you need there, but I wouldn’t want you to get confused.
Open a second window in which you have files from the flash drive, upload them there. Right mouse button and then "Paste" option.
That's basically it. The problem is solved.
Video instruction
In this training video you can see how to load music onto a flash drive from a disk - where the buttons are located, in what order to press them, and so on. Everything is very detailed.
If you are confused in my text, then everything will become clear in just 3 minutes.
Some licensed discs with audio files have copy protection. What to do about it? The easiest way is to use special programs that help remove it.
This method should be treated with great caution, since there are no licensed utilities to help perform this task. This activity is not legal! Therefore, you may have to download files that may contain viruses. Personally, I'm afraid of such things. There is too much “valuables” hidden on my PC.
Considering how active hackers are now, this is a really serious issue. You can read in my blog such articles as “New VKontakte virus” or “A terrible virus that everyone should know about.”
Based on the previous words, I am not giving you any specific link to the program, but I am offering the training video, in the description of which you can find the download URL, for your information only. Know that such a method exists.
Cassette
How much does it cost to digitize videotapes in salons? 200-300 rubles per hour. Now see how many videos you would like to save. Is it true that it is not profitable to go for these services? That is why we will now teach you how to copy everything you want from a cassette to a disk, spending no more than 1.5 thousand rubles on it.
What will we spend this money on? To special equipment called a TV tuner. It is available both externally (for a laptop) and internally (for a desktop computer). We will also need a tape recorder and a set of wires (usually included with a TV tuner). For external we need USB and bells, for internal - only the latter.
We connect the TV tuner, install software and drivers (discs are always included). We launch the program and insert the cassette, click “Start”. Now it’s time to adjust the image clarity. A picture appeared on the monitor, very fuzzy, blurry, right-click on it and select “Channel Settings”. After we have received the quality we need, we wind the tape to the beginning and start recording, press the button with the circle. The video is now being recorded on your computer. After the recording ends, click “Stop”.
That's it, the video is in your computer's memory. Now it can be rewritten to disk; we have already talked about how to do this and will look at some programs later. Please note that sometimes voids are formed in the resulting record, that is, places where there are no records. How to get rid of this? Using video editing and trimming programs, but this is a slightly different topic, we will not deviate from ours.
Creating an image and then overwriting it
We move on to disk images. What is this, I think you already understand. The same disk, only in digital format, intended for sharing with friends, deceiving the computer, saying that something has already been inserted into it, and so on.
In general, any image can simply be transferred from a computer to a flash drive without any problems using the same principle that I have already described. However, there is an alternative method.
This blog has a detailed article on how to quickly download a disk image to a flash drive using the UltraISO program. In it, I described in detail how to create an image and upload it, so you can read it by following the link.
To make this publication of mine more useful, I will leave you with only a video on this topic, which will allow those who are in a hurry to complete this task faster. I advise others, of course, to read the publication. It describes in detail everything that may be useful.
I also recommend that you download the licensed version of this Ultra ISO program from the Allsoft . There is too much important information stored on any PC that hackers can use to use pirated utilities with peace of mind. I wouldn't want your personal data to be hacked. The risks are too great.
More on the topic: Lesson #65
Don't forget about antivirus software too. They, of course, are unlikely to get help from well-known scammers who operate on a serious scale, but there are only a few of them, and the interest in other people’s PCs is now enormous. This is very easy money. The phrase “This will never affect me” no longer works. Everyone is interested in you.
You can download a good antivirus from the same Allsoft website. For example, I like NOD32 .
That's all. Don't forget to subscribe to my VKontakte group . See you again and good luck.
start-luck.ru
Transfer files between DVD and flash drive via computer
Sharing files between a DVD and a flash drive, via a computer, is no more difficult than exchanging files between a computer and a flash drive or disk. Each one separately. And read about it on this page.
It makes no difference where you start. Insert the DVD into the drive or USB flash drive.
But you need to start with one thing.
I'll start the description with the DVD.
Open the “Computer” folder. Click on the drive to highlight it.
Click the “Extract” button on the panel. And after the drive comes out, insert the DVD and close the drive.
You can also manually open the drive by pressing the button on the drive panel.
Teaser advertising from Redclick.ru
Next, a mandatory procedure is carried out with the DVD loaded on the computer. And more about this - here
After loading the DVD, “Autorun” will open,
In “Autorun” you need to click the “Open folder to view files” button. The DVD folder will open.
If, for some reason, “AutoPlay” does not open automatically, click the “AutoPlay” button in the Explorer panel.
Or - open the DVD folder with the right mouse button. To do this, click on the drive in the Computer folder and select “Open” from the context menu.
One way or another, the DVD folder will open. And you can move on to the flash drive.
Insert the flash drive into the USB connector on your computer (laptop). After downloading, the Autorun window will open.
If an antivirus is installed on your computer, then after loading the flash drive, the antivirus will offer to check the files for viruses. In any case, Kaspersky Internet Security always checks.
Just like with a DVD, open the flash drive folder. Either from “Autorun”, or by right-clicking from the Computer folder.
This way you will have two folders open. One is from a DVD, the other is from a flash drive.
Now you can copy or drag and drop files to move from folder to folder.
You can even delete files that you no longer need. Files deleted from removable media do not go into the computer's Recycle Bin. And they disappear completely. Therefore, be careful and do not delete the desired file by mistake.
To apply any actions to a file, click on it once to select it.
And then - either right-click and select “Copy” from the context menu. And then open another folder and right-click on the free white field and select “Insert” from the menu. And the file is copied to another folder.
You can perform the same actions with selected files using the buttons on the Explorer panel.
In Windows 7 (Home Basic) – the “Arrange” button.
In other versions of OS Windows, the same functions are performed by the “File” and “Edit” buttons.
For more information about working with files in Explorer, see the My Computer page.
Once you're done moving files, you can remove the flash drive and DVD in a secure manner.
fulud.ru
Instructions for copying discs to a computer
First of all, open the drive and insert the disc into it. Then click on the computer line (on the right side).
Next, as shown in the picture below, move the cursor to the disk drive icon and, pressing the right mouse button, click on the “open” menu bar.
The entire contents of the disk will open in front of you. Highlight it in blue (hold down the left mouse button and move up from the bottom of the window or vice versa) and, now pressing the left button, click in the “copy” tab that appears.
Now select the location (folder) where you want to save the copied video on your computer and, pressing the left key in it, click on the “paste” line.
After this, all the contents will appear on your computer, if, of course, you do it correctly - as described.
There are of course many other ways. You can simply drag and drop files (videos) and copying will occur automatically or use hotkeys.
Try the method described above for now, and over time you will learn the rest. Good luck!
How to write windows to a flash drive for installation (bootable)
In this article, I will tell you how to burn an image to a flash drive (in this case, a Windows image) for subsequent installation of the system on a computer. Nowadays, many people have laptops and netbooks that simply do not have an optical drive, or there is no way to install windows from a disk; this is where creating a bootable Windows 7 flash drive comes to the rescue. This article is primarily aimed at these tasks.
We will write the image to a flash drive in two ways. The first method will be implemented using a very good ultra iso program, and the second using WinSetup From USB. We will start by looking at the steps to work with ultra iso, since this method is less labor-intensive and the process of creating a bootable Windows 7 flash drive will be quite fast. The second method will remain for those who, for some reason, “didn’t work out” with the first option.
So, let's go. First, download the Ultra ISO program. After the program has been downloaded, installed and launched (click on the trial period if you don’t want to buy), you can begin the fairly simple process of writing Windows to a flash drive:
1. You must specify the path to the image that should be placed on your hard drive: Click “File” => Open (Fig. 1)
2. Then, select: Boot => Burn Hard Disk Image (Fig. 2)
Next, set USB-HDD+ and click Write (if the flash drive is already formatted) (Fig. 3)
This method will also tell you how to write windows to a flash drive. What you will need for this option:
1. A little free time;
2. Computer (with hardware that supports booting from a flash drive);
3. Program for preparing a flash drive (download);
4. Actually the flash drive itself (even an SD card will do);
5. An image of the operating system that we want to install.
As an example, I will show how we will record an image of the Microsoft Windows 7 Home Premium 64-bit operating system onto a 4GB SD card. I would like to immediately draw your attention to the choice of operating system. If your computer has less than 4GB of RAM, then you should install a 32-bit (x86) version of the operating system, since a 64-bit version will simply clutter up the RAM with unnecessary processes.
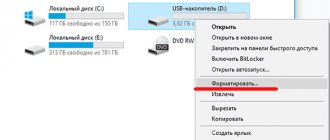
We insert the flash drive into the USB port and format it to FAT32 or NTFS using Windows. To do this, you need to go to My Computer, find the flash drive there and right-click on its icon. In the context menu, select “Format...”. In the format window, select the file system FAT32 or NTFS (the latter will be better if the flash drive has a capacity of more than 4GB), and also select the cluster size “Standard cluster size” and click the “Start” button. Everything is shown in the picture:
Next, we download a small program in which we will do all the operations we need. There are several programs of this type, but I chose WinSetupFromUSB because it requires no installation, takes up almost no disk space, and is easy to use.
More on the topic: How to fix the error
Let's launch the program. First, we need to select the device on which we will burn the image. This is done in the drop-down menu at the top (if the flash drive is not displayed in this menu, click on the Refresh button). Next, we need to prepare the flash drive for recording the image, because if we simply copy the image, it will be impossible to enter the system installer, because there is no boot sector. To create it, click on the Bootice button.
In the Bootice utility window that opens, click the Process MBR button, then see if the Grub4Dos checkbox is checked (if not, check it) and click the Install/Config button. In the Config Grub for DOS window, click on the “Save to disk” button, the program will display a window that the boot record has been successfully written to the drive.
We return again to the Bootice utility window, where we click the “Process PBR” button and do everything the same, without changing anything in the last window, click OK.
That's it, now all we have to do is write the image to a flash drive, this is done in the main program window, which we saw immediately upon launch. You need to check the required box - if you are going to install Windows XP, then this is the first checkbox, but if Vista or Seven - the second. Next, click on the “…” button on the other side of the checkbox and set the path where our unpacked image is stored on the hard drive, or simply mounted in a virtual drive using DaemonTools or Alcohol. Click on the “GO” button and wait until the process finishes.
Upon completion, the program will display the message “Job Done!” That's it, dear friends, you can reboot and start installing the operating system.
I also advise you to read the article regarding operating system optimization.
we-it.net
How to burn an ISO image to disk?
Ultra ISO, of course, is good for everyone, but I mainly use it when I need to burn an image to a flash drive. I write images to disk using another program, it’s more convenient for me.
There are many programs for burning discs. Starting with Windows 7, you can even record a blank using standard Windows tools. However, the functionality of this tool leaves much to be desired.
Therefore, many people prefer to use other programs. Probably everyone has heard about the Nero
, however, the price of about 1,600 rubles for this product forces us, Russians, to look for other solutions.
Where can I download a free disc burning program?
I did a full review of this program on my YouTube channel, I recommend watching it. From it you will learn where to download, how to install and how to use this CD/DVD burning program. Or, read on.
Review of Ashampoo Burning Studio FREE. [Video]
So, you can download this program from the official website. You will still have to pay for the freebie with your time - during installation, the program will ask for an activation key, which you can get for free by going through a simple activation procedure by e-mail.
Burn an image to disk using Ashampoo Burning Studio
So, you have downloaded and installed Ashampoo Burning Studio FREE. Then everything is simple. Launch the program and select “Disk Image”>”Burn Image”.
In the next window, you need to directly select the disk image that you want to burn to CD. I will be recording an image of Victoria, a program for checking hard drives.
So, click “Browse” and select the file with your image, in my case it has the extension . ISO.
Click the “Next” button
The next window will ask you to insert a blank (R) or rewritable (RW) disc. If you insert a non-empty disc, a corresponding warning will be displayed.
Insert the pre-prepared disc and click “Burn CD”.
We are waiting for the process to complete. Your boot CD is ready!
As you can see, there is nothing complicated about burning an ISO image to a disk or flash drive! If you have any questions, ask them in the comments!
I also recommend watching the video on my YouTube channel on the topic of recording images on a flash drive and disk. There, I, among other things, talked about how to burn a disk image using only Windows tools, without using third-party programs.
How to transfer from disk to flash drive?
I sometimes look at the website statistics and see what people are interested in. I have a popular topic, how to burn an image to a flash drive, and usually people are looking for how to burn an image to a flash drive, and then I see a request: how to burn a disc to a flash drive... To be honest, the request sounds strange, but when I looked at how many people are trying to find how to do this I’m doing it, I’m a little surprised, there are thousands of them... On the site I write topics that people are interested in or need, for note) Well, here, of course, is the first option and I hope this topic will be useful to many who are looking for how to burn a disc to a flash drive
At first I also thought whether such a program had really been written, but no, I couldn’t even find it on foreign sites, it wouldn’t be safe anyway)
Creating a virtual Windows image.
I will highlight working with Macrium Reflect Directly in virtual Windows 7 I download and install the program from the link. You can use the usual search; I always download from the manufacturer (For Home Use version). The flash drive is already connected to virtual Windows:
Once installed, Macrium Reflect will show the virtual disk space:
We work with a flash drive in two stages, which is where the video reviews in the article begin. First, let's make it bootable. In the program window, in the taskbar at the top, select Other tasks – Create Rescue Media...
in the Advanced you can change the architecture of the future Windows
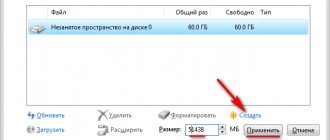
A couple of hundred megabytes of data - and you're done. At this stage there should not be any problems. Stage two : we begin recording the disk image onto a flash drive. The process looks like this:
- in the program window, check the checkbox, selecting the entire disk with both partitions (I don’t know how many you have; I installed virtual Windows according to all the rules with a Backup partition). By default, the checkbox is already checked (circled in red, on the left in the Source ).
- In the Destination I will indicate that the image will be stored on a flash drive (in the photo I have a card via a USB adapter):
- At the bottom, click Next , going to settings. Set it like I did (I left the checkbox on Full , assigning the value 1 Differential checkbox was disabled):
- Click Next . Check and click Finish :
- I will refuse to create a control file:
First we make a disk image
I haven’t written an article about the UltraISO program yet, but now the time has come, I just have a portable version.
Launch it, insert the disc into the CD-DVD-ROM and select create a CD image.
Next... Select DVD-ROM and indicate the path where to save the image. Click do!
After the image has been created, then we look for our image below and click on it 2 times so that the contents of the image appear in the upper window. Next, bootstrap - burn a hard disk image.
Now we select your flash drive, format it if necessary, but when recording, the program itself will format the flash drive and click write.
All! The myth of how to burn a disc to a flash drive has been destroyed
alexzsoft.ru
How to make a bootable disk from a bootable USB flash drive
As you know, a bootable flash drive is a flash card (USB) that will be recognized by your computer as a disk. In simple terms, the system will think that you inserted the disc. This method has practically no alternatives available, for example, when installing an operating system on a laptop without a disk drive.
You can create such a drive using our instructions.
A boot disk is essentially the same as a bootable USB flash drive, except that the files are placed in the disk's memory. In any case, it is not enough to simply copy them there. Your disk will not be detected as bootable. The same thing happens with a flash card. In order to accomplish this, you need to use special software. Below we will present three ways in which you can easily transfer data from your bootable USB flash drive to a disk and at the same time make it bootable.
Method 1: UltraISO
To solve this problem, you can use the UltraISO program. This software is paid, but it has a trial period.
- After you have installed the program, run it. A window will open in front of you, as shown in the photo below.
Click on the "Trial period" button. The main program window will open in front of you. In it, in the lower right corner you can see a list of disks on your computer and all devices currently connected to it.
- Make sure that your flash card is connected to the computer and click on the “Boot” item.
- Next, click on the “Create hard disk image” button.
A dialog box will open in front of you, in which you will select your flash drive and the path where the image will be saved. Click the "Make" button.
Wait for the procedure to complete. Then go to the “Tools” drop-down menu and select “Burn CD image.”
If you are using a RW type disk, then you first need to format it. To do this, in the “Drive” item, select the drive into which your disk is inserted and click the “Erase” button.
After your disk is cleared of files, click the “Burn” button and wait until the procedure is completed.
How to install Windows XP 7 8 10 on a USB flash drive
Very often, personal computer owners wonder about installing Windows on a flash drive. The Windows operating system is not designed to be installed on a USB drive, so installing it on a flash drive like a regular HDD or SDD drive will not work.
To help PC users cope with the task of installing Windows on a flash drive, we have prepared material with detailed examples. The examples discussed will describe the installation process on a flash drive for all current Windows , starting with XP and ending with ten . After familiarizing yourself with the material, you can easily create bootable flash drives with various Windows operating systems.
Installation of Windows 7, 8, 10 operating systems on a USB drive
Installation disks for Windows 7, 8, 10 operating systems do not allow installation on a flash drive. To install on a flash drive, you need to use third-party software. The most suitable program for our task is WinNTSetup . The utility is distributed and supported on the forum of the Internet portal www.msfn.org. You can download it from the forum page www.msfn.org/board/topic/149612-winntsetup-v386.
The most current version at the time of writing is WinNTSetup v3.8.6 . The utility is distributed in the RAR archive “WinNTSetup3.rar”. After unpacking the archive, you can see two executable files “WinNTSetup_x64.exe” and “WinNTSetup_x86.exe”. From the names of the files it is clear that each of them is designed to run on a system with the appropriate bit depth. In our case, we will run the file for a 64-bit operating system. When launched, the utility will display a message asking you to download ADK files for the program to function properly.
Download the ADK files by clicking OK, after which the utility will launch.
Now let's prepare a folder with Windows installation files and a USB drive. For example, we will take the installation disk with Windows 7 and put it in the DVD drive.
After this, return to the WinNTSetup to the “ Windows Vista/7/8/10/2008/2012 ” tab. Now let’s specify the path to the installation file “install.wim”.
At the second stage, we need to select a flash drive on which we will install Windows 7. Before selecting it, we format the flash drive in the NTFS .
Now let’s select in WinNTSetup the place where the bootloader and Windows itself will be installed, namely our flash drive.
After these steps, you can begin installing Windows 7 on a USB drive. To do this, click on the Install button in the lower area of the utility window, after which a message will appear with additional installation parameters.
Without changing the parameters, we will confirm this message by running the installation on the USB flash drive.
Before starting the installation on a flash drive, you can optimize the OS by disabling or enabling its functions. This can be done by clicking on the OS Optimization >>> button.
Having completed the installation, our next step is to restart the computer. Before starting the operating system, let's boot from our USB drive. On different computers, this is done using the F11 and F12 keys or using settings in the BIOS in the BOOT . The system must boot before selecting a username and computer.
In the same way, you can install Windows 8 and 10 operating systems on a portable USB hard drive or flash drive.
More on the topic: How to activate Windows 7
In the example considered, we used the same disk for both the bootloader and the operating system.
If, for example, you want to install a second OS on a portable USB HDD and want them to have a common bootloader, then you need to select the Windows system drive to install the bootloader. Having completed these steps, when you start the system in the boot menu, you will have a choice to launch from two operating systems.
conclusions
You shouldn't mess around with drivers too much. Linux drivers are open source and integrated into the kernel. In most cases, you don't need to install them or change them, the system will automatically detect the hardware and load automatic drivers. Once you've installed Linux, your hardware should work either right away or after installing a few proprietary drivers.
You can also install Linux drivers located on the manufacturers' official websites, but proprietary drivers may not work as well as those prepared for your system.
Moderator: Tim308
Problem installing drivers (USB, network and CD/DVD-ROM do not work)
Post by plaksa1993 » 05 Aug 2015, 21:13
Good evening everyone. I would be interested to know the solution to this situation, the point is this; After reinstalling the system (Official original), the laptop M.b. The PC on the machine has no drivers, it doesn’t see USB, the network one also requires a driver, yet the cd-rom is out of order, there’s no way to repair it or buy a new one! Is it possible to install drivers somehow or by trickery, other than removing the hdd and filling it up? there “.exe drava” on another machine, or some kind of DRP!! Are there any ways?
Sent after 10 minutes 45 seconds: Please correct the error in the title, it annoys me.
Technical solutions
Post by nsa688 » 05 Aug 2015, 21:15
Technical solutions
Post by plaksa1993 » 05 Aug 2015, 21:39
Perhaps interesting! But first, you still need to install Usb drivers in order to transfer the required file from the phone.
Sent after 1 minute 12 seconds: But still like for the thought!
Technical solutions
Post by DesignerMix » 05 Aug 2015, 21:45
- Forum Rules
- History of forum changes
- My YouTube channel
Problem installing drivers (USB, network and CD/DVD-ROM do not work)
Post by plaksa1993 » 05 Aug 2015, 21:55
Problem installing drivers (USB, network and CD/DVD-ROM do not work)
Post by DesignerMix » 05 Aug 2015, 21:58
- Forum Rules
- History of forum changes
- My YouTube channel
Problem installing drivers (USB, network and CD/DVD-ROM do not work)
Post by plaksa1993 » 05 Aug 2015, 22:18
Problem installing drivers (USB, network and CD/DVD-ROM do not work)
Post by DesignerMix » 05 Aug 2015, 22:46
It’s strange, why don’t you want to perform the operation of removing and restoring drivers? These drivers are pre-installed and will be reinstalled automatically.
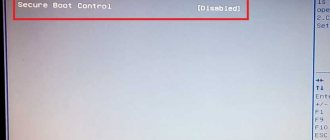
By the way, reset the BIOS settings, sometimes there is an option to disable USB, in case you have just this case, and by default USB should be enabled.
If you don’t want to try the method above, then after resetting the BIOS, if this does not help, just connect the USB flash drive, go to the device manager, go to the properties of the problematic USB controller, go to the Driver tab, click the Update button, then Search for drivers on this computer, then Select a driver from the list of already installed drivers and see if there is another driver instead of the one that is already installed. If there is, select it and click next. If not, then uncheck Only compatible devices and go to Compatible USB storage device and install the driver from the right side of the window.
If it doesn’t help or this driver is already installed, then in the device manager go to View - Show hidden devices, and then connect the flash drive and if it appears in hidden devices (it will be translucent), then remove it and reconnect.
Installing the Windows XP operating system on a USB drive
Installing Windows XP in the WinNTSetup is very similar to installing Windows 7 in the previous example. Therefore, let's format the flash drive in the NTFS file system and insert the installation disk with Windows XP into the DVD drive. WinNTSetup program on the “ Windows 2000/XP/2003 ” tab.
Now let’s select our disk as the folder with our installation files, and also select a flash drive for recording the bootloader and installing XP.
As in the example with seven, click the Install button and confirm the message, after which the installation of XP on the USB drive will begin. Just like for the seven, in XP you can optimize the OS.
WinNTSetup completes , reboot the computer and boot from our USB drive. The rest of the Windows XP installation will continue from where the installer copies the files to the disk. The entire further installation process is the same as during a normal XP installation, so it makes no sense to describe the further process.
Situation 3: USB is not visible in Windows due to file system errors
If your USB flash drive or external hard drive has file system errors, you will see your device appearing as RAW and your device will become inaccessible. Here, file system error refers to an unsupported Windows file system or a corrupted file system caused by improper operation or improper formatting. To recover a hard drive with file system errors, it is best to format the drive to convert RAW to NTFS or FAT32. By doing this, you assign a new file system to your device, and then you can use it as you wish.
Formatting a USB storage device will erase all data. Since the USB drive shows up in Disk Management, you can use EaseUS data recovery software to extract all the data from the drive before you format it. The software also supports RAW device recovery. So, follow the article on how to recover data from RAW USB flash drive to save your data in advance.
Once you have received all the data, you need to format the USB drive to convert the file system back to NTFS or another Windows compatible file system, allowing the data to be saved again.
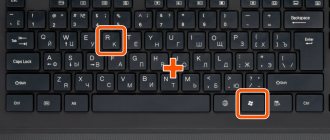
Step 1: Right-click the Start icon > Type Computer Management > click Computer Management.
Step 2: Click Disk Management in the left pane, then locate the device in Disk Browser.
Step 3: Right-click on the USB drive, select "Format" to directly format the USB drive to make it usable.
Windows To Go and Rufus
Starting with Eight, developers from Microsoft introduced a new technology called Windows To Go . This technology is designed to allow a user using a computer with the Windows 10 or 8 operating system to create a USB drive with the OS installed .
An OS created using Windows To Go is a mirror of the system on which the flash drive was created. It follows from this that all settings and installed programs will be saved . It is especially convenient to use such technology in organizations where you need to quickly prepare and configure the OS for an employee.
Let's look at an example of creating a flash drive in Windows 8.
Please note that the built-in Windows To Go is only available in the Enterprise version of Windows 8.
To do this, launch a search and type “To Go” in it. Let's launch the found master. Immediately after launch, the wizard will search for compatible USB drives with Windows To Go .
It is worth noting that to use this technology you need flash drives with a capacity of 32 GB or more.
At the next stage, we need to insert the installation disc into the DVD drive and specify the path to the “install.wim” file in the wizard. If your distribution does not have such a file, then you will not be able to use this method.
Next, the wizard will offer to encrypt the system using BitLocker , if you need it.
In the last window, you need to click the Create button, after which the creation of a flash drive with Windows 8 will begin. The creation process depends on the writing speed of the USB drive.
The most optimal are flash drives with a USB 3.0 .
the Windows To Go utility can create USB drives . Using this utility, you can create a flash drive with a 8 or 10 from Windows 7 or XP. Let's look at an example of creating portable Windows using Rufus . First of all, let's download the program from its official website https://rufus.akeo.ie. The program does not require installation, so it can be launched immediately after downloading.
Our next action will be to click on the button in the form of a DVD disc. This is necessary in order to select the Windows image . In our case, we took the image of a ten as an example. You can make a disk image from the installation disk or download it from www.microsoft.com.
After these steps, a radio button “ Windows To Go ” should appear, which you need to select. The final step is to click the Start button, after which the creation of a flash drive with ten will begin.
The example shows that using the first and second methods, it is not difficult to create a portable OS. But if you use the Rufus , you will significantly expand the functionality of loading a portable operating system.
Another utility that can install portable OSes on a flash drive is PWBoot . The utility can create portable drives with Windows 7 and 8. You can download the utility from the page https://reboot.pro/topic/6851-project-pwboot-latest-version-302. The utility does not require installation, so it can be launched immediately after downloading.
In the program window that opens, select the first item and click Next. At this stage, the utility asks us to select the “install.wim” file. In our case, we are using a file from the Windows 7 installation disk.
After these steps, click the Next button and proceed to selecting a USB drive.
At the last stage of setup, select our flash drive for recording the bootloader and click the Install button. After this, the process of creating a portable OS will begin.
The example shows that the PWBoot has a fairly simple interface and limited functionality. It follows from this that the program will be an indispensable assistant in creating a portable OS for a novice PC user.
Optimizing the operating system when working on a flash drive
If you create a USB flash drive with Windows OS, then you should know that the system constantly writes and overwrites temporary files. Therefore, by using a flash drive in this way, you risk that it will become unusable after a short period of time. This is due to the fact that the number of rewrites on a flash drive is limited.
If you want to extend the life of your flash drive , perform the following operations in the operating system:
- Move the folder for temporary files Temp to RAMDisk;
- Disable hibernation mode;
- Disable system protection;
- Disable the page file;
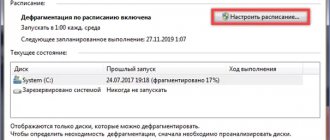
- Disable disk defragmentation;
- Disable indexing.
By following these steps, although not fully, you can extend the life of your flash drive for a longer period.