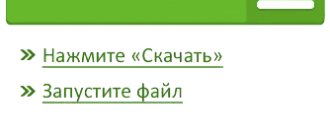
One day, your computer's operating system will not start and you will have to install it again by starting your PC from the boot disk. The bootable image is written to a DVD or flash drive in special programs, for example, UltraISO - a simple and popular tool that is also used as a recording wizard - this is a convenient alternative to the built-in application in Windows.
| Interface ↓ | How to burn a bootable disc ↓ | |
| Features ↓ | Benefits ↓ | |
Program interface
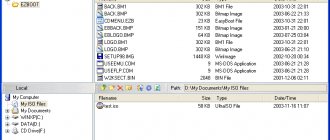
The UltraISO working window is divided into 4 areas, which display the contents of the image, the directory structure on the hard drive, and the files located in the folder specified by the user. The main menu is at the top of the main window. Below are the hotkeys to which the developers assigned the main functionality of the program.
By default, the working window areas are empty. Open the ISO file and the relevant data will appear. Click on any folder to view the attached files in the window opposite. The UltraISO interface is extremely simple and will not cause any difficulties even for beginners.
How to mount an image into a virtual drive
Actually, everything here is just as simpler than it seems. You can create several virtual drives and mount images of different formats. As a result, you will be able to view the content directly in Explorer. There are other programs for mounting a disk image...
Go to the Tools > Mount to virtual disk (hotkey F6). Select Virtual CD/DVD drive , Image file and click Mount . Voila. If there is no virtual drive, then add Options > Settings > Virtual drive .
How to burn a bootable disc
Launch the program, click the Open button in the File menu and select the image on your hard drive or removable media.
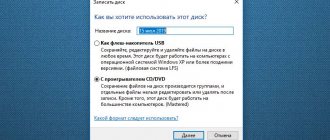
To create a bootable DVD, click the Burn CD Image button. Such media are becoming a thing of the past - most users prefer flash drives. In the latter case, you need to open the main menu item Bootstrapping and select the Burn hard disk image option.
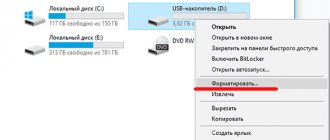
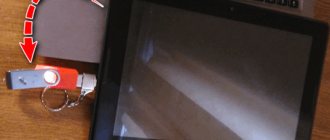
Connect the flash drive in advance, otherwise the buttons in the window that opens will remain inaccessible, as in the figure below. Click the Burn button and wait for the process to complete. Do not change any parameters unless you are sure it is necessary!
At the top of the window there is an area that displays the recording progress. By default, checking the created disk is enabled - you can disable this option or, on the contrary, activate it by clicking on the corresponding field. Before starting to create a boot disk, it is recommended to format the flash drive.
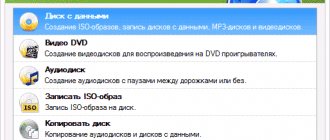
Creating an image from a CD/DVD disc
First of all, you should select the “Create CD image” command (the “Tools” tab). A new window will open in which you will need to specify the drive from which you want to make an image. Next, the user must assign the path to the folder where the image will be saved. In addition, the user can select the desired output format - standard .iso or CloneCD, Alcohol and others. You must confirm your command by clicking on the “Make” button. Using UltraISO, you can make any version of a CD or DVD image that will be supported by almost any popular imaging application.
UltraISO features
The program allows you not only to burn self-booting discs - the developers also provide other capabilities. By entering the Bootstrap menu item, users can run the following operations:
• creating and recording an image of a floppy disk or disk; • extracting the boot file from the media; • generating a load table; • downloading or saving a download file; • creation of multilingual CDs.
Additional functionality is available in the Tools menu. The latter include:
• create a disk image; • convert ISO to other formats; • mount in a virtual drive; • burn the image to disk; • calculate the CRC amount to check data integrity; • compress the ISO file to save free space; • test ISZ; • unpack ISZ; • change the volume name.
In the Options menu, you can select a folder to save the recorded file, a skin and set various settings. By default, the optimal parameters are selected, that is, a user who simply wants to burn a bootable image to a DVD or flash drive does not need to change anything.
Most home desktop and laptop owners only need a fraction of the features listed above. As a rule, nothing needs to be configured except the file saving folder, if the one initially installed does not suit the user for some reason.
Creating a virtual image
To create an image, you need to select a folder with files in the lower left panel, then drag the required files from the lower right panel to the upper right panel.
You can add files from different directories, the main thing is that the total volume of files does not exceed the maximum volume of the disk on which the virtual image will be written.
Image saving window
After adding all the files, you need to execute the command “File” - “Save as ...” and enter the name of the virtual image. You will also need to select the image format from the list. The most popular virtual image format is ISO. Therefore, if the computer owner is in doubt about which format to choose, then you can safely choose ISO.
READ ALSO: Server placement in a data center
After clicking the “Save” button, the process of creating a virtual image will begin. A small window will show the remaining and elapsed time and the percentage of doneness.
UltraISO also allows you to create images from CDs and DVDs. To do this, go to the “Tools” menu and click “Create CD image...”; to quickly access this item, you can use the F8 key.
Window for creating an image from disk
In the window that appears, you can select the CD/DVD drive (if the user has several), the save location and the image format. Clicking the “Make” button will start the image creation process.
Advantages of UltraISO
There are many programs that allow you to create bootable disks and perform other operations listed above in the description of functionality. Many users choose UltraISO for a number of advantages:
• convenient navigation; • Russified interface; • impressive functionality; • the ability to record a bootable image from a set of installation files; • convenient system for viewing files on your hard drive and image; • the main functionality is implemented in the form of a special menu.
Users of the UltraISO program do not need to understand the data recording mechanism, the features of file systems and other intricacies. The above algorithm allows any user to create a boot disk with the Windows operating system, including beginners who have never encountered such tasks before. The likelihood of errors occurring during recording is minimal. The process takes 1-5 minutes, depending on the size of the source file.
The program's system requirements for computer hardware resources are extremely low - if the PC can handle Google Chrome, then there will be no problems with UltraISO. The program is distributed by developers on a commercial basis. The free version sets a limit on the maximum size of files that can be used for recording - no more than 300 MB.
Burning a CD/DVD image
To use this feature, you need to select the “Burn CD Image” option located on the “Tools” tab. Next, you need to specify the path to the folder with the file that you want to record (click on the “..." button located to the right of the “Image file” column). You can select additional parameters - method (TAO or DAO), as well as the disk writing speed. If the user has set the TAO (Track At Once) method, then only one track will be recorded at a time. If you want to burn the entire disc, you must use the DAO (Disk At Once) method. Please note that slower speeds are recommended for burning multiboot disc images.
ImgBurn
I have already mentioned this software in one of the publications. I advise you to read it. There you can download the current version from the official website. Initially, a non-Russian version will be installed, but in the settings you can select the desired language, which will be automatically downloaded from the Internet.
How to create an image?
You need to select the appropriate option in the main window of the utility:
- From disk;
- From files/folders.
The first option is suitable if you have a distribution of the operating system that is recorded on disk. But it is not in ISO format. The application will automatically copy the content into memory and then generate the desired element.
The second method is relevant if you want to create an image from files/folders that are located on your HDD drive (or SSD).
You can then easily burn the ISO to a disc for later use (or make a recovery flash drive).
Areas of use
When asking how to use UltraISO, you need to pay attention to where this program can be used and what tasks it can solve. In addition to what was described above, it can be noted that the application is an all-in-one package.
The key function, as already mentioned, is working with images. However, the application is not only intended for creating images or extracting data. The program is capable of editing such images. This could be, say, adding, deleting or creating directories within the image itself, not to mention the ability to optimize the entire image structure to save space.
Speaking about creating bootable media, we can also note the fact that the program is even capable of extracting the so-called boot sectors of a hard drive or floppy disk (floppy disks, however, have not been used for a long time).
What is an ISO disk image
Before studying the instructions on how to make an ISO disk image, you should understand what it is. The image itself is a file containing a complete copy of the data, as well as a copy of the file system structure of a specific media. In such a file, as a rule, sectors of the source are duplicated, and its file system is ignored.
ISO is a well-known and old format (recording method). There are many other formats that provide more complete duplication. These are MDF and NRG, CUE and CCD, BIN, DMG and IMG. There are others, but these are the most popular.
This option for copying information is often used by system administrators who maintain a large number of computers, as well as gamers in order to speed up work with data located on external media. Experienced users try to collect images with drivers and valuable software in one place in advance, which easily solves the problem in case the original source is lost or broken. This method can be called the simplest, but ideal for everyone, since even a beginner can create a disk image using UltraISO without any problems.
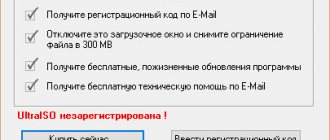
Activation
This utility is paid, so you must activate it to use it. Along with the exe file in the archive there is a text document called “Activation”. Open it and run UltraIso. Click on the “Enter registration code” button, then copy any pair of name and code into the text fields of the registration window. Click "Ok" to complete the process.
How to use UltraISO: games
Gamers know that sometimes games require a disc to run. What if he is not there? Speaking about how to use UltraISO for games that require the presence of the disc directly in the gameplay, the procedure here is not much different from everything that was described above. The simplest method is to use the “Tools” menu, in which you select the “Mount virtual drive…” command, after which you select the image of the original game, created in advance. After that, simply click the “Mount” button. Next, a window for launching or installing the game will appear.
To create an image, you can also perform integration. To do this, use the sequence “Options” / “Settings” / “Integration”, where you check the desired format (for example, .iso) and click the “OK” button. Now, after double-clicking on the image, it will either mount itself or open in a window with the game launch folder.
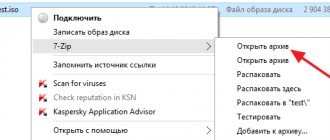
How to extract files from an image
In order to do this you need:
- Open the desired element.
- In the “ Actions ” menu, select “ Extract ” or press F4.
- In the Explorer window specify folder, into which the contents will be unpacked.
- Confirm start the procedure and wait for it to finish.
This completes the process of extracting documents from the virtual disk.