How to turn off OneDrive syncing and auto-launch
- Right-click on the OneDrive tray icon and select Options.
- Go to the tab Options. Uncheck Automatically launch OneDrive when you sign in to Windows.
- Go to tab Account. Click on the inscription Unlink this computer.
- Reboot your device.
- Please note that the OneDrive shortcut in the Explorer navigation area will not disappear. Use the instructions below to remove it.
- If you want to change everything back, find OneDrive in the Start menu, launch it and go through the first setup process.
Desktop, Pictures and Documents folders are always synchronized
For use with OneDrive, the application allows you to: configure which folders we want to synchronize all those that make up our hard drive. Among them, there are two folders such as "Pictures" and "Documents" that can be configured to store all your data directly in the cloud, allowing us to always keep all our files in sync.
That folders can be configured so that all their contents are synced automatically can be very useful, but we must use it with caution as it can be counterproductive. In case we accumulate a large number of files and gigabytes of storage, we will be uploading and downloading a large amount of data continuously, which may cause our internet connection to slow down constantly or exhaust the storage of our OneDrive fast track account.
To prevent this from happening, we will show you how we can configure OneDrive to control which folders should be synced, so we manually decide which contents of these folders we want to use locally and which we want to sync to the cloud.
How to disable OneDrive using Group Policy Editor
This method only works on Windows 10 Pro, Enterprise and Education. If you have Windows 10 Home or Home Single Language edition installed, one of the instructions below will work for you.
- Use a keyboard shortcut Win+R. Enter in line gpedit.msc and press Enter.
- Go to the following branch: Computer Configuration
–
Administrative Templates – Windows Components – OneDrive . - Double click on the parameter Prevent OneDrive from being used to store files.
- Check the box Included and press Apply.
- Reboot your device.
- If you want to change everything back, change the value of this parameter to Not configured .
OneDrive Alternatives
You should never be forced to use anything against your will. And you should never see it in your system, giving you the evil look of "I'm still here, sucker!" That's why if you have a serious dissatisfaction with OneDrive, you will be able to delete it. Plus, in the future, if you happen to fall in love with OneDrive again, everything will be completely reversible. Just do the exact opposite of what I told you to do above.
The internet offers a LOT of alternatives to OneDrive alternatives, and they all try to outdo each other with special offers every day. By far the best service is Dropbox, which arguably has the highest name recognition and the best powerful tools. But they are drowning by charging too much money.
The other top contender is of course Google Drive, which is very cheap. But you may also have problems with Google, especially if you value your privacy. But Google Docs is worth using, so you might want to keep the Drive account just for that. You get 15 GB for free. get the most out of Dropbox's measly 2GB.
Other options? Well, there's Box, Mega, SpiderOak, iCloud, and Sugarsync, to name a few. In fact, this market is completely saturated, as this Alternative.to page shows. Just yesterday I heard really good things about SpiderOak, which encrypts your files and claims that they have no way to unlock those files if they are forced to do so. Of course, you can simply encrypt your files using VeraCrypt (a successor to the Truecrypt variant) if you want to use a different service.
How to disable OneDrive using Registry Editor
If you have Windows 10 Home or Home Single Language installed, you will not be able to use the previous instructions due to the lack of a Local Group Policy Editor. In such a case, you can disable OneDrive using Registry Editor.
- Launch Registry Editor. To do this, use the keyboard shortcut Win+R. Enter in line regedit and press Enter.
- Navigate to the following branch: HKEY_LOCAL_MACHINE\SOFTWARE\Policies\Microsoft\Windows .
- Right-click on the right side of the Registry Editor and select Create - Section.
- Name the new folder OneDrive .
- Go to this folder.
- Right-click on the right side of the Registry Editor and select New - DWORD Value (32 bits).
- Name the new parameter DisableFileSyncNGSC
and give it a value
1. - Reboot your device.
- If you want to change everything back, go to the HKEY_LOCAL_MACHINE\SOFTWARE\Policies\Microsoft\Windows\OneDrive and set the DisableFileSyncNGSC
to
0 .
Why Remove OneDrive From Windows?
The Microsoft cloud stores your photos, videos and documents, usually without any problems. It offers various upgrades to limit your storage (sometimes for free) and can be accessed from any device. So why do you feel the urge to get rid of it?
Perhaps you're a fan of another system, such as Dropbox, Box or Google Drive. If you've spent a lot of time on these services over the years, you'll be rightfully reluctant to switch. On the other hand, you may have spent enough time with OneDrive to know that you don't like it. You might not even realize you have OneDrive.
In any case, you can disable OneDrive on your computer. Just make sure you take precautions first. If you're moving away from OneDrive, take the time to move the data you need to your new preferred cloud drive.
How to completely remove OneDrive
There is a way to completely remove OneDrive from Windows 10. We do not recommend using it as it may cause various problems. In particular, some applications may refuse to work, OneDrive may not be restored, and the program may be reinstalled during a system update. If you still decide to get rid of OneDrive this way, then follow these steps:
- Press Win + S.
- Type Command Prompt .
- Right-click on the found program and select Run as administrator.
- Enter the following command: taskkill /f /im OneDrive.exe
- Depending on the size of your system, run one of the commands below. 32 bit: %SystemRoot%\System32\OneDriveSetup.exe /uninstall 64 bit: %SystemRoot%\SysWOW64\OneDriveSetup.exe /uninstall
- Wait about a minute. The system will not display any dialog boxes, status bars, or the like.
- Reboot your device.
- If you want to try to get everything back (this may not work), go to the folder depending on the bitness of your system and run the OneDriveSetup . 32 bit: C:\Windows\System32 64 bit: C:\Windows\SysWOW64
Windows 10 Home Users
Disable OneDrive
First, find the OneDrive cloud icon in the notification area (the area at the bottom of the screen next to the clock). It should look like this:
Right-click and select the Settings option .
Unchecking Start OneDrive automatically when I sign into Windows will stop the sync program from loading every time Windows starts. Now click Unlink OneDrive and this will unlink the sync program from the folder in File Explorer. The blue OneDrive cloud that is usually located next to the yellow File Explorer folder will now disappear, turning it into a regular folder.
Now turn off OneDrive syncing from your computer. Your best bet is to use something like CCleaner or Revo Uninstaller to make sure you get all traces of it.
Removing a folder from your computer
OK, deleting the folder itself from File Explorer involves getting your hands a little dirty and exploring the Windows Registry. Don't panic because it is very easy. I will even hold your trembling hand for you.
First, on your keyboard , press the Windows + R keys to bring up the Run menu. When the window appears, enter
freeze
You will receive a warning asking if you are sure. Click Yes and a registry window will open.
The fastest way to find what you're looking for is to use the keyboard shortcut CTRL + F. This will open a search box inside the Registry Editor. In this field, enter the following:
System.IsPinnedToNameSpaceTree
This will immediately lead you to the correct box.
Double click System.IsPinnedToNameSpaceTree and you will get the following window:
In the Value , change the value 1 to 0 , click OK, and close Registry Editor. Now restart your computer. The OneDrive folder has disappeared. Farewell.
There is also a method floating around on Reddit that recommends deleting OneDrive. You n't try this if there's a chance you'll ever want to get OneDrive back because we don't know if it's possible without resetting Windows 10 to restore
How to remove the OneDrive shortcut in Explorer
- Launch Registry Editor. , use the keyboard shortcut Win + R. Type regedit and press Enter .
- Navigate to the following branch: HKEY_CLASSES_ROOT\CLSID\{018D5C66-4533-4307-9B53-224DE2ED1FE6} .
- Change the key value System.IsPinnedToNameSpaceTree
on
0. - Reboot your device.
Thus, if you prefer third-party cloud services, like Google Drive, Yandex.Disk or MEGA, you can remove references to OneDrive from all parts of the operating system.
Removing from autorun
In fact, the service is good and convenient, but very intrusive, and if you still use it, albeit very rarely, then I recommend simply disabling OneDrive. To do this, just remove it from autorun.
We do the following:
- Move to the tray, click on the program icon and go to the “Options” section.
- Next, uncheck the automatic launch option and click on the “Delete connection” button.
- Save the actions by clicking “OK”.
Now, when you boot your computer, OneDrive will no longer automatically load, but it will remain in Windows 10 itself, and you can launch it at any time if necessary.
Method #3 – Sign into OneDrive but don't use it
The last path is the most obvious. If you're not interested in the OneDrive service, but on the other hand you don't want to disable or delete anything on your computer, simply sign in to OneDrive using your Microsoft account.
Once you sign in, you can choose which folders sync to OneDrive—if you don't choose anything, no files will be uploaded to the cloud. OneDrive will sign in, but in practice it won't make any difference. This is also a good way to disable the popup by logging into the service without making significant changes.
Using PowerShell
You can get rid of this application using the PowerShell tool.
To run it, you need:
- Open the search section and enter the name of the tool.
- Right-click on it and open it with administrator rights.
- Enter the following phrase: Get-AppxPackage-name* OneDrive | Remove-AppxPackage and press Enter.
Now you need to wait until the procedure is completed and restart your PC.
Using the built-in uninstaller
As mentioned earlier, starting with Windows 10 update 1703, it became possible to completely remove OneDrive from the operating system once and for all.
This can be done using a regular application uninstaller, which is built into the system by default.
To use it, you need:
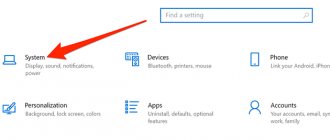
- Go to the settings section by pressing “Win + I”.
- Go to the “Applications” menu, then to “Applications and Features”.
- Select the program and click the “Delete” button.
You can also uninstall using the “Programs and Features” section located in the Control Panel:
- Open the Windows 10 search bar, enter the phrase “programs and” and click on the section found.
- After which you will see a window with installed applications. All that remains is to select OneDrive and click the “Delete” button at the top of the window.
It would seem that everything is fine, and we completely got rid of this service, but no, for unknown reasons, the synchronization service remained in the Quick Launch panel. How to get rid of it, read below.