Resetting the folder view
If you want to reset any changes, then there is a “Restore icon” function for you, which you can find in the left navigation panel of the program.
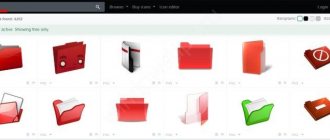
Other features of IconPackager.
In addition to manually editing folder icons, you can also download ready-made icon packs from the Internet, change the images of control panel sections, the Start menu, cursors, default icons for music files, images, and so on.
Previous article: What is the difference between a public page and a VKontakte group? Next article: Ubuntu Bash Shell Available on Windows 10
Changing folder colors
When storing a large amount of information on your computer, highlighting the folders in different colors will make it easier to navigate through them. This can be done either using the standard features of Windows 8, 10 and 11, or by using a special program.
Folder Marker Free utility
This utility offers ample opportunities for customizing folders on a computer running Windows. In addition to changing the color, you can set the priority of folders, indicate the stage of work on a specific project located in this folder, and select the type of information stored.
Briefly about how to do this in Folder Marker Free:
- Download and install the program.
- Launch the utility and change the interface language to Russian in the “Language” menu bar.
- Click on the open folder icon on the right at the top of the window.
- From the list that opens, select the folder whose color you want to change and the required color in the “Colors” tab.
- Confirm your selection with the “Apply” button.
- Make sure the color is changed.
Folder Marker Free automatically adds its own context menu to modified folders to indicate additional file properties. The function also works when the program is closed.
Using standard OS tools
You can also visually select the necessary folders using the standard features of Windows 10 and 11.
To do this you need:
- Download a set of icons in the “.ico” format on the Internet and unzip the downloaded file.
- Right-click on the folder whose color you want to change.
- In the context menu that opens, select “Properties”.
- Go to the “Settings” tab and click on the “Change Icon” button.
- Click on the “Browse” button and find the folder with icons.
- Select the desired color by clicking on it. Click the Open button and confirm the replacement by clicking “OK” in the two previous windows.
It is worth considering that the preview function does not work when changing the color using one of the methods described above. If after applying the settings the color of the folder has not changed, refresh the desktop through the context menu.
Any described method will take no more than a few minutes, and will help sort different types of files by appearance and make your desktop design unique.
Changing the folder background
First of all, it will simplify the search and make the desktop unique.
In Windows 10 and 11 operating systems, there are several ways to change the background color of a folder:
- using the QTTabBar and Total Commander utilities;
- through OS capabilities.
Below are detailed instructions for each of these methods.
Using the QTTabBar utility
This application is free and allows you to expand the capabilities of the standard Windows Explorer 8, 10 and 11, including changing the appearance of the folder to suit your needs. Finding a utility on the Internet is not difficult. For the program to work correctly, it is recommended to restart your PC after installation. Now, when you open any file, tabs appear at the top, like a browser.
To change the background using QTTabBar you need to:
- Open the QTTabBar settings using the right mouse button next to the tab that appears in the top menu or using the keyboard shortcut Alt+O.
- In the window that opens, select the “Compatible Folder View” section and check the “Compatible list view style” box. To apply the settings, click the “Apply” button.
- In the “Compatible list view style” section, open the last tab “Watermark” and select background images of folders of different categories: general, documents, images, music, video. After adding, confirm the actions with the “Apply” button.
- To read the name correctly, you should change the color of the text under the folder and the background on which it will be displayed. To do this, go to the “Appearance” section, “Folder View” tab, select the color settings you like and apply them.
Other features of QTTabBar include: changing folder icons, colors in Explorer, setting hotkeys and sounds after certain actions. For example, after copying text to the clipboard, a bell will ring. Convenient and unusual.
Using standard OS settings
This method allows you to change the appearance of the background by setting the dark mode. The procedure is as follows:
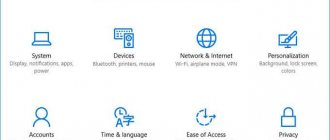
- From the Start menu, open Settings.
- Go to the Personalization section and click on the Colors tab.
- In the list of color options, find the section “Choose a default application mode” and set it to “Dark”.
After this, the background of all folders will become dark.
We use the Total Commander manager
This is a convenient file and folder manager that many people use instead of the standard Explorer. In the program settings you can also change the background of selections and the color of files. The method is suitable for those who use Total Commander as their main file manager and want to conveniently organize their space.
Algorithm of actions:
- In the main program menu, go to the “Configuration” section and select “Settings”.
- Click on the "Colors" tab.
- Specify the color of the text, background, cursor and highlights.
- Apply new settings.
After making the settings, it will be possible to highlight some folders against others, which will allow you to navigate through hundreds of files and quickly find the desired folder.
Changing the icon
In the latest Windows 10 and 11 operating systems, Microsoft developers have made many changes and added hundreds of new features. The changes also affected the appearance. Now users have the opportunity to choose the appearance of icons according to their preferences.
Change the desktop folder icon
In addition to third-party programs, any version of Windows OS has the main desktop icons, which include “My Computer,” “Trash,” and “Control Panel.” Their appearance can also be changed, which requires a number of steps:
- From the Start menu, select Settings.
- In the window that opens, go to the “Personalization” section and open the “Themes” tab.
- In the “Themes” tab, select the “Desktop Icon Settings” option and click on it.
- In the list that automatically opens, select the name of the icon that you want to change and click the “Change Icon” button.
- Click on the appropriate icon from the list proposed by the system and click “OK”
- Confirm the changes with the “Apply” button.
How to put your own folder icons
If you need to radically change the design of your desktop and make file organization more convenient, then do the following:
- First, you need to download the icon in the “.ico” format, with which we want to replace the standard one.
- Right-click on the folder whose icon we want to change. In the menu that opens, select “Properties”.
- Go to the “Settings” tab, where click on the “Change icon” button.
- Click on the “Browse” button and select the previously downloaded icon.
- In the window that opens, find the folder in which the desired icon is stored and click “Open”.
- The system returns to the previous window, where you need to confirm your choice with the “OK” button.
- To exit the “Properties” window and save the changes, click on the “OK” button.
- The icon should change, sometimes you need to press F5 to refresh.
To return the standard view of the folder, you need to click on the “Restore defaults” button in the selection window.
General information about “Explorer Options”
“Explorer Options” is a special setting environment, the main purpose of which is to configure the opening, search and appearance of directories in Explorer. If we switch to a more understandable language, the Windows file manager management interface is responsible for:
- methods for opening folders;
- displaying different types of directories in Explorer;
- searching for information on files and folders during user requests.
How to open File Explorer Options in Windows 10
Like any settings interface in Windows, File Explorer Options can be opened in several ways:
- Customizing the appearance of Explorer in Windows 7
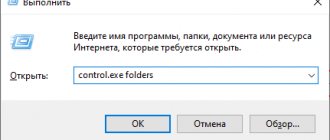
- command control.exe folders in the executing program (win + R) or command line terminal; Press the Win+R key combination, enter the command control.exe folders and click OK
- through the “Control Panel”: open the “Start” menu - “System Tools” - “Control Panel”;
- make a display in the form of “Icons”, then open “Explorer Options”; In the "Control Panel" environment, open "Explorer Options"
- open the “File” tab, click “Change folder and search options”; Open the “File” tab, click “Change folder and search options”
Description of the “Explorer Options” tabs
The Explorer Options interface is divided into three tabs: General, View, and Search. This was done for ease of use and grouping of settings.
General Tab
“General” settings have only three settings columns:
- “Browse folders” - sets the option to open folders (each in a new window or not);
- “Mouse clicks” - sets the method for opening a folder, single or double click;
- "Privacy" allows you to save recently used and frequently used directories in the Quick Access Toolbar. The “General” tab is responsible for opening folders and privacy
View Tab
The “View” tab is the most voluminous in terms of the number of settings. It consists of one dialog box with a whole list of settings in the form of toggle switches and checkboxes. Here you can customize the appearance of files and folders, as well as hide certain categories of directories.
The “View” tab is responsible for displaying folders in “Explorer”
Search Tab
“Search” configures basic settings that determine how folders are sorted when a search is requested. Information detection can be set in archives, system folders, and also searched directly inside files and documents. In addition, it is possible to use indexing or refuse it.
The “Search” tab configures the basic parameters for searching in the system
How to change for one directory
If you need to configure work with only one directory, then you do not have to open it. Simply find the item you want to change on your computer, then right-click on its icon and select “Properties” from the list.
Each of the tabs helps you change your own options:
- “General” - here you can find out information and change attributes;
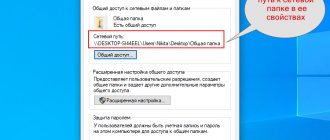
- “Access” - this tab should be used when you want to allow or deny the use of files in it by other users on the home or global network;
- “Settings” - allows you to optimize the folder for storing certain files and change its icon.
How to customize and save folder views in Windows 7
One of the annoying inconveniences in Windows is the system's inability to save custom folder layout settings. By default, all files are displayed as a table, and even if you change the view, after you close and reopen the folder, the contents will remain unchanged as a table. In addition, you can remember that “Windows” does not always correctly determine the folder template depending on the files in it; in general, in this article I will tell you in “pictures” how to quickly set up and save the desired type of folders without touching the fragile registry.
/ published in the IT publication “Computer News” on April 29, 2015 in the “Note” section /
And we will start the process with a “clean slate” - resetting the type of folders in our favorite “seven”.
- In order to reset the view of folders, you need to open any non-empty folder and in the upper left part of Windows Explorer, click on “Arrange” → then, in the drop-down menu, select “Folder and Search Options” (screenshot) → in the window that appears, on the “View” tab click on the desired button “Reset folder view” → in a new window to the question “Set the view of all folders of this type on the computer in accordance with the default settings?” Use the mouse to answer “Yes” → “OK” (next screenshot, option 1).
- The second method: through “Start”, open “Control Panel” → “Folder Options” → similar final (“View”, “Reset folder view” and confirm what has been done).
- To change the type of display of files in folders by default in the same “any-non-empty” folder, press the “Alt” key → in the menu that appears at the top of the explorer, select “View” and, of course, mark the desired type of folders (the author settled on the optimal “Regular icons” ) → then click on the familiar “Arrange”, “Folder and Search Options”, “View” tab → “Apply to folders” → “Yes” and “OK” (screenshot, option 2).
- Another way: in a folder, click on the “Change View” icon at the top right of Explorer → “Regular Icons” → after pressing the “Alt” key in the Explorer menu, click “Tools” → “Folder Options” → on the “View” tab, select “Apply to Folders” → “Yes” and “OK”.
I am sure that following the algorithms described above, you easily managed to configure and save the appearance of folders in Windows 7 in the appropriate way, i.e. "for yourself."
Dmitry dmitry_spb Evdokimov
As in previous versions, folder settings in Windows 10 can be changed and adjusted to suit your needs. This allows you to make the computer OS as functional and understandable as possible.
Displaying the hidden Folder Options item
If you have malware or viruses on your computer, Folder and Search Options may be hidden (if you need to show hidden files and folders, see How to show hidden folders in Windows 10). First, scan your device with anti-virus programs, then proceed to restore the hidden partition.
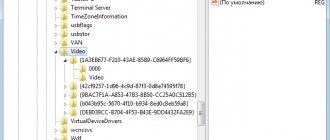
- Launch the Registry Editor with the command: regedit in the Run window.
- Go to HKEY_CURRENT_USER → Software → Microsoft → Windows → CurrentVersion → Policies → Explorer.
- Open the item "NoFolderOptions". The “Value” field should be 1. If the value is 0, change it, or delete the parameter.
- Navigate to HKEY_CURRENT_USER\Software\Policies\Microsoft\Internet Explorer\Restrictions.
- Open the item "NoBrowserOptions".
- Repeat the same steps as with the “NoFolderOptions” value.
- It is also worth checking the parameters:
- “NoFolderOptions” in the branch HKEY_LOCAL_MACHINE → SOFTWARE → Microsoft → Windows → CurrentVersion → Policies → Explorer;
- “NoBrowserOptions” in the branch HKEY_LOCAL_MACHINE → SOFTWARE → Policies → Microsoft → Internet Explorer → Restrictions.
- Make the necessary changes if necessary.
Conclusion
Configuring folder settings and opening access to them for home network users will make using the computer more convenient and functional. You can perform all actions without third-party utilities or programs using the Settings application.
Many people have wondered why Windows works this way and not some other way. Surely there are some rebels who would like to open a folder with a single click and select it with a hover or double click. Or maybe someone wants the hidden folders to cease to be so and to find out all the secrets of the users of this computer. It turns out that such features (and others too) are implemented in Windows 10 and earlier operating systems, and you can change certain Explorer settings with just a few clicks.
How to open File Explorer Options for a single folder
This is the last question left unanswered. Fortunately, opening the properties of one directory is much easier than searching for the general settings launch menu. The user just needs to go to “Explorer”, select the folder of interest, right-click, and then click “Properties”. There are several tabs with different parameters waiting for him here:
- General (size, creation date, and the ability to make the directory hidden).
- Access (setting visibility and accessibility for other users).
- Security (issuing permissions and restrictions for a specific folder).
- Previous points (restoring directory settings using a previous access point).
- Settings (optimizing the section and choosing a header image).
After changing the parameters, do not forget to click the “Apply” button. Otherwise, the new settings will be reset. If necessary, you can always return to the original settings by clicking the "Default" button. However, exactly the same opportunities are provided when changing settings for all folders together.