Disable adaptive brightness
Windows 10 comes with a feature called adaptive brightness that automatically adjusts the brightness of your display. If this setting is enabled and the environment changes, Windows automatically dims the screen.
In this case, turn off the adaptive brightness feature and see if your problem is resolved. You can turn this option back on at any time.
- Open the Windows 10 Settings app by pressing the Windows + I keys simultaneously.
- Select System in the settings window.
- Select Display from the options in the left sidebar.
- In the right pane, turn off Automatically change brightness when lighting changes.
From now on, Windows 10 will no longer automatically increase or decrease the display brightness. If your screen gets too dark or too light, use the brightness slider in the display settings menu to manually adjust brightness levels.
Setting up adaptive brightness on Windows 10 and disabling auto-brightness
How to open services in Windows 10 - description of available methods
If a user is annoyed by a too bright Windows 10 monitor screen, then perhaps the problem lies in the adaptive adjustment settings for this parameter in the power consumption configurations of the computer or laptop. To check whether this parameter is activated, you must:
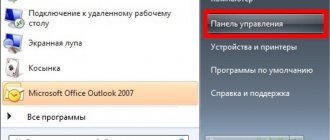
- Click on the “Start” menu button to launch the corresponding window and enter “Control Panel” in the search bar, selecting it. You can also simply right-click on the virtual “Start” button and select the desired item from the menu that appears.
- Wait until the “Control Panel” opens and go to the “Power Options” section, which can be found in the utility’s own search bar or by changing the settings display mode to “Small icons”. Sometimes you first need to go to the “Hardware and Sound” section, and only then to “Power Options”.
- In the electrical power settings, find the power mode that is currently in use and click on the “Setting the power supply scheme” link.
- Check the brightness configurations and disconnecting the display from the battery and network if you are using a laptop.
- Follow the "Change advanced power settings" link.
- Make sure that the parameters are changed specifically for the scheme being used. To do this, check the “Active” inscription in the field. If it is not there, then from the presented list select the name next to which this mark is.
- Scroll down to the inscription “Screen” and open this section.
- Go to the subsection “Activate adaptive brightness” and set the parameters to “Off.” both for mains power and for operation from a built-in battery.
- Apply and save the settings, and then restart the laptop or computer.
Note! Sometimes a reboot is not necessary, and the screen immediately stops changing its brightness depending on the light level. If this does not help, then you will have to work with the video card drivers (built-in or installed): update them or, conversely, roll back to previous versions.
The power configuration can also dim the screen.
Check the list of startup programs
If your Windows 10 screen dims a few seconds after your computer boots, the startup program could be the culprit. Your system loads a lot of programs at startup, and it's worth checking this list of programs to look for any suspicious items.
- Open the Start menu, search for Settings, and select Settings from the search results.
- Select Applications in the Settings window.
- From the left sidebar, select Launch.
- On the right, all programs with the switch enabled can start when your computer boots.
- Disable all or only suspicious programs in this list. A suspicious program is basically a program that you recently installed before the screen problem occurred.
- Restart your computer and see if the problem goes away.
Problem with Intel video cards
If your laptop has a built-in Intel 4000/530 or other video adapter, and the first method did not help, then do the following. Right-click on the desktop and select “Graphics characteristics”
The Intel HD Graphics Driver Control Panel will open. If this is not the case, then write “intel” in the search bar of the Start menu and select “Intel(R) Graphics and Media” from the results.
In the driver panel, select “Power Options”:
Next, turn off the display energy saving technology and set it to maximum quality:
The second option is to disable “Extended battery life for gaming applications”. Surprisingly, this can affect the floating brightness on the desktop.
Use the Power Troubleshooter
Windows 10 includes many troubleshooting tools, one of which is the Power Troubleshooter. With it, you can find and resolve most power related issues, including screen dimming issues, on your PC.
To run the troubleshooter:
- Open the Settings app on your computer.
- Select Update & Security from the main Settings screen.
- In the left sidebar, select Troubleshoot.
- Select the Advanced troubleshooters option in the right pane.
- Find Power in the list of troubleshooters, select it, and then select Run troubleshooter.
- Wait while the troubleshooter detects and resolves problems with your power settings.
Why doesn't adjusting screen brightness work in Windows 10?
There are several possible causes for this problem. Before you fix the problem, you need to find out why exactly the brightness control stopped working. You can change the situation yourself by using the capabilities of Windows 10.
Common reasons for deactivating the brightness control:
All sorts of problems with the monitor's color adjuster usually arise after a clean installation of Win 10 or updating the old OS to the latest version. If users notice that when they press the “Fn” + “F11” (“F12”) keys, the brightness of the monitor does not decrease or increase, and there is no adjustment slider in the Windows “Options” “Display”, then reinstalling Windows led to some kind of internal failure.
If a problem occurs, first of all, you need to check the monitor and video card drivers through Device Manager. You can adjust the color of the display through the power options or the Graphics Control Panel. As a last resort, you can activate the disabled adjustment by rolling back Windows to the previous version.
Update your video card drivers
A possible reason why your Windows 10 PC screen is automatically dimming is that you are using outdated graphics drivers. Graphics drivers allow your graphics card to communicate with your system, so you should always keep those drivers up to date.
If you have not updated these drivers for a long time, please run the driver update as follows.
- Open the Start menu, search for Device Manager, and select the option from the search results.
- Select "Display Adapters" to expand its menu.
- Right-click your graphics card under "Video Adapters" and select "Update Driver."
- In the window that opens, select the Automatically search for drivers option.
- Let Windows 10 find and install the latest graphics drivers on your computer.
- After installing the drivers, restart your computer.
If all else fails
If you don’t play 3D games, then you can take an extreme measure - change the video card driver to the built-in one in Windows. The method is NOT only suitable for Intel.
Open Device Manager (right-click on the Start menu), select “Video adapters”. Here you will have Intel, AMD or whatever. Right-click on the adapter and “Update drivers...”
In the window that appears, click “Search for drivers on this computer”, then “Select a driver from the list of already installed drivers”
In the list you need to select “Basic video adapter (Microsoft)”
While changing the driver, the screen may blink. The laptop will not reboot automatically, but it is better to do it manually. In this simple way, we turned off all the “tricks” from the manufacturer, but also lost technological advantages. In fact, now the video card can only draw the desktop and video.
To return everything back, you need to do the same thing, but select the old driver in the last step. Or restore to a system restore point.
Source
Turn off screen power saving mode
If your video or graphics card comes from a reputable manufacturer, chances are you have the manufacturer's tool installed on your computer. This tool will help you configure various parameters of your card.
This tool may have enabled a power saving mode for your graphics card. In this case, the mode automatically darkens the screen after a certain time.
To fix this, simply disable the power saving option in this utility. In the following example, we will use the Intel utility to disable Power Saving Mode.
- Open the Start menu, search for Intel Graphics Control Panel and select the option from the results.
- Select Power from the utility's main screen.
- In the left sidebar, select On Battery.
- In the right pane, under Display Power Saving Technology, select Disable.
- Click "Apply" at the bottom to save your changes.
Hopefully, your Windows 10 PC screen will no longer dim automatically. And if so, let us know which method worked for you in the comments below.
Problem with Intel video cards
If your laptop has a built-in Intel 4000/530 or other video adapter, and the first method did not help, then do the following. Right-click on the desktop and select “Graphics characteristics”
The Intel HD Graphics Driver Control Panel will open. If this is not the case, then write “intel” in the search bar of the Start menu and select “Intel(R) Graphics and Media” from the results.
In the driver panel, select “Power Options”:
Next, turn off the display energy saving technology and set it to maximum quality:
The second option is to disable “Extended battery life for gaming applications”. Surprisingly, this can affect the floating brightness on the desktop.
Why doesn't the brightness change on the computer?
If the brightness does not change with hot keys (for example, fn+F5 or fn+F6), but it can be changed in the power settings, then most likely your laptop does not have a special application installed that activates special hot keys specifically for your laptop model.
Interesting materials:
When is the last day of work upon dismissal? When are we open in December 2022? When does Vieta's theorem work? When people are laid off at work, how much do they pay? When is a permit issued for working at height? When do we go back to work after the New Year holidays? When do we go back to work after New Year's? When do we start work in January 2022? When to go to work after the New Year holidays 2020? When are the days off for work in May 2022?
Spontaneous change in monitor brightness - the laptop changes the brightness itself! Why?
Question from a user
The brightness on my laptop began to change spontaneously: when the image is dark, the brightness drops, and when it is light, it is restored to its normal level.
How can I get rid of this problem, otherwise my eyes are starting to get tired because of it? OS: Windows 8, graph. accelerator (video card) Intel HD 4000 (built-in).
Good day!
This problem began to appear more and more often after the release of Windows 8 (this OS introduced the ability to adaptively adjust the brightness, depending on the picture on your screen ☝). Also, some laptops are equipped with special software and sensors that determine the level of light in the room and use it to adjust the brightness of the screen.
There is nothing wrong with this, but in certain cases such a change does not allow it to work normally and interferes with the user. In the article I will tell you in detail how you can disable this spontaneous change in brightness.
Troubleshooting a laptop problem
Sometimes after reinstalling Windows 10, computer problems occur. The user suddenly notices that the monitor is too light or, conversely, dim, and it is not possible to adjust the color in the usual way. In this case, you can debug the screen parameters using other methods. Windows 10 provides users with the opportunity to independently (without involving a specialist) fix problems with the computer display color controller.
Adjusting brightness based on power settings
Method for making changes to the power circuit (if the display brightness is not adjusted by the usual method):
Changing brightness in graphics settings
A simple way to debug the display color through the “Graphics Control Panel” (when the color does not change in the usual way):
Integrated Graphics Update
How to update the graphics driver (if you have lost the ability to adjust the display color in the usual way):
Restarting the "Universal PnP Monitor"
How to check if an option is active:
Updating video card drivers
What to do if you cannot adjust the display brightness:
Changing the Graphics Display Type in the BIOS
How to change the “Graphics Device” type through BIOS (if the brightness on the PC is not reduced):
Fixing Catalyst Error Using Registry Editor
How to fix AMD Catalyst problems (using an ATI graphics card):