The Windows operating system has powerful recovery tools that can help solve many problems. Everyone knows about restore points and the ability to independently roll back the system to the state before the failure. But if particularly critical errors occur, the system initiates a process called automatic recovery. This happens when the OS starts, and sometimes ends fatally - with the appearance of a black screen or a corresponding message that will hang for hours until you turn off the computer. And the next time you turn it on, the picture will repeat.
This does not mean that you will have to reinstall Windows - the problem can be fixed, although not always. Today you will find out why the loop occurs during the automatic recovery preparation stage and what to do to restore normal booting of the operating system.
How to disable automatic recovery in Windows 10
You can disable automatic recovery, also known as “automatic repair”, in the following way:
- On the “Automatic recovery” screen that appears, click on “Extra options».
- Click on the tab “Troubleshooting»
- Next, click on “Extra options».
- Select the option "Command line" and enter the command in it bcdedit /set {current} recoveryenabled no.
- Close the line and click on “Turn off computer” and start it again.
To return automatic recovery:
- Click the “ Start ” button.
- We type "Command line", open as administrator and enter the command in it: bcdedit /set {current} recoveryenabled yes.
What instrument are you? Take the test and find out
Diagnosing Your PC/ Preparing Automatic Repair Loop
Laptop is stuck during startup – with a screen saying Preparing Automatic Repair or diagnosing your PC!
A true example from answers.microsoft.com is shown below:
Laptop is just stuck in an infinite loop between diagnosing your PC and Preparing Automatic Repair. Sometimes it comes up with repairing disk errors, but never stays and just enters the loop again. I've read numerous other threads online and yet to find something that works. Starting to think there is nothing I can personally do.
What should you do if you are one of them?
Video Tutorial
Now, before solving the issue, you should know what Automatic Repair is.
What Is Automatic Repair?
Automatic Repair is a feature introduced in Windows 10/8 that can fix some PC issues when the computer cannot boot properly.
But sometimes due to some reasons, Windows Automatic Repair might fail to work and get stuck in diagnosing your PC. It will go to a blue or black screen of death error. HP, Lenovo, Asus, Dell and Acer users are the most common victims of this issue according to a report online.
If your laptop stuck on Preparing Automatic Repair during startup, you can try the following solutions.
Note:
If your computer contains massive important data, it is better to recover the important data before attempting any solutions because any mistaken operation might cause data loss permanently.
How to Recover Data When PC Won't Boot
is recommended here.
Automatic recovery after shutting down or restarting Windows 10
This option is one of the most popular. Automatic recovery and system checking for malfunctions are activated after the device is finished operating. Solving the problem is quite easy - just click the “Restart now” button or a regular reboot.
Sometimes the user may notice that such an error appears only after the device has been turned off for a long time or disconnected from the network.
If this is your case, we advise you to try the following options to deal with the problem:
- Disable Windows Fast Startup. This is the easiest way. Perfect if such a screen appears after unplugging the device from the outlet.
- Install the chipset and power management drivers (for Intel - also Intel ME (Management Engine Interface) drivers). You can find them on the official website of the laptop or motherboard. Not even the latest ones will do.
- If you use the Quick Start option, do not unplug the computer's power.
When the Fast Startup option is enabled on the device, it does not shut down completely when shutting down. The computer is in a mode similar to hibernation. After such a sleep, the computer cannot boot correctly if the installed chipset and power management drivers fail. A similar situation occurs when the computer is unplugged from the outlet.
After a similar error occurs while loading the system, self-recovery mode starts.
Super test on the topic “Money” and how can you be friends with it?
Incorrect system startup
If, after turning on the computer, you see an automatic recovery notification with the words “The computer did not start correctly,” then it means that there is a problem with the system. They could appear for the following reasons:
- damage to the system files - system files could be damaged due to improper termination of the device, the actions of malicious programs (viruses), or simply due to careless handling of them;
- Damage to the system registry - registry entries can also be corrupted by viruses or programs to clean up its damage. Therefore, it is always worth making copies of the registry before changing it;
- Incorrectly installed update - if the update files were not downloaded completely or were installed with an error, then you may get this problem the next time you start the operating system;
- one-time system boot errors - due to hard drive problems, the operating system may boot incorrectly.
However, directly restarting the computer does not always help. If corruption of system files has indeed occurred, then after a reboot you will see the same window again.
If after restarting the computer you get a black screen, it means that the system was unable to load the initial Windows shell again.
Manually fixing problems causing automatic recovery
If you have a problem with automatic system recovery, try to solve it manually. For this:
- Allow the automatic diagnostics to complete, which run themselves after an error occurs.
- After that, you are taken to a screen with different tools to solve the problem.
- Next on the screen that appears is “Automatic recovery”, then “ Advanced options ”.
- Next, select the item “Troubleshooting» — «Extra options».
- Here you choose a tool, focusing on what caused the problem.
- Firstly, if such a screen begins to appear after installing new programs or working with the Windows 10 system registry, click on the “System Restore» using restore points.
- Secondly, if the permanent “Automatic Repair” started to start after updating Windows 10, click on the “Uninstall updates" Here start with the point " Uninstall latest fix", and then try "Uninstall the latest feature update».
Here the system may ask for a password; if you do not have one, just skip this point. - Thirdly, the problem appears after a power failure or division of the hard drive or SSD. Then refer to the " Startup Repair " section.
- Fourthly, if none of these options solved the Windows 10 automatic recovery preparation error, check the functionality of Safe Mode. For this:
- Select "Boot Options»
- Then run the command "Reboot».
- A window will appear, click F4 to enter safe mode.
- Safe Mode should start working. Here you can undo actions that preceded automatic recovery. Don’t forget that you can always use the section “Return the computer to its original state” - “Troubleshooting” to return the device to its original settings. This will reinstall the system while preserving your data. You just have to spend a little time and wait for all the updates.
Hard drives and RAM
If the problem is in the computer hardware, it may well be that first you should check the disk by booting from removable media using the command line, in which the command chkdsk /x/f/r is written, and at the same time use a check of the main system components (sfc /scannow).
If it is possible to make a safe start, the Victoria (for hard drive) and Memtest+ (for RAM) utilities are perfect for checking. In some cases, if the hard drive has begun to, as they say, “crumble,” as stated, the HDD Regenerator hard drive magnetization reversal program can provide invaluable help. It is difficult to say how effective this application is, but judging by the reviews, some hard drives can sometimes be restored in this way.
Avoid automatic recovery by booting into safe mode
As mentioned above, you can get rid of automatic recovery by trying to boot Windows 10 in Safe Mode. To do this, you need a minimum number of files and utilities. The device may start normally. If preparation for automatic recovery of Windows 10 appeared due to damage to system files, then this mode will help to find and fix them. For this:
- We boot the computer using a bootable USB flash drive.
- Set the desired language and move on to the next section.
- Select the item “System Restore»
- Then "Troubleshooting»
- Next we run “Command line" Enter the command in the line: bcdedit /set {default} safeboot minimal.
So you have set the system to boot in “Safe Mode”. - Close the window and click "Continue».
- Log in to your account using the "Start", run "Command line».
Then enter two commands in it, press Enter after each:
- sfc /scannow
- dism /Online /Cleanup-Image /RestoreHealth
- Afterwards, we reboot the PC.
Expansion of reserved space
Another point when the Windows 10 “Preparing automatic recovery” screen appears, but then the system does not show any signs of life, is due to the fact that you need to increase the disk space allocated for saving backup copies. Again, this only applies to situations where Windows can be booted in Safe Mode.
In this case, the best option would be to use a small and fairly simple Partition Wizard program from MiniTool or a similar development with a built-in bootloader, which is much preferable for cases when the system does not start at all. In it you just need to increase the required space to at least 250 MB (it is better to set a slightly higher value), and then try to boot the system in normal mode.
How to remove automatic recovery using special tools
Another way to solve the problem is automatic recovery, using special tools. To do this, on the error screen, after scanning the PC, select “ Startup Repair ”.
This option independently searches for and eliminates problems that interfere with the normal launch of Windows 10. In our case, this is “Preparing automatic recovery.” To launch it, in the “Startup Repair” section, select the desired operating system and wait for the recovery work to complete.
Performing an operating system rollback
If nothing helps, then you need to proceed directly to restoring the operating system files. And this action can also be performed in different ways.
Return to the point of retracement
A rollback (restore) point is the state of the computer’s system files at a certain point in time. To create it, you need to do the following:
- Open the "Recovery" section in the "Control Panel". How to open this panel has already been mentioned above.
- Click the “Configure” button in the “System Protection” tab.
Go to the settings section under the “Protection Settings” window - Make sure system protection is currently enabled. If it is turned off, then immediately turn it on and configure the desired amount of space for rollback points on the hard drive. The more you allocate, the more rollback points can be created. Turn on system protection and make sure you have disk space for restore points
- Click the "Create" button in the previous window and enter the desired name for the rollback point. It can be anything.
Enter a name for the restore point and click "Create"
Now, if problems arise, you can return to the rollback point. This can be done in one of two ways:
- run the recovery procedure in the System Protection window. In this case, you can choose which point to roll back to;
Select which point the restore should be performed to - go to advanced system recovery options. How to do this was described in the paragraph “Disabling automatic recovery”. This time select "System Restore". Select System Restore if you want to roll back to a restore point from this menu
Regardless of the method you chose, you just need to follow a few steps:
- Select which restore point the system should be rolled back to.
Select a specific restore point from the list and click Next - Press "Next" to confirm your selection.
- Wait until the recovery process completes and the computer restarts.
Video: How to restore Windows 10 using a restore point
Resetting the system to its original state
If it is not possible to return to the restore point, then resetting the operating system to its original state will help you. This action is intended to replace reinstalling the operating system. Reset Windows 10 as follows:
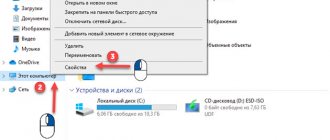
- Click on the Windows icon in the left corner of the desktop.
- Select the “Settings” section, it is marked with a gear icon. Select Settings from the Start menu
- Open Update & Security.
Open the Update & Security section to access Windows Update - In the “Recovery” tab, study the item about returning the computer to its original state. After that, click on the “Start” button.
Click the "Start" button under the option to reset your computer - Select the desired action in the next window. Please note that clicking “Delete all” will delete all data from the hard drive, except the operating system.
Specify what the system should do with files on your device - If you decide to get rid of the data, it will take some time to analyze it. Wait for this process to complete.
Wait while the system checks the files on your computer - Study the information about which programs and applications will be removed from your computer. Please review this list before proceeding.
- Review the information about your choice and confirm it by clicking on the appropriate button.
Review the information and confirm to reset your computer
After the reset, your operating system will boot in its original form, which will correct any possible problems in its operation.
Video: how to reset Windows 10 to its original state
Restore points
This method can be used if you have restore points. Then you can roll back to the original settings, and the problem “preparing automatic repair windows 10” or “Preparing automatic repair” will be solved. For this:
- After scanning the system, go to the section “System Restore».
- Click Windows 10 and move on.
- After this, a list of saved recovery points will open. It is better to select the nearest date and start the recovery process.
Volga or Pobeda? Are you familiar with the Soviet automobile industry? Test yourself in a fun test!
BIOS/UEFI Settings
Finally, the loopiness of the “Preparing automatic recovery” process in Windows 10 may be associated with the settings of the primary system, which involve deactivating the system of protection against hacker attacks at the hardware level (prohibiting the execution of executable codes). The loop appears for this reason.
Thus, to correct the situation, you need to:
- When you turn on your computer or laptop, enter the above parameters.
- Find a line like No-Execute Memory Protect or XD-bit and set it to Enabled.
- After this, you need to save the changes (F10) and restart the computer device.
Equipment check
If the Windows 10 system still does not boot, we recommend checking the serviceability and integrity of the hard drive. If you have several disks, disconnect everything and connect only the one on which the system is installed. Don't forget to remove all external drives.
You can also check the health of the disk on another device to be sure of its functionality. It is worth checking it for errors and bad sectors.
We also advise you to try reinstalling the RAM. To do this, remove all the brackets from the motherboard and insert them back one by one. After each, you try to turn on the computer.
This way you can solve the “Automatic system recovery” error if it arose due to incorrect operation of the device itself.
About the error
Preparing Automatic Repair occurs when for some reason Windows 10 is damaged. Essentially, the "preparation" feature is supposed to restore damaged files from saved restore points or Windows installation files on a connected external storage device. But in the absence of such, the window simply freezes and after a while, a reboot occurs. And the cycle repeats itself, turning into a closed loop. Break the loop by turning off the power for a while and read the instructions for fixing it.
Remove endless preparation of Windows 10 automatic recovery by reinstalling the system
This is a last resort method to solve the problem with automatic recovery. If you have tried all the methods described above, checked all the equipment and are sure of its integrity, reinstall the system using a bootable USB flash drive. To do this, insert it into the computer and then follow the prompts. However, we recommend that you let the system try to run automatic computer recovery. There may be problems with your device that need to be fixed. This procedure may take from 20 to 60 minutes.
Restoring the system using a boot disk
Another very effective way to return the system to a working state is to restore using a boot disk. It will help you both gain access to system recovery tools and allow you to restore Windows 10 using files of an identical operating system.
Creating a boot image
But before fixing the problems, a boot disk with the operating system must be created. The easiest and most accessible way to do this is to use the official Microsoft tool called Media Creation Tool:
- Download Media Creation Tool from the company's official website and run it on your computer.
- Select "Create installation drive".
Select "Create Installation Media" in Media Creation Tool - Specify the bit depth and language of your operating system. The data must match completely for correct system recovery in the future. Then click Next.
Specify the language and bit depth of your system - On the next screen, select ISO file entry. This will allow you to burn the operating system image to disk.
Specify the creation of an ISO file for burning to disk - The entire further process of creating an operating system image will be completely automatic.
Video: How to create installation media using the Media Creation Tool
Burning an image to disk
When the boot image of the operating system is created, all that remains is to write it to disk. Windows 10 has a standard recording tool for this purpose. You just need to do the following:
- Right-click on the recorded image and select “Burn disk image” from the context menu.
Right-click on the file and select “Burn disc image” - Select the drive into which the disc is inserted and click on the “Burn” button.
Select the drive with your disc and click "Burn" - Once the recording is complete, you can run Windows 10 Setup and access Windows recovery tools through it.
It's always better to try a system restore before reinstalling. But if the restoration does not work, you will already be prepared to reinstall the system.
Rolling back the graphics driver
If the problem is not resolved or you suspect that the graphics driver update was not completed correctly, you can use a rollback to previous settings. We are returning to the driver settings of the previous update.
For this:
- We enter “Device Manager”.
- Select the display driver and double click on it.
- Go to the section "Driver" and press the button "Roll back driver».
This way you will return to the settings of the previous update and can fix automatic system recovery in Windows 10.
M or F? Take the test and find out who you are in everyday life: are you a man or a woman?
Important information
In a situation with endless preparation of automatic recovery, programs and data become inaccessible. All actions will be performed in the Windows recovery environment. You will need a bootable USB flash drive or disk, which can easily be created on another computer. How to do this is written in detail in separate articles.
Read more: How to create a bootable USB flash drive with Windows 10 How to create a bootable disk with Windows 10
First, do a “hard reboot” - press the corresponding button on the system unit of your desktop computer. Unplug the laptop and remove the battery. Then hold down the power button for 15-20 seconds, insert the battery, connect the device to the mains and turn it on. If the system does not boot, proceed to the methods described below.
How to fix?
There are several effective tips for eliminating this problem.
Enabling XD-bit in BIOS
As long as the XD-bit feature (also known as No-Execute Memory Protect) is disabled in the BIOS (UEFI) settings, the user is faced with the Preparing Automatic Repair loop.
Interesting to know! The No-Execute Memory Protect function provides additional protection against hacker attacks, viruses and similar threats at the hardware level (hardware support for prohibiting the execution of program code from the data area). For the first time, such a function was acquired in processors: AMD Athlon 64, Sempron based on them, Intel Pentium 4 of the latest modification and Celeron based on them.
Turn on your computer and enter the BIOS (UEFI):
- Look in the BIOS tabs for the XD-bit or No-Execute Memory Protect feature, then select “Enable” to enable it.
- Save the settings and restart your computer (F10 → Yes).
Increasing the space of the “System Reserved” section
The error may occur due to the “System Reserved” partition having less space than it should have (at least 250 MB is needed). To increase the partition space, use the boot utility MiniTool Partition Wizard. You may need a different computer or try going into safe mode:
- Download the utility (ISO file).
- Mount it on a virtual disk (RMB on the file → open with → Explorer).
- Connect a formatted FAT32 flash drive, open the virtual disk and drag files to the flash drive to write.
- Also, to write the utility to a flash drive from an image, you can use any convenient program, for example UltraISO.
- Restart your computer and boot from the flash drive (the article “how to change the BIOS boot priority?” will help with this).
- The open program will allow you to work with hard drives.
Right-click on the system drive “C:” and click “Shrink”. Mark the 250 MB area. This will create 250 MB of unallocated area. - Move the System Reserved partition next to the unallocated space. Then right-click on System Reserved and perform the Extend function (Combining an indivisible area with a System Reserved volume).
- Restart your computer and check if Windows is working.
https://www.youtube.com/watch?v=KHuXmwexmFU
System Restore
You can restore Windows 10 using a boot disk or flash drive with a Windows distribution:
- Create a bootable Windows 10 USB flash drive (read more about this in this article) and boot from it.
- In the menu that appears, click “Repair your computer”.
- In the menu that opens, click “Diagnostics” → “System image recovery”.
Reinstalling Windows
If none of the tips described above helped to start Windows, reinstall it using the created bootable USB flash drive.
Checking the integrity of the hard drive and RAM
It is possible that Windows cannot boot due to the fact that system files are located on damaged sectors of the hard drive. To make sure that everything is in order with the hard drive, check it for bad parts and bad sectors. The Victoria program (or similar ones) can help with this. The program does not have an official website, so search engines can help you.
Also check your RAM for errors. The memtest86 program will help you with this.
Do you have any questions after reading the article? Ask them in the comments or use the special form to contact us.