Home » Uncategorized
Vladimir 11/15/2021
How to restore Windows from the command line
Laptops and PCs today are our indispensable assistants in work and education. With their help, we manage our projects, communicate with colleagues, listen to webinars and undergo online training.
And most of us use Windows system. If the system fails, you can try to restore it yourself using the command line.
To save your computer from constant resets and restarts when booting, you need to restore the operating system (Windows) in the command line.
An unsuccessful driver update, a full-screen banner asking you to pay for some service - all this complicates normal work with your PC.
“Safe Mode with Command Line Support” will help us restore the system .
Typically, the command line is used for advanced troubleshooting.
In this article, we will talk about 10 proven ways to solve Windows problems using it.
Commands to restore Windows XP
A functional failure may prevent the system from starting correctly.
A system rollback is possible only after the OS has been fully loaded.
But what if this process does not happen?
In this case, we need to use the Windows command line functionality.
The Recovery Console contains most of the most commonly used system commands.
They allow you to fix the problem and get your computer working again in a matter of minutes.
Error message
First, you need to have on hand an installation disk or flash drive with the version of Windows that was installed on your PC.
Nowadays, USB drives are the most commonly used.
Using a special utility Rufus , we can create such a drive in a couple of clicks.
If the BIOS subsystem supports booting from a removable drive, we need to insert our flash drive into the appropriate slot.
Next, you need to restart your computer (or turn it on).
Open the boot menu using the BIOS key.
Typically this is the Delete or F1 key , but other options are possible.
During loading, a hint with the name of the desired button will appear in the lower corner of the screen.
Then we select the location from which the system will install the files. In our case, this is a USB device .
Device selection
Next, the bootloader asks us to press any key to start the file copying process.
Like the picture below:
Press any key
We press, say, the space bar and move on.
The installation process of our Windows XP will open; you need to wait until all the boot files are unpacked.
Installing files
After unpacking is completed, the following window will open.
In it, press the R to open the recovery console.
Installer
Now you need to enter the number that corresponds to the desired copy of Windows.
In most cases, only one OS is installed, click on the button 1.
If you have a password set, you need to enter it and click Ok . Or just press Enter .
This will open the Recovery Console.
We can enter any command we are interested in in a text line.
A complete list of them can be obtained by writing
help
.
Recovery Console
Enter
fixmbr - this command will help restore the system boot partition.
To confirm any action, press the Latin letter Y and press Enter .
We write and confirm the command
fixboot
to start the process of writing the OS to the system disk.
Fix command
After the process is completed, enter
exit
to close the unnecessary console.
Then we restart the computer.
VIDEO: MBR recovery on Windows XP, all commands in the recovery console
Recovering MBR on Windows XP, all commands in the recovery console
10 Ways to Restore Windows Using the Command Line
Restoring the Windows system via the command line: what is needed for this?
But let's see what tools you need to rollback. Since Windows does not boot in stationary mode, to access the command console you need to start it somehow. But how?
For this, removable media with recovery or installation distributions recorded on them (optical discs, flash drives, etc.) are used. Thus, you need to have such media in stock. If it is not there, you can create a bootable flash drive or disk quite simply on another computer terminal, using the “Recovery Center” section in the standard “Control Panel” or a third-party software package.
Commands to restore Windows 7
We will restore our system through safe mode.
As your computer starts, press and hold the F8 key .
In rare cases, its function is taken over by the Delete .
A boot menu will open in front of us, in which we need to select the item “Safe Mode with Command Line Support” . As shown in the screenshot below:
Additional download options
A console will open in front of us in which we need to write the command
rstrui.exe
The “System Restore Wizard will open in front of us .
It displays a list of saved points to which we can roll back the system.
Among them there will be an automatically created point.
System Repair Wizard
Select the item that interests us and click Next. The recovery process has started.
After this, reboot your .
This method works even when the system is heavily damaged by viruses. This method can be used if the OS does not load at all.
Interesting videos that will further help you understand the problem:
VIDEO: Windows won't boot? Reboot Windows 10, 8 or 7
Windows won't boot? Reboot Windows 10, 8 or 7
Video instruction
VIDEO: Restoring windows 7, command line
Windows 7 recovery, command line
Video instruction
Reset
Sound scary? We assure you that this is a very effective, almost painless method that will help you return all settings to factory settings, saving all your personal files. But installed programs (games) will be deleted. This is the only and not so big drawback of the method.
To use it, go to “Options”. Don't know where this menu is? Just click on “Start” and you will see the desired item below.
Select “Recovery” from the side list. There are two ways to solve the problem:
- Resetting the PC (saving files and then reinstalling Windows);
- Return to the previous successful OS build.
Commands to restore Windows 8
The easiest way to start the recovery process is through bootable media.
Similar to the previous option, this can be a regular SD disk or a USB drive.
We insert our system file transferr into the desired connector and reboot the computer.
During startup, press the Delete to enter the BIOS subsystem.
“ boot ” tab and install our media in first place.
This is done in order to boot the system from it.
View of the BIOS
While in the BIOS, remember which disk is located first in the “boot” tab. If you have two or more hard drives, the boot will start from the one that does not have operating system data. Put in first place the drive on which you want to install Windows.
Now press the F 10 and click on the Y in the Latin keyboard layout.
The BIOS configuration was successfully saved. After this, the Windows 8 Installation Wizard .
“System Restore” item and click on it.
Installing Windows 8
From the list provided, select the desired operating system:
List of available OS
Now go to the “Diagnostics” and enter “Advanced parameters” :
Advanced options section
Click on “Automatic recovery” and wait for the process to complete.
While in the BIOS, remember which disk is located first in the “boot” . If you have two or more hard drives, the boot will start from the one that does not have operating system data. Put in first place the drive on which you want to install Windows.
Fix rstrui.exe errors
- 1 Information about the file rstrui.exe
- 2 Errors related to the rstrui.exe file
- 3 How to fix errors related to rstrui.exe?
- 3.1 Scan for malware
- 3.2 System and driver updates
- 3.3 System File Checker Tool
- 3.4 System Restore
- 4.1 List of file versions rstrui.exe
File information
| basic information | |
| File name | rstrui.exe |
| File extension | EXE |
| Description | Microsoft® Windows System Restore |
| Software | |
| program | Microsoft® Windows® Operating System |
| author | Microsoft Corporation |
| details | |
| MIME type | application/octet-stream |
| File type | Executable application |
| system | Windows NT 32-bit |
| Copyright | © Microsoft Corporation. All rights reserved. |
| Character set | Unicode |
| tongue cod | English (US) |
Restore point for Windows 10
First, let's look at the possibility of creating a Windows backup using cmd (command line).
To create a copy of the working operating system, you need to restart the computer as follows:
Start menu
Shift key left-click on the “Restart” option.
The following window will appear in front of you. In it, select the item “Troubleshooting” .
Action selection
In the next window, select “Advanced options”, as shown in the screenshot.
Diagnostic window
If you have a custom password set on your PC or there are other accounts on the system besides yours, additional warning screens may appear before loading cmd. In the first case, simply enter the password in the specified field and click OK. In the second, select the desired account and press Enter.
In the additional window parameters, find the “Command Line” and click on it.
Extra options
Now you need to enter the required commands in order. This will ensure that the backup is done correctly.
Enter the command in the required field
diskpart and press
Enter .
The names of all disks existing in the system and their parameters will be displayed here.
Next command
list volume and press the
Enter .
It will give us a list in which we will need to remember the system drive letter.
The system display and the letter from the graphical shell may not match, so write down the letter from this list.
List of disks
To complete, enter
exit and press
Enter .
Now let's start creating an image of the operating system.
We will use the system utility “dism.exe”.
Open cmd and type the following in the input field:
dism /Capture-Image /ImageFile:D:\Win10refr.wim /CaptureDir:E:\ /Name:”Windows 10”
Command to mount image
This procedure may take some time. Be patient.
The following window will inform us that the process is complete:
Successful completion of the operation
The image is mounted and you can proceed to the next steps.
Exit system recovery mode.
Windows 10 backup
You can also create a backup copy of the operating system in Windows 10 itself.
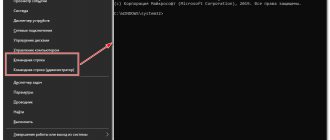
We launch the console using the hotkeys provided for this purpose Win + X.
Find the item “Command Prompt (Administrator)” and press the left mouse button or Enter .
Launching the console
After this, we create a directory for our copy of Windows.
To do this, enter in the required field:
mkdir С:\Imagen-Restaurar and press the
Enter .
Starting the directory creation process
Your actions will not result in any visible changes. Don't be alarmed.
These are the system settings. The console will give you a response after the manipulation is completed.
Leave the computer quiet for 20-30 minutes without performing any additional actions.
When working with the console, never put spaces between words; it is better to replace them with - (hyphen). In cases with spaces, errors and unexpected failures may occur.
When the process is completed, you will see the copy you created, which will be named “C:”.
You can choose the recording path yourself. You will have two options: an external screw or another local drive.
“Imagen-Restaurar” is the name of the created folder in which our image will be stored.
So, after the process is completed, check for the presence of the “CustomRefresh.wim” file in it.
If it is not detected, then click restart and try again.
If you specified the wrong path, you should look for the mounted image in the System32 .
This image is registered as a starting point for Windows system recovery.
It is worth creating a restore point when the operating system is in order. In the future, you can roll back the OS to the last restore point at any time.
Read also: 5 tips for setting up the Windows page file
8 reasons why Windows freezes: What to do
4 ways to find out the characteristics of a Windows computer
Set the required screen resolution
Sometimes when restoring the operating system, the screen resolution may drop. In this case, you should return it:
- Right-click on the desktop and select “Screen Resolution”.
In the context menu, select “Screen Resolution” - Set the recommended resolution. It is optimal for your monitor.
Set the recommended screen resolution for your monitor
- If the recommended resolution is clearly lower than required, check your graphics adapter drivers. If they fall off, choosing the correct resolution will not be possible until they are installed.
Starting Windows 10 Recovery Mode
Reboot in Safe Mode
Before restoring, you need to make sure that there are no malicious files on the system. If a virus attack has damaged Windows, then it is worth conducting a deep scan of the entire computer.
First of all, we reboot our PC in safe mode. To do this, open the Start menu.
Find the “Options” and open it by clicking the left mouse button.
Options
Now click on “Update and Security” → “Recovery” → “Special boot options” .
Find the “Restart now” and select it.
As a result of this, “Select action” .
This item gives us three actions to choose from; select the “Diagnostics” position.
Action selection
In the window that opens, select “Advanced options” , and finally “Download options”.
From the proposed list of reboot options, we need to “Enable Safe Mode”.
Boot Options
Click on the “Reboot” button.
This mode can also be selected in a short way: go to “Start”, hold down the Shift and click on the “Reboot” action. The screenshot describes in detail:
Safe Reboot
The same function can be set by default via the command line.
First, open it (it’s shown above how) and enter just one command:
bcdedit /set {default} bootmenupolicy legacy and press Enter .
Place to enter
We close our terminal window and safely restart the computer in the usual way.
During system startup, press the F8 key and a menu for selecting a boot method will appear in front of us.
VIDEO: Restoring Windows 10 using the command line
Restoring Windows 10 using the command line
Video instruction
Virus cleaning
It doesn’t matter at all what kind of antivirus you use.
Before the system recovery process, be sure to check your PC for harmful programs or files.
"Deep Scan" for this
Computer scan options
Safe mode with command line
Let's start our computer. After a few seconds, press the F8 key so that the boot selection window appears on the screen.
We follow the familiar path: “Diagnostics” - “Advanced options” - “Command line” .
The screenshots show the entire path in detail.
We can move using mouse clicks or keyboard arrows.
After each selection, methodically press Enter to enter.
Action selection
Advanced Options Menu
“Startup Recovery” can help us . It's also found in advanced options. This is a built-in system utility that can automatically fix or repair Windows boot.
Built-in utility
In the window that opens, simply select the name of the operating system from the list provided (if there are several of them).
After the automatic process of eliminating problems that prevent Windows from loading correctly, our computer will work normally.
If this method does not help, we resort to the command line.
In the input field, write the command
bcdboot.exe , then put a space.
Next we need to specify the system drive letter (mostly C) and enter the name of the operating system (Windows).
Ultimately the command will look like this:
bcdboot.exe C :\Windows
VIDEO: Windows 10 Command Line
Windows 10 Command Prompt
Video instruction
How to find out the system drive letter?
We will also use the command line for this. Enter the command
diskpart and then press
Enter
After opening this command, we write
list disk
, press Enter .
We will see information about all the disks that are on the computer.
From this list we need to find the system one. We are recruiting
sel disk 0 .
After this, the disk we need should automatically be selected.
To open detailed information about him, write
detail disk
Disk selection
In the new information window we see the name of the required system disk.
Shown in detail in the screenshot:
detailed information
This search is made in order to avoid errors during recovery.
The name of the system drive, which is assigned to it by default, does not always match the letter on the command line.
In our case, D :
To exit the “diskpart” service, enter the word
Exit and press
Enter .
Now we can return to the fixing process by typing the command
bcdboot.exe D:\Windows
Press Enter .
Ending the process
If you followed all the instructions correctly, a message will appear indicating that the download files were successfully restored.
Close the command line and reboot your device.