Photos that have faded and lost color over time have found new life in digital form. Author: John Wade
Every family has its own story, and every story has its own photographs: old color prints, vintage black and white photo cards, negatives and films. If this sounds like your situation, why not bring those photo archives into the 21st century? By digitizing old photos, you can breathe new life into them, you can easily retouch and categorize them, and then put them in a convenient place.
How to Scan Old Photos and Films Correctly
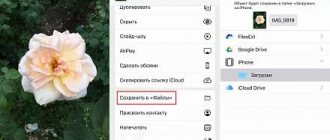
Digitizing photos using your phone
It's usually not enough to just use your phone camera to scan an old photo. The resulting photo will most likely be distorted due to the uneven position of the phone, and the photo itself will most likely have unwanted reflections and glare. To get rid of these problems, just use a special application.
PhotoScan from Google Photos is a completely free photo digitizing app. First you just take a photo. Then you need to point your phone camera one at a time at four points along the edges of the photo card - each time the application will automatically take a new photo. When the scanning process is finished, the application combines all versions into one, getting rid of glare and reflections, as well as correcting colors and distortion. PhotoScan has many analogues, so you are sure to find something suitable for yourself.
The photo was taken using an iPhone and lighting from a table lamp, which caused a large glare in the photo. The second attempt was made using PhotoScan. Author: John Wade
Is it better to use a scanner or camera to digitize photos?
A more advanced method after digitizing using a phone is to use a camera. You'll need a macro lens to get close enough, and the camera itself needs to be parallel to the surface. For lighting, you can use a table lamp, or better yet two - one on each side. Natural light from a window is also good. This way, only printed photographs can be digitized. To convert film to digital form, you need to use a lightbox instead of lamps.
Scanners are a much better way to digitize old photos. In the case of a flatbed scanner, a photograph is placed on glass, after which special software generates a preliminary version, then the correct cropping, resolution and color depth are selected, after which the finished image is saved to the hard drive. The scanner can also be used to digitize film.
In addition to household flatbed scanners, there are special scanners for films and negatives, usually designed for the 35mm format, although some models allow you to work with larger formats. A roll of film is fed into the input of such a scanner and then scanned frame by frame.
How to adjust color balance
If you digitize a photo using artificial lighting, you may end up with a yellow/orange cast. This happens because in standard mode the camera is set to shoot in daylight, and artificial light often has a warmer tint. By setting automatic white balance you will most likely get an acceptable result, however, in some cases it makes sense to set it manually. Recall that daylight and electronic flashes have a temperature of 5000 K, and incandescent light is 2700-3000 K. Set the appropriate temperature manually and see if that helps.
Another option is to use fluorescent lamps, they just have a temperature of around 5000 K. You can also always correct the white balance at the post-processing stage in Lightroom.
The hue of the photo under incandescent lighting (left) and after adjusting the white balance in the camera (right).
Scanning process
Now you are required to place several photos on the scanner glass and press the “Scan” button. But there are many nuances that beginners do not know about.
If there is a large crack in the photograph, then it must be placed so that the scanner lamp is perpendicular to the crack. If there are many cracks, then the photograph must be scanned both lengthwise and crosswise.
If the photo has texture or embossing, then by scanning it four times from all sides, the texture can be removed using the Fourier transform.
If you come across heavily wrinkled photographs, the scanner lid may not be able to press the photograph evenly. You need to create additional pressure with a small weight, for example, a book.
You should keep a lint-free cloth on hand to wipe off dust from the scanner glass.
The scanner cover is very vulnerable and if you open and close it hundreds of times, the chance of breaking it off with an awkward movement will be very high. Place some kind of support in advance that does not allow it to recline to the limit, for example, a stack of books.
How to Scan Photos for Best Resolution and Color Depth
When using a scanner, the resolution set in the program depends on the size of the original and the subsequent use of digitized photographs. Most scanning software measures resolution in dots per inch (dpi).
If you plan to simply view a digitized image on a computer screen or digital projector, the size should be no more than 600x800 pixels. This means that a 35mm negative or slide needs to be scanned at 600 dpi, but in the case of a large A4 print, 72 dpi will be enough to achieve the same number of pixels.
If you plan to print scanned photos, the resolution should be much higher, around 3500x2500 pixels. In this case, 35mm film needs to be scanned at 2500 dpi, and for A4 format 300 dpi will be enough.
The scanning software also allows you to adjust the color depth, typically ranging from 16 to 48 bits of color. This value corresponds to the amount of color information stored in the image. The more bits allocated for storing color information, the higher the quality and accuracy of color rendering will be. For most situations, 24 bits is sufficient.
Monochrome photograph, scanned in color and converted to b/w. The sharpness has been increased, the contrast has been adjusted, and wrinkles have been corrected using the Stamp tool. Author: John Wade
Plustek OpticFilm 7600i
Designed exclusively for working with 35mm film, this scanner is the ideal device for professional photographers or those with a passion for the field. The main feature that you should be prepared for before buying a scanner is limited productivity - no more than one slide per cycle.
But the Plustek OpticFilm 7600i more than makes up for this deficiency with its functionality. By excluding ordinary office documents from the list of processed materials and focusing only on photographic films, the manufacturer managed to create a real technological masterpiece that can give even the oldest photographs a second life.
Availability of ISRD technology to remove dust, scratches and other damage at a professional level; SilverFast function, which improves the scanner’s ability to distinguish details in dark areas of the image; optical resolution up to 7200 dpi; The inclusion of 35 mm IT8 color calibration samples, allowing users to create their own color profiles and ensuring high color accuracy - these are just some of the features of the Plustek OpticFilm scanner, thanks to which it is deservedly considered the flagship in the market of such devices.
Once again, it is worth emphasizing that the range of photo scanners is not limited only to these models. Manufacturers are trying to create full-fledged lines of this equipment so that each user, depending on their existing skills and experience, can purchase a device that is suitable for their level. For an easier choice and an error-free purchase, it is best to always consult with specialists who will provide comprehensive information about the equipment and help you decide on the right scanner model.
© ForOffice.ru About copying materials
Retouching digitized photos
There are many simple Photoshop techniques that can help even a beginner get the most out of their digitized photos. Sometimes, after scanning, photos become too contrasty or, on the contrary, you need to get a more contrasting image from a faded photo card. In both cases, the Contrast tool will help, which is located in the menu Image> Corrections> Brightness/Contrast (Image> Adjustments> Brightness/Contrast).
Old photos taken with non-professional cameras are often slightly blurry. This can usually be corrected, although not completely. Just use the Unsharp Mask tool. To find it, go to the menu Filter> Sharpen> Unsharp mask.
An old faded photograph from the 70s, restored using levels and color balance adjustments in Photoshop. Author: John Wade
Epson Perfection V600 Photo
This scanner model also guarantees high scanning quality and has an automatic operating mode, relieving the user of the need to constantly monitor the digitization process. Also among the undeniable advantages of this model is the ability to work with 120 type film, intended for medium format cameras. In addition, the developers introduced a special Digital ICE technology into the Epson Perfection V600, designed to remove scratches and dust specks from images scanned from transparent materials.
Thanks to these characteristics, the Epson scanner is best suited for working with rare and archival photo materials that are quite old and have minor damage. For faded originals, the scanner has special recovery modes that allow you to save the image from complete discoloration. Even more useful is the backlight correction function for automatically correcting photos, for example, with a dark face on a light background.
The rich functionality and wide possibilities for processing frames in the V600 “stole” some percentage from the performance - the device can scan no more than 4 slides at a time, which, however, will not greatly upset those who are ready for painstaking work to obtain the best results.
Fading and color balance
The ultraviolet component of daylight destroys the chemical compounds in the ink used to print photographs, causing them to fade. However, different colors are affected differently by ultraviolet radiation, which is why old photographs usually have a purple tint. Fading can be corrected using Levels. To do this, go to the menu Image> Corrections> Levels (Image>Adjustments>Levels). To correct the hue of a photo, the corresponding tool is also used, located in the menu Image> Corrections> Color balance (Image>Adjustments>Color balance). Simply drag the sliders to the right for colors that are complementary to the shade you want to correct. Green is the complementary of magenta, cyan is the complementary of red, and yellow is the complementary of blue.
The best way to fix cracks and bruises is to use the Clone Tool and Healing Brush. A stamp allows you to manually select pixels from a specific area and fill the cracks with them. The healing brush automatically selects the most appropriate pixels around the area being treated.
These simple techniques will help the photos stored in your digital asset look even better than the originals.
How to digitize very old photographs
If photography has been something familiar to your family for a long time, it is quite possible that you have a couple of daguerreotypes or ambrotypes at home. Before the advent of the digital age, both of these types were very difficult to copy. Ambrotypes were made on glass and reflected light very strongly. Daguerreotypes are even worse in this regard - they were applied to silver-plated copper with an almost perfectly mirror surface. If you simply try to photograph such a “mirror with memory”, you will not only get reflections of surrounding objects, but also bright spots of light and even a reflection of the camera lens itself.
What photographers of past centuries could not imagine was the advent of digital technology. Nowadays, both ambrotypes and daguerreotypes can be digitized without problems using a conventional scanner. However, there is a high probability that you will need to increase the contrast of the resulting copy.
Even ancient daguerreotypes from the late 1800s can be digitized without problems. Author: John Wade
Ten Tips for Digitizing Photos
- Collect old photo cards and sort them into categories: family and different generations, forgotten holidays, creative photos you took for a photo contest many years ago, pets, children, cars, vacations, etc.
- Sort them by year, people, place, or other categories.
- Separate good quality photos that can be digitized right away from those that you'll have to tinker with to correct contrast, fading, cracks and wrinkles, and other minor imperfections.
- Choose a digitization method: a camera with a macro lens or a scanner.
- If you have a choice between scanning a printout or a negative, it is better to choose the latter. This way you will get more details.
- Use a scanner whose software supports Image Correction and Enhancement. In this case, the initial scan uses infrared light to detect scratches, dust and fingerprints. The software then compares the two versions of the photo and removes any defects.
- If you don't have a lightbox, you can replace it with a special backlit tablet that artists use for sketching or drawing.
- An iPad or other tablet with a special application installed (for example) can also be used as a replacement for a lightbox.
- Scan everything in color. Black and white photos can be converted later. It's a good idea to create a sepia effect to highlight the era in which the photo was taken.
- Gently remove dust and hair from your negatives before scanning them. Wipe the scanner glass with a soft cloth to remove dust, hair, and fingerprints.
Equipment
- Tripod . You need a model that allows you to fix the camera directly above the photo or install it between the legs of a tripod and put a lightbox under it.
- Lightbox or similar . Old-fashioned models can be found on eBay or bought second-hand. More modern equivalents can be purchased at most stores.
- Alcohol level . This level can be found in the building department and will be needed to mount the camera parallel to the surface on which you will place negatives or photographs.
- Brush with fine bristles . If you already have a lens brush, this is great for brushing off dust and hair from negatives and slides.
- Scanner. Ideal for digitizing black and white and color photographs of any format.
- Special scanner for film. Suitable mainly for digitizing 35mm negatives and slides. Just keep in mind that when using cheap models, the resolution of digitized photographs is very low. If you are going to buy a scanner to digitize film, it is better to choose a more expensive model with high resolution and better color reproduction.
Author: John Wade
The fourth method is drum scanners
To complete the picture, drum scanners should be mentioned in the film scanning device market. There, the film is rolled onto a cylindrical drum using a special gel (yes, the film is moistened there), then the drum begins to rotate, and the reading device digitizes information from the film. Only wide format film is scanned on the reels. The file size after scanning the film reaches several gigabytes. The prices for this type of film scanning are simply prohibitive.