One of the easiest ways to transfer photos from iPhone/iPad to Windows PC is to connect it using a USB cable. This will make the DCIM folder visible on your computer. DCIM is an acronym for Digital Camera Images, which is a folder that stores all the images available on your device. Be it a camera shot, a screenshot or any uploaded image.
Unfortunately, for some users, the DCIM folder does not appear on the PC when connected to an iPhone or iPad. For others, although the DCIM folder is visible, it is empty and does not show any photos. For some users, only some images are displayed in the folder.
If you too are facing a problem, it's time to say goodbye to it. Here you will find several ways to fix the empty DCIM folder issue in Windows 10.
Unlock iPhone/iPad
If your iPhone or iPad is locked and you have connected it via USB to your PC, in most cases it will not show the device. Even if you hear a ringing sound and your device starts charging, you will need to unlock your iPhone or iPad to authorize it once. You don't need to do anything else, unlock your device and the folder will appear on your PC.
Part 3. Best Solution to Fix iPhone Photos Not Displaying
Well, iPhone photos not showing up on PC/Mac is a common problem among users. If you are also facing this problem, it's time to try an alternative method to transfer photos from iPhone/iPad to computer. FoneGeek Free iOS Backup and Restore is a great tool. Specially designed for this purpose. This professional iPhone data management tool allows you to transfer thousands of photos from iPhone or iPad. To your computer with one click, and not just photos from Camera Roll. But also images from Photo Library or Photo Stream.
Here's how to transfer photos from iPhone/iPad to computer in one click:
Step 1: Download and install FoneGeek iPhone Photo Transfer tool on your PC or Mac. After successful installation, launch the program and then connect your iPhone or iPad to your computer.
Step 2 : Unlock your device and when prompted, click “Trust this computer.” This will allow the program to detect the connected iPhone/iPad.
Step 3 : On the main interface, click "One-Click Export Photos to PC". All photos from your device will be automatically transferred to your computer.
Once the transfer process is complete, the destination folder will pop up. Just click "Open Folder" to view the transferred photos on your computer. Not only photos, FoneGeek iOS Data Backup & Restore can also help you. Transfer contacts, messages, WhatsApp, Viber, notes, voice memos, Safari bookmarks and other data from iPhone/iPad to computer. Moreover, you can easily manage your iOS content, such as import, export, delete. Add files or even remove duplicates.
LATEST ENTRIES IN THE RUBRIC
Picture in Picture iOS 14, works on YouTube or not?
Apple announced new iPhone software, iOS 14, during its annual WWDC conference on Monday. Updated version of iOS... Read more...
YouTube Picture in Picture not working on iOS 14 - Fix
YouTube picture-in-picture does not work on iOS 14, this may be due to many factors that we have discussed... Read more...
Can't Set Live Wallpaper on iPhone: Fix
Live wallpapers are a very fun way to spice up your iPhone lock screen. Not only do they look great, but they bring life to static... Read more...
On iOS 14 the weather widget does not work correctly: Fixed
iOS 14 introduced widgets, and they soon became an essential aesthetic for many users. And among the many widgets, the most commonly used is probably... Read more...
Problems with iOS 14.4.1: with fingerprints, with updates and others
Apple recently released a small security update called iOS 14.4.1. This update addresses WebKit security settings to prevent some malicious... Read more...
Authorize your computer
When you connect your iPhone/iPad to PC for the first time or after resetting some settings on your iPhone, a pop-up window will appear. A pop-up window will ask you to authorize your computer. Click on Trust.
Alternatively, if you don't receive the pop-up or you're not sure whether the computer is authorized to access your iPhone or not, you'll need iTunes help. To do this, follow these steps:
Step 1 : Connect iPhone to computer using USB cable.
Step 2: Open iTunes and click the Account option on the top bar. From the menu, select "Authorization" and then "Authorize this computer."
Step 3: You will be asked to enter your Apple ID and password. Enter the required data and click “Authorize”. Hopefully you will see the DCIM folder on your computer.
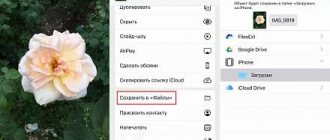
Importing photos using cloud services
An excellent alternative to the second method, because by using auxiliary cloud services, you can quickly transfer a large number of photos from your iPhone to your computer. To do this, you need a good Internet connection, as well as a registered account in one or more services: Yandex.Disk , DropBox , Mail.Ru Cloud . If you have a small number of images, even email will do.
The algorithm of actions is very simple:
- transfer photos from your iPhone to a file hosting service;
- then download the downloaded files from a file hosting service, but only through a computer.
As you can see, copying photos from iPhone to computer is absolutely easy. Once you've got your hands full, you can transfer your footage in less than 5 minutes.
Video
If, when you connect your iPhone to your computer, the phone is detected, but the directory inside is empty (although there should be photos or videos), you need to remove the device from the system and add it again. To do this: 1) connect the iPhone to the computer, trust on the iPhone 2) on the computer go to: Start - Control Panel - System and Security - Device Manager - USB Controllers 3) Right-click on the iPhone in this list and delete the device 4) Right-click on the iPhone in this list and delete the device 4) disconnect the iPhone from the computer (remove the usb cable) 5) connect the iPhone back to the computer, it will reinstall the firewood itself and everything will work.
If it doesn't work: 1) Remove the device this way a second time. Sometimes it only works the second time for me. 2) Check if there is not enough power on the USB port; push it to another 3) Try deleting iTunes (don't forget to backup the device in a separate folder)
I hope this helps you and I really look forward to your comments!