Disk Management is a useful and effective tool for managing Windows disks and partitions, but it is not as powerful as Diskpart. This command line tool allows you to delete, create, and modify partitions on any hard drive or USB drive that your PC can detect.
We recommend using a Disk Management tool in most cases, but if Windows won't start properly or you prefer to use the PowerShell terminal, Diskpart is an ideal alternative. Here are some of the most common Diskpart commands that will help you learn how to use Diskpart effectively.
If you want to use Diskpart, you need to open a Windows Command Prompt or PowerShell Terminal. Diskpart is a destructive tool, so you need to open a terminal window with administrator rights.
- To open Diskpart in Windows, right-click the Windows Start menu button and select Windows PowerShell (Admin).
- In an administrator-level PowerShell terminal (or similar Windows command prompt), type diskpart and press enter.
- The Diskpart tool will launch in a window, ready to use. Type exit at the "DISKPART>" prompt and press enter once you're done using it.
- Diskpart is also available for users booting into the Windows Recovery Environment, which is available when the computer is booted using Advanced startup mode in Settings > Windows Update & Security > Recovery.
- Click Restart Now to boot WinRE.
We'll cover some of the most common Diskpart commands in this article, but if you want to quickly see the full list of available Diskpart commands, type help at the "DISKPART>" prompt and press enter.
Description
DiskPart is a text-mode command interpreter that allows you to manage objects (disks, partitions, or volumes) using scripts or commands entered from the command line. Before you can use DiskPart.exe commands on a disk, partition, or volume, you must first list the objects and then select the object to work with. After this, all DiskPart.exe commands entered are executed for this object.
You can list all available objects and determine the object number or drive letter using the list disk, list volume, list partition, and list vdisk commands.
- The list disk command lists all disks on the computer.
- The list volume command lists all volumes on the computer.
- The list partition command, however, only lists the partitions of the selected disk. When you use the list command, an asterisk (*) appears next to the selected item. The object is selected by its drive number or letter, such as drive 0, partition 1, volume 3, or volume C.
- The list vdisk command lists all virtual disks on the computer.
Once you select an object, it remains selected until you select another object. For example, if the focus is on disk 0 and volume 8 on disk 2 is selected, the focus will move from disk 0 to volume 8 on disk 2. Some commands move focus automatically. For example, after creating a section, focus automatically moves to that section.
Only on the selected drive can you move focus to a partition. If focus is set on a partition, the corresponding volume (if any) also receives focus. If a volume has focus, the corresponding disk and partition also receive focus, provided that the volume is associated with one specific partition. Otherwise, the disk and partition are not allocated.
To successfully run the diskpart command, it is necessary that the user who runs it is a member of the local Administrators group, or anyone else with similar rights.
Changing the partition letter
We look at the list of disks and select the one we need by its number:
list disk select disk 0
We look at the disk partitions and select the one we need by its number:
list partition select partition 1
Assign a letter to the partition and look at the list of all volumes and exit:
assign letter=D list volume exit
Footnotes
- MBR
(Master Boot Record) - Master Boot Record, which contains a small fragment of executable code, a partition table and a special signature necessary for the subsequent boot of the operating system. See more on Wikipedia - GPT
(GUID Partition Table) is a standard format for placing partition tables on a physical hard drive. It is part of the Extensible Firmware Interface (EFI), a standard proposed by Intel to replace BIOS. EFI uses GPT where BIOS uses the Master Boot Record (MBR). See more on Wikipedia - For more information, see Microsoft's Recommended Disk Partition Configurations on BIOS
- UEFI -Based Systems
- MSR
Used only on UEFI systems. It contains information related to other system partitions and is used by Microsoft applications. The MSR section must:- have 128 MB of hard disk space;
located between the ESP and Windows operating system partitions.
For more details, see General information about disk partitions; the boot partition does not need to be activated
Scripting with DiskPart
With DiskPart, you can create scripts to automate disk-related tasks, such as creating volumes or converting disks to dynamic disks. Scripting these tasks is useful if you are installing Windows using silent mode or Sysprep, which do not support creating volumes other than the boot volume.
To run the DiskPart script, enter the following command at a command prompt:
DiskPart /S script_name.txt
Where scriptname.txt is the name of the text file containing the script.
To pipe DiskPart script output to a file, enter the following command:
DiskPart /S script_name.txt > log_file.txt
Where logfile.txt is the name of the text file into which DiskPart program output is written. When you launch DiskPart, the program's version and computer name appear on the command line. By default, if an error occurs while attempting to run a script task in DiskPart, script processing stops and an error code is printed (unless the noerr parameter is specified). However, DiskPart always returns syntax error codes, regardless of the use of the noerr parameter. The noerr option allows you to perform useful tasks such as using a single script to delete all partitions on all disks, regardless of the total number of disks.
Command Syntax and Parameters
The table below shows all Diskpart commands, shows their syntax, and gives descriptions.
| Team | Her description |
| Commands for disks (disks) | |
| select disk | Brings the disk with a number or letter from the list into focus. If you forget to specify the disk number, the command will display the current disk in focus. |
| select volume | Brings the volume into focus. Without parameters, returns the current volume. |
| convert mbr | Performs conversion from gpt markup to mbr. |
| select partition | Brings focus to a section by letter or number in the list. Without parameters, displays the current section. |
| active | Makes the section that has focus active (available for loading from it). The operation applies only to partitions. |
| add disk | Creates a volume mirror on disk n. |
| break disk | Splits the mirrored volume in focus into 2 equal-sized simple volumes. |
| convert basic | Converts a dynamic disk to a basic one. Works only for data disks. |
| clean | Removes all file markup from the disk (all volumes and partitions). The all parameter applied will first erase all data on the disk. |
| convert dynamic | Converts a basic disk to a dynamic one. |
| detail disk | Displays information about the properties of the disk in focus on the command line. |
| delete disk | Removes a dynamic disk. |
| import | Imports disks connected to the device into the file system. |
| online | Enables a disabled drive. |
| remove | Removes a drive letter or mount point. |
| repair disk | Recovers a RAID-5 volume in focus by replacing the failed volume with the specified one. |
| rescan | Scans the system for added disks. |
| Volume Commands | |
| assign | Specifies the drive letter or mount point. |
| attributes | Displays the attributes of the volume in focus. The set parameter sets the attributes; the clear parameter will reset all attributes. |
| automount | Specifies whether Windows should automatically partition (format into a file system) a newly created basic volume. If Enable is specified, then yes; if disable, no. |
| create volume raid | Creates a RAID-5 volume from several dynamic disks (the number of disks is not limited). |
| create volume simple | Creates a simple volume on a dynamic disk. |
| create volume stripe | Creates a striped volume of the size from the specified dynamic disks. |
| delete volume | Deletes the focused volume. |
| detail volume | Displays a list of dynamic disks that make up this volume. |
| extend | Expands the volume using the space of the current disk. |
| filesystems | Displays information about the volume's current file system, as well as the file systems it supports. |
| format | Formats a volume. |
| retain | Converts a dynamic simple volume to a bootable volume. |
| shrink | Reduces the size of the focused volume by the desired amount. Values are indicated in bytes. |
| Commands for partitions | |
| create partition extended | Will create an additional partition on the current disk. Once completed, the focus will move to the additional section. |
| create partition logical | Creates a logical disk in an additional partition. |
| create partition primary | Creates a main partition. A letter is not assigned to the new partition. |
| delete partition | Deletes the current partition. |
| detail partition | Displays the properties of the section in focus. |
| Service commands | |
| exit | Exit the diskpart utility to the console. |
| help | Displays a list of available commands with parameters. Use the command before any other sequence of commands to get help on them and their parameters: Help create partition primary or help format |
Table of codes with DiskPart errors
| Completion code | Description |
| 0 | There are no errors. The script ran without errors. |
| 1 | A fatal error has occurred. Serious problems may occur. |
| 2 | An invalid parameter was specified for the DiskPart . |
| 3 | The specified script or output file does not open in DiskPart . |
| 4 | One of the services used by DiskPart . |
| 5 | A command syntax error occurred. The script failed because the object was not selected correctly or is not valid for use with this command. |
Starting DiskPart when booting into Windows:
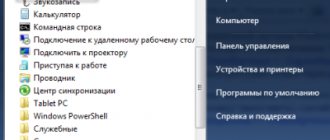
There are different ways to run this utility tool, but here is a universal way to run it on any version of Windows. If your Windows is running normally , you can start the DiskPart utility by opening the Run . You can open Run by typing it in the Start Menu .
Now you need to open Command Prompt to access DiskPart. Type cmd in the Run command area and press Enter on your keyboard. The command line will be launched.
Inside the Command Prompt, type diskpart and press Enter . Command Prompt will launch the DiskPart utility in a new window with some information about your computer at the top.
Copying files to a flash drive
The next step is to copy the installation files
programs on a flash drive. You need to copy all files completely with their entire structure and directories.
This can be done using standard Windows tools such as Explorer. If you want, for various possible reasons, to do this using the same command line, then the following commands will help you with this:
- The improved " robocopy
" copy command, unlike the legacy "copy", can copy subfolders with all their contents.
The first argument of the command is the path to the files to be copied, and the second is the path to the folder into which the files will be copied. To copy subfolders, you must add a third argument " /E
", otherwise only the files will be copied. For example, to copy all the files from drive f to a flash drive named g: you need to enter the command: robocopy f:\ g:\ /E - The outdated file copy command “ copy
”, which can only copy files (folders will have to be created manually with the “md” command). The first argument of the command is the path to the files to be copied, and the second is the path to the folder into which the files will be copied. To make it clear to the command that you want to copy not just one file in a folder, but all files, specify the code “*.*” as the file name. - The disk change command, the format of which is: DISK:. Those. to go to drive “D:\” you need to enter the following command: d:
- To select a directory located in the current folder, enter cd
, for example: cd win10 - To go to the top level of the file hierarchy, type cd \
- To go to the parent folder, write cd ..
- To view a list of files in the current folder, enter the command dir
- To create a folder, run the md
Knowledge of these commands is enough to successfully copy files to a flash drive.
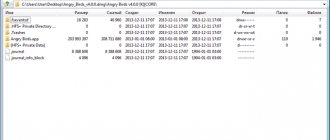
This is what it will look like if you copy installation files located on the d:\win10 drive and a flash drive named “G:\”. Preparing and launching robocopy
:
After a certain time, all files will be successfully copied:
Most often, a bootable flash drive is used to install or reinstall an operating system. If you don't have a disk drive, you can use a virtual DVD drive and an image file.
When installing an operating system from a bootable flash drive, you need to change the settings in the BIOS so that the computer boots through this device.
Starting DiskPart if you can't boot Windows:
To run DiskPart if you can't boot into Windows is a bit tricky. All you need to do is access the Command Prompt when you start your computer. Access to the Command Prompt varies between different versions of Windows.
Windows 7:
The best and most convenient way to launch Command Prompt if you are unable to boot into Windows 7 is to use a bootable Windows 7 USB drive . Connect the USB drive to your computer and press any key when prompted to boot from the USB drive. On the Windows 7 installation screen, you will find an option i.e. Repair your PC at the bottom.
Select your OS from the list and click Next to move to the next window. Click Command Prompt at the bottom and type diskpart and then press Enter .
Windows 8 and 10:
On Windows 8 and 10, you can access DiskPart by restarting your computer and holding down the Shift + F8 key combination to open the extended menu. Click Troubleshoot and select Command Prompt . Type diskpart and press Enter .
Possible errors and failures
But things don't always go so smoothly. Sometimes you may encounter situations where the system displays a message that DiskPart is not an internal or external command. This can be observed when starting to boot from removable media when selecting a GPT partition (by the way, and checking the disk in the form of the chkdsk
I am not immune from this). What to do in this case?
Entering cleaning and transformation will help here ( clean
and
convert mbr
) after the disk selection line (
select disk
). Allegedly, this process may take several hours, but, as they say, it works one hundred percent. But it is necessary to use such a tool only if there is no information on the disk. Otherwise, all data will be destroyed.
In general, DiskPart commands are not difficult to use. The most important thing here is compliance with the input sequence from the algorithm described above, of course, taking into account some additional parameters. And note, the use of this particular tool can solve not only the problems of partitioning disks into logical partitions, but also issues of formatting or eliminating some critically dangerous failures. But that is another topic.
How to create a new volume or partition through Disk Management
Open the Disk Management tool. To do this, open the Run dialog (Win + R), enter the command diskmgmt.msc and press Enter.
Right-click on the unallocated space and click Create Simple Volume.
In the Create Simple Volume Wizard window, click Next.
Enter the amount of space you want to use for the new volume (or partition) and click Next.
In the next step, you can change the formatting options, but this is not necessary, especially if you are happy with the default settings. Additionally, you can change the volume label to any name you prefer, but it's better to use something descriptive: for example, "Movies", "Documents", "Backups", etc. You can also enable the option to compress files and folders. When all settings are selected, click Next.
Review your selections. If you want to change anything, click "Back" to return to the previous steps. If you are happy with everything, click "Done".
After this, a new partition should be successfully created on your computer.
How diskpart works
Creating a bootable flash drive using the diskpart
is a fast and affordable way. Due to the fact that this utility works in text mode, every personal computer user can easily cope with this task.
With the rapid development of technology, everyone has access to the Internet, where you can find free versions of various programs for creating a bootable flash drive. However, it also happens that there is no access to the Internet due to some circumstances, so it is important to know a few simple alternative ways to create a bootable flash drive.
One of them is the described method using the command line. This manual method will be useful to every PC user. This console utility is included in the list of standard programs
. There is no need to additionally search for and install any other programs to configure a bootable flash drive. After ten minutes of using diskpart, a bootable USB flash drive with the Windows installation file is ready.