To improve the performance of Windows 11 or Windows 10, you should always try to remove all unnecessary files. Removing temporary files from the system is one of the most important ways to make your PC run faster. Additionally, temporary update files can take up a lot of space on small SSDs.
After updating the system, old files become useless and are considered only junk. There may be temporary application files, error logs, browsing data, installation files, internet files, windows defender, and driver packages on your system.
This instruction tells you how to delete temporary files in Windows 11 and Windows 10 using built-in system tools.
Deleting temporary files in Windows 11
- Go to Settings > Storage > Temporary Files.
- Check all the boxes and click “Delete files”.
How to remove them
To keep your computer “clean”, there are several options for getting rid of temporary files remaining on the system. This can be done either using special applications or manually.
Manual method
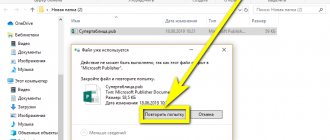
To manually clean, you need to go to one of the folders, the path to which is given above. Then select all the contents in this folder and delete them by moving them to the trash.
You can also apply permanent erasure. But when using the recycle bin option, it will remain possible to restore information if, after deletion, one or another program begins to work incorrectly. Then, if there are no problems, the trash can be safely emptied.
Using built-in Windows utilities
When using built-in utilities, such as Disk Cleanup, files can be deleted automatically. To start this cleaning process, you must perform the following manipulations:
- Go to “My Computer”, hover the mouse over the logo of drive “C”, then right-click on it. In the menu that appears, select “Properties”.
- In the window that opens, on the “General” tab, click the “Disk Cleanup” button.
- The process of analyzing data on your computer will start, after which the application will prompt you to select categories and types of data to be cleaned.
- In the corresponding menu, put “daws” next to those items that should be deleted, not forgetting about.
- After confirmation of the command by the user, the program will automatically erase unnecessary data.
Deleting temporary files in Windows 10
- Go to Settings > System > Storage > Temporary Files.
- In the new window, check all the boxes like (Defender, Thumbnails, Delivery Optimization, Temporary Internet Files and Temporary Update Files), then click "Delete files«.
How to open with Run
You can wander through the directories of drive C through a standard explorer and constantly get confused whether you opened this particular folder with temporary files or whether it was another one. It is much easier and faster to get to a specific directory using the Run window.
To open it in Windows 10, you need to use the search on the taskbar or go to the “Start” menu, and then select “Utilities” from the list and find the program there.
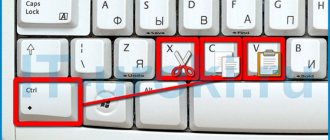
The easiest way to launch the dialog box is to use the Win+R keyboard shortcut.
In the window that opens, enter the command - %TEMP%. A folder with temporary files for the current user will be displayed on the screen. With the same success, you can enter not a command, but the full address to the folder, starting with C:\, but this is not so convenient.
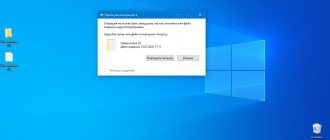
To get to C:\Windows\Temp, use the TEMP command without the “%” symbols. If a warning appears about the need for administrative rights, you need to click “Continue”.
Manually clearing temporary files in the TEMP folder
- Press a combination of buttons Win+R and write the command in the dialog box %TEMP%.
- The location of the Temp folder itself will open. Press Ctrl+Ato select all content, then right-click and select Delete. Some files will not be able to be deleted due to their current use by the system. Just check the box suggested to Do this for all current items and click Skip.
Create a shortcut to quickly remove junk files from the Temp folder
Step 1 . Open Start and write Notepad in the search, then launch it by clicking on it. For those who find this method difficult, it is simply for automated deletion of files from the temp folder.
Step 2 . In a test notepad, paste the following command below and click on the View and Save As tab in the notepad.
- del %TEMP%\*.* /f /s /q
Step 3 . Select save to desktop, file type: All files and the file name at the end should have a .BAT extension
Step 4 . Now, when you need to clear the TEMP folder from garbage and temporary unnecessary files, just run the saved file from your desktop.
Is it possible to delete the contents of the Temp folder
The Temp folder contains temporary files saved on the system disk without notifying the user. In fact, temporary files appear only after direct user intervention. For example, during the driver installation process, the installer is unpacked and automatically launched from the Temp folder.
Now about whether it is possible to delete the Temp folder and its contents. It is definitely not recommended to completely delete the Temp folder, especially in the Windows folder. And its contents need to be cleaned up occasionally, since the system disk will become very clogged. In principle, experienced users can easily manually clear temporary files, but for beginners we recommend using cleaning tools.
Removing temporary files in Windows using cleanmgr
- Press a combination of buttons Win+R and enter the command cleanmgr.
- You will be prompted to select a drive. Select drive C , where the Windows system itself is installed.
- Now check all the items and Click OK to delete them. Next, repeat steps 1-2 and click on “Clean up system files” at the bottom, then also check all the boxes and click OK.
See also:
- 9 Reasons Why Your Windows Computer Freezes
- How to Clear DNS Cache on Windows
- Cleaning the disk from unnecessary files
- How to clear data usage in windows 10
- Photos app not working on Windows 10
Channel Chat
Program files loaded into the system
Files downloaded to the C:\Windows\Downloaded Program Files folder are not used by any programs. This folder contains files that are used by Internet Explorer ActiveX controls and Java applets. When the same feature is used on a website using these files, you do not need to download it again.
The program files loaded into the system are useless because Internet Explorer ActiveX controls and Java applets are not currently used by people. They take up disk space unnecessarily and hence you should clean them up at regular intervals.
This folder may be empty. But, if there are files in it, delete them by following these steps:
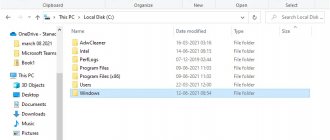
1. Click Local Disk (C:) and then double-click the Windows folder as shown in the image below.
2. Now scroll down and double click on the Downloaded Program Files .
3. Select all the files stored here and press the Delete .
Now all downloaded program files are removed from the system.
How to clean your Windows 10 computer from junk using an application
A bad feature of the Temp folder is that only those files that the system has assessed as temporary are stored in it. But Windows 10 is not omnipotent and it does not consider a large amount of system garbage as such and leaves it lying in place. You can, of course, remove all this junk manually, carefully searching through the dark corners of your system, but it will be much easier and more practical to download a special application that can clean everything in just a couple of clicks.
We will look at cleaning the system using a third-party application using the example of the CCleaner program, which is the simplest and most powerful among all its analogues.
- Download the free CCleaner utility from this link and install it.
Launch CCcleaner and click Clean.
Now open the Registry tab and run a search for problems.
Run a problem search
Click Correct Selected.
Click "Fix Selected"
Better keep backups, just in case.
Click "Fix flagged". When finished, restart your computer and delete your backups.
When finished, restart your computer and delete your backups
Correctly Cleaning Temp Folder Windows XP 7 8 10 Three Methods
Good afternoon friends. Cleaning the Temp windows folder, is it really necessary, or can we do without it? I have already mentioned this system folder many times in my articles, but I have never written an article about this folder and what exactly it was created for, I also have not mentioned. In this article we will fill this gap.
We have already mentioned various means of freeing up space on the system disk, since this disk, especially if there is little space on it, can very quickly become clogged with system junk, and your computer, no matter how new it is, will start to work slowly.
I have already said, and I will repeat again, any partition of the Windows system must have at least 20% free space, otherwise problems with this partition may begin. This is especially true for the system disk. All system files need free space to function smoothly. Otherwise, speaking in Russian, the files will have nowhere to expand, and various failures and errors may begin.
Cleaning manually
So, now we will clear your Temp account folder. You will clean the system folder using the same method.
The deletion will begin, but not all folders will be deleted. Windows will start to pop up saying that some folder or file does not want to be deleted. This shows that Windows is currently using this folder. In this case, simply click “Skip” in the window that appears and continue deleting. Many such messages may appear. Click “Skip” on all of them and delete the remaining elements.
But, this is a little tedious, especially if you have not deleted items from this folder for a long time. Therefore, in the window that opens, you need to check the “Run for everyone...” checkbox and the OS will stop bothering you with such questions.
Removal of temporary folders continues. The longer you have not removed such items, the longer it will take to remove them. As a result, after deleting, I was left with a few files out of many. This is fine. Don’t forget to empty the trash bin yourself afterwards, or using the lower method.
Manually
You can also get rid of temp files in Windows manually. The bulk of them are located in two directories: with the current account data %userprofile%AppDataLocalTemp and system %windir%Temp .
Using Explorer or a file manager, visit these folders and delete their contents as usual. Some objects may be busy with worker processes and should be skipped. After finishing the programs that use these files, or rebooting the PC, you can try again, if they were not deleted automatically.
What's in the AppData Local Temp folder?
The Temp system folder stores temporary files for applications and the operating system itself (Temp is an abbreviation for Temporary, which translates as “temporary”). Intermediate files and document fragments created during the operation of programs and the OS are placed here.
Interesting materials:
How much does it cost to rent a home in Canada? How much does the bus cost to Rosa Khutor? How much does gasoline cost in Russia in 2022? How much does an hour of parking cost at Sheremetyevo? How much does rough finishing cost in a new building? How much does a kindergarten cost in the Moscow region? How much does a child’s passport cost in Moldova? How much does an E Visa cost to India? How much does a truck cost for 1 km? How much does hot water cost in Moscow 2019?
Storage
1. Open “Options” using the Win + I key combination.
2. Go to the “System” section.
3. Click on the vertical menu item “Device memory”.
4. To analyze the contents of the system volume, click on it.
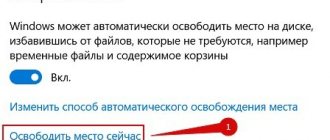
Afterwards, the window will display information about the allocation of memory on the partition, where there will be an item “Temporary files” with the amount of unnecessary objects.
5. Go to this window by clicking on the above inscription.
6. Check the required boxes and click on the first button to delete temporary files from the system volume.
Cleaning problems
Sometimes there are situations where some temporary elements are not deleted after the cleanup procedure is completed. This may be caused by problems with the command execution, or by the fact that the files are already in use by another program.
To clear your computer of remaining data, it is recommended to close all programs and applications except the one that directly performs the cleaning procedure. It is also a good idea to restart your computer to clear the device’s RAM of third-party processes. After this, the removal process should complete successfully.
June 29th, 2022 Nikolay Bagromyan
Windows 10, like its predecessors, has the amazing ability to accumulate a bunch of junk files and remnants of long-deleted applications. All this can be aggravated by viruses that accumulate during work. And despite the fact that the operating system has its own resources for automatically removing garbage, they must still be activated, and to fully believe in cleanliness and order, periodically clean the computer manually.
Cleaning the system from viruses
In addition to system garbage and forgotten files, there may be more unpleasant things that it wouldn’t hurt to get rid of. And even if you already have an antivirus, this does not guarantee you protection from all sorts of nasty things and may require checking with a program from alternative developers.
To download an antivirus, it is not at all necessary to shell out money for a full-fledged edition or surf torrents. Many security software developers provide free versions of their programs that do not even need to be installed on your computer.
- Download free antivirus Dr. Web CureIt.
Launch the downloaded application and accept the license. There is no need to worry about passwords and personal data; the antivirus will not send such information to the server.
No need to worry about passwords and personal data
Start the scan, it will take some time.
The verification will take some time
When the antivirus scans the entire computer, neutralize everything it finds.
When the antivirus scans the entire computer, neutralize everything it finds
Even after activating automatic removal of temporary files, do not forget to periodically clean your computer yourself, since standard Windows tools are far from all-powerful. And if you start to notice a gradual decline in performance and a long system loading time when you turn on the computer, it’s time to repeat a couple of points from the above.
The Temp folder in Windows 10 is designed to store temporary files that are necessary for the operation of the system or some application. Unfortunately, the contents of this folder are not always cleared automatically after completing a specific task. Therefore, users often clean this folder manually. However, in order to delete unnecessary files from this folder, you need to know how to find the Temp folder in Windows 10.