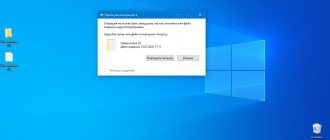
Today I will tell you how to delete temporary files from your computer. Sometimes it happens that the computer starts to work slower than before for no apparent reason. This can manifest itself in different ways: folders are slow to open, programs won't load, the browser closes, the computer freezes - all this can be the result of the computer needing to delete temporary files.
I'll say a few words about what temporary files are and where they come from. When you visit Internet pages, install or remove programs, work with files, the computer collects and stores information about all your actions, in addition, when you delete programs and files, this deletion does not occur completely: some files and folders remain on the system, removal of which will not lead to negative consequences. When a lot of them accumulate, they can not affect the computer in the best way.
Temp folder
Deleting temporary files in Windows 10 is a smart choice to improve your system's performance. These temporary files and folders are not required by programs beyond their original needs.
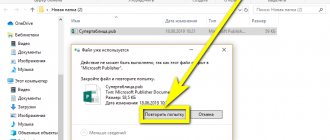
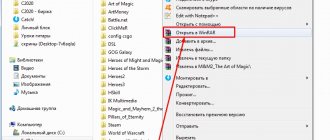
1. Navigate to your local drive (C:) in File Explorer .
2. Here, double-click on the Windows folder as shown in the image below.
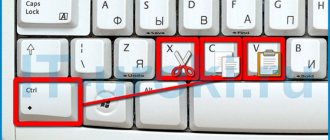
3. Now go to the Temp and select all the files and folders by pressing Ctrl and A at the same time . Press the delete on your keyboard. Note. An error message will appear on the screen if any of the associated programs are open on the system. Skip to continue deletion. Some temporary files cannot be deleted if they are locked while the system is running.
Read How to delete saved passwords in Firefox
4. Reboot your system after deleting temporary files from Windows 10.
How to delete Appdata files?
1. Press Windows key + R, then type %localappdata% and press Enter.
2. Finally, go to Temp and delete temporary files from it.
Hard drive cleaning methods
Cleaning temporary files using standard Windows 7 cleaning tools
This method is the most widely used today.
It does not require any third-party software.
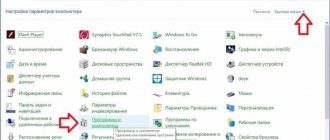
In order to start this cleaning of temporary files, you need to follow a few simple steps: “Start” – “All Programs” – “Accessories” – “System Tools” – “Disk Cleanup”.
After which a window will pop up in front of you, in which you need to select the disk on which the cleaning itself will take place. Next, mark the files that need to be deleted, click “Delete files” and that’s it.
Cleaning temporary files using Disk Cleanup
Usually this program is included with the standard Windows package, so there are no problems with its installation, but still, if you don’t have it, you can download it from the official website. Next, open the program and select the local disk that you need to clean.
Here's where the program is located:
After checking for the presence of temporary files, you need to select the files that you want to delete, then click the “OK” button and yours will be successfully deleted.
Hibernate files
Hibernation files are huge and take up a lot of disk space. They are never used in the daily operation of the system. Hibernation mode saves all information about open files on your hard drive and allows you to turn off your computer. All hibernation files are stored in the C:\hiberfil.sys folder. When the user turns on the system, all work returns to the screen from where it left off. In hibernation mode, the system does not consume power. But it is recommended to disable hibernation mode on the system when you are not using it.
1. Type command prompt or cmd in the Windows search . Then click Run as administrator .
2. Now type the following command in the Command Prompt window and press Enter:
powercfg.exe /hibernate off
Hibernation mode is now disabled on the system. All hibernation files in the C:\hiberfil.sys folder will be deleted . Files in this location will be deleted as soon as you turn off hibernation mode.
Note : If you disable hibernation mode, you cannot get Windows 10 to start quickly.
Program files loaded into the system
Files downloaded to the C:\Windows\Downloaded Program Files folder are not used by any programs. This folder contains files that are used by Internet Explorer ActiveX controls and Java applets. When the same feature is used on a website using these files, you do not need to download it again.
The program files loaded into the system are useless because Internet Explorer ActiveX controls and Java applets are not currently used by people. They take up disk space unnecessarily and hence you should clean them up at regular intervals.
This folder may be empty. But, if there are files in it, delete them by following these steps:
1. Click Local Disk (C:) and then double-click the Windows folder as shown in the image below.
2. Now scroll down and double click on the Downloaded Program Files .
3. Select all the files stored here and press the Delete .
Now all downloaded program files are removed from the system.
System cleaning
There are only 2 places where temporary files accumulate, so deleting them in Windows is not difficult.
You can delete files from a Windows folder in the following way:
But if deleting temporary files using the method described above in Windows is quite simple, then there is one more place that is a little more difficult to clean. You need to use the Total Commander program, or manually enter the full address of the folder you are interested in C:Users***AppData Local Temp
(username is used instead of ***).
The reason for this complication is the fact that these temporary Windows files are hidden from public view. To remove them, you need to use the scheme described above with full selection and deletion. But the use of specialized programs is not always permissible, because they can inadvertently clean out the necessary files.
It should be remembered that a program is a robot, and the robot does not care what exactly it deletes. Thus, it can permanently delete both a completely unnecessary file and a very important one.
Old Windows files
Every time you upgrade a version of Windows, all files from the earlier version are saved as copies in the Windows.old folder. You can use these files if you want to revert to an older version of Windows that was available before the upgrade.
Note. Before deleting files in this folder, create a backup copy of the file you want to use later (files needed to revert to previous versions).
Read How to check CPU and core speed in Windows 10
1. Press the Windows and type Disk Cleanup in the search bar as shown below.
2. Open Disk Cleanup from the search results.
3. Now select the drive you want to clean. 4. Here, click on Clean up system files .
Note. Windows automatically deletes these files every ten days, even if they are not deleted manually.
5. Now review the files from previous Windows installations and delete them.
All files in the C:\Windows.old folder will be deleted.
Disk Cleanup
To run the Disk Cleanup tool in Windows 7, open Computer and right-click the Windows partition. Select "Properties" of the disk - on the "General" tab there will be a "Disk Cleanup" button.
After launching the utility, you need to wait a little while the system generates a list of data that can be deleted without harm to the system.
In the list you will see what data will be deleted. There is information about the operation of programs, temporary Internet files, a recycle bin, various reports, etc. The amount of freed space is indicated below. To clear your memory of this unnecessary information, click “OK”.
However, such cleaning will also not be complete. There are old update files left in the system that are no longer valid, but continue to be stored on the hard drive. To get rid of them, click the “Clean up system files” button.
The system will begin rescanning the hard drive to identify unnecessary updates. After the analysis is completed, a new list of data will appear, the removal of which will not harm Windows. Here, the amount of freed up space increases significantly - the system is clearing no longer valid temporary update files.
Select all items in the list and click OK. Once the removal is complete, see how much space is freed up on your hard drive.
Windows Update folder
The files in the C:\Windows\SoftwareDistribution are recreated with every update, even after deletion. The only way to solve this problem is to disable the Windows Update service on your computer.
1. In the search bar, enter Services .
2. Open the Services window and scroll down.
3. Now right-click on Windows Update and select Stop as shown in the image below.
4. Now navigate to your local drive (C:) in File Explorer .
5. Here, double click Windows and delete the SoftwareDistribution folder .
Services
window again and right-click Windows Update .
7. This time select Run as shown in the image below.
Note. This procedure can also be used to reset Windows Update if files have become corrupted. Be careful when deleting folders because some of them are in protected/hidden places.
Basket
Although the Recycle Bin is not a folder, it is where most of your unnecessary files are stored. Windows 10 automatically sends them to the Recycle Bin whenever you delete a file or folder.
You can either restore/delete an individual item from the Trash, or if you want to delete/restore all items, click Empty Trash/Restore All Items respectively.
If you don't want to move items to the Trash after deleting, you can delete them from your computer directly:
1. Right-click Recycle Bin Properties .
2. Now check the box next to Shred files immediately after deleting without putting them in the Recycle Bin and click OK to confirm the changes.
Now all deleted files and folders will no longer be moved to the trash; they will be deleted from the system without the possibility of recovery.
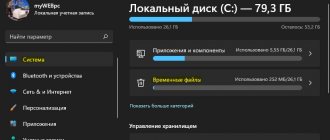
"Storage" Windows 10
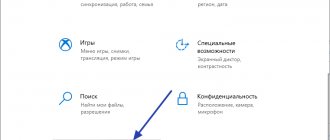
The new OS is also equipped with a new tool for scanning disks and analyzing their contents in order to clean the system volume of junk files and logs. The new utility is launched through “Options” (Win→I), where we click “System”, then go to the “Storage” tab.
The window that opens displays all the drives connected to the computer, the hard drives used in the system and their partitions. Here you can also change environment variables, set the storage location for new applications, documents, images, videos, etc.
Select the system volume to visualize detailed data about it.
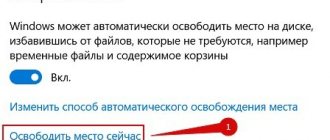
Let’s scroll through the list of all detected elements to the very end and find the “Temporary files” item, where under the section name contains information about the space occupied by these documents. Click on this area of the window.
You will be able to clear the directory with downloaded files, get rid of the garbage that is in the Recycle Bin, and erase temporary files. As you can see, more than 600 megabytes of garbage were found in the installed operating system.
Click “Delete temporary files” and wait for the operation to complete, the progress of which is in no way visualized. After clicking the button, the window can be closed; this will not in any way affect the process running in the background.
Temporary browser files
The cache acts as a temporary memory that stores the web pages you visit and speeds up browsing on subsequent visits. Formatting and loading issues can be resolved by clearing your browser's cache and cookies. Temporary browser files can be safely deleted from your Windows 10 system.
A. MICROSOFT EDGE
1. Press Windows key + R, then type %localappdata% and press Enter.
2. Now click on Packages and select Microsoft.MicrosoftEdge_8wekyb3d8bbwe .
3. Then go to AC and then MicrosoftEdge .
Read How to reset iPhone without password
4. Finally, click Cache and delete all temporary files stored in the folder.
B. INTERNET EXPLORER
1. Press Windows key + R, then type %localappdata% and press Enter.
2. Click Microsoft and select Windows .
3. Finally, click on INetCache and delete temporary files from it.
C. MOZILLA FIREFOX
1. Press Windows key + R, then type %localappdata% and press Enter.
2. Now click on Mozilla and select Firefox .
3. Then go to Profiles and then to randomcharacters.default .
4. Click cache2 and then entries to delete temporary files stored here.
D. GOOGLE CHROME
1. Press Windows key + R, then type %localappdata% and press Enter.
2. Now click on Google and select Chrome .
3. Then go to User Data and then Default .
4. Finally, click Cache and delete temporary files from it.
After following all the above methods, you will safely remove all temporary browser files from the system.
Manual removal
Temporary Windows files are stored in several system folders, from where they can be deleted manually. Directory addresses:
- C:WindowsTemp;
- C:UsersUserNameApp DataLocalTemp.
The second folder is hidden by default. To get into it, you need to allow showing hidden folders in the settings or use this method:
- Press Win+R.
- Enter the command %AppData%.
The contents of the “Temp” folders can be safely deleted from the system. However, the cleaning should not end there - there are still temporary browser files that also take up free space on the disk.
Log files
Systematic application performance data is stored as log files on your Windows PC. It is recommended to safely delete all log files from the system to save storage space and improve system performance.
Note. Only files with the .LOG and the rest left unchanged.
1. Go to the C:\Windows .
2. Now click on Logs as shown in the image below.
3. Now delete all log files with .LOG .
All log files on your system will be deleted.
Preload Files
Preboot files are temporary files that contain a log of frequently used applications. These files are used to reduce application loading times. All contents of this log are stored in a hash format and therefore cannot be easily decrypted. It is functionally similar to a cache and at the same time takes up more disk space. Follow the below procedure to remove preboot files from the system:
1. Go to C:\Windows as you did earlier.
2. Now go to Prefetch .
3. Finally, delete all files in the Prefetch folder.