10/12/2013 windows | for beginners
In this article I will tell beginners how to uninstall a program in the Windows 7 and Windows 8 operating systems so that they are actually removed, and subsequently, various types of errors are not displayed when logging into the system. See also How to remove an antivirus, Best uninstallers or uninstallers
It would seem that many people work at the computer for quite a long time, but very often we encounter that users remove (or, rather, try to remove) programs, games and antiviruses by simply deleting the corresponding folders from the computer. You can't do that.
Method No. 2: cleaning with uninstaller utilities
The algorithm for automatic uninstallation and removal of application remnants using uninstaller utilities boils down to the following:
1. Launch the built-in uninstaller.
2. Standard removal provided by the program.
3. Search for elements (files, registry keys) remaining after uninstallation and delete them.
The following solutions are most popular among PC users:
iObit Uninstaller
An easy-to-use yet powerful tool for cleaning Windows from unnecessary software. Quickly and accurately finds all remnants of deleted software. Has a “Force deletion” function.
Supports batch uninstallation: automatic sequential uninstallation of several programs.
Soft Organizer
A paid product with a large number of functions for cleaning hard drive partitions and system directories from useless elements, and optimizing the registry. Launches program removal with one click. It has the most user-friendly interface.
Revo Uninstaller
A faithful assistant in the most difficult cases of cleaning the OS from unnecessary applications. Distributed conditionally free of charge (test version - 30 days). It is endowed with advanced and lightning-fast algorithms for searching for remaining objects of uninstalled programs. Performs cleaning efficiently and meticulously.
Automatic registry cleaning
If manually cleaning the registry is not possible, you can use an automatic method, for example, using the CCleaner program.
- Go to https://www.ccleaner.com/ and click “Download for free”.
Go to ccleaner.com and click “Download for free”
- Select "Professional".
Select “Professional”
- Run the downloaded installation file.
Run the downloaded installation file
- Select "Install".
Click “Install”
- Click “Try”, wait for the program to install and launch.
Click “Try”, wait for the program to install and launch
- In the program window, select (on the left) “Registry” and click “Search for problems”.
In the program window, select “Registry” and click “Search for problems”
- After finding all registry errors, click “Fix”.
After finding registry errors, click “Fix”
- The program will prompt you to create a backup copy of the registry, click “Yes”.
Create a backup copy of the registry by clicking “Yes”
- Select a folder to save the file and click “Save”.
Select a folder to save the file and click “Save”
- When correcting errors, a corresponding message will appear; select “Correct marked ones.”
Click “Correct marked”
- After cleaning, you can view the corrected errors by scrolling through them with the left-right arrows or exit the program.
You can view fixed errors
Utilities for uninstalling programs
The vast majority of programs have their own utilities to remove them. For example, if you installed the Cool_Program application on your computer, then in the Start menu you will most likely see this program appear, as well as the item “Uninstall Cool_Program” (or Uninstall Cool_Program). It is this shortcut that should be used to delete. However, even if you do not see such an item, this does not mean that there is no utility to remove it. Access to it, in this case, can be obtained in another way.
General information about uninstalling software
Most programs you have on your computer are installed using a special installation utility, where you (hopefully) configure the storage folder, the components you need, and other options, and click Next. This utility, as well as the program itself, during the first and subsequent launches, can make a variety of changes to the operating system settings, the registry, add files necessary for work to system folders, etc. And they do. So the installed program folder somewhere in Program Files is not the entire application. By deleting this folder through Explorer, you run the risk of littering your computer, the Windows registry, and perhaps receiving regular error messages when starting Windows and while working on your PC.
More details:
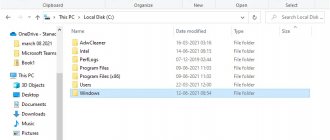
Next, in Explorer (Explorer is a tree or a list of folders and files on your computer), find the AppData here - C: / Users / Your default username / AppData or C: / Users / Your name / AppData and open the folders one by one Local and Roaming to see if there are any files or folders associated with the program you are uninstalling .
The AppData folder is the Local folder on drive C:
Note:
If you do not see the AppData folder, then in the Control Panel (via Start ) at the top right, select View -> Small or Large icons and find the Folder Options item:
All Control Panel Items - Small Icons - Folder Options
Click on it. In the window that appears, select the View Hidden files and folders” item , check the box or circle “ Show hidden files, folders and drives ”:
Folder Options -> Show hidden files and folders
AppData folder , carefully delete all files and folders related to the program , making sure once again that you are not deleting anything extraneous.
Be careful! For example, the Adobe folder may contain a number of programs. And, if you want to get rid of, for example, After Effects CC, deleting the entire Adobe folder, you can grab Photoshop and a number of other programs that were conveniently placed in one Adobe folder during installation.
3. After you have completed the second step, similarly go to the C:/ drive the Program Files , Program Files (x86) and ProgramData folders and do the same, deleting all files related to the program you want to delete.
4. Finally, go to C:/Windows/Temp and delete all signs of the program in the Temp folder.
Removing a program from the registry
Data recovery in case of OS failure
If after editing the registry the system stops booting, it can be restored using the System Restore component. The information contained in the registry, along with other OS data, will be restored for the duration of the creation of the selected data save (restore) point.
To do this, you need to enter Computer Troubleshooting mode (Windows 7).
Step 1. Press the F8 button when the PC starts booting. The More Boot Options menu will appear. Select "Last Known Good Configuration (Advanced)".
Select "Last Known Good Configuration (Advanced)"
Step 2. Select a language, click “Next”.
Select the language and click “Next”
Step 3. Enter your username (preferably Administrator) and (if you have one), password by clicking “OK”.
Enter your username, password and click “OK”
Step 4: The System Recovery Options window will appear, where you need to select System Restore.
In the “System Recovery Options” window, select “System Restore”
Step 5. When the next window appears, click “Next”.
Click “Next”
Step 6. Select a restore point. In the same window, you can select other recovery points and view the list of programs affected by recovery. Click "Next".
Select a restore point and click “Next”
Step 7. Click “Done”.
Click “Finish”
Step 8. Click “Yes”.
Click “Yes”
The computer will automatically restart, fixing the problem.
Before making changes to the registry, it is important to always create a copy of it. If there is uncertainty, it is better not to delete any data manually, but before making a decision to delete, you can search the Internet for information about the record to be deleted.
How to clean the registry
Programs that clean the registry automatically usually do their job using a special set of instructions. However, this set may not be suitable for the user in a particular case. Fortunately, the registry can be cleaned manually using a special editor built into Windows.
Step 1. Click the “Start” button and find the “Run” program in the menu, launching it with a mouse click.
Click the “Start” button and find the “Run” program
Step 2. Type the command “regedit” in the window that opens and click “OK”.
Type the command “regedit” and click “OK”
The Registry Editor will launch.
Registry Editor
Reference. Before making any modifications to the registry, it is important to create a backup copy of it. If some of the changes you make damage the PC software, this will make it possible to restore the system's functionality.
Step 3. Click “File” and select “Export”.
Click "File" and select "Export"
Step 4. Select “All” in the “Export Area” panel.
Select “All” in the “Export Area” panel
Step 5. Select the folder where the copy of the registry will be saved and enter its name.
Select the folder where the copy of the registry will be saved and enter its name
Step 6. Click “Save”.
Click “Save”
The registry editing program is divided into two windows. The left window is used to display the entire tree of registry keys, and the window on the right is used to display its individual entries.
More details:
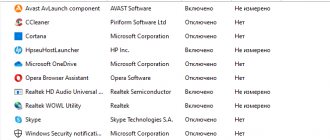
Start - Control Panel - Programs
(click “Uninstall a program”): here is a list of almost all installed programs.
Start-Control Panel
Control Panel - Uninstall a program
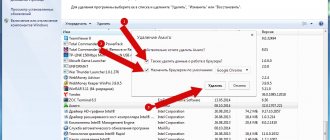
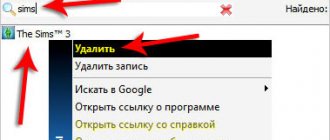
In the list, find the program you are planning to remove, then right-click on it and click on the “Delete” button that pops up.
Standard program removal in Windows