To connect the scanner to a laptop or desktop computer, you must fulfill two conditions - connect the equipment together with cords and add the scanner to Windows 7-10 so that it appears in the “Devices and Printers” section. The latter is achieved by installing drivers. Afterwards, you will be able to scan documents onto your computer using standard operating system tools or software (official or third-party).
We will separately consider the issue with multifunctional equipment, if the printer is working and connected, but it is not possible to start scanning.
Related articles:
- how to scan a photo;
- types of scanners;
Computer settings
Regardless of which of the methods described above you choose, the settings on the computer are performed the same in all cases.
You can configure it through the “Control Panel” or through “Printers and Scanners”. The setup is similar.
“Printers and Scanners” appeared on the latest versions of Windows. This application is suitable for setting up a network printer on Windows 10.
We will configure it through the “Control Panel”, which is available on all versions of Windows. In particular, it is suitable for setting up a network printer on Windows 7.
Search for “Control Panel” in your computer search. In the Control Panel we find the “Devices and Printers” section. Click on the “Add a printer” item.
The system will try to find the device connected to the computer, but, of course, it will not succeed. Therefore, we will use the item “The required printer is not in the list” at the bottom of the window.
On the next page, select the option to add by TCP/IP address or host name. Click “Next”.
In the next window, in the “Device Type” drop-down list, select “TCP/IP Device”, and below in the “IP Address” and “Port Name” fields enter the address that we obtain as follows:
- When the printing device is connected via USB to the router, enter the IP address of your router, which you enter in the browser to enter the web interface. Typically this is 192.168.0.1 or 192.168.1.1. It is indicated on the label at the bottom of the device.
- When connecting via a LAN port with an address specified through the menu. In this case, enter this address.
- If the printing device is connected via LAN and receives an IP address from a DHCP server, look at what address was received on the DHCP server.
It is better to uncheck the checkbox for asking and selecting a driver automatically.
In the next window, check the “Special” box and click the “Options” button next to it.
In the settings window that opens, select the LPR protocol, and in the “Queue name” field - in our example we wrote “naseti”, in fact, any name can be written. Click OK and return to the previous page.
Now you can click “Next” and proceed to the actual installation of the printer. The driver can be selected from the list or installed from disk.
You can give the printer a new name, or you can leave the default one.
We refuse the offer to allow shared access to the printer and click “Next” again.
A message should appear here stating that everything went well and the printer is ready for use. To verify this, print a test page.
Setting up a print server on the router
If you have any difficulties, you can use the utility to configure the print server on the router. You can download it from the manufacturer’s official website by selecting your router model in the “Downloads” section.
To configure the print server on TP-link routers, use the proprietary TP-Link UDS Printer Controller utility. After you have downloaded and installed the program on your computer, run it and it will automatically find all printers connected to the router. Select the one you want to use to connect automatically.
The utility works with Windows and Mac OS.
For D-Link routers, use the proprietary SIUtility utility. If you have a router from another manufacturer, look for compatible software on the official website.
What problems may arise
It may happen that the connection was carried out according to the rules, but the scanner still does not work. There can be many reasons for the problem. One possible reason could be that the drivers have not been installed. The scanner may not work if the cables are poorly and loosely connected to the computer, or the control lever is simply not turned on. Scanning may not occur or the image may be of very poor quality. To determine the true problem, sequential steps must be taken to check the equipment.
How to scan documents from a printer to a computer
EPSON L355 with CISS (Click to enlarge)
Scanning documents and photos from your printer to your computer is easy. To do this you need:
1. Install drivers for your MFP. I wrote about this in detail in two articles below:
- How to install a printer without a disk.
- How to install a printer from a disk.
If you have the disk that came with the device, you can use it. Disconnect the printer from the computer, insert the disk into the drive and run the file with the extension (usually Setup.exe). Follow the master's instructions.
2. Place the document on the scanner glass. In the vast majority of cases, you should place the printed side down, but for HP ENVY multifunction printers, it should be placed face up.
3. Turn on the printer and wait 30 seconds until it is detected in the system.
4. Scan. There are various methods you can use here:
- Go to the path “Control Panel\Hardware and Sound\Devices and Printers”. Right-click on the printer icon and select “Start Scanning”. In the window that opens, set the necessary parameters, click “View” and if everything suits us, click “Scan”. The 3rd video on the left shows this option using a Canon MFP as an example.
- Open special scanning software that is installed on your computer with a driver for your MFP. Usually there is a shortcut for it on the desktop. There you can open the settings and set the ones you need.
- Paint. This utility comes bundled with Windows OS. You can launch it by opening the Start menu - All Programs - Accessories - Paint. Expand the File menu (or click on the down arrow button in Windows 7). Select “From a scanner or camera”. In the window that opens, you can select the type of image to be scanned. If you don’t have time and need to quickly scan something, immediately select the type you need and click “Scan”. If you have time, you can select “Adjust the quality of the scanned image” and set more appropriate settings.
5. Save. After the scanned image appears in the program, open the menu File - Save As - Image in JPEG format. Select a directory or folder to save the document on your computer, set the file name and click “Save”.
DPI
DPI - resolution or dots per inch. The larger, the higher the quality of the image, the higher its resolution (the number of pixels in length and width) and the more the file will “weigh” and take up space on your computer’s disk. The higher you set the resolution, the longer the printer will take to process or scan the document.
- 100-200 dpi - if you need it quickly and you won’t recognize documents.
- 300-400 dpi - suitable if you need to recognize text.
- 500-600 dpi - if you need the smallest details of the document.
With a resolution of 600 dpi, the father scans old family photographs that he manages to get his hands on. There you need maximum resolution because the quality of photos from the 20s, 30s, and 40s is “not very good.”
I find it convenient to scan at 300 dpi. The photo quality is good and the text can be recognized if necessary.
There is one more nuance here. You can always reduce the resolution of the scanned file in the same graphic editor Paint. But you won’t be able to increase the resolution. You'll have to scan again.
Have fun scanning.
Create a shortcut on the desktop
It can be inconvenient to go through certain menu options each time to scan physical media, especially when scanning needs to be done frequently. Therefore, a reasonable solution would be to display a shortcut to launch the scanning program through which the work is launched.
If you are installing official software from the manufacturer, and more specifically, the maximum package with a full-featured program, then the default shortcut should appear on the desktop.
But when the shortcut does not appear or proprietary software is not used, then you can display the icon on the workspace yourself. Open “Start” and start typing the name of the desired program in the search bar. From the proposed options, right-click on the one you want and select “Create shortcut”. Or simply hold down the left mouse button and drag the shortcut to the slave. table.
On Windows 10, the above method will not work. There are fewer options for interacting with the desktop, but you can pin the program to the Start screen (located inside the Start menu) or to the taskbar.
Using special software
Any printer or MFP comes with a disk with drivers and software specially designed for a specific device model. Installing such programs makes it possible to obtain the most effective interaction with the device along with high quality parameters.
Actions when using special software:
- After installing the hardware and software, open a list of programs.
- Find the application for the version of the printer you are using and launch it.
- Click on Scan.
- Among the proposed parameters, choose type, format, color and resolution.
- Using Explorer, specify the path to the final folder where the files are stored. For ease of searching and reading a document, it is advisable to immediately give it a name.
- Removable media can act as a storage device.
- After previewing the file, correct defects and problem areas, and then click on the “Scan” button.
- After recording the data by the device, confirm the next action by pressing the “Save” button.
What is scan and scan?
A scan can have two meanings. The first is a digital copy of a paper document in the form of a file on a computer disk. The second is short for “scanning.”
How does the scanner work and what does it do? We'll tell you in detail.
Scanning is the process of “translating” text or images on a sheet of paper into electronic form using special equipment. In this case, a scanner or multifunction device.
How to connect a scanner to a netbook
First you need to prepare the required equipment:
- Laptop. It will need to be turned on in advance or ensure that the battery has a sufficient charge level.
- USB or other compatible cable for transferring information from the scanner to the memory module in the computer. The type of cord can be found in the instructions for the device. In some cases, you may need a special cable with a USB adapter. They are usually supplied with a scanning device.
- Wire for connecting the scan tool to the electrical network.
- Disk or flash storage media with recorded drivers. They can be downloaded from the manufacturer’s official website by selecting the operating system.
The connection process is not complicated, the main thing is to follow the list of actions presented below:
- Remove the scanner from the box and place it on a stable surface. It is recommended to provide in advance a place on your desktop or a separate shelf with a free space height of approximately 25 cm. This will allow you to comfortably use the device while scanning papers.
- Unpack the CD and the necessary wires for connection.
- Turn on your laptop or compact netbook and wait until the OS loads completely.
- Connect the power cable with one side to the scanner, and then to the outlet.
- Align the devices by attaching the corresponding cable to the USB connectors of each.
- Turn on the scan tool using the button located on the front panel. It is usually indicated by an icon in the form of a circle and a dash. After this, the laptop will automatically begin searching for a suitable driver. However, in the list of already installed software there are usually no such technically compatible files.
- Insert CD media into the drive or download the driver from the manufacturer's website. Run the installer. When using the disk, a welcome window will automatically open where you need to agree to the rules of the license agreement and continue the installation. If the file is downloaded via the Internet, you will need to open it by double-clicking and repeat the steps described above.
Another option for obtaining the required driver is to use the operating system functions. In this case, you will need to open the “Device Manager” and select the equipment that is marked with an exclamation mark. You should right-click on the name of the connected scanning device or the corresponding key on the laptop touchpad. Next, simply select “Update drivers”. After specifying the “Automatic installation” option, the netbook will independently begin searching for the program.
Making quick access for scanning
There are several solutions for easier and faster access to the scanning function:
- If the manufacturer's original program is installed, the shortcut can be displayed on the desktop or pinned next to the Start menu. All that remains is to open the program through the shortcut and immediately start scanning. The same goes for any program that creates images of documents. The shortcut can always be placed on your desktop.”
- In Windows 10, the program icon is easily pinned to the taskbar or Start menu among other tiles. To do this, find the program through the search, right-click and select the convenient option.
How to make a scanner over a network in Windows XP, 7, 8, 10
Comments on this post: 19
Hi all! Today I encountered the following problem: how to make a scanner over a network in Windows? The printer is easy to add, because... Windows has a built-in print server, but no scanning.
How to set up a scanner over a local network?
After a little searching, I found a program that makes a scanning server and, accordingly, can share a usb printer over the network!
Now see how it works:
1. Install this program on the computer to which the scanner is connected. Install as a server.
2. Now on a computer that does not have a scanner, install the program in Client mode.
3. To scan a document, select RemoteScan as the device.
Install as a server
I won’t explain to you how to install, everything is simple further, further, but most importantly, install as is and when installing, check the server box.
Then further, further. After installation, if your firewall is enabled, it will ask you which networks to allow this program on, I installed it in all of them.
When starting, select the scanner through which scanning will be performed. We select the scanner so that the program can share the scanner over the network.
All. The server is minimized to tray and will start when the computer starts. There is no need to turn it off. If necessary, you can change the scanner in the tray if you have several of them.
Installing the scanner as a client
Now we install the scanner on the computer where you will scan.
The installation is similar, only during installation you need to select the Client checkbox.
After installation, if the firewall asks, again select which networks you will use it on.
All. Now how to scan.
How to scan over a network via USB
Now select the program to scan. If you don't have it, you can download it in my article about free scanning programs. I took the second one, which can scan several pdf pages into one file.
Select RemoveScan as scanner
And we scan as usual) This is how you can scan over the network using a USB scanner!
Many people may need to connect a printer to a virtual machine, I’ve attached a video for this)
https://youtube.com/watch?v=dlkYgBxStog
What to do if the MFP does not scan
You should start troubleshooting based on whether this is the first installation of the scanner on this PC, or whether it has been working for some time.
If you previously successfully used the scanner, and then at some point it stopped working, then the very first thing you should do is reboot it at the same time as the PC, disconnecting it from the power supply for a few minutes, and also check the reliability of the USB cable connection to the device.
If this does not help correct the situation, then you should make sure that the scanner’s hardware is working. Any user should understand that a multifunctional device combines a scanner and a printer in one housing. And the functionality of the printer does not mean the functionality of the scanning module. The easiest way to check the serviceability of the scanning module is to disconnect the device from the computer and try to make a copy of any document offline. If you succeed, this is a good sign; if not, then most likely you cannot do without contacting a service center.
If you are convinced that the device is functioning in offline mode (copier mode), you should continue to search for the reason why the device is not working when connected to a computer.
The next thing you need to check is the serviceability of the communication line between the MFP and the PC. Ideally, if possible, you should take a new USB cable and connect it to a different port on your PC, or at least simply change the USB port to which the device is connected.
If manipulating the cable did not help, then with a high degree of probability, we can say that the problem is in the MFP scanner drivers installed on the PC or their conflict with the drivers of other devices.
As a rule, a set of necessary drivers is supplied with your MFP. The problem may be that each driver version is designed for a specific operating system, and accordingly, when installing updates, the existing driver may stop working.
In this case, you must perform the following steps:
- download the latest version of drivers for your MFP from the manufacturer’s official website, compatible with your operating system;
- disconnect the MFP from the PC;
- go to the installed printers and scanners tab and remove from it all unused devices and the problematic MFP;
- to restart a computer;
- connect the USB cable and wait for the PC to detect the type of connected device;
- install the MFP on this PC using the latest version of the drivers downloaded earlier;
- to restart a computer.
By completing this algorithm, you will completely reinstall the drivers for your MFP on your PC, eliminating the existing problems.
Be careful when downloading drivers for MFPs. For some manufacturers, scanner drivers are installed separately from print device drivers.
We use software from the device manufacturer to scan the document
- Xerox Easy Printer Manager. The utility is specifically designed for use with Xerox equipment. The program has a simple and intuitive interface. It also allows you to very flexibly adjust the quality of scanned documents. The advanced mode will allow you to specify the resolution in which the document will be saved, the full storage path on disk, file format, color.
- Epson Scan. The program was created to work with MFPs and scanners from the Japanese company Epson. Before the scanning process itself, you can specify the necessary settings in the appropriate section. If the quality of the scan is not at an appropriate level, then it should be corrected using the utility.
- HP Scan . Proprietary software is used when working with new and old models of devices from this American company. You can download the version for any Windows OS. The program has a standard set of tools, but this is enough for most tasks. Can save in PDF and JPG formats.
- Canon MF ToolBox . From the name it is clear that this is a development by Canon engineers. Users note obvious advantages: light weight of the installation file, speed of scanning, variety of formats for saving. The only drawback is the lack of a Russian interface.
Other manufacturers (Canon, Samsung, Kyocera) also have similar developments in their arsenal. Their capabilities, settings, design and operating logic are almost identical.
The computer does not see the scanner: reasons
If the computer does not see the scanner, this does not always mean that one of the devices is broken. It may be necessary to install drivers or additional programs (the device simply cannot create a copy of the image in the standard way). Among the most common reasons why the computer does not see the scanner are:
- The cable is damaged.
- There are no drivers or they are outdated.
- The scanner is not configured correctly.
- The port is damaged.
- The problem is in the system.
Cable damage
If the device does not work, first check the cable. Try switching the plug to another USB connector. Check the connection tightness. Inspect the cable and plug for external damage. Most often, the cable contacts stick (in the area where the plug is). Another problem is damaged insulation. If you know how to work with a soldering iron, try to repair it yourself. If not, take it to a service center or buy a new one.
Lack of drivers
The most common problem, since all devices require drivers. Perhaps they are simply installed incorrectly. Insert the disc into the drive and install them. If there is no disk, download it from the Internet
But pay attention, there are many drivers, but you need those that are compatible with the devices. If the drivers are already installed, remove the old version before reinstalling
Don't forget to restart your computer.
Incorrect settings
Perhaps the settings are incorrect, then the computer cannot see the device. There is a high probability that other equipment is installed by default. Go to settings and open the list of equipment. Find your scanner and right-click on it. A menu will open where you need to select Use as default.
If this does not help, click on the equipment name with the left mouse button twice. Select the “Scanner” tab and uncheck the boxes next to “Stop scanning” and “Work offline.” Clear the queue.
Port damage
Another common problem. First, inspect the port for external damage. You can also check the connector by connecting other equipment, such as a flash drive or keyboard. If they work, the reason is different. If not, you will have to take the computer to a service center.
The system is not functioning well
Problem with system functionality. For example, the computer crashed. In such cases, you must make all settings default. You can also restart your computer. If this does not help, you should reinstall Windows.
Solving problems with the scanner
New equipment should be smoothly connected, installed and configured. Problems arise only with intensive continuous operation and after a long period of operation.
The main thing that needs to be done upon purchase and after delivery (if you ordered) is to carry out an external inspection of the case. If there are chips, cracks, or something inside shakes when you shake it, maybe some element is broken. Then it is recommended to contact the store seller.
- Sometimes Windows crashes unexpectedly. This may cause the required driver to fail. A regular restart of the computer often helps restore functionality. If this does not help, the driver is reinstalled from a CD or a file downloaded from the manufacturer’s resource.
- Many people forget to switch from sleep mode to alert mode. Wake up with one click of the power button. And sometimes a separate button is responsible for exiting sleep.
- Various statuses such as “Disabled”, “Working offline” and the like. The main reason for these subscriptions is loss of connection to the printer. More precisely, lack of communication. Check that the connecting cable is not pulled out. It's a good idea to run the troubleshooter and update your drivers.
- The Fax and Scan component is responsible for the operation of printing equipment in Windows. In the tenth version of Windows, there is a conflict between the drivers of the MF series models and the standard components. Then try disabling the system component. In Control Panel, under Programs, then Programs and Features, click the link on the left that says “Turn Windows features on or off.”
Expand Print and Document Services and uncheck Windows Fax and Scan. Save changes and restart if prompted. Then try scanning using Canon MF Toolbox or another program such as VueScan.
Canon developers have also released a patch for Windows 10. This is a priority way to solve the problem; there is no need to disable anything. Follow the link, select your model, download the patch and install it on your computer.
To understand the cause of the problem, always look at the indicators located on the control panel of your office equipment. If your car has a large information display, specific error codes may be displayed.
As a last resort, you can always completely remove the Windows device, clean the system of debris, connect it, and add it again.
Update the printer driver
A missing or outdated printer driver may cause the system to report that the printer is not connected, so make sure your printer driver is updated.
Updating your printer driver to the latest version can not only solve any possible problems with your printer such as printer not printing, printer error, etc., but will also give you more options when printing.
There are two ways to update the printer driver: manually and automatically.
Manually: You can manually download the printer driver from the manufacturer and install it on your computer. Make sure to download the latest correct version compatible with your Windows system. Since this depends on the printer manufacturers and models, we will not cover it here.
Automatically: If you don't have the time or patience, you can do it automatically using special programs such as Driver Easy.
Such programs will automatically recognize your system and find the correct drivers for it. You don't have to know exactly what system your computer is running, you don't have to risk downloading and installing the wrong driver, and you don't have to worry about installation errors.
Other programs that can scan
- FineReader. A very popular utility. Its main advantage is the ability not only to scan, but also to recognize text on a document. And then save it in formats that allow you to make edits to the scanned file. Supports work with a large number of different languages. The program is paid, but has free trials and an online option.
- ScanLite. Installing the program does not take much time and is reduced to minimal steps. The launch is made by a shortcut from the desktop, which will be created automatically. To carry out scanning you need a minimum of settings. You only specify the file name of the scanned document and the disk path to the storage location.
- RiDoc. If support for scanning into different formats is relevant to you, then it makes sense to use RiDoc. Otherwise, it is better to use other options or a standard operating system application.
- WinScan2PDF. A simple, fast, reliable application for working with a scanner to produce high-quality PDF scans. Often used when working with network devices. The program is free.
- VueScan. Easily adapts to work with many models of scanners and MFPs. It has a built-in text recognition system, also known as OCR. The default scan settings can be changed by the user. You can specify: the final result file name, saving folder, format (PDF, JPEG, PNG).
- CuneiForm. Free software for scanning documents to a computer from a printer equipped with a scanner. Has a large set of settings to improve the quality of scanned images. Can recognize text, fonts and tables in different languages.
The scanner stopped working
- Check the power cable to see if your device is connected to the network.
- The MFP may be busy with initialization or some maintenance tasks. In this case, the power button usually blinks, wait until the device is ready for use.
- The printer may display an error code. For example, a cartridge needs to be replaced. And although ink is not required for scanning, most MFPs will not perform any functions in this case. Correct all errors.
- Turn off and unplug the power cords for both the printer and computer. Connect again after 1-2 minutes. If this was a one-time failure, the scanner will work after such a reboot.
- Check the USB cable:
- Connect it to another port, directly, not through a hub.
- Use the port on the back of the computer if it is a PC.
- The cable length should be as short as possible, preferably no more than 1.5 m.
- Check your Internet connection if the MFP is connected via Wi-Fi.
- Mains voltage and interference:
- Power surges can also cause the scanner to malfunction. It is undesirable to connect the MFP to a network where electrical appliances are connected that constantly turn on and off: air conditioners, switches with timers, and similar devices.
- The MFP should not be in close proximity to speaker systems, radiotelephone bases and other sources of electromagnetic interference (including microwave ovens). This is especially true if your printer is connected via Wi-Fi.
- Check your scanning device. It is best to assign an MFP.
- MFPs cannot do several things at the same time:
- If the printer is printing, wait until the job completes.
- Check the print queue and clear it if necessary (how to clear it).
- Scanning may pause if there is insufficient hard drive space or the total data size reaches its limit.
- When scanning over a network, there may be a communication error if the scanning settings are set to high resolution. Lower your resolution.
- Reset the printer to factory settings. Read how to do this in the user manual of your device.
Activating the scanner on the MFP
When you turn on the MFP, all drives and mechanisms of the device are activated. This applies to all popular brands: HP, Canon, Epson, Brother, Samsung, Kyocera and other well-known ones. Therefore, if the ready light is on, you do not need to do anything else.
simply submit the job from your computer for scanning. The MFP will receive the signal and begin making a copy of the document placed on the glass under the cover.
Before an extended period of inactivity, the MFP must wake the device from sleep mode. This is done by pressing the “On” button once.
How to scan with an HP printer?
HP - almost any person can find equipment from this brand. Easy to use, simple settings, convenient functionality. Let's move on to the mini-instructions on how to scan on an HP printer.
Method 1: Program from the HP package
- Connect the printer either via WI-FI or USB cable.
- Open the top cover
- Place the document face down
- Go to the “HP Deskjet” (“ScanJet”) program
- If the tool is not found, then reinstall it or load it through the disk that you provided (you can leave the settings as standard)
- "Save"
Simple steps to answer the question: How to scan on an HP printer.
Method 2: How to scan with an HP printer - Button on the scanner
- Repeat all the points above.
- Find the “Scan” or “Scan” button on the printer panel
- "Save"
(You can use analogues of the program if the license disk is lost).
Types of connection
Before setting up a network printer through a router, let's look at the possible connection options. So, you can connect the printer to the router in the following ways:
- Via USB port. This connection is possible if your router is equipped with a USB connector and supports network printing.
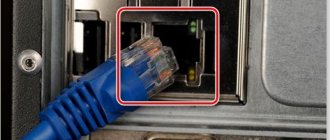
- Via LAN port. If your printer is equipped with a built-in print server with a network port, you can connect it to the router using a patch cord.
- Via Wi-Fi. Some modern printers are equipped with a Wi-Fi module and can communicate with the router over the air. You can also connect to them directly from a laptop equipped with a Wi-Fi module.
- Using a hardware print server. This is a separate device to which the printer is connected. The print server has a LAN port for connecting to the router.
USB connection
Connect your printer to the router's USB port using a cable. Both devices must be turned off. Then turn on the router and wait for it to boot. After this, you can turn on the printer. By default, the router does not need any special configuration; it should immediately recognize the printing device. You can check this by logging into the device’s web interface and opening the network map. Your printer model should be displayed there. If this does not happen, check the status of the print server. It must be online.
Wi-Fi connection
If your printer is equipped with a wireless Wi-Fi module, then you can connect it to the router over the air without any wires. You can do this in two ways:
- WPS. In the instructions for your printer we find how to activate the WPS function. Then press the WPS activation button on the router. We wait until the connection is established (the indicator on the router stops blinking) and check whether your printer appears on the network map.
- WEP/WPA. Manual setup is similar to setting up the first connection to a wireless network of any Wi-Fi device. We find the network settings in the printer menu, select the network we need and enter the username and password.
Connection via LAN port
If you happen to be the happy owner of a printer with a network port, you can connect it to the router via LAN using a regular patch cord. The cable is usually included. If it is not there, you can use the patch cord from the router if you do not have one. Or buy a cable of suitable length in a store.
In the device menu you need to set it to a static IP address. It is advisable to do this even if the DHCP service is configured on your router. The fact is that if the printer’s IP address constantly changes, this will complicate its search and it will periodically disappear from the list of available devices. There is, of course, the option to reserve an IP address in the DHCP server settings by MAC address.
After this, the printer will reboot. After which it can be found in the list of network devices.
Install the printer drivers and print a test page.
Using a hardware print server
If your printer is not equipped with a network card or Wi-Fi module, and your router is not equipped with a USB port, you can purchase a hardware print server. As mentioned above, this is a separate device that acts as an intermediary between the router and the printer.
Budget models have one USB port and a network port. More expensive ones - several USB, and also, optionally, an LPT port. Also, the print server can have a built-in Wi-Fi module and connect to the router not via cable, but over the air.
First, we connect the print server to the router, and the printer to the print server.
The print server is configured using the supplied proprietary utility. It allows you to find a print server on the network and set an IP address for it. Further configuration is carried out via the web interface according to the instructions. You can enter it by entering in the address bar of your browser the IP that was set for the print server during initial configuration.
As you can see, there are several ways to connect your network printer to your router, depending on its hardware capabilities.
How to scan from a printer to a computer
Many of you, more often or less often, are faced with the need to transfer information (text, graphics, photographs) from paper to a computer. The main assistant in solving this issue is a scanner. This can be either a stand-alone device or an MFP with scanning capabilities.
1
In order to begin the scanning process itself, you must have a computer and a scanner (or an MFP with the latter function) at your disposal.
- Turn on the computer and printer.
- Connect the MFP (or scanner) to a power source and to your computer.
- Place the document, book, photograph or other paper medium from which information should be read with its front side on the scanner glass.
This completes the preparatory stage.
2
Paint program
The presence of this graphic editor will help you carry out the procedure for transferring data to your computer easily and quickly.
- Launch the Paint program. To do this, click on its shortcut (icon) on the desktop or go to “Start” - “All Programs” - “Accessories” - “Paint”.
- In the upper left corner of the program that opens, go to the “File” menu or click on the white rectangle with a drop-down list (in the same corner).
- In the list provided, select “Get image” – “From a scanner or camera” (or “From a scanner or camera”). If this menu item is not active, it means the scanner is not ready for operation (check the connection of the device to the power source and the computer).
- A window appears on the screen in which you select the required device - your printer, the type of image to be scanned (color or black and white).
- Afterwards, press the “Scan” button.
- Ready. Here is a scanned image that you can edit if desired.
- To save the picture, go to the “File” menu and select “Save As,” indicating the path in the directory where the resulting file will be stored. The most common saving formats are .JPEG and .png.
Using a scanning app
- Install the necessary drivers for your printer on your computer. To do this, you can use the disk that came with the device, or download them from the Internet.
- Go to “Start” – “Devices and Printers” (or “Start” – “Control Panel” – “Devices and Printers”).
- Right-click on your printer icon and select “Start Scan” from the drop-down list.
- A window opens in which you set scanning parameters: the type of source document, color or black and white image will be received, the resolution of the finished image, in what format the file will be saved.
- Click the “Scan” button.
- As a result, a scanned image will appear on the screen, to which you assign a name and indicate the path to place it on your computer.
3
Resolution is one of the important parameters of the final image. It is he who determines the detail (clarity) of the picture. For text documents, you should not set excessively high values - this is not necessary, and more time will be spent on the scanning process. And remember that you can reduce the resolution of the resulting image (in a graphics editor), but you cannot increase it; you will need to rescan the document.
- 100 – 200 dpi – fast image transfer, does not imply subsequent document recognition.
- 300 – 400 dpi are sufficient indicators for text recognition.
- 500 – 600 dpi – if you need to capture the smallest details of the image.
What should you use at work?
You will need two devices. This could be: a PC or laptop and a scanner or MFP, a scanning device with a USB connector and a flash drive. The latter option will allow you to scan and save it to a flash drive. It is not difficult to purchase any equipment. It’s easy to choose in city stores or on the Internet. Another option is to consider purchasing abroad. For example, in China or the USA. The following manufacturers are popular on the market: Samsung, Ricoh, Kyocera, HP, Epson, Canon, Brother. For home use, products in the mid-price range are sufficient.
How to connect and configure a network printer
Setting up a printer over a local network begins with a computer to which the printer is physically connected, that is, via a USB cable. Make sure all necessary drivers are installed and the printer is turned on and working.
Important: Network printing will not work if the computer with a physical connection to the printer is turned off
Press Win + I and go to Devices – Printers and Scanners. Click your printer and then click Manage. I don’t use a printer, so the article is written using the example of “printer” Send to OneNote 2016. Don’t be confused by the strange name. The procedure will be exactly the same for traditional printers.
Click Printer Properties and a new window will appear on your screen.
Go to the Sharing tab and check the box next to Share this printer. Give your printer a name that is convenient for you (you can leave the default one) and click OK.
After this, the printer will be accessible from the network environment of other computers. An icon with two users will be displayed next to it in the control panel. This is a designation for shared devices with network access. Now you need to proceed to setting up the PC from which you will access the printer remotely. Press Win + I and open the section Devices - Printers and Scanners. Click on the Add printer button and wait while the system scans the environment
The printer will not be detected, so you will need to click The printer you need is not in the list. Please note that a network printer configured on a Windows 10 computer will also work on previous versions of the system. On Windows 8.1 / 7 or Windows 10 older than 1803, you need to open the Control Panel (Win + R – Control)
Go to Hardware and Sound - Devices and Printers, and then click Add a printer.
In the new window, click The printer you need is not listed.
A new window will appear in which you need to select Select a shared printer by name.
In the name field, enter MAIN PC NAME\PRINTER NAME. For example, Taras-PC\Test printer. Alternatively, you can click the Browse button, select the host computer from the network environment (you may need to enter the account and password for this PC) and select the shared printer. Click Next. The system will connect the printer and inform you that everything is ready for use. To check if your network printer is working, you can send a test page to it to print.
After this, your network printer will be listed in the list of all devices and you will be able to send your documents to it from applications.
Can't set up a network printer
Happens. If you encounter difficulties setting up a printer over a local network, here are a few tips that may help you. In general, the system for setting up and operating shared printers is quite simple. If the printer works on the main PC, then it will work on other computers on the network. The main thing is that nothing prevents devices from communicating with each other on this very network.
Both computers must be on the same private network, and network discovery must be enabled in the settings. On both computers, do the following:
- First of all, make sure that the network settings are the same on both devices. All PCs must be in private network mode. To check this, press Win + I and go to Network and Internet - Status - Change network properties.
- Make sure your network profile is set to Private.
- Then return to the Network and Internet – Status section. Click Sharing Options.
- Your current network will be indicated by Current Profile. Make sure you have Turn on network discovery and Turn on file and printer sharing turned on.
- Save your changes.
The problem may also be caused by translating the PC name into an IP address when specifying the path to the printer.
- Try replacing COMPUTER NAME\PRINTER NAME with the IP address\Printer name. For example, not Taras-PC \ Test printer, but 192.168.1.9 \ Test computer. The IPv4 address of the computer can be found in Settings – Network and Internet – Status – Change connection properties – Properties – IPv4 address.
- Then make sure your firewall isn't blocking sharing. In the lower right corner, click on the Windows Defender icon and click on Firewall and network security in the new window. Then click Allow an app through a firewall.
- In the new window, in the list of Allowed programs and features, find File and Printer Sharing. Make sure the checkbox is next to the network you are using. If not, click Change Settings, check the boxes, and then click OK.
If you're using third-party firewall apps, the process for enabling sharing will be different, but the principle is the same.
How can I scan a page so that the text and image are clear?
The most important thing is to lay out the paper correctly. Most printers have special frames that will help you align the sheet for perfect results. Typically devices support formats up to A4. If you plan to scan larger pages, you should pay attention to the parameters of your specific model.
Scanning is a simple process, although the appropriate settings on your device are required to obtain the best quality. First of all, the resolution for black and white mode should be 300 dpi. Lower values will make the image blurry, while higher values will make the printer take longer and increase the file size. 24-bit color documents scanned at 300 dpi result in a file size of approximately 25 MB. Doubling the resolution will increase scan time by up to three times.
It is also worth remembering that pages with small font (below 9) should be scanned at a higher resolution, which will ensure ideal readability of the file. By avoiding settings that use halftones, there will be no difficulty reading text in a digital copy. However, these functions are useful for photographs or graphics.
In order for a document printed on colored paper to turn out clear and not too dark, you need to increase the contrast and brightness in the settings by about 10-15%. If the file remains dark, you should increase these values even more. Some devices have manual brightness control that must be adjusted before use.
Let's sum it up
The simplest method to check is to open the “device manager” and check the controller, it should not be marked with a yellow exclamation mark. The controller must operate in optimal mode. If a problem occurs, then you should try installing the scanner on another computer; perhaps the problem is with your hardware. It often happens that perfectly serviceable systems simply refuse to work. A striking example is the Mustek scanner, which simply refuses to work with bus controllers manufactured by Tekram. So before installing a scanner, you should definitely consult which bus this product operates on or ask for recommendations on choosing a new controller.
If none of the proposed options are suitable and the scanner continues to refuse to work, then there is only one way out: take it to a service center for warranty service. The service center will definitely help you and explain what the reason was.
Vuescan
Vuescan is an application that greatly enhances the capabilities of the standard tools integrated into the Windows operating system. Thanks to the mechanism of interaction between the scanner and the computer, Vuescan solves all problems with connecting legacy scanners. Also noteworthy is the large number of color gamut settings, as well as the ability to save files in RAW format. This feature allows you to achieve maximum quality professional photos. With Vuescan, a user can run a batch scan and then process a large number of documents.