Operating systems iOS
16.12.20191622
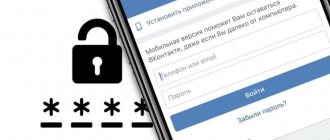
Having learned how to check an iPhone for originality, and having performed a number of simple manipulations associated with this, the owner of the device will most likely protect his confidential data, as well as make it easier to unlock the application menu. Both can be done using the Touch ID feature. What is it and how to configure Touch ID correctly - let's try to figure it out.
What is Touch ID on iPhone
Touch ID is a fingerprint scanner used in the iPhone and other Apple devices. Apple first added it to the iPhone 5S in 2013. Since then, for 5 years, this technology has been actively used in iPhones, iPads and even MacBooks.
Touch ID allows you to unlock your device with just a touch of a special surface. In mobile devices this is the “Home” button, in MacBooks it is a key.
After its introduction, Touch ID quickly gained great popularity, because you no longer have to enter long passwords to unlock your smartphone for a couple of seconds. They put their finger on it and in a moment the device is available for use.
Quantity vs quality
Today, Apple puts Touch ID sensors in almost all devices (with the exception of the iPod Touch line), while manufacturers of Android smartphones were able to access the required API only with the release of Android 6.0, which now runs about 15% of devices. Let's try to figure out how safe the fingerprint authentication method is and whether its use makes practical sense.
Following the historical order, we will begin, perhaps, with Apple.
How Touch ID works and how it works
There are currently two generations of Touch ID. They differ in the speed of data reading and therefore faster unlocking. The second generation began to be built in starting with the iPhone 6S, and the unlocking speed is really faster there.
First generation Touch ID devices:
| Devices with Touch ID 2nd generation:
|
The Touch ID sensor is built into the Home button and covered with sapphire crystal. This allows you to reliably protect the scanner from minor mechanical damage. The built-in sensor scans the fingertip and recognizes the pattern on it. In addition, it does not matter at all at what angle you place your finger: from above, from below, from the side - the device can be easily unlocked. You can add multiple fingers at once to unlock the device with either hand.
The essence of the technology, what are its advantages?
Of course, the question immediately arises: Touch ID - what is it? The device itself, the technology or, in general, the phone model? Apple Touch ID is a technology that uses a sensor that recognizes a user's unique fingerprint pattern. The unlocking process is simple: just place your finger on the Home button. The installed sensor reads the received data from absolutely any angle and in any way the iPad is positioned.
The iPad mini 3 unlock button is made of sapphire glass, which is enclosed in a stainless steel ring. Each part performs its own function: the ring detects touch, and the glass part transmits fingerprint data to the sensor. The reading program performs a comparative analysis and signals compliance. It is noteworthy that the Touch ID sensor performs the entire operation within a fraction of a second.
Advantages of the technology:
- Speed of response and minimum number of required operations.
- Security of confidential information (thanks to the specific architecture of the A7 processor, the user’s personal data will be protected).
- User information security (the password and fingerprint used for comparison cannot be copied or transferred in any way, and is also not available to the OS and applications).
- Authorization in applications (Touch ID technology is already integrated to simplify the process of confirming actions or signing).
- Using a fingerprint, you can confirm a purchase in the App Store and iTunes - using Touch ID technology will eliminate the need to enter payment data and passwords.
What is Touch ID for?
Touch ID provides multi-processor security and speeds up authentication. As we have already said, the first and main task is to unlock the device. You set a passcode and configure the fingerprint scanner. When it is not possible to use Touch ID (wet hands, etc.), simply enter the password. Touch ID helps with payments when using Apple Pay. When you want to pay in store with your iPhone, you need to double-tap the Home button to launch the Apple Pay app and let Touch ID verify that you're the one making the purchase. If yes, the payment will go through. If not, it will generate an error.
Next, Touch ID is used in the App Store. The first time you're about to purchase an app (paid or free, it doesn't matter), your iPhone will ask you to place your finger on the Home button to confirm the action. If you delete an application or game and then install it, you will not need to scan your finger.
The last common use of Touch ID is logging into apps. Usually these are banking services, access to which is undesirable for unauthorized persons. When entering such applications, the system asks you to enter a password or use Touch ID. The second option, as we have already seen, is much more convenient.
In addition, Touch ID allows you to confirm actions with iCloud. The most common usage scenario is that you want to view all saved passwords for websites - you confirm the action with a fingerprint scanner.
Non-working function: defective or improper operation?
Undoubtedly, such a function is convenient, but what should you do if Touch ID stops working or does not work initially? There may be several reasons for this:
- Household reasons (incomplete coverage of the button with the fingertip, contamination of the sensor, and even a different OS version). It should be noted that most of the complaints about Touch ID not working well fall precisely under this and the next category.
- Just a glitch in the recognition program. In this case, it is better to register a different fingerprint.
- There is, unfortunately, such an option as marriage. An indicator of such a situation is the lack of effect from rebooting the device and a scanning error. Moreover, it doesn’t matter whether the defect was made at the production stage or by a rogue seller who assembled one iPhone out of two without taking into account the binding of the Touch ID sensor to “its” processor, the phone will still have to be taken to a service center.
Possible difficulties in setting up the functionality of the function in each application are more than covered by the convenience, speed of operation and optimization of purchasing processes. Although the possibility of a marriage that could bring trouble cannot be ruled out.
How to set up Touch ID
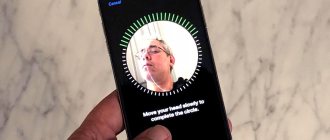
For the best effect and to avoid further inconvenience, make sure that your hands are clean and the button itself is not “stained” with anything. Go to Touch ID & Passcode settings and enter your password. Click Add Fingerprint. Next, lightly touch the “Home” button with one finger.
The system will need several such touches to completely read your finger pattern. Each time, change the position of your finger a little - the picture will show which area has already been scanned and which requires additional touches. Once everything is ready, the system will report success. Likewise, you can add a new fingerprint or use only one.
We recommend indicating the names of the prints if there are several of them. Because later, when you notice that the system does not recognize the index finger well, it will be quite difficult to immediately understand which fingerprint to change.
See also:
- HEVC: what is it?
- Refurbished iPhone: what does it mean and is it worth buying?
- What is Apple ID on iPhone and what is it for?
Problems and their solutions
Apple offers the following fixes if you're having trouble accessing Touch ID:
- Add another finger.
- Use Touch ID more often: this will improve fingerprint recognition.
- Apply a passcode: You can simply slide your finger across the screen to unlock, just like previous iPhone models.
You can also delete the fingerprint and scan your finger again.
Deleting scanned fingerprints and adding new ones
If you're having trouble with Touch ID on your iOS device, you can erase all fingerprints and start over.
Here's how it's done:
- Go to the “Settings” application.
Go to your phone settings - Select Touch ID & Password.
Select Touch ID - In response to the request, enter your password.
enter password - Click on any fingerprint.
Customize one of five available fingerprints - If you need to delete a fingerprint, click Delete Fingerprint.
Repeat the procedure until all rows have been deleted. Delete the fingerprint by clicking Delete Fingerprint - To add a new fingerprint, click Add Fingerprint. Follow the onscreen instructions to set it up. Add a new fingerprint by clicking Add Fingerprint and then the Home button
Is Touch ID enabled?
Go to Settings - General - ID & Password - Touch Screen ID and make sure iPhone Unlock is turned on (it will be highlighted in green). If you want to use your fingerprint to make iTunes and App Store purchases, you can also enable iTunes and App Store.
Check if Touch ID is enabled in your phone's main settings
7.3.10. Fingerprint sensor
For devices that support a screen lock, the use of a fingerprint sensor is RECOMMENDED. Requirements for devices equipped with such a sensor and providing access to the API to third-party developers:
- You MUST declare support for android.hardware.fingerprint.
- A complete implementation of the fingerprint API from the Android SDK documentation is MANDATORY [Resources, 95].
- MUST have a false positive rate of less than 0.002%.
- False negative rate less than 10%, response latency less than 1 second (for 1 stored fingerprint) is STRONGLY RECOMMENDED.
- It is MANDATORY to limit the speed of attempts to a 30 second delay after 5 unsuccessful attempts.
- It is MANDATORY to have hardware secure storage, and fingerprint verification must be carried out exclusively in the Trusted Execution Environment (TEE) zone or on a dedicated processor with a secure communication channel with the TEE. (This caused a fire on the Samsung S5, which had a problem with the secure communication channel)
- Fingerprint data MUST be encrypted so that it cannot be accessed outside of the Trusted Execution Environment (TEE) according to the Android Open Source Project [Resources, 96].
- MUST not allow adding fingerprints without establishing a trusted chain (user must add or verify PIN/pattern/password via TEE according to Android Open Source).
- DO NOT ALLOW third party applications to distinguish between individual fingerprints.
- It is MANDATORY to process the DevicePolicyManager.KEYGUARD_DISABLE_FINGERPRINT flag correctly.
- ALL OF THE ABOVE REQUIREMENTS ARE MANDATORY when upgrading to Android 6.0, and fingerprint data must either be securely migrated or reset.
- It is PREFERABLE to use the Android Fingerprint icon from the Android Open Source Project.
As you can see, the document does not imply double interpretations. Manufacturers wishing to certify devices running Android 6.0 and above with fingerprint sensors must fully comply with all requirements. Moreover: devices that are updated to Android 6.0 are also required to meet the new requirements (and, accordingly, undergo certification).
Another part of the document requires that encryption be enabled when using a secure screen lock (including a fingerprint sensor). As you can see, in theory things are going well. But what really?
Fingerprint scanner in Nexus 5X
How to use it?
Let's say you managed to fool the fingerprint sensor. What's next? iOS is a closed system, and all device memory will be encrypted. Options?
- Jailbreak installation: no. To hack a 64-bit iPhone or iPad, you will in any case need to enter the lock code (and in some cases, also disable the lock code in the settings).
- Physical data extraction: you can try. If you are already jailbroken, you will be able to extract most of the data, but you will not be able to decrypt the keychain. But if there is no jailbreak, then nothing can be done - to install it you will need a lock code.
- iCloud: possible. Once you unlock your device, you can force it to save a fresh backup to iCloud (Settings –> iCloud –> Backup –> Backup now). Remember, however, that to retrieve this data from the cloud, you will need your Apple ID password, and if two-factor authentication is activated on your account, then access to the second factor (which, however, can be the device under study). An important point: you will have to connect the device to Wi-Fi, as a result of which, instead of a backup copy, a command to block or destroy data may arrive on the device.
- iTunes backup: perhaps this is the only thing that can and should be done. The unlocked device easily connects to iTunes, which creates a backup copy of the data on your computer. What happens next is a matter of technique. One thing: the password for the backup. If it is installed, you will have to hack it (for example, using Elcomsoft Phone Breaker). But if it is not installed, be sure to install yours! The simplest 123 will be enough. From a backup encrypted with a password, you can extract all the data, and from an unencrypted one, everything except the keychain. Since the keychain stores all the interesting stuff, setting a temporary password before taking a backup will be very useful.
Android Smart Lock
But in fact, Android still has a number of gaping security holes that allow you not just to bypass, but to bypass all these fingerprints and passwords in one go. One of these holes is the Android Smart Lock system, with which you can automatically unlock your phone when certain external factors coincide. For example, many users allow automatic unlocking of the house, forgetting that the positioning accuracy is far from ideal and the concept of “home” for the phone will cover an 80-meter radius. Many activate unlocking with a trusted Bluetooth device or enable pseudo-biometric unlocking using a face photo (this can be done quite easily by showing a video or a 3D model).
Interestingly, there is no need for Smart Lock if there is a working fingerprint sensor: the screen turns on and unlocks with the press of one button in any case. Why is there no requirement in Compatibility Definition to disable Smart Lock when the fingerprint sensor is active? Mystery. But you can use this system to unlock your device. Just keep in mind that Smart Lock will not be active immediately after you reboot the device; To activate the system, the device will need to be unlocked with a password or pattern at least once.
Google Android 4.x–5.1.1: everything is very sad
The first devices with built-in fingerprint sensors began to appear quite a long time ago, back in the days of Android 4.4. Today there are already a lot of them: these are Samsung Galaxy S5, S6, S7, Motorola Moto Z, Sony Xperia Z5, LG G5, Huawei Ascend Mate 7 and subsequent ones, Meizu Pro 5 - and that’s not all. But not every device uses the fingerprint sensor in the correct way. This is primarily due to the fact that until Android 6.0 there was no universal API for fingerprint authentication in the system. No API means no formal Compatibility Definition requirements, and, accordingly, no certification from Google.
In the complete absence of external control, the manufacturers have piled up something like this... you wouldn’t even dream of it in a nightmare. For example, the developers of HTC One Max took an external exam in the “Android in 21 days” course and implemented a wonderful system that stores full copies of fingerprints in a publicly accessible directory in an uncompressed (not to mention encrypted) format. There is probably no need for instructions on how to “hack” this system. Let me just clarify that the data is stored in the file /data/dbgraw.bmp, and for your convenience, the access permission is set to 0666.
HTC One Max
This is not an isolated example. Samsung Galaxy S5 came out with Android 4.4 on board. Soon, hackers managed to gain access to the fingerprint scanner and successfully bypass the protection.
Before the release of the sixth version of Android, manufacturers managed to release a ton of devices to which they had incorrectly attached fingerprint sensors. It’s not even interesting to break them, everything is so sad there. It is clear that Google could not tolerate this situation for long. They didn't.
Android 6.0: Fingerprint API and Nexus Imprint
With the release of Android 6.0, Google not only developed its own API for fingerprint authentication, but also updated the Compatibility Definition Document, which all manufacturers who want to certify their devices to install Google services must follow (this is a very important point, more on it later).
Two reference devices were released at once: Nexus 5X and Nexus 6P. They include unbreakable encryption of the data section and the correct implementation of fingerprint sensors, called Nexus Imprint.
Setting up the fingerprint scanner in Nexus 6P
So, what does Google require from manufacturers to obtain a certificate of conformity? Unlike the situation with mandatory encryption on Android 5.0, this time the list of requirements does not allow for double interpretation. Let's translate an excerpt from the official document.