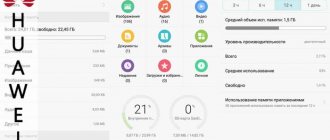
The phone does not see the memory card - a common problem that requires a quick solution, since the absence of a flash drive limits the capabilities of the device and prevents the smartphone owner from using all the functions of the device. But in order to cope with such a malfunction, it is necessary to find out the exact reasons for what happened.
Wrong SD format
For compatibility with Android, the file layout of the flash drive is required to be in FAT32 format. You can change the format using any suitable utility via a PC or using the Recovery mode on your smartphone. Usually, after installing a suitable format, the difficulties disappear. If formatting does not help, you will have to look for other causes of the problem and use other problem solving options.
Application nuances
There are nuances in using a flash card, ignorance of which can result in loss of information. It must be turned off before any extraction. This is done quickly, in 3 steps:
- go to the “Settings” item on the main screen;
- selecting the “Memory” section;
- clicking "Eject".
Safely remove the flash drive.
© screenshot / Windows 10 This action may disrupt the functioning of some programs until the card is returned to its place.
Physical removal of the device may have features associated with a variety of design solutions (location and fixation). Information about this is reflected in the user manual, which is best read immediately after purchase. As a general rule, turn off the power before removing the storage device to prevent damage to the data and electronics of the flash memory.
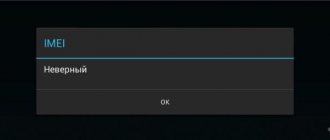
Microsd not working, out of order
In some situations, it is impossible to restore a microsd. The above applies to cases of breakdowns and manufacturing defects that prevent the use of the card. To make sure there are unresolvable faults, you need to:
- make sure that Honor does not see the memory card;
- check whether the situation changes when using the computer.
If in both cases the device remains unavailable, you should contact the store (if the warranty period has not expired) and think about purchasing a replacement.
Installation instructions
You can insert a memory card as follows:
- its slot is located;
- the phone turns off;
- the tray opens or the back cover is removed (depending on the model);
- a card is placed in the slot;
- The tray (back cover) closes.
Connection is carried out in the following order:
- the phone turns on;
- notification of card detection is expected;
- click the “Customize” menu
- storage types are swapped - removable or internal memory;
- instructions from the screen are executed, if any;
- Completion of work is confirmed by clicking “Finish”.
Transferring data to a memory card.
© Garsya / depositphotos.com Removable memory allows you to transfer data between devices. But you cannot install applications on it. The internal memory stores programs and data only for this device. The cards cannot be swapped; when transferred to another device, the information is lost.
PC doesn't see
In cases where both the computer and the smartphone do not see the memory card, it is recommended to make sure that drivers are loaded on the PC to allow the slots to work. If they are installed and updated to the latest state, there is a high probability of failure.
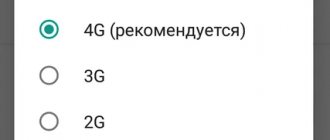
In similar situations, you need to change the connection mode on your phone. There are 2 of them:
- Mass Storage;
- Media Device.
If the card is not broken, changing the connection type will help you use it.
If you have any questions or complaints, please let us know
Ask a Question
How to activate a memory card on Android
What does it mean to activate?
After inserting the memory card into the appropriate slot (under the cover or in a special place on the side), you will need to activate it. This is necessary so that the smartphone can subsequently interact with the connected storage. The procedure is one-time and takes literally a few seconds. You must complete it, which is not difficult - the corresponding functionality appeared already in early versions of Android.
The essence is almost the same as when connecting a new SSD/HDD to a computer: you need to format it and designate it for the system. And if in the case of hard drives the procedure takes quite a long time, then owners of memory cards have no point in worrying about this.
The process of activating an SD card on your phone
Notifications
Activation takes place after the MicroSD card is inserted into the smartphone. You need to connect it when the device is turned off. Next you will need to turn it on and follow the instructions below.
- Once the card is detected, a system notification will appear. In it, tap the “Customize” button;
- Select the "Internal Memory" type and click "Next". You can also use the "Portable media" option, but in this case some functions, such as moving applications, will not be available;
- Tap “Clean up and format”;
- Wait for the process to complete;
- After formatting is completed, you will be prompted to transfer the information available in the internal storage to external media. This is not necessary, but if it seems important, you should click “Transfer now” and “Next”;
- Confirm the actions by reading the description of the operation and using the “Transfer” button;
- Please wait while the information is transferred;
- Close the “Setup Wizard” by clicking “Finish”. Nothing more can be done here.
Settings
If the notification did not arrive or was accidentally closed, it’s okay: you can launch the “Setup Wizard” through the phone control panel.
- Find the “Settings” program in the list of applications and tap on its icon. Go to the “Storage” section;
- Find the connected memory in the list, click on its name (“SD card”);
- Tap the button with three dots located in the upper right corner;
- Select “Storage Settings”;
- Tap "Internal Memory". The further procedure is identical to that presented in the previous section of the text.
Android Debug Bridge
This method is significantly more complicated than the previous two. In addition, it requires connection to a computer via USB , which supports not only charging, but also data transfer. If it is possible to use other methods described in the article, it is better to abandon the ADB option. But it will help if the smartphone’s touchscreen breaks down and can be used for a variety of purposes.
- Download the latest version of ADB for Windows. Extract the contents of the archive;
- If debugging by USB has not been enabled before, you will need to enable its use yourself. To do this, first open the System section in Settings.
- Go to the “About phone” tab;
- Quickly click on the “Build number” item. Usually doing this seven times is enough. When the hidden settings section becomes available, a corresponding toast notification will appear at the bottom of the screen;
- Go back to the "System" tab and click " For Developers ";
- Move the “USB Debugging” toggle switch to the right;
- Confirm the action by clicking “OK” in the warning window that appears, and connect the smartphone to the PC;
- Return to the computer. Use the Win+X keyboard shortcut and click Device Manager. Here, expand the “Portable Devices” category and find your phone. Right-click on its name and select “Update driver”;
- Oh and show them the way;
- Go back to the platform-tools folder where ADB is located and open this application. This is done somewhat atypically - use the right mouse button, then click “Open PowerShell window here”;
- In the meantime, even at the moment of connecting the device via USB, a confirmation window will appear on its screen. Tap “OK” in it;
- Enter ./adb shell. Now a dollar sign will be automatically added before each command - this is how it should be;
- Use the command ./sm list-disks. As a result, you can see the ID of the memory card in the system. Copy it by selecting it and using the right mouse button;
- Write sm partition disk:000.00 private. Instead of 000,00 substitute the numbers that were obtained as a result of using the previous command.
The memory card will be formatted. You can transfer data via ADB or the method described in the method associated with using the notification panel.
Instead of Windows PowerShell, a regular command line (cmd) will do. In its case, there is no need to add ./ to the beginning of the commands.
Transferring applications
By default, the smartphone offers to move only audio, photos and videos to MicroSD, but you can also place applications on the external card: software and games.
- Launch your smartphone settings and go to the “Applications and notifications” section;
- Find the program in the recently launched list. If it is not here, tap “Show all applications”;
- Click on the software name in the list;
- Tap the “Storage” item;
- Click "Edit";
- Select the "SD card" option;
- Use the "Move" button.
After formatting, the phone does not see microsd/sd
If the phone stopped seeing the memory card after the user decided to format the device, there is a high probability that the cause of the trouble lies in the actions taken. To restore you should:
- check the accessibility of the drive via a PC;
- Re-format, focusing on choosing the correct file system.
How to convert storage into a regular flash drive
To convert the storage to a standard flash drive, you need to undo the changes made by the Adoptable Storage function. To do this, follow these steps:
- go until the item “Touch the name...” appears;
- click on it;
- Click 3 dots at the top right;
- toggle “Format as internal”;
- Click on the “Format” button.
The running process continues for several minutes. Upon completion, the card is ready to serve as a storage device.
Popular manufacturers
All publications are full of reviews and comparisons of various types of cards, which are difficult to understand. Products are compared in terms of volume, read speed, write speed, when conducting synthetic tests and performance in real games and applications. Among this flow of technical and commercial information there is a constant - the names of the manufacturers. There are not many of them, and it is not difficult to remember the device manufacturers, these are:
- SanDisk;
- Kingston;
- Samsung;
- Transcend;
- noname (they can be called differently, but all members of this group are reduced to one brand - nameless, corresponding to its market share).
Memory cards from different manufacturers. © Valeriy_Al / depositphotos.com
Possible problems with the drive
Sometimes it happens that the device refuses to recognize the inserted card. What needs to be done in such cases? In 90% of cases, these problems are caused by incompatibility of the card with the touch device.
The most common causes of conflict between a touch gadget and a memory card:
- The micro SD type does not match the one supported by the tablet;
- The card capacity exceeds the maximum allowable for your tablet model;
- There are certain problems with the firmware on your tablet;
- The card is too littered with various files that affect its performance (most often files located in the root directory affect performance).
The last problem, as a rule, can be resolved quite simply. Connect the “junk” memory card to a desktop PC using a card reader, then delete the files that prevent the tablet from properly recognizing the card, or format it using Windows tools.
When you connect a memory card to your tablet, you don’t have to wait for the device to automatically detect your storage device. Open the Settings menu => microSD memory. If the card is visible in this menu, but is not available in Explorer, try formatting it using a tablet. Sometimes this can be done even if there is a problem with the files.
Criterias of choice
Before you start choosing a card, you should understand the tasks for which it will be purchased and arrange the criteria in descending order of their importance. In most cases, the choice will be optimal if you adhere to the following selection series:
- Memory size. Affects the cost of the product. SD devices are capped at 2GB at the top, while SDXC devices can go up to 2TB. The choice based on this criterion is almost entirely determined by the size of the allocated budget.
- Format. There are CF varieties and SD variations (SD, SDHC, SDXC). The latter differ in form factor - regular and micro. The storage capacity is determined by the technologies used. A larger volume requires high transfer speeds, better reliability and long-term data storage. By this criterion, the characteristics of SDXC are more attractive.
- Compatibility. This criterion is important for owners of old or obsolete equipment. The SD format has evolved from the first SDSC to SDXC, and the Compact Flash version has risen from 1.0 to 6.0 with no backward compatibility.
- Exchange speed. This parameter is important for shooting video, regardless of artistic shooting or DVR. The better the speed qualities, the higher the cost. Video resolution requirements depend on the stream power. Therefore, the assessment of this criterion is determined by a compromise between the required image detail and the budget set by the user. If class 10 is enough to record Full HD video, then the standard of high-quality 4K or 8K video will require faster memory.
When purchasing products from one of the nameless brands (they can rename themselves, create new brands), pay attention to the format markings and media volume. The larger volume corresponds to the latest technologies. Under the same conditions, switch to trusted companies, brands whose name is rated higher.