Logging into Recovery on an Android tablet
Button combinations to enter Tablet Recovery:
— Simultaneously hold down one of the volume buttons, Home and the power button. — Simultaneously pressing one of the volume buttons and the power button. — Simultaneously hold down the power button and 2 volume buttons.
The buttons are held until you boot into recovery mode.
Recovery of Chinese tablets
How to get to Recovery on tablets that do not have volume buttons?
Everyone knows that an advanced user can do wonders with the Windows operating system. But not everyone suspects that Android can offer advanced capabilities. An experienced specialist can call up the engineering menu, in which advanced configuration of the device is carried out, as well as testing of certain of its functions. How to enter the engineering menu on Android - read below.
Modern versions of the operating system have a fairly complete “ Settings”
" With it you can adjust a variety of parameters. But some of them still cannot be deeply customized. Such parameters should be looked for in the engineering menu. For example, specialists from the service center can enter the engineering menu in order to adjust the volume of the speaker, headphones and built-in microphone.
In a word, the engineering menu contains system settings that should not be available to the average user. The Android engineering menu can easily ruin a smartphone if you change its parameters almost at random. With its help, you can often even change the font size, increase the number of icons on the desktop and make other system changes. On some smartphones, the engineering menu changes the strength of signal reception, the type of vibration and other aspects of the device’s operation.
Interestingly, the easiest way to get to the engineering menu is on Android 4.4 and later versions of this OS. The hardest thing to do is get into such a menu on Android 2.2. Most often, early versions of the operating system were not equipped with an engineering menu at all - which is why they were practically impossible to customize. There are problems with this on the newest devices as well.
Engineering menuDiskussionsforum Thema10
Service codes for Nokia phones *#0000# Shows the firmware version*#9999# Try this code if the previous one does not work*#06# Shows the IMEI number. This number must match the number on the box.*3370# Using EFR - Enhanced Full Rate Codec. May improve sound quality, but will reduce battery life (by approximately 5%).#3370# Sets sound quality to normal (disables previous code)*4720# Half Rate Codec (HFR)#4720# disable Half Rate Codec (HFR)*# 92702689# Shows:1. Serial number2. Production date3. Sale date(?) - can only be set once4. Date of last repair (0000 - no)5. ?To exit, you need to turn off and on the phone12345 Security code by default*#73# Resets the timer and game records*#7780# Restores the default settings (be careful)Nokia 1610*#06# shows IMEI code *#170602112302# shows the software version Latest version Nokia 1610: v 5.15 (25.02.97) NHE-5NX - earlier V 4.19 Latest version Nokia 1611: V 4.03 NHE-5SXNokia 2110*#06#shows IMEI code *#3283# [*# DATE #] shows the week and year of production The last two digits are the year, if the year is 95, then the first two digits are the month, for 96 the first two digits are the month. To view the program version for 2110e / 2110i, enter *#170602112302# or *#9999# On new phones, code was changed to *#682371158412125# Program versions, latest V. 5.70 (xx-xx-97) V. 5.62 (05-05-97) V. 5.31 (06-01-96) Nokia 3110*#06# shows IMEI code *#3110# -> Shows the phone's firmware version. For example: V 07.11 Software version. 09/24/97 The date of the software release. NHE-8 Type of phone. Latest known firmware version: V 7.32*#7780# -> Restores factory settings (except for memory, language and counter)menu# -> Setting the device to “silence” mode*#92702689# or *#war0anty# Entering a special menu, in which you can use the commands below6232 OK -> Shows the month and year of manufacture7332 OK -> Shows the date of the last change in the program7832 OK -> Shows the date of sale (if entered)37832 OK -> You can enter the date of sale MMYY (careful! Cannot be changed later) 9268 OK ->Shows serial number (IMEI) There is no confirmation that this trick still works. Service Provider Lock The Service provider (SP) lock mode is used to bind the phone to a specific SiM card. Moreover, if you insert a SIM card from another operator, the phone will refuse to work, but another card from the same operator will work. All Nokia phones (2110 and above) have four different linking modes that can be used to link cards with four different operators. But most phones only have one activated. ( lock 1) The main code used in Nokia phones: #pw+(master code)+Y#їThis code is used to check, activate and unbind the SIM card (SP-lock). Use the * key to type p, + and w characters. 'Y' can be 1,2,3 or 4 - depending on what type of binding you choose. #pw+1234567890+1# for Provider-Lock status #pw+1234567890+2# for Network-Lock status #pw+1234567890+3# for Provider(???)-Lock status #pw+1234567890+4# for SimCard -Lock status (master code) ten-digit number based on the IMEI number of the phone. To unbind by type 1, dial the following code: #pw+(master code)+1#їIf you just want to check your phone, use any ten-digit number instead of the master code, for example 1234567890 Note: Be careful with this code, since the code can only be entered 3 times, then something might happen to your phone Security code The information in IMEI (International Mobile Equipment Identity) contains: XXXXXX XX XXXXXX X TAC FAC SNR SP TAC = Type Approval Code (first 2 digits = country code). FAC = Final Assembly Code (For Nokia FAC=10). SNR = Serial Number. SP = Spare (always SP=0). Nokia 6120*#92772689# shows the ISDN number. *3001#12345# to switch to test mode... *#9999# shows the software version of Nokia 6130 *#0000# - determines the firmware version. EFR *3370#, cancel #3370# - improves sound quality and reception but drains the battery faster EFR - Enhanced Full Rate, a system for improved call quality in GSM phones, due to faster battery drain (about 5%). EFR uses advanced coding to improve call quality without increasing bandwidth. HRM *4720# , cancel #4720# - reduces reception quality, but increases battery discharge time HFR - Half Rate - extends battery life by about 30 percent, by reducing the frequency band by about half *#06# - identification number * #war0anty# (*#92702689#) - service information: date of manufacture, serial number, date of purchase, whether there was a repair and when, full timer of the device. Exit - turn the device off and on. *#sim_clock# (*#746025025#) - supports SIM phase 2 (sleep mode) or not. Nokia 6150*#06# shows IMEI code *#0000# shows the phone software version *#6110# try this code if the previous one does not work *#746025625# stop Sim-Clock (a mode that saves battery power) this code will only work on phones with software version 5.24. *#92702689# enter special menu: 1: Shows the serial number 2: Shows the month and year of production 3: Shows (if entered) information where the phone was purchased here you can also record information about the sale of the phone (one time only) 4: Shows the date of the last change in the program - if 6 is entered: Transfers all phones, pictures, sounds from one phone to another (if supported) Software type: 5.22 (10-11-99) NSM-1 Previous versions: 5.20 (20-09 -99) NSM-1 5.17 (01-07-99) NSM-1 V 5.02 (02-02-99) NSM-1 V 4.13 NSM-1 (EFR appeared again) V 4.12 NSM-1 (EFR removed from this version ) v 4.11 NSM-1 (EFR removed from this version) V 4.02 NSM-1 When you enter the code to view the software version, something like: 5.22 (10-11-99) NSM-1 1 line: Software version 2 should appear on the screen line: Software release date Line 3: Shows phone type. EFR Enhanced Full Rate Codec (EFR): Enable: Dial *3370# and EFR is activated after the phone is overloaded (consumes more power) Disable: Dial #3370# and EFR is disabled after the phone is overloaded. Half Rate Codec: Enable: Dial *4720# and Half Rate will be activated after the phone is overloaded (power consumption is reduced) Disable: Dial #4720# and Half Rate will be turned off after the phone is overloaded Enhanced Full Rate mode allows you to get much better sound quality while the same number of bits of transmitted information, but loads your provider’s network more, the duration of the call time is reduced by approximately 5% Half Rate mode degrades the sound quality, but unloads the network and allows the provider to pass more calls through it, the duration of the call time increases approximately 30% Tricks and Glitches Power button: If you briefly press the Power button, the profile menu will appear on the screen. If you press it again the phone will turn off. Use the up and down keys to scroll through and change various settings. 54# : Dial 1#, 2#……..54# on the keyboard (when you are not in the menu) and you will receive the phone number that is assigned to this key when speed dialing Call Menu (during a call) if you press and hold the key menu 3 seconds, then the display will show Call Menu (transfer, mute, etc.) Quickly typing messages When you type a message, you must wait a few seconds if you want to type two identical letters in a row. For example, when typing the word "letter", you should wait before entering the second letter "t".. It will be much faster if you press the # key twice and then "t". The Service provider (SP) lock mode is used to bind the phone to a specific SiM card. Moreover, if you insert a SIM card from another operator, the phone will refuse to work, but another card from the same operator will work. All Nokia phones (2110 and above) have four different linking modes that can be used to link cards with four different operators. But most phones only have one activated. ( lock 1) The main code used in Nokia phones: #pw+(master code)+Y#їThis code is used to check, activate and unbind the SIM card (SP-lock). Use the * key to type p, + and w characters. 'Y' can be 1,2,3 or 4 - depending on what type of binding you choose. #pw+1234567890+1# for Provider-Lock status #pw+1234567890+2# for Network-Lock status #pw+1234567890+3# for Provider(???)-Lock status #pw+1234567890+4# for SimCard -Lock status (master code) ten-digit number based on the IMEI number of the phone. To unbind by type 1, dial the following code: #pw+(master code)+1#їIf you just want to check your phone, use any ten-digit number instead of the master code, for example 1234567890 Note: Be careful with this code, since the code can only be entered 3 times, then something might happen to your phone Security code The information in IMEI (International Mobile Equipment Identity) contains: XXXXXX XX XXXXXX X TAC FAC SNR SP TAC = Type Approval Code (first 2 digits = country code). FAC = Final Assembly Code (For Nokia FAC=10). SNR = Serial Number. SP = Spare (always SP=0). Nokia 6600*#2820# Shows the so-called MAC address of the BlueTooth device - must be unique for all devices*#7780# Gently restores the phone to its original settings (asks for permission in advance)*#7370# Deep reset of the phone with full restoration of the factory state (preliminarily asks for permission) If you hold down the “Pencil” key while booting the phone (until it is fully loaded), then applications that load automatically when you start the phone will not be executed. You can also hold down the Green key + Star + key 3 when booting - it seems like you should, as they say, completely format the phone , returning it to its original position While the phone is operating, press and hold the “Menu” key for a while - a list of running applications will be displayed, to switch, move the joystick and click on the one you want, to unload from memory, select and press the “C” key and answer “OK” and wait a little .Nokia 7110 Phone codes for obtaining various information: *#0000# - determining the firmware version. EFR *3370#, cancel #3370# - improves sound quality and reception but drains the battery faster EFR - Enhanced Full Rate, a system for improved call quality in GSM phones, due to faster battery drain (about 5%). EFR uses advanced coding to improve call quality without increasing bandwidth. HRM *4720# , cancel #4720# - reduces reception quality, but increases battery discharge time HFR - Half Rate - extends battery life by about 30 percent, by reducing the frequency band by about half *#06# - identification number * #war0anty# (*#92702689#) - service information: date of manufacture, serial number, date of purchase, whether there was a repair and when, full timer of the device. Exit - turn the device off and on. *#sim_clock# (*#746025025#) - supports SIM phase 2 (sleep mode) or not. Codes for determining whether LOC is installed on the device or not. True, the same answer is given to all 4 codes. Your Nokia can be blocked by 4 types of locks: SPROVIDER-LOCK - 1 NETWORK-LOCK - 2 COUNTRY-LOCK - 3 SIMCARD-LOCK - 4 To check the status of these locks, enter the line: #pw+(MASTERCODE)+(y)#, where - p = press * 3 times - w = press * 4 times (in the original, on the contrary, w - 3 times, p - 4) - + = press * 2 times - MASTERCODE = exactly the thing with which your device was locked. But to check the status enter 1234567890 - y = number from 1 to 4Latest software version: V 4.80 02/23/00 NSE-5 V 4.77 01/25/00 NSE-5 - EFR and HFR do not work in some countries with this version V 4.76 13-01-00 NSE-5 V 4.75 07-01-00 NSE-5 V 4.73 15.11.99 NSE-5 1. When you want to change the tone for a group to the tone received via SMS, the group name is not displayed and the phone may disconnect ! 2. Receiving Operator-Logo's does not work correctly! 3. The code for activating/deactivating EFR (*3370# & #3370#) and activating/deactivating HR (*4720# & #4720#) do not work! 4. Sim lock status does not work. 5. NDS 2.0 does not work with 7110! 6. When you are in WAP mode and you receive an SMS, the phone may turn off! V 4.72 10-11-99 NSE-5 V 4.70 28-10-99 NSE-5 V 4.69 05-10-99 NSE-5 V 4.67 28-09-99 NSE-5 Nokia 8210 Phone codes for obtaining various information: *# 0000# — determination of the firmware version. *#6110# - try this code if the previous one does not work EFR *3370#, cancel #3370# - improves sound quality and reception but drains the battery faster EFR - Enhanced Full Rate, a system for improved call quality in GSM phones, due to more rapid battery discharge (about 5%). EFR uses advanced coding to improve call quality without increasing bandwidth. HRM *4720# , cancel #4720# - reduces reception quality, but increases battery discharge time HFR - Half Rate - extends battery life by about 30 percent, by reducing the frequency band by about half *#06# - identification number * #war0anty# (*#92702689#) - service information: date of manufacture, serial number, date of purchase, whether there was a repair and when, full timer of the device. Exit - turn the device off and on. *#sim_clock# (*#746025025#) - supports SIM phase 2 (sleep mode) or not. Codes for determining whether LOC is installed on the device or not. True, the same answer is given to all 4 codes. Your Nokia can be blocked by 4 types of locks: SPROVIDER-LOCK - 1 NETWORK-LOCK - 2 COUNTRY-LOCK - 3 SIMCARD-LOCK - 4 To check the status of these locks, enter the line: #pw+(MASTERCODE)+(y)#, where - p = press * 3 times - w = press * 4 times (in the original, on the contrary, w - 3 times, p - 4) - + = press * 2 times - MASTERCODE = exactly the thing with which your device was locked. But to check the status, enter 1234567890 - y = number from 1 to 4Nokia 8850 Phone codes for obtaining various information: *#0000# - determining the firmware version. EFR *3370#, cancel #3370# - improves sound quality and reception but drains the battery faster EFR - Enhanced Full Rate, a system for improved call quality in GSM phones, due to faster battery drain (about 5%). EFR uses advanced coding to improve call quality without increasing bandwidth. HRM *4720# , cancel #4720# - reduces reception quality, but increases battery discharge time HFR - Half Rate - extends battery life by about 30 percent, by reducing the frequency band by about half *#06# - identification number * #war0anty# (*#92702689#) - service information: date of manufacture, serial number, date of purchase, whether there was a repair and when, full timer of the device. Exit - turn the device off and on. *#sim_clock# (*#746025025#) - supports SIM phase 2 (sleep mode) or not. Codes for determining whether LOC is installed on the device or not. True, the same answer is given to all 4 codes. Your Nokia can be blocked by 4 types of locks: SPROVIDER-LOCK - 1 NETWORK-LOCK - 2 COUNTRY-LOCK - 3 SIMCARD-LOCK - 4 To check the status of these locks, enter the line: #pw+(MASTERCODE)+(y)#, where - p = press * 3 times - w = press * 4 times (in the original, on the contrary, w - 3 times, p - 4) - + = press * 2 times - MASTERCODE = exactly the thing with which your device was locked. But to check the status, enter 1234567890 - y = number from 1 to 4 Latest software version: V 5.11 09-12-99 NSM-2 Nokia 9110 Phone codes for obtaining various information: *#0000# - determining the firmware version. EFR *3370#, cancel #3370# - improves sound quality and reception but drains the battery faster EFR - Enhanced Full Rate, a system for improved call quality in GSM phones, due to faster battery drain (about 5%). EFR uses advanced coding to improve call quality without increasing bandwidth. HRM *4720# , cancel #4720# - reduces reception quality, but increases battery discharge time HFR - Half Rate - extends battery life by about 30 percent, by reducing the frequency band by about half *#06# - identification number * #war0anty# (*#92702689#) - service information: date of manufacture, serial number, date of purchase, whether there was a repair and when, full timer of the device. Exit - turn the device off and on. *#sim_clock# (*#746025025#) - supports SIM phase 2 (sleep mode) or not. Codes for determining whether LOC is installed on the device or not. True, the same answer is given to all 4 codes. Your Nokia can be blocked by 4 types of locks: SPROVIDER-LOCK - 1 NETWORK-LOCK - 2 COUNTRY-LOCK - 3 SIMCARD-LOCK - 4 To check the status of these locks, enter the line: #pw+(MASTERCODE)+(y)#, where - p = press * 3 times - w = press * 4 times (in the original, on the contrary, w - 3 times, p - 4) - + = press * 2 times - MASTERCODE = exactly the thing with which your device was locked. But to check the status, enter 1234567890 - y = number from 1 to 4 And there is a Nokia Asha 503
Android engineering menu and secret codes. What does the Android OS allow you to configure through the engineering menu? Sound volume, sensors and much more, read about all this in our article.
Our smartphones carry a lot of secrets that are hidden by manufacturers. Do you know anything about the engineering menu on Android? Have you heard about secret codes? Since they opened our article, it means they heard something remotely. All these tools appeared at the birth of the first mobile phones, but, as is natural, over the years they became more functional and understandable.
However, it is worth noting right away that the manufacturers’ plans do not include making the engineering menu or secret codes on Android (as the name implies) available to everyone. And this makes sense. Let's go in order.
The fast and easy way
It should be noted that to open the engineering menu you do not need any third-party program. You don't even need root access! You just need to type a special combination on the virtual keyboard - the so-called engineering menu code. The problem is that many manufacturers use their own code; there is no universal combination. Sometimes the code is different even between different models produced by the same company!
First, you should find the section where you dial a telephone number.
If the engineering menu is not displayed, try pressing the call key after entering the combination.
By the way, owners of devices based on the MediaTek MT6573, MT6577, MT6589 and some others chipset can download the Launch MTK Engineering Menu
. As you might guess, the utility will allow you to launch the corresponding menu without entering a numeric code.
conclusions
Above we have listed the main sections of the engineering menu available on the tested devices. Now let’s summarize what features the user receives during installation:
- Formatting, restoring to factory settings.
- Testing the operation of individual elements of a smartphone or tablet, such as sensors, touch screen sensitivity and calibration accuracy.
- Detailed information about the device and its parts. For example, you can track battery consumption since the last charge and view statistics on the programs used.
- Energy optimization. Alternatively, unnecessary frequency ranges are turned off. In Russia, the standard indicators for working in 2G and 3G networks are 900 and 1800 MHz, while in the USA they are 850 and 1900 MHz.
- Set more detailed settings, such as changing the font size or speaker volume.
The engineering menu can be of great service to experienced users and developers - it can be used to revive the device (for example, by returning the system to factory settings), solve the problem of an overly quiet speaker or microphone, and also monitor and check various system components. But you need to use it extremely carefully and competently, so as not to turn your gadget into a “brick”.
Sources used:
- https://droidov.com/nastroiy-injenernoe-menu-android
- https://viarum.ru/inzhenernoe-menyu-na-android/
- https://androidlime.ru/engineering-menu
If you can't enter the menu
It is quite possible that you will try to enter all the above combinations, but will not get into the engineering menu. This happens on Android 6 and some other fairly recent versions of the operating system. Apparently, the engineering menu is locked, or some specific code is required to call it.
Manufacturers of Android smartphones implement and use the engineering menu to test devices. It contains all kinds of tests and device settings that are not available to ordinary users. However, today, knowing the USSD command or downloading the application from PlayMarket, anyone can go to the engineering menu.
Additional codes
You can access engineering functions in Android without a menu, through special codes. They are entered as a dial number, allowing you to test hardware components and display technical information about them.
In addition to general codes, a number of manufacturers have their own specific ones:
- Sony: **05***# — reset PUK code;
- Samsung: ##778 – launch the system menu;
- Motorola: *#*#2432546#*#* - check for updates, *#06# - show IMEI;
- HTC: ##3282# - calls the system application, ##3424# - full test of the gadget, ##7738# - protocol check.
It is also convenient to use the Secret Codes program to work with codes. Install it on your device, the application will search for combinations to control the OS and display a complete list of them. To check a value, you do not have to rewrite it; you can launch the function with one click on its name.
How to enter the menu
To open the menu installed by the manufacturer, activate the dial pad on your smartphone and enter one of the USSD commands presented in the table. After entering the command, the numbers will disappear from the screen, and a menu will open instead.
Table: combinations for launching Engineering Mode
| Device manufacturer | Team |
| Sony | *#*#7378423#*#* |
| *#*#3646633#*#* | |
| *#*#3649547#*#* | |
| Philips | *#*#3338613#*#* |
| *#*#13411#*#* | |
| ZTE, Motorola | *#*#4636#*#* |
| HTC | *#*#3424#*#* |
| *#*#4636#*#* | |
| *#*#8255#*#* | |
| Samsung | *#*#197328640#*#* |
| *#*#4636#*#* | |
| *#*#8255#*#* | |
| Prestigio | *#*#3646633#*#* |
| LG | 3845#*855# |
| Huawei | *#*#2846579#*#* |
| *#*#14789632#*#* | |
| Alcatel, Fly, Texet | *#*#3646633#*#* |
| Smartphones and tablets with a MediaTek processor (most Chinese devices) | *#*#54298#*#* |
| *#*#3646633#*#* | |
| Acer | *#*#2237332846633#*#* |
Video: how to work in Engineer Mode
If the code does not work and you cannot launch the service menu using the standard method, use third-party applications - you can download them on PlayMarket. Recommended programs - “Launch the MTK engineering menu”, Mobileuncle Tools, Shortcut Master.
The manufacturer menu does not work on some device models with Android 4.2 JellyBean (xx1, xx2), as well as on Android 5.1 Lollipop. The menu is also invalid when the Cyanogen Mod firmware is installed. In Android 4.4.2, when you reboot, changes made in the application are reset.
“Launch the MTK engineering menu”
The application allows you to open and configure the engineering menu without typing digital commands. Works correctly on MediaTek processors (MT6577, MT6589, etc.) and Android systems 2.x, 3.x, 4.x, 5.x. According to user reviews, the program successfully performs its functions, but after rebooting the smartphone, the settings made using the application are reset.
Link to Google Play: //play.google.com/store/apps/details? >
Mobileuncle Tools program
The functionality of the application is similar to the previous one, but, in addition to accessing the engineering menu, the user has the opportunity to view information about the screen, sensor and device memory, as well as update the firmware, restore the IMEI number and improve GPS. For stable operation, root rights are required.
Why do advertisements appear in VK on Android?
The answer to the question is simple - monetization. By earning money from clicking on links, displaying posts, or performing certain actions, the VKontakte administration gets the opportunity to implement new functions, expanding the staff and the efficiency of employees. However, several thousand users hiding advertising will not have a significant impact on VK.
Examples of sections where advertising appears:
- Audio recordings . Along with the limit on listening time per day in the absence of a paid subscription included in VK Combo or purchased separately in the BOOM program, voice advertising is also presented. It often mentions the network’s own projects, such as those that have fed up active music listeners on VKontakte: “Masks for calls”, “Video communication”, “Clips”;
- Ribbon . The home page contains a list of recent activity on the pages you follow. There are also advertisements in the format of both simple entries and mini-games, often dedicated to promotional code giveaways;
- Communities . VKontakte itself rarely inserts advertising in groups, and for the most part this is the income of the public owners.
Ads published in communities must have a corresponding label; if this is present, the post will not be displayed in the feed and notifications will not be received for it. If it is missing, this is a reason to complain to the moderators, which can be done by tapping on the “three dots” and selecting the “Spam” item.
Advertising appears based on recently visited profiles, groups, web pages; purchased goods. VK cooperates with data providers, which is permitted by the services' privacy policies. When issuing such records, the program also takes into account geolocation using GPS data, WHOIS and information specified in the profile. Targeting also plays a role: gender, age category, marital status, activity in using certain sections.
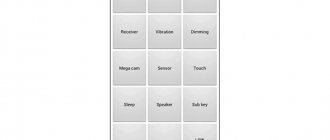
What can be configured in the menu
The appearance of the engineering mode and the ability to adjust parameters may vary depending on the tablet or smartphone model. In the menu, users most often adjust the sound, change camera settings and use recovery mode. The parameters for adjustment and the procedure are given below. Be careful - menu item names may vary between different device models! You act at your own risk.
Audio: Increase volume level
If your phone does not ring loudly enough, find the Audio section in the engineering menu and go to LoudSpeaker Mode. Select Ring. For each signal level (level 1–6), change the values - set the numbers in ascending order, from 120 to 200. Increase the value in the Max item. Vol - maximum 200. Press the SET button to save the settings.
Audio: Increase phone call volume
To enhance the speaker tone for conversations, in the Audio service menu section, select Normal mode and open the Sph item. Set the values for signal levels (level 1–6) from 100 to 150, and the number for Max. Vol. – up to 160.
To increase the sensitivity of the microphone, go to the menu Audio - Normal mode - Mic. For each level, assign the same microphone sensitivity values, for example, 200. Press the SET button, reboot and check whether the other party can hear you better.
Video: adjusting sound parameters in the engineering menu
Battery: Disable unused frequencies
Smartphones quickly drain battery life running applications, maintaining cellular communications, and network connections. Using the engineering menu you can increase the battery life.
Modern devices scan several GSM frequencies - 900/1800 MHz and 850/1900 MHz. In Russia there is a 900/1800 MHz pair, which means there is no need to scan the network at other frequencies. The radio signal for the second pair can be turned off, which will significantly save the charge level.
In Engineer Mode, open Band Mode. Disable unused frequencies by unchecking the corresponding items - PCS1900 and GSM850. If the device supports two SIM cards, open the SIM1 and SIM2 items one by one and perform the indicated steps in each. Press the SET button to save the settings.
If your smartphone and SIM card operate in 3G networks, disable the networks that are not used in Russia: WCDMA-PCS 1900, WCDMA-800, WCDMA-CLR-850. Press the SET button again.
You can enable scanning of disabled networks by returning to the same menu and checking the boxes.
Camera: photo and video settings
By default, Android devices save pictures in JPEG format. Meanwhile, photographers prefer to shoot and process material in RAW to gain more editing options. The technical menu allows you to select the desired image format.
Find Camera in the menu and select Capture Type. Set the photo format to RAW and press SET. Also in the Camera menu you can increase the size of pictures, set the ISO value, enable shooting in HDR for higher photo detail, and set the frame rate for videos. After changing each parameter, remember to press SET to save the settings.
Recovery Mode
Recovery Mode is an analogue of Bios on a computer, it allows you to manage the device without logging into the Android system. Recovery mode features:
- resetting settings to standard;
- firmware update;
- access to root rights;
- creating a backup copy of the OS;
- removal of personal data from the system.
In Recovery Mode, do not perform an action if you are not sure what it will lead to. Some commands may harm the device and system.
Increasing phone volume through the engineering menu
Now let’s demonstrate how to work with hardware settings using the example of one of the most popular operations and learn how to increase the volume on Android through the engineering menu. So, go to the menu using Mobileuncle MTK Tools or by entering the “magic” code, then find and open the Audio subsection. If you entered the menu through the Mobileuncle Tools program, this subsection will be located in the senior section Engineer Mode, in other cases it is usually located on the Hardware Testing tab.
In the Audio subsection you will have the following options:
- Normal Mode – normal mode that works when a headset is not connected to the device.
- Headset Mode – headset mode that turns on when headphones or speakers are connected to the smartphone.
- LoudSpeaker Mode – loudspeaker mode. Activated when the speakerphone is turned on, provided that a headset is not connected to the device.
- Headset_LoudSpeaker Mode – loudspeaker mode with a connected headset. The same as the previous one, but with headphones or speakers connected.
- Speech Enhancement - this mode is activated when talking on the phone without using the speakerphone.
There may be other settings in the section, for example, Debug Info and Speech Logger, but it is better not to touch them. Select the mode for which you want to change the volume level (let it be Normal Mode), select Type in the list that opens and indicate for which function we will change the volume. The following functions may be available:
- Ring – adjust the volume for incoming calls;
- Media – adjust the speaker volume when playing multimedia;
- Sip – sound settings for Internet calls;
- Sph – sound settings of the conversational speaker;
- Sph2 – sound settings of the second speaker (the option may not be available);
- Mic – change the microphone sensitivity;
- FMR – FM radio volume settings;
- Sid – it is better not to touch this parameter, otherwise problems with the interlocutor’s voice may occur.
Having selected a function, scroll through the current list, set the desired Value (from 0 to 255) and click to apply the new Set settings.
To change the volume level, you can also use preset templates - the Level option. Most phones have seven levels, from 0 to 6. It is advisable not to touch the Max Vol setting, just as you should not set the Value values too high, otherwise the sound in the speakers will begin to wheeze. Other modes in the Audio subsection are configured in a similar way.
Some smartphone and tablet models require a reboot for the new settings to take effect.
Service codes for Android devices
In addition to the technical menu, secret USSD codes—combinations of numbers and symbols that the user types by typing them to perform an action—allow you to control the functionality of Android smartphones. Secret codes for different devices are given in the table.
Table: list of secret commands for Andro >
| Manufacturer | Digital Team | Meaning |
| Codes for most manufacturers | *#*#7780#*#* | Rolling back settings and uninstalling user applications |
| *2767*3855# | Firmware change, total settings rollback. | |
| *#*#232339#*#* *#*#526#*#* | Checking wireless connections | |
| *#*#34971539#*#* | Camera details | |
| *#*#232338#*#* | View Wi-fi address | |
| *#*#273283*255*663282*#*#* | Activating media backup on your phone | |
| *#*#1472365#*#* | Express GPS test | |
| *#*#0*#*#* | Checking the screen | |
| *#*#2663#*#* | Viewing touchscreen information | |
| *#*#2664#*#* | Touchscreen testing | |
| *#*#4636#*#* | General device and battery data | |
| *#*#0673#*#* *#*#0289#*#* | Audio tests | |
| *#*#7262626#*#* | Checking GSM reception | |
| *#*#0842#*#* | Vibration and display brightness test | |
| *#*#3264#*#* | RAM information | |
| *#*#232331#*#* | Testing Bluetooth Communications | |
| *#*#8255#*#* | Checking Google Talk | |
| *#*#232337#*#* | Bluetooth address information | |
| *#*#1234#*#* | Device firmware data | |
| *#*#44336#*#* | Device build date | |
| *#06# | IMEI number information | |
| *#*#197328640#*#* | Service activity test | |
| *#*#1111#*#* | Free-to-air version of programs | |
| *#*#2222#*#* | Iron number for free-to-air | |
| *#*#0588#*#* | Checking the proximity sensor | |
| Sony (devices use the same commands) | **05***# | Unblocking a PUK code |
| Motorola | *#06# | IMEI |
| *#*#786#*#* | Reverting settings to original | |
| *#*#1234#*#* *#*#7873778#*#* | Opening applications with root rights | |
| *#*#2432546#*#* | Checking for updates | |
| *#*#2486#*#* | Entering the service menu | |
| HTC | *#*#4636#*#* | Service menu |
| ##3282# | EPST System Application | |
| *#*#8255#*#* | G-talk monitor | |
| ##33284# | Network status | |
| *#*#3424#*#* | Functionality test | |
| ##3424# | Device diagnostics | |
| ##7738# | Protocol diagnostics | |
| ##8626337# | Voice Coder | |
| Samsung (generic codes are effective) | ##778 (+call) | Activation of EPST menu |
| LG (working with codes is replaced by the technical menu) | 3845#*855# | International devices |
| 3845#*400# | Chinese devices | |
| 5689#*990# | Sprint | |
| ##228378 (+ call) | Verizon Wireless | |
| 3845#*851# | T-Mobile | |
| 3845#*850# | AT&T |
If for some reason the service code did not work, do not worry - install and run the Secret Codes application (Link on Google Play: //play.google.com/store/apps/details? >
There are many ways to improve your Android mobile device using the engineering menu. The menu structure differs in different device models, but the basic functionality is preserved everywhere. When opening and changing parameters in the service section, be careful - some commands lead to system failures and damage to the device.
Here you can find all secret codes for ASUS ZenFone Max (M2). Check out how to enter hidden mode and use advanced options of Android 8.1 Oreo. Let's get access to secret information about ASUS ZenFone Max (M2). Click here and find out more information about secret codes.
Examples
Let's look at a few examples of useful actions that can only be performed in a secret system application.
- How to increase the volume on an Android smartphone through the engineering menu: go to the Harware tab and the Audio item. Select the mode whose values you will change: to add volume to the Android speaker in a conversation - Normal mode, speakerphone - LoudSpeaker, in headphones - Headset. Enter the mode, change the type of function: Ring – call, Sip – call via an Internet channel, Media – playing music, Mic – microphone. Each function has 7 sound levels, from 0 to 6. Select each of them sequentially and set the values in Value, at the end be sure to click on Set - otherwise the parameter will not be saved.
- Disabling frequencies to save battery consumption: open the Band mode subsection. In the list of frequencies, leave only those used in your country; for Russia these are 900 and 1800 MHz. Uncheck the remaining items and press Set so that the device does not waste charge scanning unsupported ranges. If there are 2 SIM cards inserted in your smartphone, you need to turn off the frequencies for each of them - in this case, sub-items SIM1 and SIM2 will appear in the menu.
- Improving the quality of photos. Open the Camera subsection, edit the photo format - you can set RAW instead of regular JPEG, frame size, frame rate, ISO value.