Having become the owner of a Meizu phone, the user may find that his device does not always work correctly. The sound turns out to be too quiet, the connection is not always stable, and other dysfunctions are observed that need to be corrected. To solve these and similar problems, there is a special engineering menu (engineering mode), which allows you to fine-tune your phone, as well as track its key characteristics along the way. After I talk about entering the engineering menu on Meizu phones, you will have an order of magnitude more options. But it’s worth mentioning that you can turn on T9, take a screenshot or set a ringtone without entering the specified menu.
What is the engineering menu on Meizu and what functions does it perform?
Note from the author of the article: You probably already understood from the title that this menu was created in order to configure, test and debug various phone modules.
Since it is mainly used for the latter purpose, the average user will not be interested in digging into at least half of these functions. In addition, we urge you to be careful: if you do not know what exactly you are doing, then it is better not to mess with this setting, as there is a risk of disabling important parameters of the device or even turning it into a “brick”. So, after all, what is the engineering menu for on Meizu smartphones and what functions does it perform:
- The engineering menu hides hundreds of different smartphone settings, which are divided into various tabs
- The engineering menu helps reset your smartphone
- Using the engineering menu, a specialist can scan the phone (operating system) for errors
As you can see, it has many functions, now it’s time to learn how to use them!
Necessary information about the engineering menu in the phone
As you know, a full engineering menu is available only for Meizu gadgets running on MediaTek processors. On alternative Qualcomm processors, this menu is either absent or available in a rather stripped-down form, with very poor functionality.
By default, the engineering menu is hidden from the user's view. This is explained by the desire of the developers to protect important phone settings from interference by the incompetent owner of the gadget. If you need to reset Meiza to factory settings, use my recommendations at the link.
After all, the main purpose of the engineering menu is to debug the phone at the final stage of testing, check the functionality of system components, and take readings of individual sensors by the developer and the direct manufacturer. Making unqualified changes to the phone through the engineering menu may result in the Meizu device failing, with the possibility of turning it into a lifeless brick.
Therefore, if you decide to make any changes through the engineering menu, then make sure that you know what you are doing and that the changes you make will not cause your phone to malfunction.
Meizu engineering menu: how to access and what opportunities it provides
All Meizu smartphones equipped with a MediaTek processor have an engineering menu . In this article we will briefly talk about most of its capabilities, as well as how to access this treasure trove of experiments for a true geek.
As you can easily guess from the name of the menu itself, it was created for debugging in case of smartphone repair. So approximately 99% of the points in it are completely uninteresting even to idle users who like to customize everything for themselves, and some can even be dangerous.
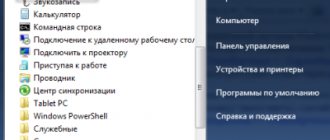
To get to the Meizu engineering menu, dial *#*#3646633#*#* in the proprietary dialer. After this, the EngeneerMode application will automatically open, which looks completely outdated, as if it was written for Android 4.0. All the items there, and there are hundreds of them, are distributed across six tabs: Telephony, Connectivity, Hardware Testing, Location, Log and Debugging and Others.
On the first tab of the Meizu engineering menu, you can view, test and even configure some parameters of the smartphone’s 2G/3G/LTE modem. Here you can set automatic call reception (Auto Answer), remove band support (BandMode) and even check compatibility with a particular well-known operator. In general, it is better for the average user not to meddle here, although almost everywhere there is a Reset to Default button.
In the Connectivity tab, you can test Bluetooth and Wi‑Fi, as well as make some settings. For example, you can enable full screen blanking when using Wi‑Fi Display (Power Saving) or set the quality (Video Capability).
It is the third tab, Hardware Testing, that is especially loved by enlightened Meizu fans. In it you can increase the maximum sound volume in the headphones, test the display, and also check all the main modules and sensors of the smartphone.
In Location you can do the same thing, but with technologies responsible for location. Here, for example, you can turn off tower location determination (A-GPS), if you need it for something. This move will reduce energy consumption in a number of situations, but will significantly increase the time it takes to determine the location.
Log and Debugging mainly contains links to various built-in tests and utilities from MediaTek and component suppliers. Others included tests and tuning items that had no place in other places. For example, right there in Settings Font you can set the sizes of all types of fonts.
It is worth clarifying that the engineering menu in completely new Meizu smartphones has a different structure, but finding the necessary items there, by analogy, will not be difficult.
How to open the engineering menu on Meizu devices
To go to the engineering menu on Meiza, you can use several methods:
- Use a special code that is dialed in the dialing application. Go to the appropriate application on your phone, and type there:
*#*#3646633#*#*
Enter special access code
If nothing happens after typing this combination, try alternative combinations:
*#*#4636#*#* or *#15963#*
- If for some reason these codes do not work, then to gain access to the engineering menu I recommend using special mobile applications at the level “MTK Engineering Menu”, “MTK Engineering Mode” and other analogues. You will need to download them through the Google Play app store, launch them, and then use them to access the engineering menu of your gadget.
After entering the appropriate code, the corresponding interface (engineering mode) will open in front of you. Let's take a closer look at its features.
Additional menu options from Meizu
Despite the fact that the features of the engineering menu may differ depending on the specific Meizu phone model, usually such a menu has six main tabs, each of which contains a number of relevant parameters. Let's take a closer look at these tabs:
- “Telephony” tab . Here you can configure a number of parameters related to phone calls. In particular, you can set automatic reception of an incoming call (Auto Answer), work with supported bands (BandMode), configure a 2G/3G/LTE modem, test the phone antenna (Antenna Test), and so on;
- Connectivity tab . This tab is responsible for various types of connections between the phone and other devices (usually Wi-Fi and Bluetooth). You can test the operation of the latter, enable screen blanking when Wi-Fi is running, and configure other parameters;
- Hardware Testing Tab (Equipment testing) will allow you to conduct various comprehensive tests of your phone’s components, and also, importantly, increase the volume in your headphones (the “Audio” parameter - “Handset mode” - set the value to 160);
- The “Location” tab is responsible for your location. Here you can conduct tests of the corresponding phone components, as well as enable or disable the corresponding parameters (for example, deactivate A-GPS);
- The “Log and Debugging” tab contains various phone debugging tools for developers (usually the corresponding tools from MediaTek);
- The “Others” tab usually contains indirect additional tools.
By working with the capabilities of a particular tab, you can more finely customize your gadget to suit your requirements. At the same time, your intervention must be of a qualified nature, so I would not recommend simply changing the parameters as you please.
What can be configured on a smartphone in the engineering menu
The engineering menu differs on different platforms; in many cases, it only allows you to test some parameters. On Xiaomi Redmi Note 3 Pro and Note 4X, built on Qualcomm chips, the engineering menu allows you to test various functions. These include the screen, sensor, sensors, cameras, sound and microphone, communications, battery, navigation, etc. There is no way to change anything, you can only find out if everything is working correctly.
There are much richer opportunities on the MediaTek platform. In Oukitel U7 Plus (MT6737 chipset), the engineering menu allows you to configure network, sound, communication modules, and other modules. On Redmi Note 2 with MTK Helio X10, the menu was identical, and on other devices with MTK it is not particularly different. We will use his example to describe the possibilities.
Telephony tab
This section is responsible for setting up a cellular modem. Here, interesting possibilities are provided by the BandMode, Network Selecting and GPRS options.
BandMode
In this menu, you can select communication standards that will be active on the phone when connecting to mobile networks. In the menu item, you can select frequency ranges for each SIM card; if there are two SIM cards, the full list is usually available only on the main one (usually the first one). Once you know exactly which frequencies your operator uses in the region, you can uncheck all the others. This will slightly increase battery life due to the fact that the device will not search for operator towers in these ranges, wasting extra energy on scanning the airwaves.
Sometimes some communication standards (especially LTE) are supported at the chipset and core level, but are disabled in the firmware. By checking the box next to them, you can activate support for these networks. It is worth warning that it does not work everywhere: on the same Redmi Note 2 (Chinese version) TDD-LTE was enabled in this way, but on Oukitel U7 Plus these items are not activated.
Network Selecting
The name speaks for itself: this item is also responsible for selecting networks. Only in this case the user can choose which types of networks to use. The goal is the same as in the previous paragraph: to reduce the load on the cellular modem, thereby reducing battery consumption. You can choose to work only in 2G, 3G, 4G, or combine several standards.
If your operator does not have 3G or 4G at all, these items can be disabled so that the smartphone does not constantly try to search for LTE networks, thereby speeding up battery drain. You can also disable 3G and 4G if you need constant communication (for example, for correspondence over the Internet), but traffic is limited and uncontrolled use of WCDMA and LTE by background processes can quickly waste it.
GPRS
Despite the name, this item is not interesting because of the GPRS communication settings, which many people no longer need, and it is not recommended for “mere mortals” to change the settings themselves. The main feature is the ability to record the IMEI of the smartphone. In the appropriate item, you can enter the device identification number and click Write to save it.
The ability to write IMEI is often required after an unsuccessful flashing, when it “flies” and the device cannot register in the operator’s network. By copying this code from the smartphone box, you can restore functionality. Attention! illegally changing the IMEI of a smartphone in many countries (including Russia, Ukraine) is a crime! In addition, by rewriting this code to a random one belonging to another subscriber of your operator, communication problems may occur due to a hardware conflict. Therefore, we recommend that you always keep the box or sticker with IMEI in case of unsuccessful firmware. After all, on devices with a non-removable cover, this identifier is not written under the battery.
Connectivity Tab
In this tab, functions for testing and fine-tuning the Bluetooth module, radio receiver and Wi-Fi are available. The vast majority of users have nothing to do here, since there are no settings interesting for a layman, but it’s easy to disrupt the normal operation of Bluetooth by entering something wrong.
Hardware Testing Tab
This settings item in the engineering menu is responsible for the hardware configuration. The Audio and TouchScreen items are of interest to users. The latter contains HandWriting and MultiTouch items. It’s easy to guess what these parameters are responsible for.
Using the first one, you can check the clarity of the touchscreen response and check for the presence of “blind spots”. This menu is especially useful when purchasing a smartphone, in particular, without a warranty. The second point allows you to do the same, but with the participation of several fingers. With it you can test how well the smartphone processes gestures of several fingers simultaneously.
Audio
It is this treasured item that is needed by those who are looking for how to increase the volume in the engineering menu. The top items allow you to control the volume of the device and are responsible for different modes.
Normal Mode is a mode for normal use, with music or video sounds output to the music speaker. Headset Mode is responsible for controlling the volume in the headphones. LoudSpeaker mode allows you to adjust the conversation volume when using the speakerphone. The last item is a combined one; it is responsible for speakerphone when headphones are connected. In order to change the sound in the engineering menu, you need to select which device you want to configure.
- Sip - settings for Internet telephony;
- Mic - microphone sensitivity
- Sph - conversational speaker;
- Sph2 - second earpiece (a rare beast among smartphones);
- Sid - after changing this parameter, an echo of your voice may appear during a conversation, so you do not need to touch it;
- Media is a multimedia speaker, what most people need.
In order to adjust the volume, you need to go to the required mode (for the volume of a multimedia speaker this is Normal Mode), select the Media item and set the volume value in the specified range.
The Level parameter is responsible for the volume value set by the rocker at each division. Level 0 is the minimum value (one division), the highest Level is all divisions, on Oukitel U7 Plus it is 14, on other smartphones it may differ. The value can range from 0 (speaker silent) to 255 (full volume). There is no particular point in changing the value, but if after a certain division it seems to you that the sound suddenly becomes much quieter, you can increase the values for this division (and lower levels) by a couple of units. The main thing is that the conditional Level 6 does not turn out to be louder than Level 7 due to the value being too high.
But to increase the maximum volume in general, you need to change the value in the Max Vol item. The maximum level corresponds to a value of 160, but manufacturers often set it lower (on the tested device it was 128). By setting the number higher, the volume will increase, but there may also be side effects such as gurgling, noises and wheezing. The optimal value should be selected using the scientific method: increase the value by a few units, save, check the sound on video or music, and if everything is fine, increase it further.
How to increase the volume of the Meizu speaker?
How to increase the volume of the Meizu MX6 speaker
- Enter the service menu *#*#3646633#*#*
- Open the Hardware Testing tab.
- Go to the section Audio -> Volume -> Audio playback.
- Click on 3/4 pole headset.
- Select speaker and set the desired volume level. Maximum 160.
Interesting materials:
How to restore sound on Windows 10? How to run the latest restore point? Where to go to restore your work record? Where to go to restore the Inn? Where to go to restore your work record? Is it possible to recover an Instagram account after deletion? Is it possible to recover a Telegram account? Is it possible to restore an acrylic bathtub? Is it possible to restore a Kazakhstan train ticket? Is it possible to restore a power of attorney from a notary?
How to reset your phone via the engineering menu?
Below are some combinations for the most popular phones:
- Models from HTC - *#*#3424#*#*, *#*#4636#*#* or *#*#8255#*#*;
- Samsung devices - *#*#197328640#*#* or *#*#8255#*#*;
- Sony smartphones - *#*#3646633#*#*, *#*#7378423#*#* or *#*#3649547#*#*;
Interesting materials:
How to use a coupon on Biglion? How to use Lenor for washing? How to use Plex on PS4? How to use a springform pan? How to use dry scrub? How to use serum and face cream? How to use shadows? How to use vanillin in baking? How to use veneers instructions? How to use frozen banana?