- Disable Anti-counterfeit protection
- Disabling Windows 10 antivirus through the system registry
- Disabling Windows 10 Antivirus from the Local Group Policy Editor
- Disabling Windows 10 antivirus using third-party programs
- Defender Control
Windows 10 operating systems have a built-in Windows Defender or Windows Defender antivirus solution (the name depends on the OS build number). Users can disable some functions of this antivirus in its settings, but they cannot disable it completely (so that it does not start at all) using the usual methods. But solutions still exist. Let's look at them.
Disable Anti-counterfeit protection
Among other Windows Defender antivirus tools, it contains a function that blocks the ability to change certain system parameters. To disable the antivirus, you just need to change some of these protected settings, so the first thing you need to do is disable the “Anti-counterfeiting” function:
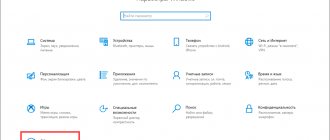
- Press the “Win + I” key combination on your keyboard and open the “Update and Security” section in the “Windows Settings” window that appears.
1
- Next, open the “Windows Security” tab on the left and click on the “Open Windows Security” button.
- A new window will open. On the left side, go to the “Protection against viruses and threats” tab. In the center of the window, find the inscription “Protection settings against viruses and other threats” and click under it on the “Manage settings” element.
- Scroll to the Anti-counterfeiting section in the Settings window, then toggle the switch to Off to disable the feature.
Further actions involve changing the system registry and editing group policies (Windows 10 Professional or Enterprise users can skip the next part of the article).
Disabling Windows 10 antivirus through the system registry
To get started, launch the Registry Editor application:
- Press the key combination “Win + R”.
- regedit into the Run window and click OK.
A small digression. To be able to return the registry to its current - not yet changed - state, we recommend creating a backup copy of it before making changes. For this:
- In the Registry Editor program, open the File menu, select Export..., then specify a folder to save the registry backup.
- If required in the future, the registry can be restored from the copy just created, for which you will need to run the “File > Import...” function in the Registry Editor program.
Let's continue disabling the antivirus:
- Copy and then paste the line into the address field of the Registry Editor (after pasting, press Enter): Computer\HKEY_LOCAL_MACHINE\SOFTWARE\Policies\Microsoft\Windows Defender
On the left side of the program window, the “Windows Defender” registry key should open with a single item inside “(Default)”. Our task is to create one special parameter in this section, as well as a subsection that will contain several more parameters - commands for the operating system that prevent Windows Defender from starting.
First, let's create a setting in the "Windows Defender" section:
- While in the Windows Defender section, click on the empty area on the right side of the Registry Editor window, select New, then select DWORD Value (32-bit).
- Give the created parameter the name “DisableAntiSpyware” (without quotes), then double-click on it with the mouse - a small window will open, where you need to enter 1 in the “Value” field and then click the “OK” button:
Now, in the “Windows Defender” section, create a “Real-Time Protection” subsection (if it is already present, skip the following steps):
- Right-click on the “Windows Defender” partition, select “New” from the context menu, then click on the “Partition” element.
- Name the created partition “Real-Time Protection” (without quotes) and open it immediately.
- It remains to create a few parameters in the newly created “Real-Time Protection” subsection. Click on an empty area of the Registry Editor window, select New, then select DWORD Value (32-bit)
- Name the parameter “DisableBehaviorMonitoring” (without quotes), double-click on it, enter one in the “Value” field and click “OK”:
The last two steps need to be done 3 more times. As a result, in the “Real-Time Protection” subsection there will be 4 parameters with values of “1”. Their names are as follows:
- DisableOnAccessProtection
- DisableScanOnRealtimeEnable
- DisableIOAVProtection
Now restart your computer. Windows 10 Antivirus should no longer start, but the Defender icon in the taskbar notification area is still there. If you need to remove it too, this can be done in a few simple steps:
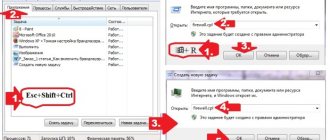
- Launch "Task Manager" using the key combination "Ctrl + Shift + Esc".
- Go to the “Startup” tab, find the “Windows Security notification icon” element in the list that appears (can also be called “Windows Defender notification icon”), select it and click the “Disable” button in the lower right corner.
Turn off notifications
If notifications about Windows security not being optimal appear too often, it can become annoying. There are two options: turn on Do Not Disturb mode and change system settings.
Blocking by turning on Do Not Disturb mode
This is the easiest and fastest method, but the downside is that you will stop receiving notifications not only from the standard antivirus, but also from all other applications. If this doesn’t bother you, then right-click on the “Notifications” icon in the lower right corner of the desktop and select the “Enable Do Not Disturb” option.
Turn on Do Not Disturb mode
Add to System Settings Exceptions
- Using the Windows search bar, launch the Security and Maintenance Center service.
Open the Security and Service Center service
- In the “Security” block you will find information about the disabled defender. The system will insist on turning it on, but you are required to click the “Don’t receive any more messages on this topic” button. No more notifications will appear.
Turn off notifications
Disabling Windows 10 Antivirus from the Local Group Policy Editor
This method does not work in Windows 10 Home, only in Pro/Professional and Enterprice/Corporate. To disable the built-in antivirus, follow these steps:
- Call the Run program by pressing the Win + R key combination, then enter the gpedit.msc and click OK.
- The system program we need will be launched. In the left part of its window, open the following sections in sequence: “Computer Configuration”, “Administrative Templates”, “Windows Components” and “Windows Defender Antivirus”:
- On the right side of the window, find the “Turn off Windows Defender Antivirus” option, which is highlighted in the image above, and double-click on it. A new window will open. At the top left of the window, switch the switch to Enabled, then click OK.
Now open the “Windows Defender Antivirus” section itself, find it and go to the “Real-time Protection” subsection. Here you need to change 4 parameters in the same way as was done in the previous step, but instead of “Enabled” we move the switch to the “Disabled” position. The parameters are as follows:
- Enable behavior monitoring
- Scan all downloaded files and attachments
- Monitor the activity of programs and files on your computer
- Enable process checking if real-time protection is enabled
In the end it should look like this:
All that remains is to apply the changes - update Group Policy in forced mode. This is done simply:
- Open the Run application (Win + R), copy the command gpupdate.exe /force , click OK.
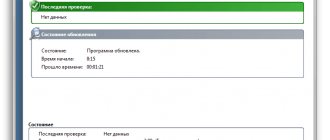
- The success of the policy update will be indicated by the system as follows:
Now you can restart your computer.
Possible questions.
Question : I have disabled the antivirus, but the Antimalware Service Exexutable process continues to load the system.
Answer : check if there is a DisableAntiSpyware with a value of 1. At the very beginning of the article we wrote about this parameter. Antimalware Service Exexutable should not appear if you have done everything as written in the article.
Question : I'm trying to access the registry editor, but it says access is denied
Answer : you must log in with administrator rights, otherwise nothing will work. This computer most likely belongs to a company and has a policy that restricts access to Windows components.
Disabling Windows 10 antivirus using third-party programs
Third-party developers who have nothing to do with Microsoft offer their own solutions for disabling “hard to disable” features of Windows operating systems, including the built-in antivirus. Let's look at two small utilities that provide the ability to disable Windows Defender in a few mouse clicks.
O&O ShutUp10
The O&O ShutUp10 program allows you to enable/disable many system functions, most of which ordinary users are not aware of. The list of utility capabilities also includes disabling Windows 10 antivirus:
- Install the O&O ShutUp10 program.
- You need to install it, but you should run it with administrator rights (right-click on the downloaded program icon and select “Run as administrator” in the context menu).
- In the main window of O&O ShutUp10 you can see a large list of various Windows parameters. Find the section “Windows Defender and Microsoft SpyNet” among them. Inside it, before the line “Turn off Windows Defender”, move the switch to the “Enabled” position.
- Restart your computer (either manually or by clicking the Restart button if O&O ShutUp10 displays a message).
What is Windows Defender?
You can also recognize this antivirus by the names Windows Defender and Microsoft Security Essentials. Most users use it successfully and do not express any complaints, especially since it works successfully on computers with the old and unstable Vista OS. However, if you consider how many pirated copies of the Windows operating system are widespread among the people, problems arise.
The unlicensed OS does not have the latest updates. They are the ones who can be responsible for performance. Since Defender is part of the system, it is also updated along with other firmware. Therefore, users using pirated Windows do not have the latest protection against new viruses and their computer will not be fully protected. As a result, the choice is made in favor of third-party anti-spyware programs.
Windows Defender interface
So, why do users decide to refuse to use the standard antivirus from Microsoft:
- weak protection;
- lack of timely updates for users of pirated copies of the OS;
- the program arbitrarily deletes files it considers malicious;
- other reasons (for example, you don’t like the application interface).
Comparison of popularity with other free antivirus programs. Results of an independent survey.
| Name | Popularity percentage |
| Kaspersky Antivirus Free | 20,97% |
| Avast Free Antivirus | 17,83% |
| 360 Total Security | 15,99% |
| NANO | 7,5% |
| Avira Free Antivirus | 7,18% |
| AVG Antivirus Free | 6,61% |
| Microsoft Security Essentials | 6,4% |
| Comodo Internet Security | 6,21% |
| Bitdefender Antivirus Free Edition | 5,26% |
| Panda Free Antivirus | 4,04% |
Defender Control
Defender Control is designed solely to enable or disable Windows Defender. It's even easier to use:
- Download and install Defender Control.
- Click on the "Disable Windows Defender" button.
- It may take some time to disable Windows Defender. At the end of the procedure, the Defender Control program window will turn red. If necessary, the antivirus can be re-enabled by clicking the “Enable Windows Defender” button.
- It is not necessary to restart the computer. You can check the result of the performed procedure by clicking the “Open Security Center” button. The Windows Security Settings window that opens should indicate that “Your organization manages your virus and threat protection settings.”
Command line
Another method that we forgot to mention at the beginning is to disable the built-in antivirus software using the command line. This method is similar to disabling Defender through the settings, that is, it is disabled temporarily.
Launch the command line as administrator. How to do this - read here. In the PowerShell line that opens, we just need to enter one command – Set-MpPreference -DisableRealtimeMonitoring $true.
The command disables real-time protection, but re-enables it after a while.