Sometimes situations may arise when you need to type a specific text or message on the computer, but you cannot use the keyboard, for example, if it is broken. Don't rush to run to your neighbor or friend to get the keyboard. The Windows operating system provides typing text using an on-screen keyboard. On-screen input is very similar to using a simple keyboard, but sometimes you may have problems using different combinations, for example, how to change the language on the on-screen keyboard. In this article I will show 2 ways to change the keyboard layout; if the first one does not suit you, then you can use the second method.
To begin the process of changing the language, let's figure out how the layout changes on a regular computer or laptop . If you know how to do this, feel free to skip to the next paragraph. You can find out how to change the language through the “Regional and Language Options” setting, which is located in the Control Panel. In the window that opens, go to the “Keyboard switching” tab, which will tell you which keys are used to change the language on your computer or laptop. You need to pay attention to the “Keyboard shortcut” column in the “Switch input language” line.
If you need to assign other keys, then click the “Change keyboard shortcut...” button.
So, we have found out which keys are used to change the language in your device. Now let's open the desired program - the on-screen keyboard.
To launch a program for entering text from the screen, go to the “Start” menu - “All Programs” - “Accessories” - “Accessibility” and click on the “On-Screen Keyboard” item.
Simple ways to switch
Today there are not many ways in which you can switch the keyboard. In total, there are two main options for how to change the language on the keyboard:
- using the mouse;
- by pressing certain keys on the keyboard.
Toolbar
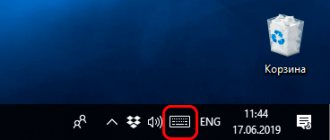
If you look at the monitor screen, you can see the language menu in the lower right part of the screen. On some computers this looks like a list consisting of two items - RU and EN. In this case:
- RU - Russian;
- EN - English.
In order to change the symbols used when entering, just left-click on the indicator and select the desired item from the list. If this icon is not visible, it is recommended to change the layout by pressing hot keys or changing settings in the parameters.
How to change input language in Windows 7.
Switching using the keyboard
Users often need to quickly change the layout. Most students know how to switch the language on the keyboard, since when preparing work they often need to change the entered characters from Russian to English or vice versa.
Switching on the keyboard is done by pressing certain key combinations. With standard settings, in most cases the parameter changes when two keys are pressed simultaneously, the combination of which depends on the settings of the personal computer. By default, the two most commonly used options are:
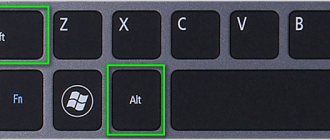
- Shift+Alt;
- Ctrl+ Alt.
All buttons are located at the bottom of the keyboard on the right and left sides. This combination was not chosen by chance. These are the keys that are considered the most convenient to press on the keyboard. On some personal computers, usually using a version higher than OS 8, pressing the Spacebar is used to change the layout.
You can understand which combination is installed on a particular computer by testing and checking the fact of the change. The user has the opportunity to independently set the desired key combination, which, when pressed, will subsequently change the type of characters entered. To do this you need to do the following:
- Right-click on the language bar in the lower right corner of the monitor screen.
- Select the “Settings” menu item from the drop-down list by right-clicking on it.
- Go to the “Hot Keys” section and enter the required combination.
Depending on the system type, the path to enter the keyboard shortcut to change the language may vary. At the same time, the essence of the actions performed does not change. In order to make the settings, you must enter information in the appropriate settings section.
This method is not very convenient when working with more than two languages. In this case, the parameter changes occur in a clearly defined sequence. If the user misses the required one when pressing a key, then he has to go through the entire path of pressing the keys again until he returns to the required language again.
Special programs
Today you can install programs on your computer that are designed to automatically replace entered text. Such tools are very convenient for those who, due to their line of work, often have to switch language layouts. If a person does not switch the layout while working, then the result is gibberish.
When installing a special program, the user will no longer need to think about whether a change has occurred. This category of programs includes:
- Punto Switcher;
- Key Switcher;
- Anetto.
The program understands at what point the language on the keyboard should be switched, and itself changes the layout from Russian to English, translating incorrectly entered characters.
The choice of option to change the language layout depends on the preference of the individual user. If you need to switch between two languages, the easiest way is to press a specific key combination. When using three or more languages, it will be most convenient to switch using the language bar.
Setting up hotkeys to switch languages
The general principle is the same, but different versions of the OS have their own nuances related to the interface features.
Windows 10
First, let's look at how this is done in Windows 10. First, you need to click on the “Start” button and select “Settings”.
In the window that opens, select “Time and language”.
On the right side of the next window we are interested in the “Language” item.
By clicking on it and going to the next item, select “Keyboard”.
In the window of the same name, select the line “Keyboard shortcuts for...”.
And here we are only interested in “Change combination...”.
And only after all these actions, a window will open where you can select the desired key combination, confirming your choice by clicking OK. On older builds of the “tens”, all this could have been done much easier using the classic control panel, but later the developers began to “drag and drop” everything to the new "Options".
If the user wants one button to change the layout, you need to select the “E or accent mark” item. In other operating systems everything is done similarly. In addition, in the settings you can change the color of the Taskbar; read the article “How to make a transparent Taskbar in Windows 10” how to do this.
Windows 8-8.1
To get to the necessary settings, you first need to left-click on the language bar in the tray and select “Language Settings” there.
A window will open where we need “Advanced options”.
There we will be greeted by the already familiar item “Change keyboard shortcuts...”, after selecting which other computer settings are similar to those described in the column about “ten”.
Windows 7
In “Seven” all these operations are performed much easier. Right-click on the abbreviation of the layout you are using in the taskbar. In the context menu that appears, select “Options”.
In the window that opens, select the “Keyboard switching” tab and “Change combinations...”. Next, pressing certain keys is selected in the same way as the methods described above.
How to Change Keyboard on Phone - Language, Color and Theme
Unlike a standard keyboard, a virtual keyboard replicates the functionality of a computer keyboard. Thanks to her you can:
- print in different languages;
- use your native language using foreign keys abroad;
- dial with the mouse;
- quickly move from typing method to alphabet.
Changing Virtual Keyboard Keys on the Phone
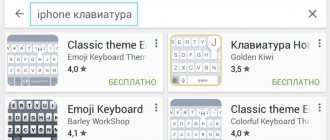
To select a new virtual keyboard on an Android smartphone, you must follow the following algorithm:
- Go to “Settings”.
- Select “Language and input”.
- Let's move on to the current keyboard. It is located in the subsection or tab “Keyboard and input methods”.
- Mark the “Russian” dot and select the layout.
- We get to “Language and input”. Select the required type of virtual keys and activate it. Voice input can also be found in this section.
- For the English-language layout we repeat the same thing.
In the new generation of Android smartphones, the procedure will be slightly different:
- “Settings” -> “Language and input”. If there is no such item in the menu, you should go to “Advanced settings” or find the item through the search.
- After going to “Language and input”, select “Manage keyboards” and enable the one you need.
- Go back to “Language and input” and click on “Current keyboard”. Select the required keys here.
IMPORTANT! Once you have configured the desired layout, you can change it at any convenient time. You can call up options through any messenger by long pressing on the “Select layout” icon.
After that, select the desired item and you're done.
Enable Quick Change Keyboard Keys on the Phone
To start using this function, go to “Text input methods” and proceed according to the instructions. You can change the layout to virtual using a special icon located on the keyboard.
To activate the icon for quickly calling a virtual layout you need to:
- Launch virtual keys.
- Go to “Settings” by clicking on the gear (located at the bottom of the window).
- Go to “Advanced settings” -> “Data input protection”.
- Options will appear on the screen with which you can make settings:
- Here you can put a checkmark to launch the virtual keyboard using the key combination CTRL+ALT+SHIFT+P. To do this, put a checkmark in the appropriate line.
- The virtual keys icon can be placed in input fields in any messenger. To do this, check the box “Show shortcut icon in input fields.”
- Also, the appearance of the icon can be ensured only on certain sites where it is useful to the user. To do this, follow the steps: “On-screen keyboard” -> “Change categories” -> “Input security settings”. Here you will find sites where it is possible to display key changes in input fields. After completing the actions, the icon will appear after entering the specified sites.
IMPORTANT! The virtual editor allows you to type text with the mouse or using buttons.
How to pin a keyboard to your phone screen?
Move the keyboard around the screen by dragging the circular button. Tapping this circle will dock/unpin your keyboard. If you want to switch back to the fixed keyboard, simply drag it to the bottom of the screen.
Interesting materials:
What flower does the name Olga have? Where does the name Camilla come from? What kind of name is Kira? When is Polina's name day? When did the name Maria appear? Who can enter into contracts on behalf of the organization? Who came up with the name Sofia? Mark is the name of what nation? Is it possible to give a child the name of a deceased relative? Is it possible to change the name on the ticket?
How to change the language in Windows 7,8 and 10?
On any version of the operating system, there is a special button in the lower right corner to change the language. To make a replacement, you need to left-click on the “EN” or “RU” button (depending on the already selected language), and select the desired language. You can add any languages to the list of available ones. To do this, you need to go to the language panel settings and tick the languages that should be active.
The on-screen keyboard is a convenient and accessible feature in the Windows operating system. With it you can type different symbols and signs using a computer mouse. This is a great helper for people with disabilities. In addition, it will become indispensable if a regular keyboard becomes faulty, and you urgently need to print something or find something on the computer.
Adding a new input language to the system
A situation may arise related to moving to another country or the user's linguistic success, when it is necessary to add one or more new layouts to the system.
Alas, owners of Window 8-10 Single language can safely skip this item. Microsoft has completely blocked the ability to install additional language packs on these versions, so the only way out in this case is either purchasing a “full-fledged” system or reinstalling it.
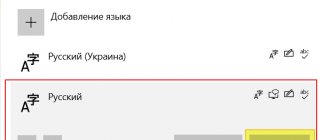
Owners of other editions need to left-click on the language abbreviation in the tray, and then select “Language Settings”.
A window will open, in the lower middle part of which there is an “Add language” item.
After clicking on it, a new window will open with an input/search field, with which you can find the language the user requires.
Let's say we decide to add the Belarusian language.
There was no need to enter the entire name into the search bar - after entering four letters, the system found the required option. Select the “Belarusian” item by left-clicking on it, and then click on “Next”.
In the newly opened window, where the system will helpfully warn you about the size of the downloaded package, you need to click on the “Install” button. The required file will be automatically downloaded and installed, after which another layout option will appear in the language bar list.
Similarly, you can put even the Ukrainian language, even Chinese.
How to bring up the on-screen keyboard
The virtual device can all be found in the Ease of Access Center. In addition to the ability to print electronically, the user also has the ability to call up a screen reader or magnifying glass to enlarge the text. The main difference in operating systems is that in new versions, this item may be renamed or located in a different subsection of the settings. The on-screen keyboard is built into all Windows systems.
To start using it, you first need to call it. It is controlled using the mouse. Therefore, learning how to use it will not be difficult. The device can be called up when necessary or left always active on the screen. In addition, the settings set the settings so that when you turn on the computer, the screen device is automatically displayed on the screen. Translating the language into English is also easy.
For Windows 8 and 10, to bring up the virtual keyboard, you need to point at the lower right corner. A menu will appear. Click on search and write “keyboard” in the search line. In the list that appears, find the desired icon and open it. After that it will appear on the desktop. In Windows 7, to activate the function, you need to point to the “Start” icon, and similarly to the steps described above, find the desired item in the search bar.
Another quick way to call a virtual device is the “osk” command. To bring up the keyboard on the screen, you need to hold down two “Windows + R” keys. A search bar will appear on the desktop. We enter a special decoding into it: on-screen keyboard. And click search. After these steps, the virtual device should be activated immediately. The method is relevant for all versions of Windows.
Third-party programs for controlling the keyboard from a computer
The standard Windows utility is a convenient application that allows you to cope with management, but this is not the only development. There are a lot of them, and each of them has its own advantages and disadvantages.
Name Brief descriptionAdvantages
| On-Screen Keyboard Portable | The program is a virtual keyboard that you can install on a USB drive and run it on any PC. The keyboard itself isn't particularly attractive, but it is functional. You can resize it to suit your needs and it remembers your settings when you exit. This type of keyboard protects you from hardware keyloggers, but not against keylogger software, so it doesn't protect you from malware that tries to save entered passwords and so on | Lightweight and portable |
| Exbi Keyboard | This on-screen keyboard allows you to easily enter texts in different languages without having to install a full language pack. It can handle multiple languages simultaneously. It comes with English and Urdu by default, but you can add other languages and switch easily by pressing CTRL + Space keys. Free and supports many Unicode languages | The user can change the background color and the keys themselves |
| Jitbit Virtual Keyboard | You can type with a mouse or a stylus (a digital pen used by Tablet PC devices with a touch screen). The virtual keyboard also protects your trusted data by preventing it from being tracked. Enter secure passwords, personal data, sensitive information using the Jitbit virtual keyboard | Absolutely free, protects your confidential data |
Note! Be careful with the apps you use. Trust only trusted developers, and, of course, if possible, use a standard Windows utility to protect yourself from the machinations of attackers.
So, a broken physical keyboard is not a problem; this problem can be solved in two clicks. Use one of the suggested methods, and then you can wait until the day when your physical keyboard is repaired without much difficulty.
This is interesting: New version of Windows 11 released
How to switch to English font on keyboard?
Any user has to switch the keyboard layout from Russian to English and vice versa. There may be others, but these are the main ones. They have to be changed when typing texts, when generating queries for search engines, and when commenting on posts.
An experienced user performs such a change without hesitation. There are no tricks here. But if a person is just starting to master a computer, then the following tips will help him switch to another language. On laptops and computers, there are several options for changing it.
Through the language bar
The letter designation displaying the system language is located at the bottom of the screen, in the right corner next to the clock. Changing the computer layout is done using a manipulator: just click the left button on the panel to go to a pop-up window in which you can tick the desired one.
The language bar appears when the system uses more than one language. For example, if only English is specified, it will not be visible. To turn it on, you need at least two.
Using the keyboard
This method is most often used as the most convenient. Therefore, let's look at it in detail.
Switching from Russian to English and vice versa occurs using “quick keys”. These are combinations of buttons, pressing which activates a sequential change of system languages, making it possible to switch from one to another. The required keys must be pressed simultaneously. “Hot” buttons are selected during Windows installation.
Use combinations:
- Ctrl+Shift;
- Alt +Shift (Alt, which is located on the left);
- Yo.
If you don’t know which option is set for your computer or laptop, go through the combination options, so you will understand which one you can use to switch from Russian to English or to another.
Using a specially configured keyboard
If for some reason you are not comfortable making the switch, it is easy to make a convenient combination of buttons yourself. To do this you need:
- In the “Start” pop-up window, find the “Control Panel” line.
- Among the items, find and select the submenu Change keyboard layout, which is usually located in the section called Clock, Language, Region.
- In the drop-down window you need the “Languages and Keyboards” tab. In which there is a button “Change keyboard”.
- In the “Switching keyboard” section at the bottom there is a button for changing keyboard shortcuts. When you click you will get a list of available combinations. Choose the most convenient one and confirm your choice. Then you can always switch to English or another language this way.
- The path to the keyboard settings is not only through the Start menu; you can also get there through the context menu of the language bar. You can get there by selecting the arrow. In the menu we are interested in the “Options” section. Then do everything as described above.
The described algorithm is suitable for all versions of the operating system; the names of the panels may differ slightly. But in terms of meaning, finding the right menu is quite simple.
If for some reason the required language is not available, it is not difficult to add it. English is usually the default. If you need to add, for example, Russian, you need to go to the same menu as to change the layout. But in the “General” tab.
After selecting the “Add” button, a list of languages available for use will become available. After confirming the selection of the desired one, it will be displayed in the panel and will be available for switching from the keyboard.
Programs
Sometimes, to change the layout, they use special programs that determine what language the typing is in and automatically switch to it. This is convenient if you often forget about switching layouts, and discover this when some of the text has already been typed. The best programs were recognized as Punto Switcher, Key Switcher, Anetto Layout, Keyboard Ninja.
How to write in capital letters
Of course, names, titles and every sentence should be capitalized. To write one large letter, press the Shift key and the key of the letter you want at the same time. For example, for the letter A
Shift + a = capital letter A
The Shift key is also needed to type special characters, which are located, for example, on the number keys at the top of the keyboard. An exclamation point under the number 1, the Internet symbol @ under the number 2, a question mark under the number 7, and so on. Remember that the special character you receive also depends on the current keyboard layout! In the Russian layout there is a quotation mark under the number 2, in the English layout there is @. This is how you can type a question mark in the Russian layout
shift + number 7 = question mark in Russian layout
And if you suddenly want to decorate your message by writing it all in capital letters, just press and release the Caps Lock key.
Caps Lock key
To return to normal letters, press Caps Lock again. Now, if all your letters suddenly turn out to be capital, then you know how to fix it.
How to change the language on the on-screen keyboard
There are two options to solve this problem. In the first case, you can launch this application by following the path: “Start” - “All Programs” - “Accessories” - “Special Features”. In the list that opens, click on the name “On-Screen Keyboard”.
Changing the language for input on the on-screen keyboard occurs using the same combination as on a regular keyboard. However, the way to press this combination is slightly different. So, if you change the language using the “left ALT + SHIFT” combination, then you should alternately press these keys on the screen. First click on ALT, then on SHIFT. After this, you need to click again on any of the buttons from the specified combination. It is worth noting that in some cases, for a positive effect from this manipulation, you should double-click the mouse again.
How to make the electronic keyboard always start automatically
If you regularly have problems with the main keyboard, or it is more convenient for a person working at a computer to work with an on-screen keyboard, then you can configure it to launch along with the operating system. You don't have to turn it on manually every time. For this:
- Launch the electronic keyboard using any of the above methods.
- Click the Options button on the on-screen keyboard.
- In the menu that appears, click on “Control the launch of the on-screen keyboard at login.” There you can set the on-screen keyboard to be the default. In the electronic keyboard parameters you will find other interesting settings.
Now you know how to launch an electronic keyboard on your computer, and you will not be lost, despite the surprises of your main input device.
How to change the default keyboard on Wear OS
Wear OS allows you to choose from two native input methods or third-party alternative apps that you can install to input texts the way you want. You can set the method or app you like as your default typing option.
To do this, open the Settings app on your Wear OS watch. You can do this by tapping the crown button or side button, scrolling through the list of apps, and then tapping the Settings app.
Alternatively, you can access the Settings app by unlocking your watch, swiping down from the top of the Home screen, and then tapping the gear icon at the top of the Quick Settings screen.
When the Settings app launches, scroll down and select the Personalization option.
Then click on the “Input Methods” option.
On the next screen, select Manage Keyboards.
Now select the keyboard you want to use for everything on your watch. You can also choose a keyboard from a third-party app that you may have installed on your watch.
After this, the selected keyboard is what will appear from now on whenever you are about to type something on your watch.
What to do if the required language is not available
If, when switching the keyboard language using one of the above methods, you find that the language you need is not in the list of available options, you need to add it to this list. The procedure to follow depends on the version of Windows.
1. Go to the settings menu for languages and text input services of the operating system (open the “Languages and text input services” window).
This can be done in one of the following ways:
a) if the language bar is displayed in the lower right corner of the screen (see what the language bar is above), right-click on it and select “Options” in the context menu that appears (see the figure, click on it to enlarge);
b) if the language bar in the lower right corner of the screen is not displayed, open the language settings menu through the control panel. For this:
• in Windows XP – go to the “Start” menu (click the button in the lower left corner of the screen), then open the “Control Panel” item, in it select the “Language and Regional Standards” section.
A window will open in which you need to go to the “Languages” tab and click the “Details” button (see Figure 1 on the right, click on it to enlarge);
• in Windows Vista, Windows 7 – go to the “Start” menu (click the button in the lower left corner of the screen), go to the “Control Panel” and there, in the “Clock, language and region” section, click on the “Change layout” item keyboard or other input methods." The “Language and Regional Standards” window will open, in which, on the “Languages and Keyboards” tab, you need to click the “Change keyboard ...” button (see Figure 2 on the right, click on it to enlarge).
The result of performing the above steps should be the opening of a window called “Languages and text input services”. In it, on the “General” tab, the input languages available on the computer will be displayed (see the figure below).
2. Click the “Add” button located to the right of the list of available languages. An additional window will open in which you will need to find and select the desired language, and then click the “OK” button. The window for selecting additional languages in Windows XP looks like a drop-down list; in newer versions of Windows, it looks like a drop-down list. In the drop-down list, before clicking the “OK” button, you need to find the item with the desired language, expand it, select and highlight the appropriate option (see the figure below).
After that, in the “Languages and Text Input Services” window, click the “Apply” button, then the “OK” button.
Numeric keyboard along with on-screen
What happens if you check the box next to “Enable numeric keypad” (Fig. 5) and click “OK”? As a result, in addition to the on-screen keyboard, a digital keyboard will appear (circled in a red frame in Fig. 6).
In the lower right corner in Fig. 6 there is a NUMLOCK key. Depending on whether it is enabled or disabled, the numeric keypad can have two different appearances. They are outlined in red in Figures 6 and 7 below:
Rice. 6. In the on-screen keyboard, the numeric keypad is enabled when the NUMLOCK key is disabled.
In Figure 6, the numeric keypad operates in cursor control mode. There are arrows to move the cursor around the screen: up, down, left, right and other keys. A regular, physical keyboard also has a numeric keypad, see THIS article for more details. .
If you press the NUMLOCK key, it will turn blue (Fig. 7). In addition, the numbers 0, 1, 2, ..., 9 will appear, as well as buttons with arithmetic operations. The slash "/" means "divide". The asterisk "*" is "multiply". The minus sign "-" performs a "subtraction". The plus sign "+" gives "addition". "." icon needed for decimal numbers, for example 0.51 or 10.818
Rice. 7. On-screen keyboard along with the numeric keypad when the NumLock key is pressed.
Entering text using the on-screen keyboard
The checkmark next to the “Key press” option (Fig. 5) allows you to type text by pressing keys on the on-screen keyboard.
This type of text input will be familiar to those users who are accustomed to working with a virtual keyboard on a tablet or smartphone.
Changes on Samsung smartphones
Samsung mobile equipment includes an alternative option for installing the Russian language. Work is possible provided that the version of Android from 4.2 is used. This method involves connecting the gadget to a PC using a cable, after which you should download the localization folder to the system.
Basic rules to follow:
- Using the official website, install a program called MoreLocale 2.
- After this, set up developer mode on your smartphone. To do this, you need to go to the settings menu, find the “About phone” section, where the build number will be presented. You need to click on a similar inscription about 10 times, after which a pop-up window will appear notifying you that administrator rights are open (You are developer now).
- Now you need to go back to the settings and click on the “For Developers” section. In the menu, move the tab left or right with your finger, then click on “USB Debugging” and agree to the following notification.
- Before connecting the smartphone to the computer, you need to install the utility on the system drive, make a separate folder named “adb”, where the program material will be unzipped.
- Connect the smartphone to the PC, enable USB debugging on its display and wait a while until the system is detected. After this, call the command menu using the Win+r button combination or go to the Start-Run menu, specify cmd in the menu.
- Enter the address cd c:adb to go to the desired folder, enter adb devices.
- During the operation, the display must be unlocked. If after entering the word appears next to “devices”, then all operations were done correctly. After this you need to enter adb shell.
- Fields: pm list packages morelocale and pm grant jp.co.c_lis.ccl.morelocale, permission.Change_CONFIGURATION.
- The application should display a notification similar to the one in the image, and then you can disconnect the smartphone from the computer.
- Now the device should be restarted and the utility enabled. It must contain the required language. Click on the desired option to change the language throughout the gadget.
Types of layouts on Android smartphones
Modern Android has standard types of layouts with English. They are divided into 5 different categories. It's easy to find out which one is on your phone. Open a social network and start texting. Now translate to English using space
Pay attention to the first 6 digits. Match them with the list:
- QWERTY;
- QZERTY;
- Dvorak;
- QWERTZ;
The most popular is the standard layout called Kverti. It is used on all personal computers and is universal. Its name comes from the location of the first six digits. The rest are more specialized, suitable for certain models and devices
Before buying a mobile phone, pay attention to this fact. In the salon they let you see the phone in operation, you can evaluate the convenience of the layout
Everything is the same in the new models.
How to enable virtual keyboard on Windows 7
To open the virtual keyboard on Windows, just open “Start” and type “On-screen” in the search bar - the first of the proposed results will be the on-screen keyboard. But if you are not looking for easy ways or are physically unable to type anything in the search bar, use the following method.
- Go to the Start menu
- Select the folder “All programs” - “Standard”.
- "Special abilities".
- In the proposed list we find the item “On-screen keyboard”.
If you plan to use the on-screen keyboard frequently, we recommend dragging the program shortcut to the taskbar (the area next to the Start menu) - this way you can quickly open the keyboard without having to go to the Accessibility section every time.
You can also assign a call combination to an application for quick access - however, this is only relevant if you still have a physical keyboard and the ability to use it. To do this, right-click on the “On-Screen Keyboard” shortcut and open “Properties”. This can be done in the previous step - while you are in the Start menu.
In the Shortcut section, you will find the Shortcut area. If it says “No”, then the combination to launch the keyboard has not yet been assigned. Come up with a keyboard shortcut that is convenient for you and type it in the appropriate field. Be careful - you should not use combinations that are already taken, otherwise they will stop working properly and will be overwritten to open the keyboard.
To save the settings, click “Apply” and “OK”, and then close the settings.
On-screen keyboard shortcut settings for quick launch
- On the taskbar
- On the desktop
- Launch hotkeys
- On the taskbar
Pinning the on-screen keyboard to the taskbar is easy. To do this, again, through the “Start” menu, in the “Special Features” folder, find its shortcut and by right-clicking on it, call up the context menu, in which we select the corresponding “Pin to taskbar” item.
Please note : to speed up the launch of the virtual keyboard, you can also pin its shortcut directly to the Start menu itself.
- On the desktop
How to set up the on-screen keyboard to launch from a desktop shortcut
If you need an on-screen keyboard shortcut directly on your desktop, just create one. This is done in a few simple steps. But, before you begin this procedure, you need to find out where the executive file of this application is located. To do this, again through the “Start” menu we find the on-screen keyboard shortcut and, by calling the context menu, as described in the previous step, open its properties.
Then, in the “Shortcut” tab, copy the entry from the “Object” column.
Next, anywhere on the desktop, right-click and select “Create” and “Shortcut” from the context menu that appears.
In the next step, paste the previously copied entry and click “Next”.
In the newly opened window, assign a name to the shortcut, as shown in the screenshot below.” You can name it in your own way; this will in no way affect the performance of the program.
After clicking the "Done" button, a virtual keyboard shortcut will be created on the desktop.
- Launch hotkeys
How to open the on-screen keyboard using hotkeys
Everything is very simple here too. The fact is that to launch system programs and files, the operating system provides a function for manually assigning hot keys, although with one “But”. The fact is that the assigned combination consists of three buttons, two of which are blocked by the system. That is, it is impossible to change them. The user can select only the third key.
This is interesting: What kind of program is Unity Web Player, installation method, removal, description of how the extension works
So, again we go to the shortcut properties section of the program in question, as described in the previous method, and in the “Shortcut” column, by pressing any of the keys suitable for launching it, we assign our own combination. In our case, we assigned the “k” key, from the word “keyboard,” as the third button. You can assign any other one.
After completing these steps, click “Ok” and check the functionality of the given combination.
What to do if the language on the keyboard does not switch on Windows 7, 8, 10
Switching layouts is one of the main functions of the OS. Language switching is used almost everywhere, so the situation when the layout does not change causes some difficulties when working on a computer.
There can be many reasons for this malfunction, and it is impossible to say with certainty what exactly caused the problem.
The first thing to do if the language stops switching is to restart the computer. Most often this solves the problem, but if nothing has changed, then it is worth trying several effective methods.
Adding a language
If there is a language panel on the task panel, and it is possible to select all languages, then you can skip this instruction. Otherwise, you can try changing the panel settings. The malfunction may have occurred due to the fact that only one language is installed on the system.
The procedure is quite simple:
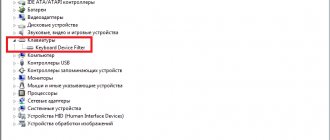
- In the Start menu, look for Control Panel. Here we need to change the viewing mode from categories to large icons. Then we look for the Regional and Language Options component.
- After opening the window, go to the Languages and keyboards section. Then you need to click on Change keyboard.
- Now we check how many languages are installed on the system. If there are several languages in the list, then you can move on to the next section, but if the system has one language, switching will not occur and you will need to add another language. To do this, click on the Add button.
- In the list that opens, look for the required language and press plus to open possible layouts. We are interested in the Keyboard item, in which we look for the classic layout and put a tick on it. Confirm by clicking OK.
- After all the manipulations, one more value should appear in the list. Above the list you can set the language that will operate in the system by default. We confirm all actions by clicking the Apply button.
Using Registry Editor for Beginners
Changing the keyboard shortcut
Another solution to the problem is to change the combination that is used for the change. The hotkeys may have been reset and need to be reinstalled.
To do this, repeat the steps in the previous section to go to the panel settings.
To change these settings, highlight the “Switch input language” item and click the button below (Change keyboard shortcut). There are three options to choose from:
- Combination of Ctrl and Shift
- Left Alt and Shift
- Accent mark or letter E.
Select what you need and confirm your choice.
You can also assign your own combination for each language, for which you need to select the second item in the keyboard switching window.
If all else fails
If all else fails, you can try launching the panel manually. To do this you need:
- Go to the path C:\WINDOWS\system32
- Find the ctfmon.exe file and run it
After launching it, the panel should appear and switch the layout.
If this does not help, then we try to fix the registry. In this case it is necessary:
- Open a command line (press Win+R at the same time). Then enter the regedit command, which will open the registry editor.
- In the editor itself, you need to follow the path HKEY_CURRENT_USER\Software\Microsoft\Windows\CurrentVersion\Run
- You need to create a new element in the directory, for which we right-click on an unoccupied space in the window and in the drop-down menu click Create, and then String parameter
- Change the name of the created element to ctfmon.exe
- Open the created value by double-clicking and enter the value C:\WINDOWS\system32\ctfmon.exe in the field
- The setup is complete. Close the editor and reboot.
Settings on Android 10
If you are using a modern version of Android (for example, Android 10), then adding a new language to the keyboard should not cause you any difficulties. First, you need to open the menu with Device Settings. This can be done through the list of all programs, using the top curtain, or using an icon on the desktop.
After opening the settings, you need to go to the “System - Language and input - Virtual keyboard” section.
As a result, you should see a list of virtual keyboards that are installed on your Android phone. In our case, there are only two keyboards: Gboard and Google Voice Typing. Here you must select the keyboard you use, go to the “Languages” section and click on the “Add keyboard” button.
Next, a list of all languages that can be added to this virtual keyboard will appear. This list is usually quite large, so it is best to use the search. Enter the name into the search and click on it. After this, all that remains is to select one of the proposed options and click on the “Finish” button.
That's all, the input language has been added. You can open the keyboard in any application and try switching the layout.
Why doesn't the on-screen keyboard turn on?
When a physical device fails, it is stressful, but does not cause any particular inconvenience, because there is a built-in virtual analogue. However, when the virtual keyboard refuses to turn on, things get serious. The user becomes literally helpless, limited to only a few manipulations that can be performed using a computer mouse. Other functions are in stop mode.
Of course, you can try to open it using the monitor's control panel, or through the tray (where it is located depends on the version of the operating system you are using). But it happens that even in this way it is impossible to launch it. The problem lies in the computer software, possible infection of the device with viruses, malware that disrupts the performance of processes.
How to change the language on the on-screen keyboard
For people with disabilities or who do not have a regular keyboard, Windows tools have an electronic one. It completely replicates all the buttons on a standard keyboard; you can press letters with a mouse or other pointing device. If you need to change the layout, you can use the mouse and the language bar in the system tray (the method is described above) or the following instructions:
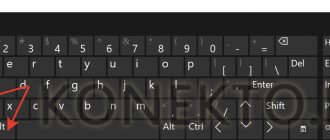
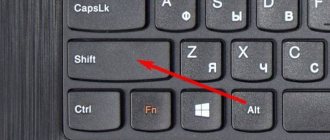
- Click on the Alt button image once with the left mouse button.
- Then click on Shift twice.
- You can change the sequence: once with Shift and twice with Alt.
- EEG - what kind of research is it? What does electroencephalography of the head show and how to decipher the results
- Pain in the right side under the ribs
- Pie with saury
How to remove the keyboard lock on a computer?
Instructions
- Press the Fn+NumLock key combination. ...
- If you actually blocked the keyboard, use standard keyboard shortcuts, say, Fn+F12, Fn+F7, Fn+Pause, Win+Fx (instead of x there is any number from 1 to 12).
Interesting materials:
Where do swallows go from Moscow? Where to use 18650 batteries? Where to use clay in the country? Where to use smoked paprika? Where to use an avocado pit? Where are fat-soluble dyes used? Where is it copied on the iPhone? Where is the easiest place to go after college? Where is it better to go to the Maldives or Seychelles? Where is the best place to go to the sea in the UAE?
How to change the standard keyboard
One of the advantages of a smartphone running Android is the ability to customize each control element for the user. The same applies to the method of entering text. The standard interface can be replaced with any other one that will have images or a different display of letters.
The standard keyboard is quite easy to replace. First, the user needs to download it. There are many apps in the store that provide a different keyboard interface. After this, it should be installed. To do this, you must use the following instructions:
- Open your smartphone settings.
- Select the “Input language” section.
- Go to “On-Screen Keyboard”.
- The screen will display a list of keyboards that the user has installed. You must choose one of them.
- Confirm your actions by clicking on “OK”.
At this point, the user needs to disable the old keyboard, if this did not happen automatically. It is also important to check the new input method. It should work completely. To do this, you need to open notes or any message. After that, enter text from the new keyboard.
It is recommended to install only verified applications. Otherwise, the input method may not work correctly.
How to disable automatic loading of the electronic input device when logging into the OS
Now let's look at how to enable or disable the Windows 7 on-screen keyboard when loading the OS. Autoloading the virtual keyboard is especially relevant if you use it on a regular basis, or are faced with the situation of entering an account password for the first time in this way. Use one of the options below.
1. Bring up the keyboard on the computer screen using one of the methods described above. At the bottom, click the “options” button. Follow the link to control when the on-screen keyboard starts when you log in.
2. Get to Accessibility in Control Panel using method 2 described above for Windows 7, 8. Select the option marked in the screenshot.
In the control panel element that opens, check the box next to “use the on-screen keyboard.” Click OK. After which the computer keyboard will automatically appear on the monitor screen every time the OS boots. By performing the reverse steps, you can remove the on-screen keyboard from Windows startup at any time.
The language does not switch the first time, what should I do?
The latest Mac OS update has caused a lot of complaints from users that the switching does not happen with a single press of hot shortcuts. Changing the language on a macbook occurs only after the second time. It’s worth figuring out how to quickly change the language in this case.
The main innovation of the OS is the addition of the Siri voice assistant; it is called by default by pressing the Command + “space” hotkeys. A new software product causes conflict situations.
They solve the problem in two ways: you will need to change the language and keyboard layout on the MacBook or the voice assistant. How to change the language and hot combinations was described above.
Eliminating combination conflicts in settings
In order to find the problematic combination and understand how to switch the language on a MacBook, the OS developers came up with an alert system. On the left side of the window, you should pay attention to the presence of exclamation marks next to the desired command. They are the ones who indicate the problem. In this case, repeating combinations will be listed in the right window.
In order to switch the language quickly, you need to select a combination that is not used for other commands.
Changing Siri call settings
After adding the Siri voice assistant, the developer assigned it the “Command-Space” combination. The OS uses the same key combination to change the language, so a conflict occurs.
If you do not plan to use this application, then the easiest way is to disable it altogether in the settings.
- Find Siri in system settings.
- On the right side there is a toggle for “Enable Siri.” If you remove the icon, the application will not work at all.
- Here they also change the set of buttons that call the voice assistant. The new value is set opposite the “Keyboard shortcut” line.
If you do not plan to use Siri on an ongoing basis, then you should be prompted to assign any other combination.
How to change layout keys on Mac OS
To assign buttons that, when pressed, will change the language, follow these steps.
Open Keyboard Settings
Open the main settings of your Mac computer by clicking on the apple icon in the upper left corner and selecting “System Preferences” from the drop-down menu.
In the list that opens, find and open the setting called “Keyboard”.
Choose a keyboard shortcut that suits you
In the “Keyboard Shortcuts” tab on the left side, select the item called “Input Sources”. After this, on the right side of the settings window, you can create any key combination convenient for you, which will be responsible for changing the language on your Mac. Just click on the current combination, then enter a new one on the keyboard, for example - cmd + spacebar.
Keyboard shortcuts
Modern programming provides many options for keyboard shortcuts.
On almost every button you can see 2, 3 or even 4 symbols. Typically they work in combination with the Shift key, but there are other variations. Also, many manufacturers use combinations of the Fn key with other buttons. They can be found at the top of the keyboard. They are responsible for launching one or another process: decreasing or increasing brightness and volume, opening Windows settings, or completely turning off the sound. In fact, each manufacturer provides for the implementation of its functions when a certain key combination is pressed and therefore listing them is not advisable.
What are the default input methods in Wear OS?
When you start using Wear OS, you are given two options for input method - Google Keyboard and Google Handwriting Input.
As you'd expect, the first option gives you a full-size, functional keyboard that you can type on or move around to enter words as you please. Although you have all the keys on one screen, they are all crammed, there is no space between them, and if you have large fingers, you will face problems when typing directly from your watch.
Google Handwriting, as the name suggests, is for those of you who don't feel comfortable typing on the Google keyboard. You can enter a letter or part of a word by dragging your finger across the space to draw the letter, numbers or part of the word. This can be a better alternative to Google Keyboard if you don't like typing on a keyboard on a very small screen.