Setting up the keyboard on Windows
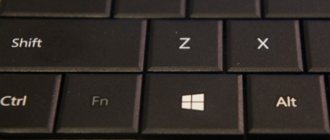
Windows does not allow you to reassign actions for all keys. For example, the key with the icon of the operating system itself - Windows - is inviolable. It cannot be reassigned, it can only be disabled. In other cases, to reassign a key action, you must perform the following steps:
- Make sure the keyboard you are about to configure is connected to the system. This can be done through the "Device Manager" in the "Control Panel".
Make sure the keyboard is connected - Launch “Mouse and Keyboard Center” (if it is not there, download and install it from the official Microsoft website).
Install "Mouse and Keyboard Center" and launch it - Select from the list of keys the one for which you want to reassign the action, and double-click on it.
- Select the command required for the key in the list that appears.
Unlike versions 7 and 8 of Windows, Windows 10 does not allow the user to customize the keys, but they can be reassigned using third-party utilities.
Method 2: SharpKeys
This program has wide functionality and, in addition to performing its main task, allows you to assign various built-in special functions of the Windows system (for example, switching language or keyboard layouts) to any keys. In order to reassign a non-working key to another (working) key, you must complete the following steps:
- Launch the SharpKeys program and click the “Add” button.
- On the left side of the window, select the key you want to reassign, and on the right side, select the key or function that will be used when you press the reassigned key.
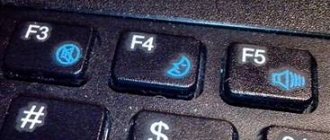
- For example, in order to assign a call to the “Calculator” program to the “F2” key, you need to select “Function: F2(00_3С)” in the left column, and “App: Calculator (E0_21)” in the right column.
- You can also disable unnecessary keys.
- After you have added the required number of key reassignment rules, you must click the “Write to Registry” button, as a result of which all these rules will be written to the operating system registry.
- Restart your computer for the changes you made to take effect.
How to program key combinations
The official Windows utility, “Mouse and Keyboard Center,” will help you program key combinations. You can download it from the Microsoft website. It is easy to use and has an intuitive interface.
After downloading and installing the program, find your keyboard in it, select “Keyboard shortcut” in the list and, by entering the combination in the field, assign functionality to it.
Using the Mouse and Keyboard Center app, you can program key combinations
Why do you need MapKeyboard?
The main purpose of the MapKeyboard program is to reassign (remap) any keyboard keys. In other words, the user can assign the desired button the function of any other key. For example, when you press “F12” the “Caps Lock” key function can be triggered.
The MapKeyboard program is capable of reassigning the functionality of a large number of keys simultaneously. This will allow, for example, to use such rarely used keys as “Insert”, “Scroll Lock”, “Page Up/Page Down”, “Pause Break”, etc. for entering numbers or any other useful functions.
Also, the MapKeyboard utility will be useful for a keyboard with completely non-functional or faulty keys (works only after several presses, gets stuck, etc.) keys. The user will be able to programmatically replace inoperative similar keys by assigning their function to working buttons.
The application is of particular value for fans of computer games in which control is carried out by pressing many keys (for example, MMORPG games). Although the games themselves often have the ability to reassign buttons, doing this through MapKeyboard is much more convenient and easier.
What to do if the keys are reassigned arbitrarily
The keys cannot be reassigned on their own, since the computer itself cannot do anything. There are several reasons for the keyboard to malfunction. First of all, check your computer for viruses and only then try the methods described below.
Outdated keyboard drivers
A situation may arise when the system on the computer is updated, but the keyboard drivers are not. In this case, we expect a conflict between the system and the equipment.
- Open Windows Device Manager via the search bar in the Start menu.
- In the list of devices, find the “Keyboards” item and expand it.
Find "Keyboards" - Call the context menu with the right mouse button and click on “Update drivers”.
- Select "Automatically search for updated drivers."
Select the first item in the list - Follow the system instructions.
Don't forget that each device has its own operating life. If the keyboard lasts longer than 5 years, then you need to change the equipment.
Sticky keys
If the keyboard malfunctions appeared after a child sat at the computer or a pet ran across it, most likely, some key sticking was turned on. For example, holding down the Windows key in combination with the top row of letters controls the windows of the system, and when simply typing text, you can get absolutely undesirable results. To fix this:
- Press the Shift key 5 times in a row to bring up the sticky settings.
Follow the instructions in the utility window - Click on the "Options" button to enable the settings window.
- Open the “Keyboard” tab and click on the “Settings” button in the “Sticky Keys” item.
Click on the “Settings” button in the “Sticky Keys” item - Uncheck the “Use this method of inclusion” checkbox.
Uncheck the box “Use this method of inclusion” - Click OK and restart your computer. This will disable sticking throughout the entire system.
Starting with Windows 7, the entire setup is even faster. Press Shift five times, follow the link “Go to the center...” and turn off everything that interferes there.
Turning on the computer system unit through BIOS
To make the settings, we need to enter the BIOS, and to do this, we restart the computer and at the start of loading stage, press the Delete or F2 button.
Attention! It is better for an inexperienced user not to conduct experiments in an open window. Some actions may cause the entire system to malfunction.
- If you have a Phoenix BIOS.
Entering the BIOS
, open the
Power
and select
APM Configuration.
A selection list will open in which you can select to turn on the computer from the keyboard, select the item: Power On by PS/2 Keyboard,
in which you can choose which buttons you will use to turn on the computer:
- Space Bar - enable with a space bar.
- Ctrl-Esc - enable with a combination of two keys.
- Power Key - enable with a special key, which is available in the extended version of keyboards.
Finally, save the settings by pressing F10
, and confirm the action with the
Enter key.
- If your computer has an Award BIOS.
Similarly we enter Bios
, select an item from the list of the
Power Management Setup menu,
in the window that opens, select the item
Power on by Keyboard
and in the drop-down list - one of the items:
- Power on by Keyboard Password
: turn on the computer using a password. To enable, enter the password and press Enter. - Any KEY
: turn on the computer using any keyboard key (the main thing is not to forget it later
