Author of the article
Kristina Gorbunova
Higher education in the specialty “Information Systems”. In the field for more than 7 years, he develops websites on WordPress and Tilda.
Ask a Question
Each router and modem has its own IP address. By entering this identifier into the browser, you can access the network device settings. It will come in handy if you need to change your Internet password or connect several routers into one network via WDS. Let's look at how to find out the router's IP address on devices running Windows, Linux and Mac OS.
Default router addresses
Home networks usually use standard router IP addresses:
- 192.168.1.1;
- 192.168.0.1.
Some routers will have a different default hostname. For example, for Xiaomi it is 192.168.31.1. Upvel devices use 192.168.10.1 as their hostname. This data is relevant if the wizard did not change the device identifier during initial setup. If the parameters have been adjusted, you can find out the IP address of the router on the local network on the computer to which it is connected.
Installation and activation
The process is simple, the main thing is to do everything carefully and with a smile:
- Select a suitable area for the tp access point. As for installing the router, hanging it, or installing it in some other way - decide based on the situation and model. The main thing is power, keep the network cable loose, do not pull it
- Check the button press (Reset / WPS) - it should work easily and freely.
- Screw removable antennas into the installed places, if they are included with the router.
- Connect the power supply by inserting the wire with one end into the socket and the other into a specific socket. The indicator light should light up.
- Insert the Internet cable into the WAN/Internet port, usually it is colored differently. Connect the cable between the LAN ports of the router and the network card of the PC/laptop.
Devices with Wi-Fi can be configured with a wireless option. The “air” option is relevant if you cannot connect to the router via LAN.
Label
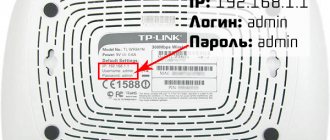
On the bottom of the case there is a sticker with the main specifications of the router and the IP address. The sticker indicates the login information for the web interface. The address can be in numeric or alphabetic format. After authorization, it is recommended to change the standard password to a more complex one.
TP-Link
Asus
Automatic configuration
Automatic router setup from TP-Link begins with determining the connection type:
- Select “Quick setup” in the navigation menu.
- Click on the “Next” button.
- Select a method for determining the connection type and telecommunications service provider.
- ABOUT.
- Look into the agreement concluded between the subscriber and the provider. You need to find the username and password. Enter your credentials in the appropriate field.
- If you have a dynamic IP address, the MAC Cloning window will appear. If you are connecting to the Internet from a host computer, then you should o.
- If you are using a static IP address, you will see a different window on the screen. You must specify the service provider's IP, subnet mask (255.255.255.0), default gateway, primary and secondary DNS. All necessary information can be found in the contract for the provision of telecommunications services or call customer support. It makes no sense to give specific examples, since we all use the services of different providers.
- Next you need to configure the wireless mode. In the “Wireless Broadcasting” item, select “Enable”. In the “Wireless network name” section, specify a custom name for the access point; you can use the default name. In the “Region” tab, indicate “Russia” or another country. In the “Mode” item, it is recommended to use “Mixed”. Leave the “Channel Width” and “Channel” parameters unchanged. The device will automatically determine the preferred one. Select the maximum data transfer rate “300 Mbit/s”. Set the encryption protocol to “WPA2-PSK”. Come up with a unique access key combination.
- Click "Finish".
If everything is connected, then you can go to any website on the Internet to check the connection. For more advanced users, below we suggest performing the configuration yourself to customize the settings for yourself.
On Windows
The computer exchanges data with devices connected to it and automatically reads the network address from the router. The user can find it out in two ways: using the ipconfig or tracert commands, in the connection status information. You can also install a special utility on your computer that collects information about your network connection.
In Windows network settings
- Open Start > Settings > Network and Internet > Network and Sharing Center.
- Click on “Ethernet” or “Wireless”.
- In the window that opens, click on the “Details” button.
- The IPv4 default gateway value specifies the router's IP.
When checking IP through network settings, you only need to check IPv4 parameters. The local IPv6 address is not used to access the modem web interface.
In Windows 10, you can find out the IP address in the network profile properties. For this:
- Click on the network icon in the lower right corner.
- In the tab that opens, click the properties of your network connection.
- Scroll down the list of options to properties. The value of the IPv4 DNS servers item will indicate the router address.
Via command line
- Using the Win+R combination, launch the Run dialog box. This keyboard shortcut works on Windows 8, 10 and other OS versions. In the window that opens, enter cmd.
- In the command line that opens, enter ipconfig and press Enter. The main gateway will contain an IP address for configuring the router.
Another way to find out the access point address is to use the tracert command. It determines the route for the data. On the command line you must enter tracert and the address of any website. In the example this is google.com. The first identifier is the router's IP.
If the Win+R combination did not work and you were unable to open the Run window, you can launch the command line from the Start menu. Open it and scroll to the "System" folder. There will be a command line and other tools for setting up and working with Windows.
Using utilities
Advanced IP Scanner is a free program for collecting information about your network connection. Scans all devices connected to the local network, provides access to FTP servers and shared folders. Runs without installation.
The program is Russified. To determine the IP address, click on the “Scan” button.
Information about all devices, their names on the network and addresses of access points will appear on the screen. The first IP in the list belongs to the router.
The program “10-Strike: Network Scan” has similar functionality. The utility scans the LAN, finds active computers, hosts, and open ports. Completely free.
Using programs
There are many special utilities that allow the user to find out the local address of the IP router. One of the simpler and more effective options is the NetAdapter Repair All In One program.
The main task of this software is to eliminate system errors and diagnose network equipment. In addition, the utility displays detailed information about connection types and parameters of wireless devices. You can find the network address using this utility as follows:
- Install and enable the software.
- On the right side of the screen, find the “Default Gateway” item.
- The router address will be displayed opposite the line name.
On Linux
To view the IP, you will need to open the terminal using the combination Ctrl+Alt+T. After that, enter the command $ ip route show. The first line will display the router address.
You can find out the internal IP by viewing the packet routing table. To do this, enter $ route -n. The first entry is the router address.
The router's IP is also displayed in the ARP entry table. It opens with the command $ arp -a.
Everything about wireless router settings
Step-by-step instructions - connecting to the Internet, setting a network password, advanced parameters: WDS, MAC addresses, connection encryption algorithms.
TP-Link control panel home page
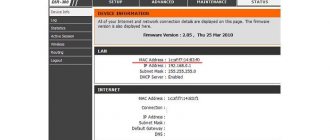
You cannot change anything on the main page (Device Info) - this is a purely informational section. At the top there is information about the firmware and model version, below are the current indicators of the access point and connection with the provider, as well as the date and time.
Attention! When the router is fully configured, all values in the Device Info table should have non-zero values. If there are zeros anywhere (or values like 0.0.0.0), there is something wrong with the connection. True, the repeater mode allows zero values.
On Mac OS
Built-in OS tools allow you to find out the IP address of the modem connected to the computer. Algorithm of actions:
- Click on the menu button in the upper left corner. Select "System Settings".
- In the window that opens, select “Network”.
- A window will open on the screen with general information about all network interfaces of the computer and network. The IP address will be listed below the connection status.
You can find out the IP through the menu bar. For this:
- Hold down the Option key on your keyboard.
- Click on the Wi-Fi icon while continuing to hold the key.
- A window with the characteristics of the current network will appear on the screen. Find the line with the IP address.
You can check the access point address through the terminal. To launch the program, hold down ctrl and spacebar. In the window that appears, enter Terminal. Enter ipconfig getifaddr en0. The IP will be displayed immediately after executing the command.
ifconfig |grep inet is another command that allows you to determine the IP of the access point. It requests additional information about the current Internet connection.
Using the Windows command line
Another method for finding a network address is to use the Run command and the Command Prompt.
The procedure is carried out as follows:
- Go to "Start".
- Find the section with standard programs and click on the “Command Line” tool. You can also press several buttons at the same time - WIN + R and specify “cmd” in a special menu.
- When the command entry window appears, the user will need to enter “ipconfig/all”.
- Next, a page with information about the wireless LAN adapter will open.
- Upon completion, the user will need to find the default gateway line, which contains the local address combination.
From your phone or tablet
If you don’t have a desktop computer or laptop at hand, you can determine the router’s IP using your smartphone. To do this, go to the “Settings” menu and select the “Network and Internet” section. Turn on Wi-Fi and click on the name of the network you are connected to.
In the section that opens, look at the “Gateway” item. The numbers indicated there are the IP of the router.
You can determine the IP for connecting to the router’s web interface using third-party programs. Let's look at their work using Wifi Analyzer as an example.
- Connect to Wi-Fi.
- Launch the program.
- Select the network you are connected to from the list.
- Server IP is the router address.
Correcting network interface settings
- Press the + R keys simultaneously.
- Now we enter exactly the same command as in the picture above.
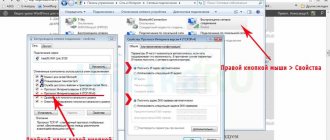
- Go to the properties of the connection through which you are connected to the router.
- Make sure that IP and DNS settings are set to automatic in Protocol 4 properties. Let's look at the screenshot above.
If you still cannot connect after this, check whether you entered the address there. It must be entered exactly into the address bar, not the search bar.
How to change router IP
The default address of the device can be changed in the local network (LAN) settings. To do this, you need to launch the router's web interface. The general algorithm for the IP replacement procedure is the same for all devices, but due to differences in software, the procedure may differ.
TP-Link
The IP address of the TP-Link router is set in the LAN settings. The company produces devices with five different interfaces. Let's look briefly at each of them.
In the gray-green interface, to change the IP address of the Wi-Fi router, go to the “Network” tab, subsection LAN. Be sure to save your changes.
In the blue Smart interface, you first need to open the “Advanced Settings” section, and then the LAN subsection.
In the standard turquoise interface, IP address settings are made through the “Network” section of the LAN subsection.
In the smart version of the turquoise interface, you need to go to the “Advanced settings” section.
In Reliably Smart software, you should also change the IP in “Advanced settings”.
After entering the new IP, be sure to click on the “Save” button.
D-Link
Open the "Advanced Settings" section.
From the Network icon, select LAN.
In the window that opens, find the “IP address” field and enter a new value. Be sure to click on “Apply” in the window.
After saving the new address, the router software will prompt you to change the DHCP server pool. Click "OK".
Save the changes you made and reboot the router.
Asus
Open “Advanced Settings”, find the “Local Network” tab. In the IP address line, change the value and click Apply.
Other models
Many Xiaomi routers are supplied without Russian and English firmware by default. After authorization, the interface is loaded in Chinese.
To understand the router settings, you can enable automatic text translation from Russian to English in the Google Chrome browser. The interface will immediately become clearer. To change the IP address, go to the “Settings” section.
Open the local network subsection.
Find the “Local IP” building. There you can change the address. Be sure to save your changes.
The Netgear router access point address is changed by switching the web interface to advanced mode. You need to open the LAN settings, click the "Edit" button, and then change the IP address. Be sure to click the Apply button after making changes.
In the old Netgear firmware, the LAN options are located in the Advanced section on the main screen.
The further procedure is the same as in the new firmware.
In the Tenda web interface, the local network settings are located in the advanced settings. To access them you need to open “LAN Settings”.
On ZyXEL devices, LAN settings are located in the “Home Network” tab. The address is specified in the IP parameters.
In the firmware of Keenetic routers, IP parameters are also set in the “Home Network” section.
The Alcatel standard address is changed in the LAN settings, located in the Network section.
MikroTik routers are configured through the QuickSet menu.
Switch to Home AP mode through the drop-down list next to QuickSet.
In the Local Network section, change the device IP. In the lower right corner, click on the Apply Configuration button.
SSID
So, the Rostelecom cable is connected to the router, you can start surfing the network... Stop! Now each neighbor sees the younger half of the MAC. The SSID is appended with numbers that need to be changed.
MAC, BSSID
Both parameters nominally characterize the filling of the device, but there is a fundamental difference:
- MAC characterizes wired Internet (Ethernet adapter).
- The BSSID belongs to the wireless part (Wi-Fi).
The first parameter is often simply changed, the second is almost impossible to rewrite or erase. This state of affairs is explained simply: the wire always lies in one place. Intelligence agencies easily recognize the source. Mobile gadgets move, so the only way to identify a subscriber is the BSSID.
Change MAC
The MAC address of an Ethernet network card can be easily changed using standard Windows tools. Router settings often carefully hide a similar router option. The standard approach is as follows:
- Open the Internet or Network tab.
- Select external WAN connection.
- Click on the desired interface.
- Perform the necessary actions.
There are several options. Firstly, it is allowed to clone a PC address. Yes, the MAC of the Ethernet network card will be visible from the outside, which can be changed arbitrarily. Secondly, you can assign your own numbers to the router. There is also an option to return to factory settings.
Note! Some providers change the external MAC upon request.
For what
There are several ways to track the location of the router using technical information (BSSID). It is more difficult to track on the MAS; most of the topics touching on the topic contain complete nonsense or are erroneous.
How to view an external address
The router has two types of addresses: local for the internal network and external. By default, only the local hostname is indicated on the sticker or in the device passport. The external IP address is assigned by your provider when you connect the router to the Internet. For most users, it is dynamic, that is, it changes automatically with each new connection to the network.
A static IP address is provided by Rostelecom and other providers for a fee. It is registered in the settings of the network adapter or Wi-Fi router.
Web interface
You can view the external IP of the router through the web interface. After authorization, open the “Status” tab and scroll to WAN. The IP address specified there will be external and used to connect to the Internet.
Websites
- You can determine the external IP of the router on the website https://ifconfig.me/.
- You can view the external address of the modem on the website 2ip.ru. In addition to IP, the service shows the user’s location, provider name, browser and operating system.
- The IP and host name shows https://myip.ru/.
- If you enter an IP in a Yandex query, information about the external address will appear.
- The site https://www.ip-ping.ru/ also provides users with the opportunity to find out their IP.
When connecting to any website or third-party server, the computer exchanges an external identifier with it. To hide your real IP, you can use VPN, proxy servers, NAT Firewall, but access to these services is paid.
What you need to know to connect a TP-Link router
Wi-Fi connection via TP-Link is quite simple. For the procedure, you will need the router itself, as well as a crimped patch cord cable, through which the device will be connected to the computer for the first time.
Usually the cable comes with the original TP-Link router. All main settings for accessing the network are made from the computer. The user will also need an agreement with the provider for the provision of Internet.
Important! To connect to high-speed network access, the user must have an Ethernet or ADSL cable entering the house.
With minimal knowledge about the operation of routers and types of network connections, users can perform the settings themselves.
Method #1 Sticker
Each device is equipped with a sticker located on the reverse side:
- Turn the router over;
- Study the information;
- The information is in the line of the same name.
As you can see, nothing is simpler. Sometimes the sticker may be on the side of the device - carefully inspect the gadget and you will definitely find the data.
Please note that some devices do not have an IP address line. But there is a link to the manufacturer's website. So if the required numbers are not on the modem case, look for them on the website.
Couldn't see the sticker? You may be using used equipment from which it was removed. Don’t worry, there are other ways to find out the external IP address of a router, and we’ll tell you about them later.
How to protect your Wi-Fi network from strangers?
Even though the Wi-Fi network is password protected, there are still many loopholes to connect to it. To protect yourself from possible unpleasant problems, it is important to take care of maximum network protection. Often, for a typical home network, a few simple methods will be sufficient:
- setting a secure login and password to enter your personal account;
- setting and periodically changing the network password;
- choosing the right encryption type;
- disable the connection option without a password.
If the user wants to completely make his router “impregnable,” then other advanced methods can be used:
- regular firmware updates;
- disabling remote access to the device;
- dividing access into subnets (creating guest access);
- creating hidden Wi-Fi;
- organizing MAC address filtering;
- reduction of coverage area;
- choosing a router with a firewall and VPN;
- scanning the network for the presence of connected foreign devices;
- installation of special equipment and software.
Setting up a TP-Link router from Rostelecom and any other providers is a simple task that even an ordinary user can handle.
Once you understand the parameters and carry out everything according to the instructions, you will no longer have to call a technician. Setup will only take 2-3 minutes. Found a typo? Select the text and press Ctrl + Enter
What is this data for?
Let's figure out for what purpose a combination of numbers is needed.
- To access the settings interface;
- When setting up a local network;
- To change the password for the wireless network;
- To set up the Internet on a PC;
- To test the network.
If you don't know your login information, you won't be able to log in, manage your device, or make changes to how it works, which is why this is so important. Well, we have already talked about how to find out information above.
By the way, if you want to know how to find out the IP address of someone else’s router, then the information may surprise you. You won't be able to do this if you're not connected to a device. You should not try to hack someone else's device to gain access to free Internet.
We told you how and where to find the router's IP address - use the article to find the necessary data at any time!
Possible malfunctions and ways to eliminate them
If the router does not respond to connection to the power supply, the indicators do not light up, you should check the power button. The router may have burned out.
If the router does not distribute the Internet, there are options:
- Due to problems on the part of the provider. In this case, you should either just wait a while or call technical support. If experts say that everything is fine on their end, then the problem is related to the router. It's worth trying to reboot the router itself. In the vast majority of cases this will be the solution.
- There were some problems with the settings. The easiest way is to reset to factory settings using the Reset button.


