- OPENING ISO IMAGES USING STANDARD WINDOWS TOOLS (ONLY WIN 8 AND HIGHER)
- OPENING ISO IMAGES USING SPECIAL PROGRAMS
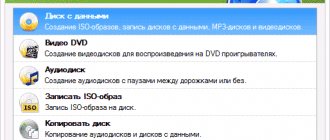
- OPENING ISO IMAGES USING ARCHIVERS
Quite often on the Internet you can find files with the extension “.ISO”, which are disk images.
Typically these are games or distributions of various operating systems, including Windows. Programs are often distributed in ISO format. The ISO image itself cannot be installed, because it is not an executable file. However, it can be opened and/or unpacked. If the ISO image contains, for example, a game, then after gaining access to the contents of the ISO, it can be installed in the standard way.
PassFab for ISO
If you ever need such help, you must find an effective program that can perform the said task. We prefer to use PassFab for ISO in such scenarios as we find it to be the most efficient and easy to use. So, without wasting any more time. Let's look at the procedure to burn ISO file to USB using software:
- 01Simply download and install PassFab for ISO on any available computer and run it.
- 02 Select "Load System ISO" or "Import Local ISO" from the program interface.
- 03Select USB as your media preference. Now connect a blank USB drive to your computer and click "Burn" to continue.
- 04Now just wait a few minutes and the recording will complete.
- 05You will receive a notification with a prompt on the screen.
BUY NOW
This is the most efficient way to burn ISO image to USB.
02 of 19
OPENING ISO IMAGES USING ARCHIVERS
In a way, ISO images are archives, so they can be opened (opened, not mounted as a virtual drive) using an archiver that supports these file formats. Among free archivers, one of the best options is 7-Zip :
- Download and install the program.
- Go to the folder with the ISO file and double-click on it with the mouse or call up the context menu above it, select the “Open with” submenu and then “7-Zip File Manager”.
- In the window that opens, you can see the contents of the ISO file. Click the “Extract” button at the top of the window, then in the “Copy” window, specify the folder to extract the ISO image and click “OK”.
- Once unpacking is complete, go to the specified folder, from where you can begin installing the game or program.
WinCDEmu
If you are looking for an open source ISO mounter, then you need WinCDEmu. The software will be integrated into Windows Explorer after installing the software and you can launch it simply from the context menu.
The operation is very simple, the ISO file can be mounted with one click. You will also be able to mount different types of ISO files. The list includes CUE, CCD, NRG, MDS/MDF and IMG files. The program will allow you to create several virtual disks, but other than that the options are very limited. But it will handle your basic needs.
Download link: https://wincdemu.sysprogs.org/download/
03 of 19
Completing Grub setup
We have everything prepared, now all that remains is to update the Grub bootloader configuration so that new items are added to /boot/grub/grub.cfg and appear in the boot menu. For Ubuntu the command will look like this:
sudo update-grub
On other distributions you may need the command:
sudo grub-mkconfig -o /boot/grub/grub.cfg
Then you can reboot and see what happened:
If something goes wrong, you can press the E and edit this menu item to try to fix the problem directly in the bootloader.
Microsoft Virtual CD-ROM
In 2013, Microsoft released the Virtual CD-ROM Control Panel. The specified program was available in Windows XP, 7 and Vista. The software has been designed in such a way that all Windows users can mount an ISO disk image at any time. The program is also useful for burning discs and restoring backup files.
The latest version of Windows, such as 8, 8.1 or 10, supports ISO files. So you will actually use this program on older versions of Microsoft Windows such as 7, XP or Vista. The program doesn't have many additional features, but it's great for mounting ISO files.
Download link: https://www.microsoft.com/en-in/download/details.aspx?id=38780
04 of 19
Virtual CloneDrive
Virtual Clone Drive is a great ISO mounting tool and third on our list. You can create several virtual disks and mount image files with them, which is very convenient. The program is available for free on the official website.
Mounting ISO files will be easy using virtual drives created with Virtual CloneDrive. But there is a drawback. The number of virtual disks that you can create is only 8, no more. But for most users, 8 virtual disks are enough.
Download link: https://www.redfox.bz/en/virtual-clonedrive.html
05 of 19
Rufus
Features: partition schemes, file systems, ISO auto detection, target system type, boot mode, bad sector checks, ISO burning mode
First Rufus. Rufus is a very small executable that has continually improved its offerings over the years. Along with standard ISO and USB options such as cluster size and file system, Rufus now automatically detects the settings for the selected ISO and enters the optimal settings. In addition, Rufus has a hidden advanced mode with tons of additional options.
Rufus scored 21m12, which is definitely not the fastest. Despite this, Rufus is an excellent USB ISO tool.
WinCDEmu Free ISO Mounter
You know about WinCDEmu, but there is also WinCDEmu Free ISO Mounter. As the name suggests, it is a free ISO mounting software. In everything it is similar to the program of the same name.
The usage is very simple and with just one click you can also get any kind of ISO files. Also supports both 32-bit and 64-bit versions of Microsoft Windows XP and 7.
Download link: https://wincdemu.sysprogs.org
06 of 19
DAEMON Tools Lite
One of the best and popular ISO mounting software is DAEMON Tools Lite. This program was specially designed for the said purpose and has been used for many years to access ISO files by millions of users.
So, DAEMON Tools Lite is one of the best free editing software, but it is only intended for home use. It also comes with several advanced features and supports all old and new versions of Microsoft Windows OS.
Download link: https://www.daemon-tools.cc/products/dtLite
07 of 19
Power ISO
PowerISO is the choice of many users when it comes to mounting ISO files on Windows PC. The program is very versatile and has many additional features. With PowerISO you will be able to mount and even burn various file types such as BIN, ISO, NRG, CDI and DAA.
PowerISO runs on Windows 7 and one of its most notable features is the ability to create a bootable USB drive. As mentioned earlier, the program is also very versatile.
Download link: https://www.poweriso.com
08 of 19
Windows USB/DVD Download Tool
Features : no
Such an eloquent name. You choose your ISO. You choose your media type; USB or DVD. You click the Start Copy and turn it off. At its most basic user interface, with two options, the Windows USB/DVD download tool is almost straightforward, comparable only to USB ISO. This makes it a great tool when installing Windows 10 from a USB drive.
The Windows USB/DVD boot tool appeared in 17m51, which puts it at the top of the ISO/USB time table.
ISODisk
The next tool on this list is called ISODisk. This free software will allow you to create multiple virtual disks, the number of which can increase up to 20. Apart from this, you can also mount the ISO file that you want to burn.
The program works automatically, it will immediately have access to the files inside the ISO. You can also create an ISO file from a CD or DVD.
Download link: https://www.isodisk.com
09 of 19
Checking a bootable USB flash drive on your computer
The most reliable way to check whether a bootable USB flash drive is working is to boot from the flash drive directly on your computer. To do this, when you start the computer, you need to enter the Boot Menu using certain keyboard keys (different models of motherboards use different keys).
Starting a bootable USB flash drive in a different way: enter the BIOS or UEFI to select the boot priority from the USB drive.
Next, make sure the flash drive is working and that it boots.
gBurner Virtual Drive
gBurner Virtual Drive is another very powerful editing tool that will help you create multiple CD or DVD drives and also allow you to manage them. The program is equipped with advanced features and makes it very easy to create virtual disks. You will be able to mount ISO files of different formats. Like WIM, VMDK, VHD and VDI.
Download link: https://www.gburner.com/index.htm
10 of 19
Workshop ISO
Another ISO management program for your PC is called ISO Workshop. The program has been developed very efficiently using modern codes, making it one of the best for mounting and creating virtual disks. The procedure is very innovative and convenient. You will be able to easily convert ISO files and copy the contents inside.
Download link: https://www.glorylogic.com/iso-workshop.html
12 of 19
OSFMount
OSFMount may not have many advanced features, but it can meet your basic needs. You can use it to mount ISO files without any problem. Unfortunately, you will not be able to create disk space using this tool.
So, just download the program and use it to mount ISO files with a drive letter and don't worry about the program making changes to the original file.
Download link: https://www.osforensics.com/tools/mount-disk-images.html
13 of 19
Booting a computer from a USB flash drive or other removable media
In order for your computer to start from a CD, DVD, flash drive or external USB drive when rebooted or turned on, you need to make changes to the BIOS settings. Most modern motherboards provide the ability to boot from a USB flash drive , but on older models you can sometimes only enable boot from optical drives. This problem in some cases can be solved by installing the latest BIOS version, but for very old motherboards such updates may not be released.
After turning on the PC, go to the BIOS by pressing the “Del” or “F2” key. Then find the appropriate menu items, indicating the boot order and devices used for this. Depending on the manufacturer and BIOS version, this can be done in the “Boot” or “Advanced BIOS features” sections. In addition, modern motherboards allow you to specify the device from which the system will boot without reconfiguring the BIOS. To do this, when starting the PC, you need to call the “boot menu”. As a rule, this can be done using the “F12” key.
Checking the bootable flash drive is necessary to make sure that the bootable flash drive is working and can boot from it on the computer. After writing an ISO image or files to a flash drive, it makes sense to check whether the flash drive is bootable.
Bootable media are USB flash drives, CD/DVD disks, ISO images from which you can boot when you turn on or when you restart the computer. If you select boot priority from removable media in the boot menu or BIOS, the computer will start booting from the boot disk.
The user should take care of creating bootable media in advance in order to be prepared for surprises, which, as a rule, happen at the most inopportune moment.
Basically, a bootable flash drive is used when force majeure occurs. Possible reasons why you may need to use a bootable USB flash drive:
- there is a problem with the system, the Windows operating system cannot boot, to restore the system you will need to boot from a bootable USB flash drive or from an emergency recovery disk;
- due to virus infection, it is impossible to launch an anti-virus scanner from Windows; for treatment, you must use an emergency boot disk from the anti-virus manufacturer;
- there was a need to reinstall the Windows operating system;
- After a serious failure, you need to restore or copy files from your computer disk.
Therefore, it is worth having bootable disks with you to be prepared for all surprises. Boot disks are created using a large number of programs. If the flash drive is not bootable, booting the computer from the USB flash drive will become impossible. Because of this, the user will not be able to solve the problems that arise.
How to check that a bootable USB flash drive is working? There are several ways to check a bootable USB flash drive:
- checking the bootable USB flash drive when loading directly on the computer;
- checking a bootable USB flash drive on a virtual machine emulator without rebooting.
In the first case, it is clear that you need to boot from the flash drive and check its operation. In the second case, programs for checking a bootable flash drive will help.
The applications are add-ons to the QEMU virtual machine, which allows you to check the ability to boot from a flash drive or from an ISO image without rebooting the computer.
Using programs, you can find out whether the flash drive is bootable, check the ability to boot from an ISO image or USB drive on your computer. The user will be able to make sure in advance that this flash drive or image will boot on the computer.
The programs presented in the article (MobaLiveCD, Qemu Simple Boot) are various shells of the QEMU emulator, others connect this emulator for testing (WinSetupFomUSB), or are an add-on to the VMware Workstation Player program (VMWare WinPE Test). MobaLiveCD and Qemu Simple Boot check ISO images and flash drives, WinSetupFomUSB checks bootable flash drives, and VMWarePETest checks bootable ISO images.
Pismo File Mount
Pismo File Mount is another valid program that can mount ISO files on a Windows PC. You can conveniently mount ZIP, ISO, Compact ISO files and even convert them to different systems on virtual disks created by the program.
Virtual disks can be configured. The program supports ISO and CISO file systems, and also converts them into disk space very easily.
Download link: https://pismotec.com/pfm/
14 of 19
Novicorp WinToFlash [no longer available]
Features: Multiboot, grub4dos, bootloader options, burn wizard, file systems, burn profiles, auto ISO boot
Novicorp WinToFlash is a popular ISO to USB utility that comes with a user-friendly burning wizard. The wizard will walk you through the burning process, although it's not unique to the utility (Rufus fills in all the information you need, for example). WinToFlash also allows you to create multiboot USB devices, as well as an autoloader for any missing ISO files.
WinToFlash runs at 22m01, which is a decent speed for a tool that will walk you through the ISO to USB process.
TotalMounter
Another complete solution for mounting CDs or DVDs is TotalMounter. Like any other program on this list, TotalMounter can also create virtual disks. It can also burn a specified virtual drive without you even having to access the optical drive.
The program effectively scans the system before performing any of the given steps and is also compatible with both 32-bit and 64-bit systems.
Download link: https://www.kernsafe.com/product/totalmounter/features.aspx
15 of 19
ImDisk Toolkit
ImDisk is a very simple tool. There aren't many extra features here, but all your basic needs will be covered. The tool simply makes it easy to mount any image files from your hard drive or CD. The program is also customizable. The user interface is also simple and attractive.
Download link: https://sourceforge.net/projects/imdisk-toolkit/
16 of 19
DVDFab Virtual Drive ISO Mount
DVDFab Virtual Drive is one of the free tools provided by DVDFab Suite. The program is very easy to use and can create up to 18 virtual disks at the same time. All drives are accessible and it can mount 8 different types of image files.
It is a multifunctional program that is compatible with numerous versions of Windows.
Download link: https://www.raymond.cc/blog/download/did/2029/
17 of 19
YUMI
Features: Multi-boot, ISO auto-boot
YUMI (Your Universal Multiboot Installer) is another ISO-USB multiboot installer with settings for a wide range of Linux, Windows and system utility. ISO. YUMI is easy to use. You scroll down the mailing list and select the ISO you want, then select the appropriate ISO on your system from the box below. No ISO? Yumi will take care of this for you.
YUMI started at 17m46 - slower than the first time I did these tests about five years ago (it was 14m50s back then!), but still ahead of the rest.
Gizmo Drive
Another lightweight and portable tool is Gizmo Drive. The program is capable of mounting multiple ISO, IMG, BIN, CUE, NRG, etc. files at the same time. There are also many additional features that you have access to.
Gizmo Drive has several features. You will be able to access encrypted ISO files. You can change settings and customize. Thus, the program is quite flexible.
Download link: https://arainia.com/software/gizmo/overview.php?nID=4
18 of 19
UNetbootin
Features: grub4dos, ISO autoboot (Linux only), syslinux
UNetbootin is primarily a Linux LiveUSB burning tool, but it works well enough with Windows that it deserves inclusion on this list. The UNetbootin utility isn't flashy, but it has some neat features. For example, it has an auto-download feature for Linux distributions, allowing you to choose from a range of popular distributions and system utilities.
UNetbootin came home at 22m01, just like WinToFlash, and again, a decent time for a useful tool.
WinArchiver Virtual Drive
There are several programs available for mounting image files, but none can match the portability provided by WinArchiver Virtual Drive. As the name suggests, the said program is not only capable of working with regular image files, but also with archive files such as RAR, ZIP, 7Z, etc.
You will be able to launch the archive from the Start menu and select the manual mount option. So, the procedure is very simple. Overall, this is an excellent ISO editing program.
Download link: https://www.winarchiver.com/virtual-drive.htm
19 of 19
Checking a bootable USB flash drive in MobaLiveCD
The free program MobaLiveCD is designed to check bootable flash drives and bootable ISO images. MobaLiveCD works without installation on your computer; to launch the program, click on the application file.
The program must be run as an administrator, otherwise an error message will appear.
To start the test in the MobaLiveCD program, you need to select an ISO image (Run the LiveCD button) on the computer, or a bootable flash drive (Run the LiveUSB button) connected to the PC.
The program allocates only 256 MB of memory for operation, so due to lack of memory, the application may not be able to cope with a large image or a large bootable flash drive.
On my website there is a detailed article about working in the MobaLiveCD program. From there you can download the Russian version of the application.
MagicDisc
MagicDisc is one of the most famous programs designed specifically for mounting ISO files. The program is capable of mounting multiple image files at the same time. Although you can create a maximum of 15 virtual disks.
The program also has a very user-friendly interface. You will be able to easily access the files inside the image. MagicDisc is compatible with Windows 7 and it's very easy to do.
https://www.magiciso.com/tutorials/miso-magicdisc-overview.htm
Final Words
Consequently, there are a number of ISO mount programs available for your Windows operating system, and most of them are available free of charge and are easy to use. Therefore, we have compiled a list of such programs that are considered the best in their field. But if you want to burn ISO file to USB, then the only possible option is to use PassFab to ISO, the best ISO editor and a very easy to use and convenient tool!
PassFab for ISO
- Support Windows 10, Windows 8.1, Windows 8, Windows 7, etc.
- Support USB from various manufacturers such as SanDisk, Kingston, etc.
- Support burning ISO to USB flash drive, CD or DVD-ROM
- Support for GPT and MBR partition types
BUY NOW
Burning an ISO image to a USB flash drive
Method number 1 - PowerISO
PowerISO is a very powerful program for working with ISO images. Allows you to open them, edit them, extract files from them, add files to ISO images, compress them, burn them to CD/DVD disks and flash drives, etc. Also in PowerISO you can make an image of any of your disks, test it, get a checksum (to assess whether the file is broken.).
In general, how to write an image to a flash drive using PowerISO.
1) The first thing you do is open the image. To do this, click the "Open" button, or open the file menu, and then specify the image file. You can also use the Ctrl+O keystroke.
PowerISO - opening an ISO disk image
2) If the image was opened and the program did not issue any warnings, go to the “Tools” menu. Select a function such as “Create a bootable USB drive” (see the arrows in the screenshot below).
Create a bootable USB drive
3) In some cases, the program will ask you to give it administrator rights. We just agree: the program will restart and you will continue the recording process.
With administrator rights
4) In the recording settings window, you need to:
- In the “USB drive” column, indicate your flash drive (Caution! Do not mix up the letters, because during the recording process, all data on the flash drive will be deleted;
- recording method: if you are recording a bootable ISO image, select the “USB - HDD” recording method (for example, to record images from Windows);
- the file system column can be left as default;
- then click “Start”;
- By the way, please note that at the bottom of the window there are links to instructions (several links, depending on the image being recorded).
Burning settings in PowerISO
5) The program will warn you again that all data on the selected flash drive will be deleted!
Warning: the flash drive will be erased
6) Next, the recording process will begin. Recording time depends greatly on:
- loading your computer with extraneous tasks (I recommend turning off everything unnecessary: at least torrents, games, video editors, and other programs that put a lot of stress on the PC);
- size of the recorded image;
- speed of the USB drive and the flash drive itself.
7) If the recording went well and without errors: you will see the message “USB drive recording completed successfully”, as in the screenshot below.
Successful burning of a flash drive
Method number 2 - UltraISO
UltraISO is the most famous program for working with ISO images. It can do almost everything with them like the first one: open, mount, edit and modify, burn bootable flash drives, external hard drives, CD/DVD drives, etc.
It is as easy to use as the first one. Both, by the way, fully support the Russian language.
And so, let's start working in UltraISO
1) First, download (link above), install and run the program. There is nothing special to comment here, except for one thing - run the program as an administrator (otherwise the option to write a USB flash drive may not be available!).
Note! To run as administrator: just click on the UltraISO program icon and select “Run as administrator” in the context menu, as shown in the screenshot below.
Run with administrator rights
2) Next, open the ISO image file (to do this, click the menu “File/open”).
UltraISO - opening an image
3) If the image has opened, open the menu “Boot/Burn disk image” (see screenshot below).
Burning a disk image
4) Then you need to set the recording settings:
- disk drive: select the letter of your flash drive (the data on it will be deleted, so be careful and attentive!)
- recording method: either USB-HDD+ or USB-HDD (this is for recording bootable media, which is what is required in most cases). It’s quite difficult to say specifically what to choose; in most cases, USB-HDD+ works - but if suddenly your BIOS version does not see it, rewrite the flash drive in USB-HDD mode;
- then click the “Record” button.
UltraISO recording settings
Note! In normal mode, UltraISO automatically formats the media into the FAT32 file system (even if the flash drive was previously NTFS). In order for NTFS to remain, you need to select ExpressBoot, then click on ExpressWrite. Bottom line: when you unpack the image onto a flash drive, the file system will remain unchanged.
5) Next, a standard warning will appear about deleting all information from your flash drive. We check the letter of the flash drive again and agree.
Deletion Warning
6) If everything went well, you will see the following message in the program message: “Cache synchronization. Recording complete!” . Please make sure that there are no errors in the list of program messages, otherwise your boot image will simply give an error when installing Windows