Many users ask a completely logical question - how to make a title page correctly? Indeed, the cover of your document can say much more about it than the text contained in it. A beautiful cover and a well-written beginning are an excellent presentation of any work that gives an impetus to action. The better the title page is designed, the better quality your report, portfolio, etc. will look. Naturally, it should not be compiled manually - all work should be done using the multifunctional Microsoft Word application. There are already quite a lot of ready-made title page templates already “sewn” into it. Thanks to this article, you will be able to understand how to make a title page and make it unique.
How to insert a title page in Word
Microsoft Word is very easy to use. to add a title page, you need to find a subsection responsible for inserting various elements. It's at the top. Click on the “Insert” section and select the “Pages” subsection, which contains the “Cover Pages” button. This way, you can display a fairly large number of cover page templates on your screen that you can use for your own purposes. Once you have decided on your decision, you will need to confirm it by clicking on the layout with the left mouse button. Let's look in detail at how to make a title page in different versions of Word.
In word 2007
In fact, all Word programs for creating a title page are identical, and the difference between them lies only in the wide choice of templates. In order to make a title page in Word 2007, we need:
- Create a new document;
- In the “Insert” tab, click on “Cover Page”;
- Select a suitable template from the list. Click on the left mouse button to confirm your action;
- Next, you need to enter all the necessary data (title, abstract, date, etc.). We can get the following options for title pages:
In word 2013
In terms of creating title pages, this version of the program is no different from its predecessor. You also need to find the “Cover Page” button in the “Insert” tab. But title page templates in Word 2013 will be more innovative and presentable. Of course, there are layouts from previous versions, but there are a lot of new ones.
Notes:
We will help with distance learning
Submit a request for a free cost estimate
- If you already had your own title page, it will be replaced with a new one;
- If the cover page was made in an earlier version of the program, it will not be possible to replace it. You will need to remove the old one first.
In Word 2019
You can also create a title page in Word 2022 using a similar method - in this regard, the developers consistently adhere to the chosen methodology:
- Click on the “Insert” section;
- The “Title Page” window will appear on the right. Click on it and select the desired view.
There are a lot of title pages in the new version of Word. For example, you can choose one of the first templates.
To confirm the choice of template, you will need to click on the left mouse button. The final step will be filling out the data.
Standard “cover” design for a text document
To make your coursework or diploma project look original (if there is such permission), then why not come up with an interesting design for the title page. In this manual we will look at design options from simple to complex. Initially, we will use the built-in utilities.
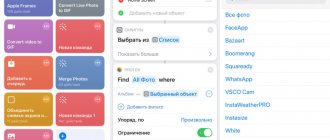
- One of the simplest methods is automatic insertion. To do this, go to the “Insert” tab on the toolbar. Then click on the “Title Page” object. A menu will open with ready-made title pages, designed in different styles.
- If you need to divide a multi-page document into several sections, use the drop-down menu. To call it, just right-click on the selected sheet. In our case, you only need to check the “Insert at the beginning of the document” option.
- Next, fill in all the empty fields. Click in the “Title” field and make changes. Use the Backspace key to delete the highlighted mark and write the desired title. We do the same with other fields to be edited.
Good to know
If you need to delete some blocks on the title page of a document, simply select the desired object and right-click. Then select "Cut". After the completed operations, the marked block will be deleted.
Beautiful title page design in MS Word
In order to design a beautiful title page, you need to decide on the direction of your activity. After all, it is the title page that will create the first impression of the information contained in the document. Let's look at the most popular templates that will help you beautifully design your title page:
- Median themed title page template. This template will perfectly highlight your work and help you start your report in a presentable way. The title page has space for any photo, and you can also add a company logo. The second page will contain all the information about your work: headings, sections, citations.
- Formal template for title page. If you prefer to stay away from the photo title page, then Hloom's basic style is for you. It's simple and accessible!
- Cover page template for reports. This style is also a member of the Hloom family, which will work really well for any report. It has many additional areas for text. At the bottom you can enter the name of the report author.
- APA style title page template. If you need an APA template to meet document requirements, Hloom has several templates for that. This template is intended for an article that is written by one author. It contains space for the title of the work, the institution, and the discipline itself. The second type of template is intended for two authors.
- Book title page template. To fully reveal the theme of your work and do everything possible, then the old-fashioned but creative Hloom template will allow you to fulfill all your desires and requirements. Everything here is conservative and simple - you can add your own title and short description. Nothing extra!
- Universal cover page template. Need to choose a template that will suit any theme? Then the Template.net template will fit perfectly into the theme of your work. There are no third-party images and nothing superfluous at all. There's a title, a subtitle, and a splash of color that separates them. You can also add information about your company.
Let's sum it up
The design of an abstract (report, coursework, etc.) is no less important than the content. And the first thing that characterizes the quality of work is the correctness of the title page. Its writing is subject to the requirements set forth in GOSTs. The text should be placed according to the established scheme: each of the four blocks should contain certain information about the institution in which the work is being defended, its performer, supervisor, discipline, topic, place and time of writing, etc. There are standards for margin parameters, font types and sizes, the use of lowercase and capital letters, spacing and text alignment, as well as a number of other rules.
Introduction
The saying “You meet someone by their clothes...” is not alien even to text documents. When opening a file in the Microsoft Word text editor for the first time, the attention of absolutely any user is focused on the title page. A beautiful beginning - a presentable cover - is an impetus to action, a desire to familiarize yourself with the content. Sometimes a well-designed title page will say much more than the text located underneath it. The multifunctional Word application, which is one of the best products from Microsoft, is capable of providing the user with several very attractive modern “title cards”, “built into” the program’s capabilities. Using ready-made layouts, the user only has to fill in the empty fields. In the article below, we will look at a method that helps you insert not only a standard title page into a document, but also create a unique design for the first page.
Create your own title
Next, you create your own cover page, which will require changing the text alignment (usually centered, some elements right or left), line spacing, fonts (almost always Times New Roman) and their sizes (12, 14 and 16 pt are used. ), highlight text fragments (sometimes bold is required).
For the title you need to create a blank first page; this can be done by clicking on the “Blank Page” button in the same “Insert” tab, “Page” group. Also, as the title is formed, you can gradually move the rest of the text to the second page.
Inserting a blank page
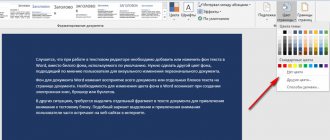
After creating your own title that meets the requirements for document preparation, you must save it as a template. In order to save a new title, you need to select it, and in the window where title collections are presented, at the very bottom click on the “Save selected fragment to collection...” button.
Retention of title
In subsequent jobs, you will need to insert this template (as described above) and make minor changes to it, such as the title of the job and the name of the reviewer. You can find your title template at the very bottom of the Word collection.
Header and footer in section
Open the document.
Step 1. Go to the “Header and Footer” mode:
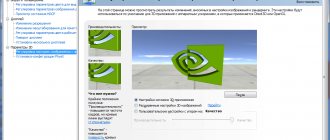
Method one . Click LM at the top of the title page:
Method two . Ribbon Insert → group of commands Header and Footer → command Header → selecting a ready-made header from the list of Built-in headers and footers (Lesson 38):
I personally like the first method .
As soon as we entered the “Header and Footer” mode, the “Designer” ribbon for working with footers was immediately activated.
Step 2. Type the text. For example, the name of the organization is “Horns and Hooves”. We get this picture:
That is, the name of the organization in the form of a footer has multiplied across all pages of the document. For a better understanding, I viewed two pages simultaneously.
Let's forget about the first two steps and start life over. Let’s remove the “Horns and Hooves” inscription from the header.
Step 1 . Go to the header of the second section
Step 2. About (Designer ribbon → Transitions group of commands → click LM on the command As in the previous section)
For reliability, I show the location of the “Same as in the previous section” command in full screen mode:
As soon as we pressed the “Same as in the previous section” button, a window appeared:
Step 3. Click “Yes” and see what happens.
Step 4. Open the “Styles” work area (Home ribbon → Styles command group → group button)
Let's pay attention to a couple of points:
- There are two “hooks” on the horizontal ruler, which indicates that the header/footer style has tabs (see Lesson 2)
- Two styles appeared in the list of styles: “Header” and “Footer”. Let's remember Lesson 13 and Lesson 15 and conclude that we have built-in styles. These styles only clutter the list of styles. A little later I'll show you how to prevent header and footer styles from ever appearing.
Move the cursor to the name of the “Header” style in the “Styles” working window and you will see a window with the style characteristics:
Look at the horizontal ruler and make sure that the position of the first tabulator is 8.25 cm, and the second one is 16.5 cm. We will deal with the alignment of tabulators in one of the lessons. And I want to draw your attention to the word “Priority” in the “Header” style characteristics window. Make a note: when we look at style management, we’ll look at what priority is.
This style characteristic is included in the program by default. But we can always change the style and update it (lesson 7, lesson 11, lesson 12).
Now let's repeat the steps, but for the footer:
Step 1 . Go to the footer of the second section
Step 2. About (Designer ribbon → Transitions group of commands → click LM on the command As in the previous section)
Step 3. Click “Yes” in response to the question “Do you want to delete this header and footer and use the header and footer of the previous section?”
| Understand and remember! | 1. The first section consists of one page 2. We have set our own headers and footers for the first section 3. These headers and footers will not be repeated on subsequent pages, no matter how many sections we create |
Standards and regulations
Special requirements and standards have been developed for the design of title pages for student work. In a secondary school, a list of such rules is compiled by the teacher. If the teacher has not voiced his own requirements for the work, the student can make a title card according to generally accepted rules.
The title page is the first page of a scientific or research project. It must contain the following information:
- Full name of the secondary or higher educational institution.
- A type of work can be a report, a project, an essay or an information message.
- For high school students, technical schools and universities, it is advisable to indicate the subject in which the material is being taken. In lower grades this requirement is not necessary.
- Topic of the work and full title.
- Last name and first name of the performer.
- Group, class or course.
- Last name, first name and patronymic of the teacher who checked the work.
- Date of completion of the abstract or report.
- The city in which the educational institution is located.
Most teachers pay attention to how the work is presented. For school and student essays, the generally accepted requirements are as follows:
- Indents from the edge of the page: on the left - 30 mm, on the right - 10 mm, at the top and bottom - 20 mm.
- The typeface is Times New Roman.
- The name of the educational institution is typed in font size 12, the type of work is 28 bold, the name of the project or abstract is 16 bold. The remaining data is indicated in standard font size 14.
- Paper format - A4.
- All data on the page is centered. The exception is the student's first and last name, as well as the group and course number.