To print a document in book form, you don’t have to go to a printing house - a regular printer will do. However, this process has its own difficulties. If you don't take them into account, you risk wasting a lot of time, paper, and toner. If you want to print a book quickly, easily and without errors, use our tips.
Note: if there are more than 20 pages, then it is better to use special programs. For example: FinePrint (search on Yandex) and ClickBook (search on Yandex).
How to type in Word 2007, 2010 and others
The printing process itself should begin only after all the text in the document with which we are performing this procedure is completely ready. So let’s prepare it first.
Preparing document text
Making the cover
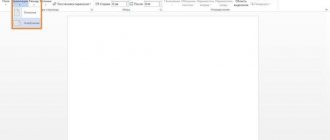
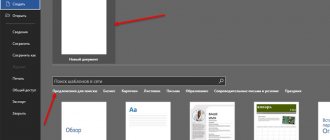
First, let's create the first home page. To make it beautiful and presentable, we use the built-in capabilities of the Word program. In the main menu, go to the “Insert” tab, and on it we find the “Pages” section. It contains “Title Page”. From the proposed options, choose the one that suits the style and you like the most.
You also need to fill in all the necessary information and, if necessary, you can slightly edit the template itself to suit your requirements.
Putting down page numbers
The “title” is ready, and therefore we can safely move on to numbering. To do this, in the same “Insert” tab, activate the “Page Number” button. Select placement (bottom, top, left, right) and format from a separate menu in the same list below. And also the user has the opportunity to insert footers or headers. There you can indicate the number or title of the current chapter, author and similar data.
Formatting sections
It is important to correctly format the beginning of sections from a new page from the beginning. Many people mistakenly press the “Enter” key to transfer to a new sheet. With further editing, insertion, or cutting of text on other pages of the book, it is quite possible that the beginning of the section will shift. This will entail the need to edit the entire document. We recommend using the Page Break option.
First, place your mouse cursor where the new chapter begins. Go to the “Insert” tab and click on the corresponding button there. But you can do it easier - press the key combination on your keyboard “CTRL+Enter”.
Details about printing envelopes in Word: methods of creation, setting up the program and technology.
Setting up printing in portrait format
At this point, there are at least three important settings to make:
- Set margin sizes.
- Indicate the placement of two pages on one sheet.
- Set up duplex printing in the printer properties.
To the right of this menu is a preview window. When you make changes to the parameter settings, you will immediately see the effect. We recommend viewing it in full before sending for printing. If you find errors, problems or shortcomings, you can still correct them and prevent unnecessary waste of paper.
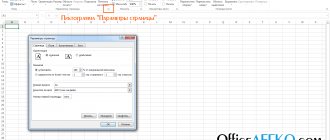
You can configure brochure printing using the page settings:
- Access this menu by clicking the corresponding shortcut in the print settings window.
- Select the orientation "Landscape", specify the type "Booklet", and the number of pages per sheet 4 and click "OK".
- Go back to the window and now specify the binding size.
What to do if there is no duplex in the printer
Unfortunately, not all, even modern, printers are equipped with automatic two-sided printing (duplex system). But you can also print in book format using this technology. The only disadvantage of this situation is the additional inconvenience of rearranging sheets of paper after printing the text on one side. Therefore, first experiment and find out how to properly re-put paper in the tray so as not to ruin it.
Why Word documents do not print: the most common reasons and their solution.
Method 2. Page markup
An alternative to the first method is page-by-page markup of the document you need. So, if you were unable to make one page landscape and the other portrait in Word using the first method, then do the following.
Let's say you have five pages of text in book layout, and you need to make the second and fourth sheets in landscape format. Proceed as follows:
- Click the mouse on the upper left edge of the second page so that the cursor takes the extreme left upper position;
- Select the top tab “Page Layout”;
- In it, again click on the arrow to the right of “Page Options”;
- Click on “landscape”, and in the “Apply” option, select the option “To the end of the document” and click on “OK”.
Changing the page layout
Starting from the second page, all pages became landscape.
Screenshot of portrait and landscape pages in Word
- Now we need to make the third page a book page in Word. Place the cursor on the upper left edge of the third page, again enter the page settings, but there select “Landscape” and “To the end of the document”.
- The third and subsequent pages will become landscape. Now we go again to the fourth page and use the same algorithm to make it book-ready.
- Then we move to the fifth and make it landscape. I think the essence of the actions is clear to the reader.
- As a result, we get this result.
Alternating page orientation
How to print as a “book” without Word
If you do not have the Word program or its use is not suitable, then you can print the book without it. The editor or printer properties should allow you to configure the following settings:
- Printing more than one page per sheet.
- Book orientation.
- A4 paper format.
- Two-side print.
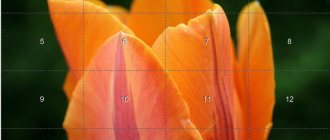
There is one more, perhaps the most important, step. Pages must be printed in a specific sequence. To understand exactly how, you should do a little experiment. Take several pages of paper, turn them into landscape format and fold them in the center. Write down the numbers in pencil, and then lay out each sheet separately. Notice which numbers are on one sheet. Thus, it will become clear to you in what order you need to place this or that page on the sheet on one side and the other.
Manual book printing setup
Let's look at an example. Let's say our book consists of 20 pages. We will need 5 sheets of paper to print it. We will place them in the following order: first and last, second and penultimate, third and third from last, and so on. In the end it will be like this - 20, 1, 2, 19, 18, 3, 4, 17, 16, 5, 6, 15, 14, 7, 8, 13, 12, 9, 10, 11.
How to make one page landscape using page options
There is also another way to make one page landscape and the other portrait. It's a little more confusing than the one above, but it can still be used.
In order to use this method, you need to place the cursor on the page that comes before the one that should be landscape. After that, you need to go to the “Page Layout” tab and use the small button to open the “Page Setup” window. If you have Word 2003, then to open the “Page Setup” window, use the “File - Page Setup” menu.
After that, you need to select the "Landscape" orientation and apply this "To the end of the document" setting.
After saving the settings using the “Ok” button, all pages below the selected one will switch to landscape orientation. Now you need to place the cursor on the page that you want to make landscape and open the Page Setup window again. This time you need to select portrait orientation and apply it to the end of the document.
After saving the settings using the “Ok” button, you will receive one page in landscape orientation, and the rest in portrait orientation.
Text Style Changes
Printing a brochure in Word, as you can see, is a very simple task. You can also change the color, size and way of writing letters in this editor using a set of styles. In order to format the text in a certain way, you should go to the “Home” - “Styles” tab. Here, right on the control panel, there is a set of the most popular styles. You can select the design method by clicking on the triangle in the “Change Styles” section.
Well, we figured out how to make a brochure in Word. This procedure is not at all tricky. You can design such a book at your own discretion. Try it.
What is a publishing package?
This is a set of library indicators that are assigned at the time of publication of a book. 16 copies are required for registration. They are sent by mail to the Book Chamber, national, state and other large Russian libraries. A publishing package is needed when planning to commercially sell a circulation. For ultra-small sets (up to 50 copies), registration with classifiers is not required.
Information on the author: full name and payment details (the cost of the publishing package is from 1,500 to 4,000 rubles). You also need to briefly describe your book (make an annotation), indicate its title and circulation size.
What's included in the publishing package:
- ISBN is a unique number compiled according to the international standard. Issued by the Russian Book Chamber. Its goal is to unify the list of publications for effective search and classification. ISBNs are supported in more than 130 countries around the world.
- A barcode is a graphic representation of a code in the form of lines of different thicknesses. It is formed on the basis of ISBN.
- Universal Decimal Classification is a number that appears on the back of the title page. Its presence is regulated by GOST 7.4–95. The main goal is to organize and systematize card files in libraries.
- Library and bibliographic classification - registration in the identifier table of Russian printed publications. The index is entered in accordance with GOST 7.4–95 and is a mandatory element of the output information about the book.
If you order a publishing package along with printing of a book, its cost will be lower. The price of a separate service is 20-30% higher.
The author of the book receives such a document after registering the ISBN.
A small book (brochure) can also be printed on a regular office printer. How to print - watch this video:
Gradient fill
The question of how to print a brochure in Word can be considered closed. How can you make the guide unique? If desired, the background of the book can be made not only monochromatic, but also gradient. In order to achieve this, in the same drop-down menu you need to select the line “Fill methods”. A set of tools is also presented here. In addition, you can customize your own gradient by selecting the two colors you want and placing them in a certain direction.
Allowing URL access
When setting up WiFi HotSpot on Mikrotik, sometimes you need to allow access to some URLs for unauthenticated users, for example, for the radius web server, and you want the client to be able to access it without logging into the access point, in In this case, add your IP address.
HotSpot users cannot communicate with each other over the local network or PROXY-ARP. If the customizer encounters a broadcast problem, it removes the address pool from it to disable universal NAT.
Using a Hotspot server without logging in using the https Mikrotik HotSpot redirect protocol may result in a failure to redirect the client to the authentication page if the requested page uses this protocol. You must enable HTTPS login to avoid this scenario.
The Hotspot HTTP entry point provides:
- Additional security using SSL key encryption.
- Ability to redirect clients from HTTPS URLs.
- Using an SSL certificate to enable Mikrotik HotSpot https redirect on the Hotspot server.
You can use a signed certificate from a trusted certification authority (CA), as well as a self-signed certificate, to use HTTP login without displaying an SSL warning in the client browser.
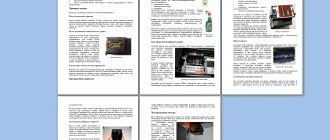
Book printing
Thus, we found out how to make a brochure in Word, or rather, how to orient the text in exactly this way. Now let's see how to print it out as a book. In the Word 2003 editor, the print button is located in a prominent place - on the toolbar. In other versions of the program, you simply click on Office and go to the “Print” line. A window will open with three options: “Preview”, “Quick Print” and simply “Print”. All these buttons can be displayed on the control panel. To do this, right-click on the desired item and select the line “Place... under the ribbon” in the context menu that appears.
Now let's see how to print a brochure in Word. Most modern printers have a “Text by Book” function. The device itself will arrange the pages of the brochure in the required order. The sheets will be pre-printed on one side only. Next, the program will open a window in which the user will be asked to arrange the pages in the desired sequence. After this, printing can continue.
Create a Document Template
Press Crtl-N (File > Create New Document). We configure the document settings (File > Page Setup), this is a very important step. In the “Fields” tab, set the values as in the example. In the “Paper Source” tab, don’t forget to check the “distinguish between even and odd page headers” checkbox. The default paper size is correct - A4. Once you've printed a few pages, you'll understand why these parameters are the way they are and learn how to manage them, but for now just take my word for it.
Textured or patterned background
How can you make a brochure even more beautiful in Word? In the Fill Methods window, you can make the background textured or patterned. The editor provides a fairly rich set of standard designs. If you wish, you can even draw your own pattern in a program like Photoshop or create a texture. The drawing is saved in a folder on the computer and opened in Word in the same window (select from the list). If you wish, you can also install a picture from the Internet or a photo you took yourself. You can design the background in this way in the “Drawing” tab in the same window. It is worth considering that when using a small-sized image, it will be located on the page many times, covering it completely.
Change text color
A designed and printed brochure in Word will be quite easy to read, no matter what background or pattern you choose. When changing the color of the page, the editor automatically changes the color of the text so that it is as visible as possible. However, if you use a picture, the text may blend into the background. In order to make the necessary changes, go to the “Home” tab and select the “Font” section. The “Text Color” icon is located here (bottom row, very last). By clicking on the triangle in the drop-down menu, you can select the desired shade of the letters.