Hello, dear readers! Today I’ll tell you how to create Yandex email on your computer and phone. You'll learn how to create an address book and add contacts to it. Learn how to create folders, email signatures, email templates, and I will also show you how to create rules for incoming messages. Website owners will find detailed instructions on how to create a domain email, and company owners will learn how to create a corporate email for their employees.
Email from Yandex can be called the best domestic development, which can compete with such a giant as Gmail from Google.
After its creation, access to many useful services is available that both ordinary users and Internet entrepreneurs cannot do without on the Internet. Here is a list of the main ones:
- Metrics
- Webmaster
- Direct
- Disk
- Cleanup
- Zen
The full list of services can be found here.
How to create a mailbox in Yandex on a computer
In an open browser on your computer, follow the link https://passport.yandex.ru/registration?mode=register.
We will be redirected to the registration page. Where you need to enter your personal data, create a login and password.
Yandex.Mail registration page
Login is the characters that will be located in front of @yandex.ru and it must be original. If such a login already exists, the system will report this and show available options.
Selecting a login on the registration page
My login will look like this AleksandrZyryanov77 and my email address will look like this
In case you forget your password, to restore access to your account you need to indicate your phone number and confirm it using the code from the voice message by entering it in a special box and clicking confirm.
Phone confirmation upon registration
If you don’t want to use your phone, click on “I don’t have a phone.” After this, you will need to select one of the security questions and prepare an answer to it. To be on the safe side, I recommend entering an invented combination of numbers (password) instead of a simple answer. Next, enter the specified characters.
Selecting a security question
Once all fields are filled in, click register.
Completing registration
After this, the “YandexPassport” page of the created account will open where you will need to upload a profile photo or skip these steps as this can be done later.
Yandex passport
Next, your personal email account from Yandex will open where letters will be sent.
Yandex.Mail personal account
Mail.ru mail
To register in this search engine, you need a browser on your Android. Which one doesn’t matter, from Chrome to Opera and others. So, we enter the browser:
- In the address bar of the browser, enter mail.ru and tap on the button in the search;
- A new window opens for us, where we need to click on the “Registration” button;
- Then, we need to enter personal information: first and last name, your gender, what date you were born. After this, you need to come up with a login that you like. Please pay attention to the password. It must have both capital letters and simple letters, numbers and special letters. symbols. In this case, it is advisable to use the password generator again by checking the boxes above these commands. The level of security of your address will directly depend on how complex your password is;
- You must enter a valid smartphone number, since we will need it if we decide to recover the password. To complete the process, you need to click on the “Register” button.
As you can see, we have completed registration. We will be informed about this by a message on the phone display. There is one stroke left, you need to enter a captcha, and your email is created!
How to create Yandex email on your phone
There are several ways to create mail on a mobile device:
- Through the mobile version of the yandex.ru website in any browser installed on the phone.
- By installing a special application on your mobile phone.
Through the mobile version of the website yandex.ru
To do this, open the browser installed on your phone and go to https://passport.yandex.ru/registration?mode=register.
The browser will open the email registration form we are already familiar with.
Registration form in Yandex.Mail via mobile phone
All further steps are no different from registering mail on a computer, and I described them in detail in this article here.
Via mobile application
I will show all the actions on a phone on which the Android operating system is installed.
I don't think they will be much different from the actions on phones that have other operating systems installed.
To install, go to the Play Store application from Google. You can use another identical application.
In the search field enter “Yandex.Mail”
Search for an application in Google's Play Store
The application description page will open. Click “Install”
Description of the application in the Play Store
After the application is installed, open it.
Yandex.Mail application icon
A list will open, from which at the very bottom click “Start Yandex.Mail”
Mail selection menu
A page will open where you will need to enter your phone number and click “Next”
Page for entering your phone number
After this, an SMS with a code will be sent to your phone, enter the code and click “Next”
Entering code from SMS
In the form that opens, enter your Last Name and First Name and click “Next”
Entering First and Last Name
Create a username and password and click “Register”
Filling in login and password
A short instruction manual for using the email box will open. We familiarize ourselves with it and click “Go to mail”
Completing registration
That's it, Yandex mail has been created on your phone.
Yandex.Mail mailbox in the mobile phone application
Mail connection
So, the first step is to create the email address itself, with which we will work further. In the case of Yandex, this is done in the following way:
- Go to the website https://mail.yandex.ru/.
- Click the "Add Account" button.
- Please provide your full name, login, strong password and phone number. You can omit the last point, however, if you lose access, it will be difficult to recover the password without a phone.
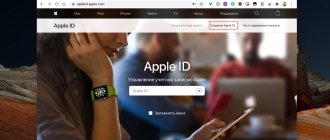
It is worth noting that you are creating not just an email account, but an entire profile in Yandex ID. This means that after registration the user will be able to use this account in Yandex.Taxi, Yandex.Market, and so on.
How to create a domain (corporate) email on Yandex
It was not for nothing that I wrote such a title, since domain mail is a corporate mailbox or Yandex 360 for business, perfect for personal use, as well as for organizations and even large portals.
The free option is perfect for personal use and small companies.
Paid option – has several tariffs, from which you can choose the one that is necessary for your company.
To create mail with your own domain, you must be logged in to your Yandex account and have a registered domain.
After these conditions are met, go to https://360.yandex.ru/business/ or enter the appropriate query in the search engine.
The Yandex 360 for business website will open where we go to tariffs
Yandex 360 for business website
On the next page at the very bottom, click “Free plan”
Choosing a free plan in Yandex mail for business
We accept the License Agreement and consent to the processing of personal data
License Agreement and Privacy Policy
The system will automatically create an organization and a window will appear where we click “Set up mail”
Personal mail account for business
Enter the domain name and click “Add domain”
Adding a domain
On the next web page a message will appear that the domain is connected but you need to confirm that it is yours and below there will be instructions for confirming the domain in several ways:
Domain Verification Instructions
1. Using the yandex-verification meta tag, you need to insert the code specified in the instructions into the code of your site.
Instructions for confirming a domain using a meta tag
To do this on your hosting, in this case it is Makhost. Go to the sites section and in the root folder of the site look for a file called “header.php”; if you have a one-page site, then the file “index.php”.
Open and insert our meta tag before the closing tag and save the changes.
Inserting a meta tag into the site code
After that, in your business mail account, click the “Check domain” button
Domain verification
If the code is installed correctly, a message will appear stating that the rights to the domain have been confirmed.
2. Using an HTML file with code that needs to be uploaded to the root directory of the site.
Open the instructions for this confirmation option and download the file.
Domain verification using an HTML file
Next, go to the hosting, open the root directory of the site, select “Upload file”
Site root directory
Click “Select file”
Uploading a file from a computer
In the computer window that opens, select the finished file and click “Open”
Uploading a file from a computer
And then click “Upload”
The process of downloading a file from a computer
All verification files are in place.
Uploaded HTML file
Go to your personal account and click the “Check domain” button
Check domain button
We wait literally a minute and see that the domain has been confirmed.
3. Create a new TXT record specified in the instructions in the domain DNS records section on the service where the domain is located.
Instructions for setting up a DNS record for a domain
We go to the service where the domain is located. This could be hosting or a domain registrar.
As I wrote earlier, my hosting is Makhost.
Go to the “Domains” section and click “DNS” and select “Add record”
Domain DNS records on Makhost hosting
Fill in the fields. For my domain, according to the instructions, I set the following values:
- Host – igrymozga.ru. (be sure to include a period at the end)
- Record type – TXT
- The value of the entry is the verification code specified in the yandex-verification instructions: 0492adafххххххххb
After that, click “Add”
New TXT record
We are waiting for the entry to be added. This process can take up to 72 hours.
The process of adding a TXT record
It only took me 5 minutes to connect.
We check the confirmation by clicking on the “Check domain” button.
I have described three ways to verify a domain. But that’s not all, because just below there was a warning “incorrect MX record” for the domain.
Notification that rights to the domain have been confirmed
This happened as a result of the fact that the domain was not delegated to Yandex services.
In order to fix this, go to the service where the domain is located. My hosting is Makhost.
Go to the domain DNS records section.
Domains in your Makhost personal account
And at the very bottom, click on the “Enable Yandex.Mail” icon.
Creating an MX record for Yandex.Mail in Makhost
In a special column, enter the previously received domain verification code (numbers only) and click “Connect email”
Entering the verification code
Attention! If you previously created mailboxes on your hosting, they will all be deleted.
We go to the DNS records of the domain and see that the MX record we need has been created.
MX record for Yandex
About ten minutes later we refresh the page in our personal business mail account and see that the MX record is configured correctly.
Notification about configured MX record
About ten minutes later we refresh the page in your personal account and see a message that the domain has been confirmed and you can send and receive mail.
Organization Verified Domains
Next, go to the users section and as you can see, you are an administrator and can add employees and create mailboxes for them by clicking the “Add” button
Users section
Next, fill in your personal information, come up with a username and password, and click “Save”
Adding users to your organization
After adding an employee, give him a login and password to log into his mailbox. I created this login “ [email protected] ”.
All mail with our domain has been created. With the free plan, create up to 1000 mailboxes, send up to 1500 messages in the Mailing list service, and each connected employee receives 10 GB of space on Yandex.Disk.
Help on the free business mail tariff from Yandex
To expand the capabilities of domain mail from Yandex, go to the tariffs section and select the one that suits you.
Business mail rates from Yandex
How to change email
While using e-mail, the question may arise about how to change the mail on Honor’s phone. The reasons for such a step may be different, for example, reluctance to use the mailbox, it has been hacked, or the loss of login data. In this case, you just need to create a new e-mail. To do this, do the following:
- Sign in to the Email app. mail.
- Click on the “Inbox” button.
- Click on the “Add” item.
- Select which service interests you - Yahoo, Gmail, etc. If the server you need is not in the list, click on the “Other” button.
- Enter your email address and password.
- Click on “Login”. If necessary, you can configure the electronics manually.
- Next, click on “Inbox” and select the main email on your Honor phone.
In this way, you can add several e-mails, and, if necessary, delete an extra account. To do this, go to “Settings” for a specific account, and then click on the “Delete account” button at the bottom.
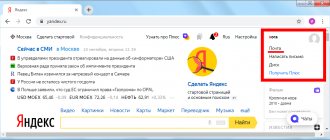
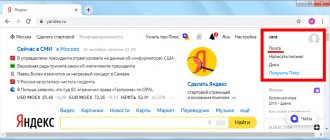
How to log into Yandex account
To log into your Yandex account, just log into your Yandex.Mail personal account.
Below we will look at how to do this from a mobile phone and from someone else’s computer by entering your username and password.
How to log into Yandex.Mail from a mobile phone
There are two ways to sign in.
The first method is from the browser installed on the phone.
To do this, go to the Yandex main page using the link https://yandex.ru and at the top we find and click the “Login” button
Yandex home page
In the form that opens, enter your login and click “Login”
Login input and login button
Enter the password. To check the correctness of the input, you can click the eye icon and after checking, click “Login”
Password entry and login button
You will then be redirected to your mailbox.
The second way is through an application installed on your phone or tablet.
Open the application by clicking on its icon.
Yandex.Mail application icon
Next, from the provided list of mail services, click on “Yandex”
List of mail services
Enter your login and click “Next”
Login entry
Enter the password, check that the entry is correct by clicking on the eye icon and click “Log in with password”
Entering your password
Also, as you can see, you can log in via SMS by clicking the appropriate button, after which a form will open in which you will need to enter a password and click the “Next” button
Entering code from SMS
Regardless of the login method, a page will open where you click “Go to mail”
Page with the “Go to mail” button
That's all, your mailbox will open.
How to log into Yandex.Mail from someone else's computer
Before accessing your email from someone else’s computer, you need to remember a few important rules and actions that will help protect your account from third parties:
- When logging in, never save data in the browser. Users often have the password saving feature enabled in their browser settings. Therefore, when you enter the data, an information window will pop up where it will be written that the password has been saved. Be sure to cancel the save.
- At the end of your work, you must log out of your account. This is necessary in order not to remain logged in to your account and unauthorized people do not gain access to it. To check, be sure to close your browser and open it again, go to the Yandex main page and make sure that you really signed out of your mail.
- If suddenly you don’t remember whether you logged out of your account or not, but you no longer have access to someone else’s computer. Log in to your mail from your computer and in the upper right corner click on your login and in the menu that opens select “Exit Yandex services”. And be sure to change your email password, as someone may have already gained access to your email.
To log in, you need to open your browser and go to the Yandex main page https:// yandex.ru and click the “Login” button in the upper right corner.
Home page Yandex
On the authorization page, enter your login and click “Login”
Entering your login to log in to your mail
Next, enter the password and click “Login”
Entering a password to log into mail
All logins to Yandex mail have been completed.
How to come up with a strong password
A good password is one that is difficult to guess or guess.
Never tell anyone your password to log into your account. The more people know your password, the higher the likelihood that an attacker will find it out.
To create a complex password, use:
both uppercase and lowercase Latin letters;
only not allowed
Which passwords are weak?
What should not be used as a password:
Passwords that you already use on other sites or applications. If someone finds out, for example, your password to a social network, they will try to enter not only Yandex, but also other social networks, postal services, and online banks with this password.
Personal data that you could indicate somewhere on the Internet: name, birthday, passport number, etc. Even your mother’s maiden name, which no one seems to know, should not be used.
How to add a contact in Yandex.Mail
At the top, look for the contacts icon and click it
Go to the contacts section
Next, click “Add contact”
Add contact button
A form will open in which we fill in the data and click “Add contact”
Form for adding a contact
All is ready. We go back to contacts and see that the contact has been successfully added.
You can also load contacts from a file and upload those you already have in the file.
Loading contacts from a file
Next, a form for downloading a file from your computer will open. Click “Select file”
Form for uploading files from a computer
Select the desired file on your computer and click “Open”
Selecting a file on your computer
We wait for the file to download and click “Save”
Save contacts button
Then all contacts from the file are saved in the contacts section.
Mail services that are available for free
Before installing email on your Samsung phone, it is important to decide on a suitable service. Today, Android smartphone users can create an e-mail using the following platforms:
- Gmail.com;
- Rambler;
- Yandex.ru;
- Yahoo!;
- Outlook.
These are the main options that allow you to create an email on your Samsung Android phone for free. When choosing a mail service, you must proceed from your own needs. A universal option that opens up maximum opportunities is gmail.com. Each service has its own program, which you can install for free and subsequently set up email on your Samsung phone.
How to create an address book in Yandex.Mail
The address book in Yandex mail is collected automatically; it includes all the contacts to which you have ever written.
You can also add contacts to your address book using the method I described above.
You can view all the contacts included in this book by going to the “Contacts” section
Go to the contacts section
This is what the address book looks like in Yandex.Mail. True, I have only one contact there for now since the account is new.
Contacts section in Yandex.Mail
We use mail
Now you need to figure out how to work with email. Immediately after registration, you are taken to the message control panel.
There is a menu on the left:
- inbox – received messages are received and collected here. In order to open a letter, you just need to hover the cursor over it and click the left mouse button. Unread ones are highlighted in bold. When you open the letter, it will not be highlighted;
- sent – the name speaks for itself. All messages you create and send to the recipient are stored here;
- deleted
– a message can be deleted from any folder, after which it will be sent to this folder; - spam – all advertising correspondence ends up here;
Important! Messages you need may also end up in spam, so it is better to periodically check this folder and delete unnecessary ones.
- drafts - if you wrote a text and got distracted, you can save it rather than send it. You can find the saved message in the “Drafts” folder;
In order to create a message you need:
- go to the post office;
- select the “Letters” tab - “Write”;
- In the “to” field, enter the recipient’s email address;
- in the “Subject” field - the title of the message (filling in is optional);
- in a large white field - the text of the message;
- click "Submit".
All messages have been sent. You can also attach a postcard or file.
There are two ways to delete a letter:
- open the letter and click the “Delete” button at the top;
- open the folder where the unnecessary letter is located, check the box next to it. Click “Delete” at the top.
There is a horizontal menu at the top:
- letters;
- disk;
- contacts.
Each of these points has its own sub-points. Working with letters is described above. Large files are stored on the disk; and in contacts you can create your own notebook with the addresses of your correspondents.
Be sure to exit the box when finished. This way no one will be able to read your correspondence.
To log into your mail again you need to:
- go to the main page;
- enter your username and password;
- click “Login”.
How to create a group in Yandex.Mail for mailing
Before creating a group for sending letters via Yandex.Mail, you must be sure to familiarize yourself with the limits for sending letters and the requirements for mass mailings.
Here are the restrictions on sending letters from regular mail.
Restrictions on sending letters from Yandex regular mail
Restrictions on sending letters in business (corporate) mail.
Restrictions on sending letters from Yandex business mail
The requirements for mailings are described in detail in Yandex.Help here.
If these rules are violated, your letters may simply begin to end up in the spam folder, and your mail may be blocked for one day.
For mass commercial mailings, it is best to use special services such as SendPulse or JustClick
But you can still create a mailing group on Yandex.Mail and calmly send messages to friends and colleagues within the established limits.
And now we’ll talk about how to do this.
In your personal account, go to the contacts section.
Go to the contacts section
On the right select “Create group”
Create group button
We tick the necessary contacts from the address book. But no more than 50 to meet the limit. Enter the name of the group, for example “Experiment” and click create.
Group creation process
The entire group has been created.
Mailing group
To write a letter to this group, you need to go to “Write a letter” and in the “to” column start entering the name of the group. After the group appears, select it.
Using e-mail programs
The most famous of all programs is Microsoft Outlook, which is the benchmark by which other developers move. The advantage of using programs rather than a website is the ability to quickly check, send, edit, sort, and save messages. It is possible to integrate the application with others in the Windows environment, for example, with a calendar, contacts, media content, and office applications.
Perhaps the only disadvantage of Outlook is its vulnerability to viruses. But there are also safer programs, for example, The Bat!, which competes with it. Let's not dwell on comparing their characteristics, let's consider the principle of displaying an email program on the desktop:
- Go to Start, find the required program there, right-click on it.
- From the context menu, select “Send to desktop (create shortcut).”
The action will bring the mailer icon to the desktop
Another advantage of using applications is that you can display on your desktop not only the mail itself, but also the creation of a letter to a specific recipient. For example, if you send a report to your boss multiple times every day, enter the following in the path line when creating a shortcut: mailto: [email protected] After the colon, of course, indicate the recipient's address.
Using an e-mail service does not exclude the possibility of sometimes or constantly resorting to applications. Yandex offers a free opportunity to use your mailboxes in any mail program. To do this, specify the following in its settings:
- Incoming mail settings:
- server address imap.yandex.ru;
- SSL connection protection;
- port 993.
- Outgoing mail settings:
- server address smtp.yandex.ru;
- SSL connection protection;
- port 465.
Settings for other email programs are carried out in a similar way.
Communication via the imap protocol allows you to save and synchronize outgoing correspondence with the Yandex server and access it from various computers and devices.
Thus, it is possible to display any mailbox on the desktop, no matter whether you work in the web interface or use special programs. You can create several shortcuts with your most used commands for quick access.
How to create a folder in Yandex.Mail
To create a folder, go to your Yandex.Mail account in the left column, click on “Create folder” in the window that opens, enter a name, for example, “Message from visitors” and click “Create folder”
Creating a folder
In this way, you can create many folders that will be located in the “Inbox” tab
Created folder
Which services provide a free mailbox?
Any of the methods described below is universal for other email services. The instructions can be used regardless of your phone model. Small differences may only be in the interface.
I recommend creating email in the following email services:
All of these email services are good in their own way, with their own pros and cons. However, I still recommend choosing two: Yandex and Google. Ideally, it would be good if you have a mailbox in both of these services, each of them will complement each other.
All of the listed email services have their own mobile application for managing letters. I recommend using them, they will be much more convenient than a standard email client.
How to make a signature in Yandex.Mail
You can add a signature to a letter in Yandex.Mail in several ways:
- Each time you write a letter, enter certain text at the end. This method takes time.
- Add signature to emails automatically. I will tell you about this method now.
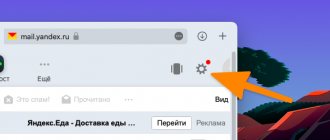
In order to make such a signature or even several signature options, you need to go to your mailbox settings. To do this, click on the gear icon in the upper right corner in front of the avatar and in the menu that opens, click “Personal data, signatures, portrait...”
Go to personal data settings
On the page that opens, in the “Your signatures” section, we come up with and enter a signature into a special form, for example, “Sincerely, Alexander Zyryanov”, check the link to the address box, select the location and click on “Add signature”
Signature settings
This way you can add several signature options.
When writing a letter, the signature will be entered automatically, and if there are several options, you can easily choose the one you need.
Selecting a signature option for a letter
Phone number instead of login
Each phone number can become an additional login for only one account. At the same time, for each account you can connect only one additional login - only the main phone number can become such a login.
Enter a phone number (only numbers, for example 79871234567) wherever you need to specify a Yandex login.
The exception is the Access Restoration page: on it you must enter exactly the login that you came up with during registration.
Use the address as a mail alias.
Features of mail with an additional login
Letters sent to this address will go to your Yandex.Mail mailbox. The address will stop working if you disable the additional login or unlink the number from your account.
If the phone number is transferred to another person, and the new owner connects it as an additional login, the email address will also pass to him. How to avoid this:
If you have lost your SIM card, have it restored at your mobile operator's store.
If you changed your number, unlink the old number and link the new one on the Phone numbers page.
Source
How to create a template in Yandex.Mail
To create letter templates in mail from Yandex, you need to go to the “Drafts” folder in your account
Go to the “Drafts” section
At the top of this folder, click “Create Template”
"Drafts" folder
In the letter form that opens, fill in the required information:
- Letter subject
- The text of the letter itself
- Attach the required document (optional)
At the bottom, click on the “Templates” icon and in the menu that opens, click “Save as template”
Creating a letter template
Now, in the “Drafts” folder, a subfolder “Templates” has appeared in which the letters you have written, which you decide to use as templates, will be saved.
Folder with letter templates
Now, when writing a letter, you can easily use the created template.
Choosing a template for a letter
How to setup
Now set up email on Android Honor so that it functions correctly. To do this, take the following steps:
- Enter your Email folder.
- Click on the three dots at the top right.
- Click on the appropriate section to configure the necessary data on your phone.
- Go to the "General" section.
- Insert a preview option - None, one, two or three.
- Confirm that the smartphone will ask before deleting the message.
- Combine a chain of letters by topic (move the toggle switch to the right if desired).
- Set to download images only via Wi-Fi.
- Configure notifications (you can allow or disable them).
After that, go back a step and click on the name of your e-mail on Honor’s phone. Here you can easily configure the following parameters:
- account name - you can change it from standard to any;
- your name;
- signature - a phrase that will be added with each letter, can be removed altogether;
- default account - move the toggle switch if this e-mail needs to be configured as the main one on the Honor phone;
- data synchronization parameters: number of letters downloaded at a time, synchronization schedule, etc.;
- email encryption;
- setting up incoming messages;
- outgoing message server.
As you can see, you can set up the “electronic” in the standard application, and this issue does not cause difficulties.