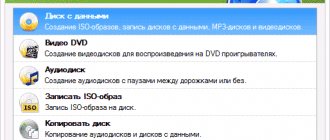
No matter how powerful your computer is, it still has one weak point: the hard drive. It is responsible for the integrity and security of your data and has a significant impact on the performance of your PC. At the same time, the hard drive is the only device in the system unit that has moving mechanical parts inside, which makes it a weak link that can completely damage your computer.
Today there are two ways to speed up your computer: the first is to buy an expensive SSD, and the second is to make the most of your motherboard, that is, set up a RAID 0 array of two hard drives. Moreover, a RAID array can also be used to increase the security of your important data.
In this article, we'll look at how to create software RAID using built-in Windows tools.
Create a software RAID using built-in tools in Windows 8 or Windows 10
How to create a software RAID using Storage Spaces
Windows 10 has a built-in Storage Spaces feature that allows you to combine hard drives or SSDs into one disk array called RAID. This feature was first introduced in Windows 8 and greatly improved in Windows 10, making it easier to create multi-disk arrays.
To create a RAID array, you can use either the Storage Spaces feature or the Command Prompt or Windows PowerShell.
Before you create a software RAID, you need to determine what type it is and what it will be used for. Today, Windows 10 supports three types of software arrays: RAID 0, RAID 1, RAID 5 (Windows Server).
You can read about what types of RAID exist and which RAID is best used for what purposes in the article “Types of RAID and which RAID is best to use.”
So, we have decided on the RAID type. Then, to create a disk array, we connect all the disks to the computer and load the operating system.
It is worth noting that all disks of the future RAID should be the same not only in memory capacity, but preferably in all other parameters. This will help avoid many troubles in the future.
Next, to create a software RAID array, follow these steps:
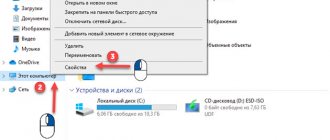
- Open Control Panel by right-clicking Start and selecting Control Panel.
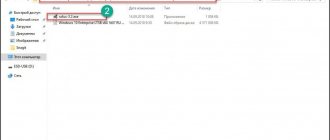
- In the window that opens, select “Storage Spaces”
- Then select “Create a new pool and storage space”.
- Select the drives you want to add to the RAID array and click “Create storage pool”.
Important: all data on the disks from which the RAID array is created will be deleted. Therefore, save all important files to another drive or external storage device in advance.
Once you have set up the array, you must give it a name and configure it correctly.
- In the "Name" field, enter the name of our RAID array.
- Then select the letter and file system for the future RAID
It is with this name and letter that the array will be displayed in the Windows system.
- Now you must select the type of resistance.
- Simple (without fault tolerance) is RAID 0;
Two-way mirror - RAID 1;
- A three-way mirror is also RAID 1 (the only difference is the number of copies of the main hard drive);
- Parity – RAID 5.
- Click "Create storage space".
After the wizard configures your new RAID, it will be available as a separate drive in the This PC window.The new drive will be no different from a regular hard drive, and you can do anything with it, even encrypt it with BitLocker.
Depending on the selected RAID type, the wizard will automatically set the maximum available capacity of the disk array.
Typically this value is slightly lower than the actual amount of data available, and you can also set the disk space to a larger size. However, keep in mind that this is so that you can install additional hard drives when the array is full without having to rebuild it.
You can read about using BitLocker in the article “How to encrypt data on your hard drive using BitLocker.”
You can create another software RAID. Only the number of hard drives connected to the PC limits the number of RAID arrays that can be created.
How to create a software RAID using Disk Management
Another way to create software RAID arrays in the Windows operating system is to use the built-in utility called “ Disk Management ”. It allows you to create all basic RAID types . Just like the previous one, this method is quite easy and does not require deep knowledge of the operating system. So, to create software RAID 0 you should:
Types of RAID
Speed Raid 0
Raid 0 has nothing to do with reliability, because it only increases speed. You need at least 2 hard drives, and in this case the data will be “cut” and written to both disks simultaneously. That is, you will have access to the full capacity of these disks, and theoretically this means that you get 2 times higher read/write speeds.
But let's imagine that one of these disks breaks down - in this case, the loss of ALL your data is inevitable. In other words, you will still have to make regular backups in order to be able to restore the information later. Typically 2 to 4 disks are used here.
Raid 1 or “mirror”
Reliability is not compromised here. You get the disk space and performance of only one hard drive, but you have double the reliability. One disk breaks - the information will be saved on the other.
The array of RAID 1 level does not affect the speed, but the volume - here you have at your disposal only half of the total disk space, which, by the way, in raid 1 there can be 2, 4, etc., that is, an even number. In general, the main feature of a first-level raid is reliability.
Raid 10
Combines all the best of the previous types. I propose to look at how this works using the example of four HDDs. So, information is written in parallel on two disks, and this data is duplicated on two other disks.
The result is a 2-fold increase in access speed, but also the capacity of only two of the four disks in the array. But if any two disks fail, no data loss will occur.
Raid 5
This type of array is very similar to RAID 1 in its purpose, only now you need at least 3 disks, one of them will store the information necessary for recovery. For example, if such an array contains 6 HDDs, then only 5 of them will be used to record information.
Due to the fact that data is written to several hard drives at once, the reading speed is high, which is perfect for storing a large amount of data there. But, without an expensive raid controller, the speed will not be very high. God forbid one of the disks breaks - restoring information will take a lot of time.
Raid 6
This array can survive the failure of two hard drives at once. This means that to create such an array you will need at least four disks, despite the fact that the write speed will be even lower than that of RAID 5.
Please note that without a powerful raid controller, such an array (6) is unlikely to be assembled. If you only have 4 hard drives, it is better to build RAID 1.
How to add or remove a disk in an existing RAID array
How to add a disk to RAID
Let's assume you already have a software RAID array and are using it. One day a situation may arise when you run out of disk space. Luckily, Windows 10 allows you to add another drive to an existing array using built-in tools.
To add a drive, you must open the Storage Spaces utility using the method described above and select Add Disks.
In the menu that opens, select the drive you want to add and click “Add Drive.” The hard drive will be added to the existing RAID array.
How to remove a disk from a RAID array
To remove a disk from a RAID array, follow the algorithm:
- Open the Storage Spaces utility as described above and click the Change Settings button.
- Open your existing RAID array and select Physical Disks.
- From the pop-up list, select the drive you want to remove and click Prepare for Removal.
Windows will automatically move the data to other drives, and the Prepare to Delete button will change to Delete.
After clicking the Remove button, the system will remove the drive from the RAID. To continue working with this drive, you will need to create a new partition on it. To do this, you can use the built-in diskpart utility or the Disk Management utility.
You can read about how to use the “diskpart” utility in the article “Using Diskpart to Manage and Recover a Hard Drive, Memory Card, or USB Drive.”
Let's summarize
RAID 5 is needed for a limited range of tasks, when a much larger number of HDDs (than 4 disks) are assembled into huge arrays. For most users, raid 1 is the best option. For example, if there are four disks with a capacity of 3 terabytes each, in RAID 1 in this case 6 terabytes of capacity are available. RAID 5 in this case will provide more space, however, the access speed will drop significantly. RAID 6 will give the same 6 terabytes, but even lower access speed, and will also require an expensive controller.
Let's add more RAID disks and you will see how everything changes. For example, let’s take eight disks of the same capacity (3 terabytes). In RAID 1, only 12 terabytes of space will be available for recording, half of the volume will be closed! RAID 5 in this example will give 21 terabytes of disk space + it will be possible to get data from any one damaged hard drive. RAID 6 will give 18 terabytes and data can be obtained from any two disks.
In general, RAID is not a cheap thing, but personally I would like to have a level 1 RAID of 3 terabyte disks at my disposal. There are even more sophisticated methods, like RAID 6 0, or “raid from raid arrays”, but this makes sense with a large number of HDDs, at least 8, 16 or 30 - you must agree, this goes far beyond the scope of ordinary “household” use and is used demand is mostly in servers.
Something like this, leave comments, add the site to bookmarks (for convenience), there will be many more interesting and useful things, and see you soon on the blog pages!
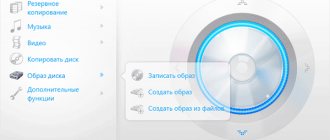
Create a software RAID using the command line
Another way to create a software RAID is to use the command line or Windows PowerShell.
To create a software RAID using the command line:
- Right-click Start and select Command Prompt (Admin) or Windows PowerShell (Admin).
- In the window that opens, enter the command “diskpart” and press “Enter”.
- Select the disks you want to add to the RAID array one by one and turn them into dynamic disks using the commands:
- select disk 1 – where 1 is the number of the desired disk
convert dynamic – convert to dynamic
- select disk 2
- convert dynamic
- select disk 3
- convert dynamic
To display a list of disks, enter "list disk".
The Diskpart utility will display all the drives connected to your PC.
Now that we have converted our drives, we can create a RAID volume by entering the following commands:
- select disk 1
- Create Volume RAID Disk 1, 2, 3
After this, you should make sure that the array is created.
To do this, enter the command “list disk”.
All disks will be combined into one disk.
- select volume 2
After this, the selected disks will be combined into a RAID array.
Note that this method will create RAID 5.
RAID 0
If you want to create RAID 0, in the Diskpart utility, enter:
- list disk;
- create volume stripe size=n disk=1,2,3 – where n is the size in megabytes, and 1,2,3 are the numbers of disks that will be included in the RAID 0 array.
RAID 1
To create RAID 1, you need to enter the following commands one by one:
- list disk – to display connected disks;
- select disk 0 — the number of disks from which a mirror is created;
- convert dynamic – convert the disk to dynamic.
Attention! Sometimes the message “You must restart your computer to complete this operation” appears. If it appears, restart your computer.
If there is a message about successful conversion, continue and enter:
- select volume 0 – select the desired disk;
- add disk=1 – add the desired disk for mirroring.
This will create a RAID 1 array.
What is a RAID array and why do you need it?
First of all, a RAID array allows you to provide high fault tolerance for the hard drives (HDD) of your computer by combining several hard drives into one logical element. Accordingly, to implement this technology you will need at least two hard drives . In addition, RAID is simply convenient, because all the information that previously had to be copied to backup sources (flash drives, external hard drives) can now be left “as is,” because the risk of its complete loss is minimal and tends to zero, but not always, but this is a little lower.
RAID translates roughly like this: a protected set of inexpensive disks. The name comes from the times when large hard drives were very expensive and it was cheaper to assemble one common array of smaller disks. The essence has not changed since then, in general, like the name, only now you can make just a gigantic storage out of several large HDDs, or make it so that one disk duplicates another. You can also combine both functions, thereby getting the advantages of one and the other.
All these arrays are under their own numbers, most likely you have heard about them - raid 0, 1...10, that is, arrays of different levels.
Software RAID creation in Windows 7
In Windows 7, you can use Disk Management to create a software RAID. It should be noted that the disk from which the system boots cannot be used in RAID, as it will be converted to dynamic. You can use any disks except system ones.
Step 1: Open Start, right-click Computer and select Manage.
Step 2: In the wizard that appears, click Next.
Step 3: In the menu that opens, you must select the drives that you want to combine into a RAID array and click Next.
Step 4: Select a letter for the created RAID array and click Next.
- S (Striping) - corresponds to RAID 0;
- M (Mirroring) - corresponds to RAID 1;
Step 5: In the next window, select the file system type (NTFS), specify the block size and specify the volume name. After that, click "Next".
Step 6: Once the system has created the new RAID array, click the Finish button.
After clicking the “Finish” button, a warning window will appear indicating that the basic disk will be converted to dynamic and booting the OS from the dynamic disk will be impossible. Just click "OK".
After this, the created RAID array will appear in the “My Computer” window as a regular hard drive with which you can perform any operations.
The array has been created, now let's install Windows 10
We connect a bootable USB flash drive with Windows 10 to our PC. We reboot and go to the Bios settings. In the Boot boot settings, we set the first priority for our flash drive. Please note that in addition to the flash drive in the list of disks, there is already a newly created RAID 0 array.
Reboot and proceed to install Windows 10.
Click “Install”.
As with installing any software, you must accept the license agreement.
You need to proceed with a custom installation.
Select a disk. You can create partitions on it. Click “Next”, thereby starting the installation of Windows 10.
All. Windows 10 was successfully installed on a RAID 0 array.
If you go to “Disk Management”, you can see that the system recognizes two disks in the array as one.
Let's look at the device manager.
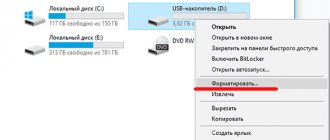
How to fix the error “Can't Add new drive, error 0x00000032”?
Can't Add new drive, error 0x00000032 may appear . In some cases, this error appears when creating a RAID array . Moreover, error 0x00000032 may appear even after you have cleaned and formatted your drive. It usually occurs on disks that have already been used in a RAID array or in the operating system.
In some cases, a RAID array may report a disk failure when in fact there is nothing wrong with it. To solve this issue, you must first understand the cause of the error.
The cause of the error “ Can't Add new drive, error 0x00000032 ” is incorrect metadata that remains on the disk even after wiping and formatting the drive. In addition, the error is often caused by data in the boot sector that formatting and wiping the disk did not remove.
The thing is that disk cleanup and formatting do not physically clean the disk, but only remove all “ references to files ” and indicate to the operating system that it can write information to a new partition, erasing previous data.
However, physically the files (including metadata) remain on the disk and cause errors when adding a disk to a RAID array .
To fix the error “ Can't Add new drive, error 0x00000032 ” you need to “ reset the problem drive ”.
To do this you should:
Step 1: Right- on “ Start ” and select “ Windows PowerShell (Admin) ”
Step 2: In the window that opens, enter the command:
Get-PhysicalDisk | ft FriendlyName, SerialNumber, UniqueId –auto
...and press “ Enter ” to execute it.
Step 3: A list of your drives will open in front of you, which will indicate the name of each drive ( FriendlyName ) and its unique identifier ( UniqueID ).
Select the UniqueID of the desired disk and copy it using the key combination “ Ctrl + C ”
Note : You can also use the drive name ( FriendlyName ), however in some cases the system may display the same name for all drives. Therefore, to avoid errors, it is best to use the disk's UniqueID .
Step 4: To reset your drive use the following command:
Reset-PhysicalDisk -UniqueId "your-unique-id"
...replacing your-unique-id with the disk identifier that you copied earlier (to paste the identifier, use the key combination “ Ctrl + V ”). As a result, your command should look something like the screenshot below.
Important : your disk's unique identifier must be in double quotes . Otherwise the command will not work.
After this, you can again use this disk in your RAID array .
Setting up Raid0 array
First, you need to connect two hard drives that we have to the motherboard at once.
After turning on the computer device, you need to go to the BIOS. While the computer is booting, press the Del button on the keyboard.
In the new window, select the Advanced section at the top and find the SATA Configuration item in the list.
SATA Configuration
Next, in a new window, find SATA Mode Selection and set it to Raid.
Raid in Sata Mode Selection
In order to save everything, you need to click on F10 and Yes. After this, the computer device will reboot.
In order to enter the Raid configuration, you need to press the keyboard shortcut CTRL + I in the BIOS.
In the window that appears, select Raid Volume and press Enter.
Raid Volume
It is on this page that you need to make the main settings for the Raid 0 array being created.
To enter the name Raid 0, you must first press the spacebar and then enter it.
raid 0 array name
By using the Tab button, you can move to the items below.
Raid Level you need to select Raid (Stripe).
In the section where the size of the hard drive is indicated, everything should be left unchanged.
In the Capacity parameter, you must leave the automatically configured volume and press Enter.
No further changes need to be made. Just scroll down and click on Create Volume and Enter.
On the warning page, you need to select the answer Yes and press the Y button on the keyboard.
data may be lost
Thus, it turns out that Raid 0 is now in working order. To exit you need to press Esc.
In the new window, click on Y.
In this case, after each turn on the computer device, you will be prompted to press the Ctrl+I key combination to go to the Raid control panel.
What to do if you lost important data on a RAID array
Using RAID arrays can significantly improve data security, which is very important in the modern world. However, the human factor cannot be ruled out.
Loss of important files is possible due to accidental deletion, formatting, changes in the logical structure of the file system and many other reasons. In addition, RAID failure is possible.
In this situation, it is better not to make hasty decisions. The best option is to contact specialists or use specialized data recovery software.
RS RAID Retrieve is capable of recovering any type of RAID array and supports all file systems used in modern operating systems.
Download RS RAID Retrieve
Data recovery from any RAID arrays
How to create an array of hard drives on a computer using a RAID controller?
Before we can build this system, we need to know if the motherboard supports Raid disk arrays. Many modern motherboards already have a built-in Raid controller, which allows you to combine hard drives. Supported array circuits are available in the descriptions for the motherboard. For example, let’s take the first ASRock P45R2000-WiFi board that caught my eye in Yandex Market.
Here, a description of the supported Raid arrays is displayed in the "Sata Disk Controllers" section.
In this example, we see that the Sata controller supports the creation of Raid arrays: 0, 1, 5, 10. What do these numbers mean? This is a designation for various types of arrays in which disks interact with each other according to different schemes, which are designed, as I already said, to either speed up their operation or increase reliability against data loss.
If the computer motherboard does not support Raid, then you can purchase a separate Raid controller in the form of a PCI card, which is inserted into the PCI slot on the motherboard and gives it the ability to create arrays of disks. For the controller to work after installing it, you will also need to install the raid driver, which either comes on the disk with this model, or can simply be downloaded from the Internet. It is best not to skimp on this device and buy from some well-known manufacturer, for example Asus, and with Intel chipsets.
I suspect that you still don’t have a good idea of what we’re talking about, so let’s take a closer look at each of the most popular types of Raid arrays to make everything clearer.
What is RAID 0
I think it’s worth writing a little about what RAID is. RAID is an array of several physical hard drives combined into one virtual media. There are many different RAID configurations, each with pros and cons. Most often, an array of multiple disks is used to provide fault tolerance by storing redundant data. Large arrays consisting of many hard drives help prevent data loss when several physical hard drives fail at once.
The simplest RAID option that does not provide fault tolerance is RAID 0. Its advantage is increased performance compared to other RAID implementations. Essentially, all RAID 0 does is stripe the data being written to the array across all the disks in the array. At the input, the data is divided into equal blocks and written in parallel to all physical disks. This principle greatly increases the speed of sequential writing and sequential reading. In theory, the sequential read/write speed can be equal to the sum of the speeds of each disk. The situation is worse with random writing and random reading of small files. However, these speeds also increase compared to a single disk, although not as much as in the case of sequential read/write operations.
RAID 0 scheme (source)
The main goals that I pursued when creating the array were: combining disk capacities and maximum performance. The best choice for this is RAID 0.
Difference between software and hardware RAID 10
The decision about which controller to use to work with RAID 10 is made by everyone based on their needs. However, before making such a decision, it is worth comparing them in terms of price, performance and reliability.
As for the price, hardware solutions will definitely be more expensive. Moreover, the more important the information is stored on a computer, server, or NAS storage, the better the controller should be (and accordingly more expensive).
At the same time, it should be said that a full-fledged software RAID 10 can be implemented using only the built-in capabilities of the Windows 10 operating system, which means, theoretically, such a RAID should be cheaper.
RAID 10 cannot provide the required performance.
RAID 10 data is first divided into stripes and then written to each of the RAID 1 arrays - older computers begin to slow down a lot.
Therefore, if you have an old machine, you can try creating software RAID 10 . The creation process is described in detail in the next paragraph of this article.
If we compare the reliability of software and hardware controllers, then we can say that hardware controllers are less prone to failures and less dependent on the operation of the operating system. But again, they are noticeably more expensive. Therefore, it makes sense to use them only for professional purposes. If we are talking about a home computer/server, a software controller will be the best solution.
Installing Storcli on Windows
The installation process itself is very trivial, but I will describe it for beginners. You go to the manufacturer’s website and in the section for downloading firmware and drivers, find Storcli. As a result, you will receive an archive file that needs to be unpacked. As a result, you will have a folder with all supported operating systems. We are interested in the Windows folder; it will contain two executable files.
If you are too lazy to look for Storcli, you can
Now you need to open the command line for this folder, there are two options:
- You hold down the Shift key and right-click on the folder and select “Open command window”
- You simply open cmd and enter the command “cd the path to your folder”
Disks used for RAID 0
As I wrote in the introduction, our RAID will consist of four disks. The first drive - Seagate Barracuda 80 GB with an IDE interface - is the weakest:
However, his condition is quite normal. There are no bad sectors or other errors. In the screenshot below, SMART and the performance of this disk in the CrystalDiskMark program:
Seagate Barracuda 80 Gb IDE
Since my motherboard does not have IDE connectors, I could not connect this drive directly. To do this I had to use a controller board. This is what she looks like:
Don't think that I bought the controller specifically to connect an old drive. I have nothing to do. By chance I remembered that I had it lying around idle and decided to use it. This controller is two-way. That is, it can be used to connect an old IDE drive to a modern motherboard, but you can also connect a new SATA drive to an old board that does not have a SATA controller. In the photo below I show how the drive is connected to the board. The controller board is inserted into the IDE connector, and the SATA cable and power supply for the controller itself are connected to it. The disk power is connected as usual:
Of course, the first question that arises when working with such controllers is: “How much does it degrade the speed of the disk?” I also wanted to check this and I connected the drive to an old board with an IDE connector. Below is a screenshot of performance, but the disk is already connected directly IDE to IDE:
Performance comparison (direct connection - left and via controller - right)
As you can see in the comparison screenshot, there is almost no difference in performance. It is so insignificant that it can be said to be within the measurement error. So the good news is that such a controller practically does not limit the performance of the hard drive in any way. With that sorted out, let's move on to the next disc.
The next drive is also a Seagate Barracuda 80 GB, but with a SATA interface, more modern:
Although this disk is SATA, it is also far from being the latest. And yet, everything is fine with SMART. You can see it in the screenshot below along with the performance test:
Seagate Barracuda 80 Gb SATA
The third disk I used to create the array is Maxtor 80 Gb SATA:
SMART and performance test of this disk:
Maxtor 80 Gb SATA
I didn’t have a fourth 80 GB disk. But to create a RAID array it is not at all necessary to use disks of the same size. Therefore, the Seagate Barracuda 160 Gb SATA was chosen as the fourth disk:
SMART of this disk shows 1 bad sector. It appeared a long time ago and no new ones are being added, so everything is in order. Although the operating time is impressive - 47 thousand 300 hours:
Seagate Barracuda 160 Gb SATA
To complete the introductory part, I will show how all these 4 disks are placed in the computer case. Directly in front of them is a 120 mm fan that blows air through the entire “basket” (there is a distance between the disks). There are no problems with cooling:
All four drives are connected to the computer, let's proceed to creating a RAID:
Screenshot of the Disk Management window