For full operation of the printer, you need to install additional software - drivers. Usually, they come complete with the device, on a special boot disk. Without them, the computer will not detect the connected device. Of course, we are not talking about devices that are automatically recognized by the system. I would like to note right away that you need to read the entire article, since there are complex and simpler ways to install drivers and therefore you need to read the article to the end. Almost at the very end of the article there is information on how to install a printer driver automatically, keep this in mind. When the question arises of how to install a printer without a disk, inexperienced users think that it is very difficult. But in fact, this procedure can be mastered in 15-30 minutes. Let's check if this is true.
There are two main ways to install a printer without a boot disk, namely, download the necessary drivers from the Internet
- Using basic Windows Update tools;
- Independently, knowing the device identification code or using the printer model.
The first method is perfect for simple printer models (only printing and scanning documents, without additional settings), because Windows Update installs a basic driver package.
The second method allows you to download the latest version of the software, so after installing them, the user will have access to absolutely all the functions of the printer, including more “advanced” ones.
In addition, the reason for installing drivers may be not only their complete absence, but also a malfunction of the device itself. Sometimes, using one driver or another, the printer refuses to print documents, and all because the driver you installed was not suitable for your device. This is, of course, one of the reasons why the printer may not work correctly, but as you understand, it’s not for nothing that we are talking about this right now. After all, below we will tell you how to download your driver to your computer, but if you are in a hurry, you may have difficulties. Therefore, proceed step by step.
General recommendations on how to connect a printer to a computer in several ways
In most cases, a printer is a universal device and offers its user a lot of additional functions. Accordingly, such equipment can be connected to a PC using different methods:
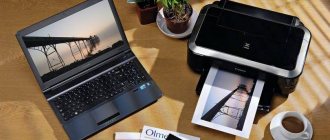
- Wired connection . This method is carried out by connecting two devices using a USB cable. To do this, connect the supplied wire with a standard output to the USB connector of the computer case, and the other to the corresponding socket of the printer.
- Wireless connection. Bluetooth and Wi-Fi modules may be involved here. Of course, this method is available for devices equipped with similar functionality.
- Opening the "Sharing" option. This method is useful if you need to print from an additional PC, and the printing device is programmed for a desktop computer.
- MFPs are connected to a computer in the same way as single devices
- Connect via built-in features . For new home PC models, the easiest way to connect a printer is assumed. To do this, you only need to turn on both devices and connect them with a cable, after which an “installation wizard” will appear on the monitor, which will independently recognize the printer and install the necessary software.
- Using drivers . You can find them on the disk that comes with your printing machine, or on the website of your printer manufacturer. But for this you need to accurately indicate the model of the device.
The methods for connecting your computer and printer to each other may vary depending on the type of operating system installed. Only the most important stages differ.
Connecting the Printer to a Windows PC: Basic Features
Connecting a printer to a personal computer requires care, because one wrong step can lead to malfunctions of both devices. We bring to your attention the exact connection algorithm:
Stretching the cable connecting two devices cannot guarantee their quality connection
USB to AMBM cable for printer
- We unpack the printer and install it in a designated place not far from the PC. Make sure that the connecting cable is sufficient for a good connection with the connectors. Connect the power cable to a 220 V socket.
- Start the operating system, wait until it is completely loaded, and then click the “Enable” icon on the printing device. In the lower right corner you will see an icon indicating the search and automatic installation of drivers (typical for new PCs).
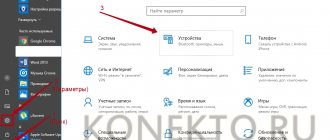
- Next, go to the Start menu (this is the button in the lower left corner of the screen). Then go to “Settings”, then “Devices and Printers”. If your printer doesn't appear, click Add Device.
- Then select the name corresponding to the brand of your device from the list and follow the instructions, confirming your agreement by constantly pressing the “Next” button.
Each software has a license agreement. You need to familiarize yourself with it to correctly install the printing device.
Driver for Canon MFP
An MFP is a multifunctional device that combines a scanner and a printer. Any modern MFP requires a driver to interact with the operating system. For example, the Canon MF4018 MFP will not be able to function normally without a driver. You can download the driver for Canon MF4018 MFP for Windows for free from the official website.
You can also download the driver for any other Canon MFP from the official website.
How to connect a printer to a computer with a software disc
Most printer models that have complex installations come with CDs that contain all the software for the corresponding device. In this case, you need to perform only three steps one by one.
| Stages | Description of actions |
| Connecting all wires | To do this, insert all cords correctly into the appropriate connectors on the printer and computer. Connect power. |
| Opening a CD | Start your computer, insert the CD into the drive and wait for it to load on the screen. |
| Software installation | Following the instructions, complete all the steps by clicking the “Next” button, and also select the installation method: “Automatic” or “Manual”. Once installation is complete, restart your computer. |
Many printer models are compatible with tablets and smartphones, so control is convenient using these gadgets. The functions of such software include: selection of print type, number of copies, sheet orientation, etc.
How to connect a printer to a computer without a disk: use the Internet
If for some reason you do not have the installation disk for the printer, or it was badly worn out and now no longer functions, and you have reinstalled the operating system, then use the following method:
If connecting to a printer is unavailable using one of the methods, you can use another more reliable and convenient one.
- We connect the devices to each other in the same way as for the previous methods. The “Device software has not been installed” icon will appear at the bottom. In this case, we move on.
- We go to Yandex, where in the search engine we select the brand and model of your printing device, as well as the version of the operating system. Choose the site you like and see if the drivers match.
- When you find a suitable option, click “Download” and wait until the download from the file hosting service finishes. Then unpack the file and perform the usual software installation.
Connecting a printer via Bluetooth is only permissible if the two devices are located next to each other, otherwise the signal will be lost
Device types
How to use the printer? The first problem that users face is choosing a printing device.
Today you can find:
- laser printers;
- inkjet models.
In addition, all mentioned devices are divided into:
- Black and white;
- colored.
Users decide for themselves which printers are right for them. Color printers are popular now, but black and white devices are still not in the shadows. Such devices are found in almost every home. They are used to print black and white documents.
Sharing a printer on a network using a computer
With open access to the printing device, you can operate it from anywhere on your local home network. Now you don't have to turn on your main PC to print a photo or document. To carry out this procedure without restrictions, you need to perform several actions:
- Connect the two devices using a cable and plug them into the network. After starting the devices, go to the “Start” button, then to the “Settings” tab, “Manage networks and sharing”.
- Next, go to the “Status”, “Sharing Options”, “Home or Work” button.
- Check the box next to “Enable file and printer sharing.” Next, connect from any home computer.
Remember that the computer to which the printer is connected by wires must be turned on. Otherwise you won't be able to print.
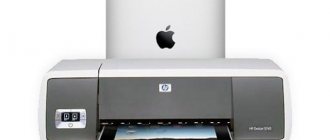
Driver for Canon printer
Canon printers are gaining great popularity because their range includes home printers, professional printers, and photo printers. Undoubtedly, a driver for a Canon printer is an important element for its correct functioning.
For example, you can download the driver for the Canon 3010 printer for free from the official website.
The official website has official drivers for Canon of any model.
The nuances of connecting a printer to MacOSX by sharing it over the network
This operating system has some differences, so if you need to share the printer for public use, you need to complete all the steps up to step four from the previous section, after which we move on to the next step:
- Open the Apple system menu and go to “System Preferences”, “Printers and Scanners”, click “+” in the list that appears.
- Go to the Windows tab at the top of the new window that appears. Here, enter the name of the printer that you want to make accessible to all home PCs.
MacOS is a custom system, so connecting your printer to it will be slightly different
Setting up a printer with a computer running an Apple operating system is similar to traditional computers. The difference between connections via cable or wireless network Bluetooth or Wi-Fi for MacOS is obvious. Here it is important to follow the instructions and know the technique for connecting devices on standard WindowsXP.
Possible connection problems
Many people have encountered errors when trying to connect a printer to a computer. To properly switch devices, it is necessary to urgently solve the problem that has arisen, and therefore find the cause.
If you do not see your device in this tab or it is not working correctly, you need to look for the cause of the failure
If the computer does not see the printer: what could it be?
Have you bought a new printer, but when you try to install the device to work via a computer, it is not visible in the devices? Most likely, the problem is in the installation disk, or more precisely, that the drivers on it are outdated. In this situation, you can download a more recent version of the utilities.
If antivirus is enabled on your OS, the program can also block the connection being created. Therefore, temporarily disable the application and restart your PC. If this action does not help, check your PC for viruses, and, of course, check that all cables and settings are connected correctly (if it is wireless switching).
The printer does not connect to the computer via USB - the OS is to blame
Most likely, this problem is caused by incorrect connection or tight wire tension. Try disconnecting the cable from both devices and connecting again. You can also check the serviceability of the USB connector on your PC. To do this, connect any other device to this output.
Often, due to lack of OS activation, the Windows system does not fully install the printer on the PC.
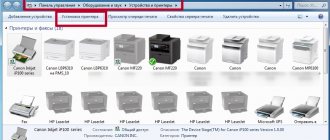
Go to “Control Panel” and “Devices and Printers”. In the list that appears, select the device, then right-click to open the context menu and check the “Use as default” checkbox.
Sometimes, to solve a problem with printer visibility on a PC, you need to clear the print queue or try to uncheck the “Work offline” or “Pause printing” checkboxes.
Dear readers of our resource, if you have any questions about the topic of the article, ask them in the comments, and also share your methods of connecting a printer to a personal computer.
Manual & Fax Installation
In previous versions, the options fax and XPS were installed automatically. If you need to manually install Fax and XPS, see the instructions below.
Note. Requires a Windows client computer. Faxes are not supported on ARM devices.
By fax:
- Go to Settings > Applications
- Select tab and apps and other options
- In the Additional Features area, select Add a Feature
- Select Windows Fax and Scan, then install Windows Fax and Scan
For the author of the Microsoft XPS document:
- Type Windows Enable or Disable Features on the taskbar and select the Control Panel option.
- Find the Microsoft XPS Document Writer folder, check the box next to it, and click OK."
- If this checkbox is already selected, select it and click OK. Then the Windows Features window will open again and again ask the box to reinstall the XPS printer.
Test print page:
- You can print a test page to check if the printer is installed correctly.
- Print a test page
- Select "Save As" and then "All Files" from the "Save As" menu
- When naming the file, be sure to add. XPS after the file name
- The file will then be printed in the selected location